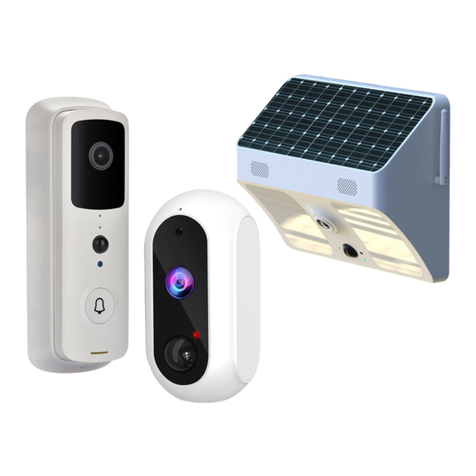
KJB Security C1197 User manual

USER'S MANUAL
7" DIGITAL WIRELESS
MONITORING & RECORDING SYSTEM
ENGLISH
ISO9001
The material in this document is the intellectual property
of our department .
No part of this manual may be reproduced, copied,
translated, transmitted, or published in any form or by any
means without our department prior written permission.
Our products are under continual improvement and we
reserve the right to make changes without notice. But no
guarantee is given as to the correctness of its contents.
We do not undertake any responsibility for the harms
cause by using our product.
The model of the products in the user's manual only for
recognition, but these names also perhaps are belong to other
company's registered trademark or the copyright.
The product picture may differ from the actual product,
only for your reference. The accessories will probably be
different according to the different selling areas. For details of
accessories, please refer to your local distributor.
P/N: 530407100001


- 4 -
This is a smart 7" wireless monitoring and recording system which with DIY design
and professional features to take care of you and your property.
MPEG4 compression, support VGA , QVGA two kinds of resolution
support SD card capacity 3 G
Multiple recording mode
Up to 300ft wireless transmission range
Support 4channel auto switching
Support QUAD image view
Interference free,secure and private signal
VGA resolution: 640x480
IR LED for night vision
With CDS to control IR LED
Built-in microphone
Power Adaptor(for monitor) User Manual Bracket
Remote Controller Monitor Camera
Power Adaptor(for camera) AV cable
2
USER'S MANUAL
(1). Pres s “ ”butt on to select the desir ed folde r.
- 11 -
USER'S MANUAL
(2)Press rewind the video.“ ”button to
(3)Pr ess fast-forward
the video.
“ ” bu tto n to
(1)Press play or pause the video. “ ”button to
Play Back
2 0 1 2 0 5 1 0
F r e e / T o t a l : 1. 4 9 G B / 3 . 6 8 G B
2 0 1 2 0 5 0 4
A r e y o u s u r e ? No
(2) “ ”button or “DEL” button on the remote. Long press
(3).Press“ ”button to select “YES”or “NO”.
(4).Press “ ”button to confirm.
Play Back
F r e e / T o t a l : 1. 4 9 G B / 3 . 6 8 G B
A S F 0 5 6 0 0 8 M B
A r e y o u s u r e ? No
(1). Pres s “ ”butt on to select the desir ed folde r.
(3).Press“ ”button to select “YES”or “NO”.
(4).Press “ ”button to confirm.
The system comes with camera(s) that have already been paired at the factory.
Power on the receiver and camera by connecting it to power outlet with supplied
power adaptor respectively.
The pairing function assigns each camera to a different channel on the wireless
receiver(up to 4 cameras), and is necessary for configuring additional cameras.
It is highly recommended to pair the cameras to the receiver before
permanently mounting the cameras.
1. Power on the receiver and camera by connecting it to power outlet with supplied
power adaptor.
2. Press the Menu button on the receiver or remote controller to select “
”.
.
3. Select a channel by pressing the“ ” buttons on the remote controller or pushing
upwards/downwards the joystick on the receiver. Press “ ” button to confirm the
selection.
(2) “ ”button or “DEL” button on the remote. Long press

1SD 1
A S F 0 1 7 3 9
1 2 / 0 5 / 1 2 -
1 1 : 4 5 : 0 2
- 10 -
USER'S MANUAL
Play Back
V I D E O
F r e e / T o t a l : 1. 4 9 G B / 3 . 6 8 G B
Play Back
2 0 1 2 0 5 1 0
F r e e / T o t a l : 1. 4 9 G B / 3 . 6 8 G B
2 0 1 2 0 5 0 4
Play Back
1 1 C L O C K
F r e e / T o t a l : 1. 4 9 G B / 3 . 6 8 G B
1 2 C L O C K
1 4 C L O C K
Play Back
F r e e / T o t a l : 1. 4 9 G B / 3 . 6 8 G B
A S F 0 5 6 0 0 8 M B
(1)Press “ ” button to enter VIDEO interface.
(2)Press “ ” button to select the desired folder.
(4)Press button to select the desired file.
(5)Press " " button to play the file.
“ ”
(3)Press “ ”button to enter file list.
1 2 / 0 5 / 1 2 -
1 2 : 3 0 : 0 2
.
Power Supply
Operating Temperature
Atmosphere Pressure
Power consumption
Operating Humidity
Dimension(W* * )H D
Weight(without package)
Display Screen
Resolution
Video standard
Frequency Range
Auto switching dwell time
Receiving range
Receiving sensitivity
Video output
Audio output
Picture compression
Recording resolution
Recording mode
SD card
Mini USB
TFT LCD
800(
PAL/NTSC
2.400GHZ~2.483GHZ
5seconds
Up to 300ft at open air
1ch CVBS 1.0Vp-p
1ch audio output impedance600
MPEG4
VGA/QVGA
Manual /Schedule/motion detection
30fps@QVGA,25fps@VGA
24hours conti nuous recording at VGA wit h 16G SD card
32G max.
100-240V~ 50/60HZ 5V/1A
5W max.
+4
10%~90%
86kpa~106kpa
182mm×122mm×30 mm
450 kg
Frame rate
Data storage
USER'S MANUAL
-85dBm
Image Sensor Type
Effictive pixel
Lens
IR LED
AGC
Electrouic shutter
White Balance
color CMOS image sensor
f=4.3mm
24 , =850nmpcs
Auto
1/60~1/15,000 sec
AUTO
Power Supply
Operating Temperature
Power consumption
Dimensions
Weight
5V/1A
3W max.
+4
95×140mm
200g
Environment Rating
TX Power
IP 64
14dbm
- 5 -
Reserved

(1). In the live display mode, press “ ” button to start recording, a record file will be
automaticall created every 2 minutes.
(2). Press “ ” button again to exit the record mode.
(1). Enter “RECORDE SETUP” menu, then set the “Schedule recording” to “ON”
(2). Set start time on “Start TIME” item.
(3). Set end time on “End TIME” item.
(4). The system will automatically start and stop recording based on the times entered.
(1) Enter “RECORD SETUP” menu, then set the “Motion detection activity” to “ON”.
(2) In this mode the receiver starts recording when motion detected by any activated camera.
- 9 -
USER'S MANUAL
SCHEDULE RECORD: ON---valid, OFF---invalid
Star t Record End Record
Live Mode After Press" "Button
SET TIME: record start time
END TIME:record end time
1SD 1
1 2 / 0 5 / 1 2 - 0 9 : 1 9 : 39
1SD 1
A S F 0 1 7 3 7
1 2 / 0 5 / 1 2 - 0 9 : 1 9 : 5 6
1SD 1
A S F 0 1 7 3 8
1 2 / 0 5 / 1 2 - 1 1 : 3 0 : 0 2
1SD 1
1 2 / 0 5 / 1 2 - 1 1 : 4 0 : 0 2
Before recording, you need to insert a SD card to the SD card slot. The system can support the
size of up to 32GB SD card.
.
- 6 -
(1) : Remote cont roller sensor.
(10) :Long press to turn on or shutdown
he Monitor.
(2) :
Press to toggle between AV output and LCD display.
(6)
Play or pause the selected file under “PLAYBACK/VIDEO
menu.
Press to select SINGLE/QUAD/AUTO display mode.
(7) /(8)
In the on-screen menu,press to select set ting item.
In playback mode,use the buttons to fast-forward or rewind.
In SINGLE mode, press botton to setect CH1/CH2/CH3/CH4
In “PLAYBACK/VIDEO”menu,press button to the delect unnecessary files.
(4)/(5)
In the on-screen menu, use the buttons to scroll up or down.
In live or playback mode, use the buttons to increase/decrease volume.
(9)
Press to enter or exit recording mode.
(3) : Press to enter or exit the Main-menu.
(11)
The LED lights with blue when the power is turned ON.
The red LED will be blinking when camera signal is recerved.
(12)
/
Connect the included A/V cable to view video
from the receiver on a TV or monitor.
:DC 5V/1A
Sends and receives signals to
or from the Camera.
(13)
Insert SD card to this SD card slot for both
video and audio recording.
USER'S MANUAL
4
3
2 3 4 5 86 7 9 111 10
2
1
5
(reserved)

Other KJB Security Security System manuals