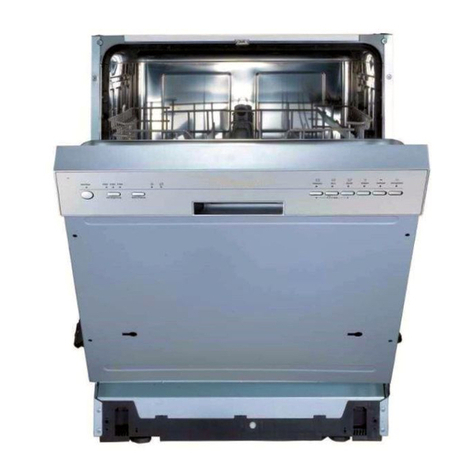
KKT KOLBE DW600ED User manual

Version: 1.5 / 220413 EN
User’s manual
for your dishwasher
Model: DW600ED

2
User manual
Dishwasher, model DW600ED
Version 1.5
© KKT KOLBE Küchentechnik GmbH & Co. KG
KKT KOLBE is a registred trademark.
Thank you!
Thank you for your confidence
and congratulations on the purchase of your new gas hob.
Read this manual thoroughly, before unpacking the appliance.
It contains important information about safe installation, use and
maintenance, as well as important warnings about the use of your
appliance.
Mark the passages that are important for you, keep the manual
so that you can refer to it at any time and also pass it on to other users.
In view of the constant further development, we reserve the right to
make any necessary modifications to the appliance and/or the man-
ual in order to better meet the requirements of user-friendliness, user
protection and the current technical standard.
You can always find the latest version of your user’s manual on the
corresponding product page or in the “Questions & Answers” section
of our online shop at www.kolbe.de.
You have chosen a good appliance that will serve you for many years
with proper operation and care.
Should you have any complaints despite our thorough quality control,
please contact our in-house customer service.
They will be happy to help you.
For a smooth process in the event of any queries, we recommend that
you note the 20-digit serial number of your appliance in the field below.
This can be found on the rating plate on the side of the appliance door.
Your KKT KOLBE Team
Serial number of my appliance:
3
EN
Important Safety Instructions . . . . . . . . . . . . . . . . . . . . . . . . . . . . . . . . . . . . . . . . . . . . . . . 4
Hints and Symbols . . . . . . . . . . . . . . . . . . . . . . . . . . . . . . . . . . . . . . . . . . . . . . . . . . . . . . . . . . . . 10
1. Product Overview . . . . . . . . . . . . . . . . . . . . . . . . . . . . . . . . . . . . . . . . . . . . . . . . . . . . . . . . 14
1.1 Appliance components
1.2 Appliance specications
1.3 Control panel
2. Using the Dishwasher . . . . . . . . . . . . . . . . . . . . . . . . . . . . . . . . . . . . . . . . . . . . . . . . . . . 18
2.1 Before rst use
2.2 Water softener
2.3 Rinse aid dispenser
2.4 Detergent dispenser
2.5 Preparing and loading dishes
2.6 Crockery baskets and cutlery basket
3. Operating the Dishwasher . . . . . . . . . . . . . . . . . . . . . . . . . . . . . . . . . . . . . . . . . . . . . 33
3.1 Washing program overview
3.2 Dish washing operation
3.3 Additional features
3.4 Removing the dishes
4. Cleaning and Maintenance . . . . . . . . . . . . . . . . . . . . . . . . . . . . . . . . . . . . . . . . . . . . 38
4.1 Cleaning the appliance
4.2 Filtering system
4.3 Spray arms
4.4 Caring vor the dishwasher
5. Troubleshooting . . . . . . . . . . . . . . . . . . . . . . . . . . . . . . . . . . . . . . . . . . . . . . . . . . . . . . . . . 44
5.1 Problems, possible causes and what to do
5.2 Error codes
6. Installation . . . . . . . . . . . . . . . . . . . . . . . . . . . . . . . . . . . . . . . . . . . . . . . . . . . . . . . . . . . . . . . . . 49
6.1 Water connection
6.2 Connection to the power supply system
6.3 Positioning of the appliance
6.4 Levelling and height adjustment of the dishwasher
6.5 Mounting the door panel
6.6 Tension adjustment of the door spring
6.7 Attaching the condensation protection
6.8 Mounting the dishwasher
7. Technical data . . . . . . . . . . . . . . . . . . . . . . . . . . . . . . . . . . . . . . . . . . . . . . . . . . . . . . . . . . . . 58
Note on the Declaration of conformity . . . . . . . . . . . . . . . . . . . . . . . . . . . . . . . . . . . 59
Support and service . . . . . . . . . . . . . . . . . . . . . . . . . . . . . . . . . . . . . . . . . . . . . . . . . . . . . . . . . . 60
Table of content

4
!Important Safety Instructions
This manual is the basis for handling the
appliance.
Read and follow the instructions described in
it carefully before installing and operating your
dishwasher.
The manufacturer is not responsible for dama-
ge or problems, which have been caused by not
following the instructions, incorrect installation or
improper handling.
Danger from explosive hydrogen gas
• If a hot water system has not been used for two
weeks or more, explosive hydrogen gas may
form under certain conditions.
Therefore, rinse pipes that have not been used
for a long time by letting the water ow from
each tap for a few minutes. This will release any
accumulated hydrogen gas.
Since the gas is ammable, do not smoke or
use an open ame during this time.

5
EN
General safety
• This appliance is designed for indoor household
use and is intended for cleaning dishes.
Use it exclusively for its intended purpose.
• Never attempt to modify the product features of
this appliance, the cord or the power plug.
• The appliance is not suitable for use by persons
with reduced physical, sensory or mental ca-
pabilities or lack of experience and knowledge
(including children) unless they are supervised
or instructed in the safe use of the appliance.
• If the power cord or water hoses are damaged,
the appliance must not be used.
This also applies to damage to the worktop,
control panel or in the oor area, as internal ma-
chine parts could become freely accessible.
• The power cord may only be replaced and the
appliance repaired by a certi ed electrician.
• Always switch off and disconnect the applian-
ce from the power supply before cleaning and
maintenance.
• Do not pull the plug out of the socket by the ca-
ble and keep the cable dry to avoid damage and
electric shock.
• During operation, the outer surfaces of the dish-
washer may heat up.

6
Installation
• It is imperative that the installation is carried
out in accordance with all relevant building
regulations and requirements of the local water-
works.
• This appliance is equipped with a grounding
plug and must be connected to an power outlet
that is installed and grounded in accordance
with all applicable regulations to prevent elect-
ric shock.
If in doubt, consult a quali ed electrician.
• Make sure that the surfaces surrounding the ap-
pliance (including the underside of the worktop,
if applicable) are adequately protected against
moisture to prevent damage from escaping
steam.
• Make sure that the power cable is not bent or
pinched during installation.
• If the plug is no longer accessible after installa-
tion, a disconnecting device must be integrated
into the xed wiring with at least 3 mm contact
spacing in all poles.
• Connect the appliance to the main water valve
with new hose sets. Do not reuse old sets.

7
EN
Proper use
• Do not operate your dishwasher unless all en-
closure panels are properly in place.
• This appliance is designed for normal house-
hold washing loads only.
• Only use detergents, rinse aid and salt suitable
for automatic dishwashers and follow the ma-
nufacturer‘s dosage recommendations.
Do not use soap, hand dishwashing detergent
or washing powder.
• Some dishwashing detergents are highly alkali-
ne and can be very dangerous if swallowed.
Also avoid skin and eye contact with detergents
and water and keep children away from the
dishwasher when the door is open.
Remove any detergent residue from the dispen-
ser after use.
• Place sharp objects so that they cannot dama-
ge the door seal.
• Knives and other sharp or pointed utensils must
be placed in the basket with their tips pointing
downwards or in a horizontal position to pre-
vent cuts.
• Only wash dishes that are labelled dishwasher-
safe or follow the manufacturer‘s recommenda-
tions.

8
• Do not wash objects with this appliance that
have been in contact with corrosive, acidic or
alkaline chemicals, paint, gasoline, iron or steel
deposits.
• In case of broken dishes, do not use the ap-
pliance until all shards been removed to avoid
damage.
• Open the appliance door very carefully during
operation and only at the beginning of a was-
hing programme.
Otherwise hot water and detergent could es-
cape.
• Do not leave the appliance door fully open
except when loading and unloading the dish-
washer.
• Never stand or sit on the open appliance door
or the dish rack and do not load them with
heavy objects.
Doing so may cause damage and unbalance the
appliance.
• It is recommended to unplug the appliance and
turn off the water supply when not in use.

9
EN
Child safety and pets
• Keep small parts and packaging materials away
from children and pets.
These can be very dangerous if swallowed or
pulled over the head, for example.
• Check the inside of the appliance before start-
ing a washing cycle.
Children or pets may enter the appliance
if the door is left open.
• Keep all detergents in a safe place and out of
reach of children and pets.
• Some water may remain in the dishwasher after
the washing cycle is nished. This water is not
potable and may contain detergent residues.

10
Hints and Symbols
Notes and Icons
In this manual
Warning of danger to persons
Pay special attention to safety instructions marked with this icon
and act with appropriate caution to avoid danger to life and health.
Pass on these warnings to other users also.
!Beware of damage
Follow the instructions marked with this icon especially to avoid
damage to the appliance.
Also pass on these safety instructions to all users.
Informations and tips
Following the instructions marked with this icon will provide you
with useful information, facilitate the respective procedure and
may save you from many a problem.
Note on illustrations
The images in this manual are for illustrative purposes
and may vary.
For appliances, components and accessories
EU conformity
The product complies with the applicable EU requirements
regarding safety, environmental protection and health protection.
Follow the instructions for use provided
Read this manual carefully, especially the relevant sections,
before using the product and pass on the relevant information
to other users.

11
EN
Hints and Symbols
Environmental protection and disposal
Notes on disposal
No disposal in household waste (WEEE marking)
Do not dispose of the product as unsorted waste.
Take it to a collection point for the recycling of electrical
and electronic equipment for reuse and recovery.
To do this, disconnect the mains cable and make the door closing
device unusable.
Recyclable material (Möbius loop)
Separate the relevant components of the product by type from
the residual waste and dispose of them in accordance with local
regulations.
Recyclable material (Triman icon)
Separate the product from residual waste for disposal
according to the accompanying sorting instructions.
• The environment and health are endangered by incorrect disposal.
By ensuring that the appliance and its packaging are disposed of properly,
you help to avoid possible hazards
.
• The materials used are selected carefully and should be recycled
in order to reduce the use of raw materials and waste.
Separate their components by type and dispose of them accordingly.
• For informations on current disposal methods and recycling,
contact your local council, your waste disposal company or the seller.

12
Notes on water and energy saving
• Always bear in mind that washing dishes in the dishwasher
following this manual will mostly use less energy and water
than washing them by hand.
• If possible, use the ECO programme.
This is particularly energy-ef cient and environmentally friendly.
• To reduce the environmental impact of wastewater, pay attention
to the composition of your cleaning products. For example, those
labelled „Bio“ or „Eco“ are usually more environmentally friendly
because they contain no or only small amounts of environmentally
harmful active ingredients.
The cleaning effect may be limited as a result.
• To avoid unnecessarily high water and energy consumption,
do not prewash the dishes manually.
This is normally not necessary.
• Note that water and energy can be saved by respecting the maxi-
mum loading capacity indicated in this manual.
Also follow the further instructions for loading the dishwasher in the
corresponding chapter.
Hints and Symbols

13
EN
Notes on transporting the appliance
If you need to transport the appliance a er unpacking / at a
later time, observe the following instructions to avoid damage:
• Keep the original packaging of the product and always
transport the appliance packed in it in the same way as
when it was delivered.
Observe the markings on it.
If the original packaging is not present:
• Secure all loose / removable parts, so that they cannot
touch each other.
• Avoid impact on the appliance and its components
and take appropriate protective measures if necessary.
• Ensure that the appliance is in a horizontal position
when transporting it and when putting it down.
Hints and Symbols

14
1. Product Overview
Product Overview
1.1 Appliance components
1Inner pipe
2Lower spray arm
3Salt container
4Detergent and
rinse aid dispenser
5Filter assembly
6Cutlery basket
7Upper crockery basket
7.1 Cutlery rack
7.2 Cup rack
7.3 Lower spray arm
8Lower crockery basket
1
2
3
4
6 7
7.3
8
5
7.1 7.2

15
EN
Product Overview
1.2 Appliance specications
Product dimensions
W
D 1
H
D 2
T1 B
H
T2
P
Hints on operation
• Maximum permissible water pressure / inlet: 1 MPa.
• Minimum permissible water pressure / inlet: 0.04 MPa.
• Load limit per wash cycle: 12 place settings.
• Energy saving function:
In standby mode, the appliance switches off after 15 minutes
without any input.
Width (W)59.8 cm
Depth (D1) 57 cm
Depth (D2)
incl. open door 115 cm
Plinth recess (P)8.5 cm
Height (H)81.5 cm
Max. height
with turned out feet 87.5 cm
Power cable length 150 cm
Drain hose length 140 cm
Aquastop length 150 cm
Height of plinth panel 14 - 20 cm
Door panel dimensions W 59.4 ± 0.1 cm
H 59.5 ± 0.1 cm

16
1.3 Control panel
Product Overview
1 On / Off
Switching the appliance on/off by pressing the button.
Signal lamp indicates switched-on status.
2Program Program selection by pressing the button repeatedly
if necessary.
Corresponding program indicator lamp lights up.
3 Start time
pre-selection
Shifting the start time of the selected program by
1 hour each time the button is pressed (max. 24 h).
4 Key lock /
Child lock
Locking / Unlocking the control panel (except On/Off
button) by holding down the and button (3sec).
Indicator lamp lights up.
5Half load Reduced energy and water consumption for washing
cycles with half load by pressing the button.
Indicator lamp lights up.
Selectable for programs , , , and .
6Extra drying Increased drying performance by pressing the button.
Indicator lamp lights up.
7 Start / Pause Starting / pausing the selected program
by pressing the button.
10
1 2 3
4
5 6 7
98

17
EN
Product Overview
8Program indicator lamps
Intensive
Display of the currently selected program /
Program details see table
in the corresponding chapter.
Universal
Eco
Glass
90 Minutes
Rapid
Pre-rinse
9Display Time / status display / display of error codes.
10 Signal and indicator lamps
On Indicates that appliance is switched on.
Salt Indicates when rinsing salt must be added.
Rinse aid Indicates when rinse aid must be added.
Key lock /
Child lock
Indicates key lock activation.
Half load Indicates currently selected „Half load“ function.
Water failure Indicates when the water supply is switched off /
does not work.
Extra drying Indicates currently selected „Extra drying“ function.

18
2. Using the Dishwasher
2.1 Before rst use
• When installing the appliance, follow the installation
instructions in this manual.
• Adjust the water softener according to your water hard-
ness.
• Fill the salt container.
• Fill and adjust the rins aid dispenser.
• Fill the detergent dispenser.
Note
If your appliance smells slightly of solvent or similar at
the beginning, this is normal.
With new appliances, plastic and synthetic odours can
occur during the rst 20 to 30 washing cycles due to
heating. However, these odours will gradually dissipate.
2.2 Water softener
The water softener is designed to remove limescale,
minerals and salts from the water,
to ensure optimum washing results and to prevent lime-
scale residues on dishes, accessories and appliance parts,
as well as harmful or adverse effects on the operation of
the appliance due to deposits resulting from hard water.
For information about the hardness of your water supply,
contact your local water authority.
Using the Dishwasher

19
EN
Adjusting the salt dosage
The water softener must be adjusted manually according to the
hardness of the water in your region.
• Switch on the appliance.
• Within 60 seconds after turning on the appliance, press and
hold the program button for more than 5 seconds to enter
the water softener setting mode.
• Press the program button repeatedly until the dosage setting
corresponding to your water hardness appears on the display
(sequence: H1→H2→H3→H4→H5→H6; see table)
• Press the on/off button to con rm the setting.
Water hardness Dosage
setting
Salt
consumption
°dH (D) °fH (F) °Clarke (GB) Mmol/l
0 - 5 0 - 9 0 - 6 0 - 0.94 H1 0
6 - 11 10 - 20 7 - 14 1.0 - 2.0 H2 9
12 - 17 21 - 30 15 - 21 2.1 - 3.0 H3 12
18 - 22 31 - 40 22 - 28 3.1 - 4.0 H4 20
23 - 34 41 - 60 29 - 42 4.1 - 6.0 H5 30
35 - 55 61 - 98 43 - 69 6.1 - 9.8 H6 60
• 1°dH=1.25°Clarke=1.78 °fH=0.178mmol/l
• Factory setting: H3
Using the Dishwasher

20
Filling the salt container
!Attention! Risk of damage!
• Any type of salt not speci cally intended for use in
dishwashers, especially table salt, will damage the
water softener.
Only use rinsing salt intended for dishwashers.
• If any spilled grains of salt or salty water remain on
the bottom of the machine for a long time,
this can lead to corrosion.
To avoid this, do not ll the softener with salt until
just before starting a wash cycle.
• Remove the lower basket and unscrew the cap of the salt
container (Position see section Appliance components).
• Place the end of the supplied funnel into the hole and
pour in about 1.5kg of dishwasher salt.
• Fill the salt container to its maximum limit with water.
It is normal for a small amount of water to come out of the
salt container.
Using the Dishwasher
Table of contents
Other KKT KOLBE Dishwasher manuals

KKT KOLBE
KKT KOLBE GS6013ED User manual

KKT KOLBE
KKT KOLBE DW452ED User manual

KKT KOLBE
KKT KOLBE GS452VI User manual

KKT KOLBE
KKT KOLBE DW4503VI User manual

KKT KOLBE
KKT KOLBE GSI452ED User manual

KKT KOLBE
KKT KOLBE DW452VI User manual

KKT KOLBE
KKT KOLBE DW614FS User manual

KKT KOLBE
KKT KOLBE GS6012ED User manual

KKT KOLBE
KKT KOLBE GS60VI User manual

KKT KOLBE
KKT KOLBE GS45VI User manual