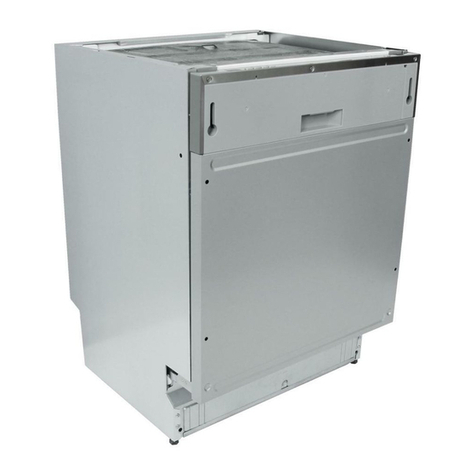
KKT KOLBE GS45VI User manual

Version: 1.0 / 150108 EN
User’s manual
for your dishwasher
Model: GS45VI

Hints and symbols
!
Dispose of the dishwasher packaging material correctly.
All packaging materials can be recycled.
Plastic parts are marked with the standard international abbreviations:
(e.g. PS for polystyrene, padding material)
This appliance is identied according to the European guideline
2002/96/EC on waste electrical and electronic equipment -WEEE. The
guideline species the framework for an EU-wide valid return and re-use
of old appliances.
This icon indicates a hazardous situation.
You‘ll nd it especially with all descriptions of the steps that might
cause danger to persons arising.
Observe these safety instructions and behave accordingly careful.
Enter these warnings also to other users of the device.
This icon indicates a warning.
You can nd it in the description of the steps that must be obser-
ved in order to damage to the unit can be prevented. Please inclu-
de these safety instructions to all device users.
This icon indicates an information.
Dieses Symbol weist Sie auf nützliche Tipps hin und macht auf
richtiges Vorgehen und Verhalten aufmerksam. Das Beachten der
mit diesem Symbol versehenen Hinweise erspart Ihnen manches
Problem.

EN
When using your dishwasher, follow
the basic precautions including the
following:
Hydrogen gas is explosive
Under certain conditions, Hydrogen
gas may be produced in a hot-water
system that has not been used for
two weeks or more. Hydrogen gas
is explosive. If the hot-water system
has not been used for such a period,
before using the dishwasher turn on
all hot-water faucets and let the water
ow from each for several minutes.
This will release any accumulated
hydrogen gas. As the gas is ammable,
do not smoke or use an open ame
during this time.
Warning! Proper use:
• Do not abuse, sit on, or stand on the
door or dish basket of the dishwasher.
• Do not touch the heating element during
or immediately aer use.
• Do not operate your dishwasher unless
all enclosure panels are properly in
place. Open the door very carefully if the
dishwasher is operating. There is a risk
of water squirting out.
• Do not place any heavy objects or stand
on the door when it is open. The appli-
ance could tip forward.
• When loading items to be washed:
Locate sharp items so that they are not
likely to damage the door seal;
Load sharp knives with the handles up to
reduce the risk of cut-type injuries;
• Warning: Knives and other utensils with
sharp points must be loaded in the bas-
ket with their points down or placed in a
horizontal position.
• When using your dishwasher, you should
prevent plastic items from contacting
with heating element.
• Check that the detergent receptacle
is empty aer completion of the wash
cycle.
• Do not wash plastic items unless they
are marked dishwasher safe or the equi-
valent. For plastic items not so marked,
check the manufacturer‘s recommen-
dations.
• Use only detergent and rinse additives
designed for an automatic dishwasher.
Never use soap, laundry detergent, or
hand washing detergent in your dish-
washer.
• Other means for disconnection from
the supply must be incorporated in the
xed wiring with at least 3mm contact
separation in all poles.
• Keep children away from detergent and
rinse aid, keep children away from the
open door of the dishwasher , there
could still be some detergent le inside.
• Young children should be supervised
to ensure that they do not play with the
appliance.
• This product is not designed for use by
persons (including children) who have
reduced physical, sensory or mental
capacities or persons with no experience
or knowledge, unless they are instruc-
ted and supervised in the use of the
appliance by a person responsible for
their safety.
• Dishwasher detergents are strongly al-
kaline. They can be extremely dangerous
if swallowed.
• Avoid contact with skin and eyes, and
keep children away from the dishwasher
when the door is open.
• The door should not be le in the open
position since this could present a trip-
ping hazard.
• If the supply cord is damaged, it must be
replaced by the manufacturer or its ser-
vice agent or a similarly qualied person
in order to avoid a hazard.
Safety Information
4
Packaging material could be dangerous for children!
For disposing of package and the appliance please go to a recycling centre.
Cut o the power supply cable and make the door closing device unusable.
Cardboard packaging is manufactured from recycled paper and should be
disposed in the waste paper collection for recycling.
By ensuring this product is disposed of correctly, you will help prevent po-
tential negative consequences for the environment and human health,
which could otherwise be caused by inappropriate waste handling of this
product.
For more detailed information about recycling of this product, please con-
tact your local city oice and your household waste disposal service.
Congratulations on the purchase of your new dishwasher!
We recommend that you spend some time to read this Instruction
/ Installation Manual in order to fully understand how to install
correctly and operate it.
For installation, please read the installation section.
Read all the safety instructions carefully before use and keep this
Instruction / Installation Manual for future reference.
Konformiditätserklärung
• During installation, the power supply
must not be excessively or dangerously
bent or attened.
• Do not tamper with controls.
• The appliance is to be connected to the
water mains using new hose sets, and the
old hose-sets should not be reused.
• Make sure that the carpet must not obst-
ruct the openings at the bottom base.
• Use the dishwasher only for its intended
function.
• The dishwasher is intended for indoor use
only.
• The dishwasher is not designed for com-
mercial use. It is intended for use in do-
mestic households and in similar working
and residential environments.

5
Table of content
1. Specications
1.1 Product specications
1.2 Informations about energy eiciency
2. Device description
2.1 Control panel
3. Using your dishwasher
3.1 Before the rst use
3.2 Loading salt into the soener
3.3 Set up the water soener
3.4 Fill the rinse aid dispenser
3.5 Adjusting the rinse aid dispenser
3.6 Loading the upper basket
3.7 Adjusting the upper basket
3.8 Loading the lower basket
3.9 Folding racks
3.10 Cutlery basket and fork shelf
4. Starting a washing program
4.1 Wash cycle table
4.2 Changing the program
4.3 At the end of the cycle
4.4 Forget to add dish
5. Energy saving
6. Maintenance and clearning
6.1 Filter clearning
6.2 Maintenance and cleaning
6.3 Cleaning tips
7. Troubleshooting
7.1 General troubleshooting
8. Information sheet
7
8
10
19
23
24
27
31
EN

6
My device
For future reference please record the
following information, which can be
found on the nameplate. Also, please
note the date of purchase of your device
that is on your invoice. The rating plate
of your dishwasher is located on the right
inside of the hinged door.
Model number:
Serial number:
Date of purchase:

7
General Information
1. Specication
1.1 Product specications
1.2 Daten zur Energieeizienz
• 10 Place settings
• 8 programs:
Automatic
ECO
Intensive
Normal
Glass
Rapid
1 hour
Prewashing
• 4 Temperatures: 40°C, 45°C, 46°C, 60°C
• LED-Display
• Self-cleaning stainless microlter
• Aqua-Stop
• Waterproof-System
• Concealed radiator
• Height-adjustable upper basket
• Tiltable plate holder
• Adjustable feet
• Water consumption: 2380l/year
Energy eiciency class: A++
Cleaning performance class: A
Drying performance class: A
Energy consumption
O-Mode: 0,45 W
Stand-By-Mode: 0,49 W
Electrical Information
Rated voltage: 220-240 V 50 Hz
Maximum connection value: 0,83 kW
Fuses: 16 A
Dimensions:
Height: 815 mm
Width: 448 mm
Depth: 550 mm (closed door)
1125 (opened door)
EN

8
Device description
2. Device description
Ansicht von vorne
Rückseite
1. Top spray arm
2. Cutlery rack
3. Upper basket
4. Inner pipe
5. Lower basket
6. Salt container
7. Dispenser
8. Cup shelf
9. Spray arms
10. Filter assembly
11. Inlet pipe connector
12. Drain pipe
13. Adjuster

9
Control panel
2.1 Control panel
EN
1 2 3 4 5 6
3. Alt button: Press this button to select
either upper basket or lower basket.
4. Delay button: Press this button to
adjust delayed start.
5. Program button: Press this button to
select your right washing program.
6. Power-Button: To turn on/o the
appliance.
1. Display (Shows delayed start, pro-
gram, error code, etc.)
Rinse aid indicator (Indicates when
the dispenser needs to be relled.)
Add salt indicator (Indicates when
the dispenser needs to be relled.)
Delay time or error codes indicator
Program indicators
(Indicate which
washing program is selected)
Alt functions indicator
ExtraDry-Indicator (Shows if the
ExtraDrying-Function is selected)
2. ExtraDry: To choose Extra drying
function

10
Using the dishwasher
3. Using the dishwasher
3.1 Before rst use
3.2 Loading the salt into the soener
• A. Set the water soener
• B. Pour 500ml of water inside the salt container
and then ll with dishwasher salt
• C. Fill the rinse aid dispenser
• D. Detergent
Important
Always use rened salt, which is intended for the dishwasher. If
you take a dierent kind of salt (in particular table salt), the water
soener is damaged.
• Remove the lower basket and then unscrew
and remove the cap from the salt container.
• If you are lling the container for the rst
time, ll 2/3 of its volume with water (around
500ml).
• Place the end of the funnel (supplied) into the
hole and introduce about 2kg of salt. It is nor-
mal for a small amount of water to come out of
the salt container.
• Carefully screw the cap back on.
• Usually, the salt warning light will be o in 2-6
hours aer the salt container is lled with salt.
Open

11
Using the dishwasher
3.3 Set up the water soener
The water soener must be set manually, using the water
hardness dial. The water soener is designed to remove mine-
rals and salts from the water, which would have a detrimental
or adverse eect on the operation of the appliance. The higher
the content of these
minerals and salts, the harder the water is. The soener
should be adjusted according to the hardness of the water in
your area. Your local water authority can advise you on the
hardness of the water in your area.
• Open the door and switch on the appliance.
• Press the P-button to get into the control mode for water
soener (60 seconds).
• Navigate to the desired value by pressing the P-button keys
more times.
Important Information
The next relling of salt in a dishwasher relling of 500 ml of wa-
ter in the reservoir of the water soener is not necessary.
EN
Water hardness
Value Salt consumption
(grams/cycle)

12
Using the dishwasher
If there is no rinse-aid warning light on the control panel, you can
judge the amount of rinse-aid by the color of the optical level indi-
cator „D“ located next to the cap. When the rinse-aid container is
full, the whole indicator will be dark. As the rinse aid diminishes,
the size of the dark dot decreases.
Full
3/4 full
1/2 full
1/4 full - Should rell to
eliminate spotting
Empty
rinse aid
indicator
2
1
3.4 Fill the rinse aid dispenser
Rinse aid is automatically added during the last rinse,
ensuring thorough rinsing, spot and streak free drying.
• This appliance has been designed for the use of liquid rinse
aids.
• The dosage of the rinse aid is on the inside of the tiltable door,
next to the Chamber of the dosage of dishwasher tablets.
• To make the rinse aid reservoir of accessible, turn the cap
counterclockwise, the cap is thus loosened from the lling
opening (1). Pour slowly the liquid rinse aid (2); the capacity
of the reservoir is about 110 ml
• You should pour in the rinse aid slowly until the level indicator
is completely black.
• You should not overll the reservoir, it could cause the selec-
ted wash program for excessive foaming. Wipe o the remains
of the rinse aid with a damp cloth.
• Unscrew the cap clockwise back again until it locks into po-
sition (3).
• If the control indicator „Rinse aid“ on the control panel on, it is
necessary to ll the detergent reservoir again.
• Important: Even if you use detergent tablets 3 in 1, it is neces-
sary to constantly rell rinse aid into the reservoir.

13
Using the dishwasher
3.5 Adjusting the rinse aid dispenser
The amount of rinse agent that consumes the dishwasher, also
depends on the water hardness. With the setting of the rinse aid
dosage you should experiment until you nd the optimum setting
that ensures the best results.
• We recommend that the rst ushing adjust the rinse aid dis-
penser at number 4.
• If there are water spots on the dishes or the dish is not dry
enough, move the arrow counter-clockwise and set it to the next
higher number.
• Set the rinse aid dosage to no water stains will last as long a
upward.
• If there are streaks and stripes on the dishes, the setting of the
rinse aid dosage could be too high. This causes foam during the
ush. Move the arrow clockwise to the next lover number.
Dosage of dishwasher tablets
The dosing of the detergent must each time the ushing are lled
(except for the ush mode).
• Open the lid of the detergent container (1) and ll in the deter-
gent (2).
EN
Press to open Fill in detergent

14
Using the dishwasher
• The chamber on the picture (A) is inten-
ded for detergent of the main washing
program. In the detergent dispenser
only one tablet of detergent is inserted.
If you use powder detergent or liquid de-
tergent, follow the recommendations of
the detergent manufacturer.
• The chamber on the gure (B) contains
an extra detergent, namely for each
ushing, which has a Vorspülungsfunk-
tion; but this is only an optional extra
function. This is only for powder deter-
gent or liquid detergent, not for tablets.
• Close the lid of the detergent container
and on the outside edge make the clip
so that it keeps the lid closed.
• The clip opens aer the rinsing operati-
on is started and the tablet / powder /
liquid are dosed into the dishwasher.
Intensive detergent
• The use of the program for normal rin-
sing in conjunction with reducing a in-
tensive dishwashing liquid contaminati-
on and is suitable for your dishwasher.
This dishwashing corresponds to the
specic enzymes that dissolve the dirt
particles and are included in the con-
centrated dishwashing detergents.
• For this reason, when selecting the nor-
mal wash cycle using dishwasher deter-
gent the same result as „Intensive“ can
be achieved.
Detergent tablets
• The detergent tablets of dierent
brands dissolve at dierent rates. For
this reason some detergent tablets do
not dissolve during the short wash cy-
cles and can thus develop a suiciently
eective cleaning power.
• Therefore always choose a longer pro-
gram, if you use the detergent tablets, to
remove all residues during the ushing
process.
Detergents
There are 3 sorts of detergents:
• With phosphate and with chlorine
• With phosphate and without chlorine
• Without phosphate and without chlo-
rine
Normally new pulverised detergent is wi-
thout phosphate. Thus the water soener
function of phosphate is not given. In this
case we recommend to ll salt in the salt
container even when
the hardness of water is only 6 °dH. If
detergents without phosphate are used in
the case of hard water oen white spots
appear on dishes and glasses. In this case
please add more detergent to reach bet-
ter results. Detergents without chlorine
do only bleach a little. Strong and colou-
red spots will not be removed completely.
In this case please choose a program with
a higher temperature.
A B

15
Using the dishwasher
3.6 Loading the upper basket
3.7 Setting the upper rack position
The upper basket is designed for gentle rinse of the sensitive,
fragile and smaller dishes pieces, eg of glasses, cups, small plates,
bowls and shallow pans (if they are not heavily soiled) provided.
The height of the upper basket can be adjusted
in order to create more space for large utensils
both for the upper /lower basket. The height
of the upper basket can be adjusted by li up
the basket for the upper position, and up press
the handle to lower the upper basket, see the
pictures on the right:
When removing the basket from the guides
The basket must be empty. For easier posi-
tioning of pots and Pans, the position of the
upper tray has to be changed.
EN
• The dishes are to be distributed
such that it does not move during
the wash under the pressure of the
water ow.
• Use the picture as a guide to the
distribution of the dishes in the dish-
washer.
* The procedure for loading the cutlery tray
on the upper rack, refer to the correspon-
ding page.
1 Cups
2 Saucers
3 Glasses
6 Serving bowl (big)
Lower position
Higher position
1
1 1
1
33 3
6
2
3
3 3
3 3
1
1

16
Using the dishwasher
3.8 Loading the lower basket
3.9 Foldable stand the lower rack
The lower basket is designed for large
and more dirty dishes, such as Pans,
pan lid or serving dish suitable. In
the lower basket, you can also insert
mugs and various plates.
2 Saucers
4 Small serving bowl
5 Medium serving bowl
7 Dessert dishes
8 Dinner plates
9 Soup plates
10 Oval platter
• Depth kitchen pans are inclined
position so that the water can ow
from the pans.
• The lower bracket has at the back of
the basket folding holder that can
be folded down, making it easier to
load large kitchen pans and serving
dishes. 1
2
Fold down the holder Easily place the pots
Lower cutlery basket is adjustable

17
Using the dishwasher
EN
3.10 Loading the cutlery baskets
In the basket, the cutlery should be placed with handles at
the side. For optimum sweep eiciency to use the already
connected to the basket place net and put the cutlery indivi-
dually into the appropriate slots.
• The kits are lodged in the cutlery basket on the top
holes for achieving the best cleaning results.
Important
Avoid falling through the cutlery through the bottom of the cutlery
basket, as it could cause damage to the spray arm and / or own cutle-
ry. If the bottom of the cutlery basket begins to deform and thereby
enables falling through the cutlery, so replace the cutlery basket.
!
1 Soup spoons 5 Dessert spoons
2 Forks 6 Serving spoons
3 Knives 7 Serving forks
4 Teaspoons 8 Suppenlöel
32
8
6
6
2
4
1
3
6

18
Conguring the cutlery basket

19
Washing programs
4. Overview
EN
Program
Program infor-
mation
Cycle
description
Dishwasher
cleaner for pre-
and main wash
Running
time
(min)
Energy
consump-
tion
(KWh)
Water
con-
sumption
(l)
Rinse
Aid
Automatic
For all soiled
loads, such as
pans,casserole
dishes and
dishes that have
been sitting with
dried food on
them for a while.
Pre-wash (45°C)
Autowash (45-
55°C)
Rinse
Rinse(62°C)
Drying.
3/22 g
(or 3 in 1)
150
Minutes
0,77–
1,12
8–
12,3 ✓
Intensive
For heaviest
soiled crockery,
and normally
soiled pots?
pans? Dishes etc
with dried on
soiling.
Pre-wash(50 °C)
Wash (65 °C)
Rinse
Rinse
Rinse(65°C)
Drying
3/22 g
(or 3 in 1)
160
Minutes 1,3 17 ✓
ECO
(*E 50242
Standardpro-
gramm)
This is standard
programme, it is
suitable to clean
normally soiled
tableware and
it is the most
eicient pro-
gramme in terms
of its combined
energy and water
consumption
for that type of
tableware.
→ Pre-wash
→ Main wash
(50 °C)
→ Rinse (65 °C)
→ Drying
25 g
(or 3 in 1)
170
Minutes 0,75 10 ✓
Normal
For normally
soiled loads,
such as pots,
plates,glasses
and lightly soiled
pans.
Pre-wash (45 °C)
Wash (55 °C) Rinse
Rinse (65 °C)
Drying
3/22 g
(or 3 in 1)
175
Minutes 1,3 14 ✓
Glass
For lightly soiled
crockery and
glass.
Pre-wash
Wash (45 °C)
Rinse
Rinse (60 °C)
Drying
3/22 g 110
Minutes 0,87 14 ✓
1 hour
For normally
soiled loads
that need quick
wash.
Wash (65 °C)
Rinse
Rinse (60 °C)
Drying
3/22 g 60
Minutes 1,33 12 ✓
Rapid
A shorter wash
for lightly soiled
loads that do not
need drying.
Wash (40 °C)
Rinse
Rinse (45 °C)
20 g 40
Minutes 0,50 11
Pre-Rinse
To rinse dishes
that you plan to
wash later that
day.
Pre-Wash –8
Minutes 0,01 4
A
1h

20
Using the dishwasher
!
!
The Washing program „ECO“ is „medium“ for the ushing of
the suitable soiled dishes and most eicient in terms of com-
bined energy and water consumption.
The fair values of the washing program are a guideline only. Cir-
cumstances that are not dependent on the device, for example
the temperature of the supplied water, the water pressure, etc.,
may aect the overall duration of the wash cycle.
* Default program, according to the test cycle.
1. Draw out the lower and upper basket, load the dishes and push
them back. It is commended to load the lower basket rst, then
the upper one (see the section entitled “Loading the Dish-
washer”).
2. Pour in the detergent (see the section entitled „Salt, Detergent
and Rinse Aid“).
3. Insert the plug into the socket. The power supply is 220-240 VAC
/50 HZ, the specication of the socket is 10A 250VAC. Make sure
that the water supply is turned on to full pressure.
4. Open the door, press the power button, and the light will turn on.
5. Press the Menu button, then press the P-button, the wash
program will be changed as follows direction: Auto→intensive
→normal→ECO→90 Min→glass→rapid→soak→;
Select a program. Then close the door, the dishwasher begins to
start.
Make sure that notes from the rst section have been complied
with „before rst use“.
4.1 Set up the washing program
Table of contents
Other KKT KOLBE Dishwasher manuals

KKT KOLBE
KKT KOLBE GS6013ED User manual

KKT KOLBE
KKT KOLBE DW452VI User manual

KKT KOLBE
KKT KOLBE DW614FS User manual

KKT KOLBE
KKT KOLBE GSI452ED User manual

KKT KOLBE
KKT KOLBE DW600ED User manual

KKT KOLBE
KKT KOLBE GS60VI User manual

KKT KOLBE
KKT KOLBE GS452VI User manual

KKT KOLBE
KKT KOLBE GS63VI User manual

KKT KOLBE
KKT KOLBE DW452ED User manual

KKT KOLBE
KKT KOLBE GSI62ED User manual
Popular Dishwasher manuals by other brands

Fisher & Paykel
Fisher & Paykel DOUBLE DISHDRAWER DD24DV2T installation guide

Bosch
Bosch SHP88PZ55N operating instructions

Bosch
Bosch 9000 035918 (8406 0) Instructions for use

Bosch
Bosch SHXN8U55SS operating instructions

Miele
Miele Built-under dishwashers Installation diagram

Bosch
Bosch SMV4HCX52E INFORMATION FOR USE