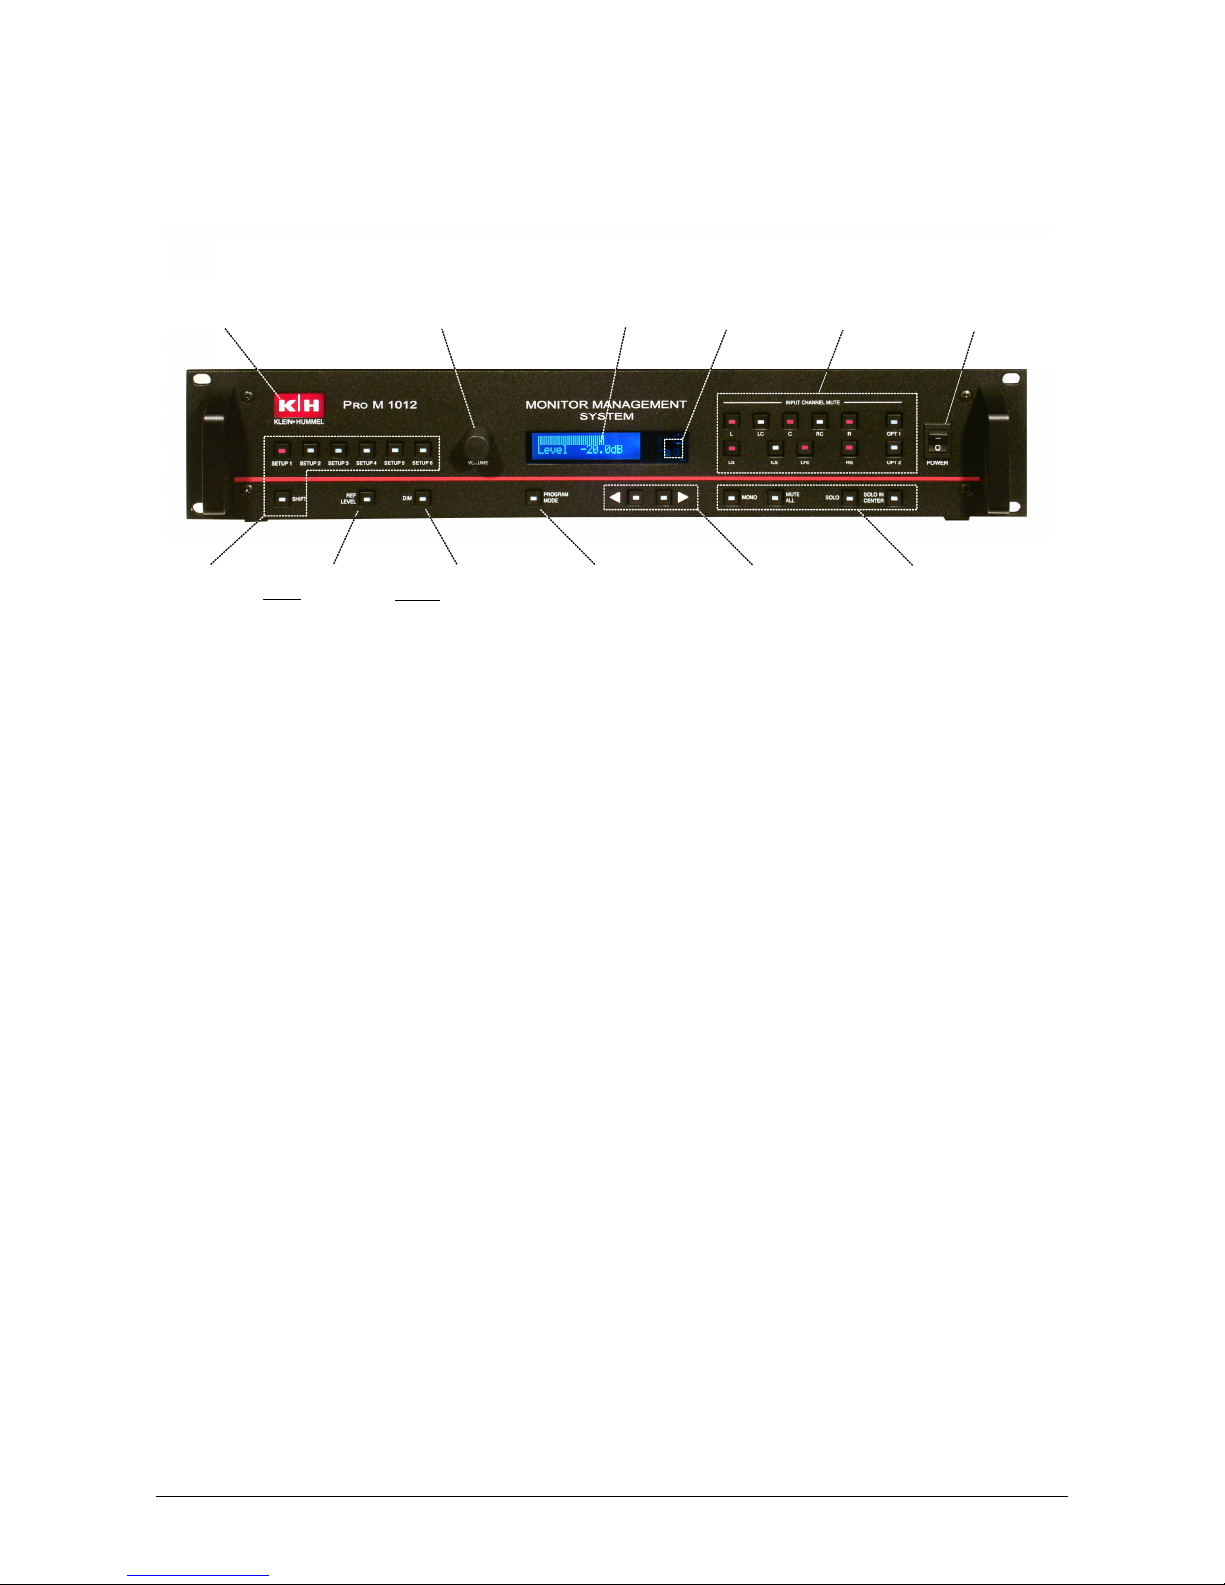
PRO M 1012 page of
Appendix
A1 Transferring New Project Files from a PC to the PRO M 1012
Important note! The Pro M 1012’s Project File contains the 80 Basic Configurations plus all user-
defined parameter settings. If the existing parameter settings need to be saved for future use, then
transfer the existing Project File to the Configuration Manager (see A2) before transferring a new
project file to the PRO M 1012!
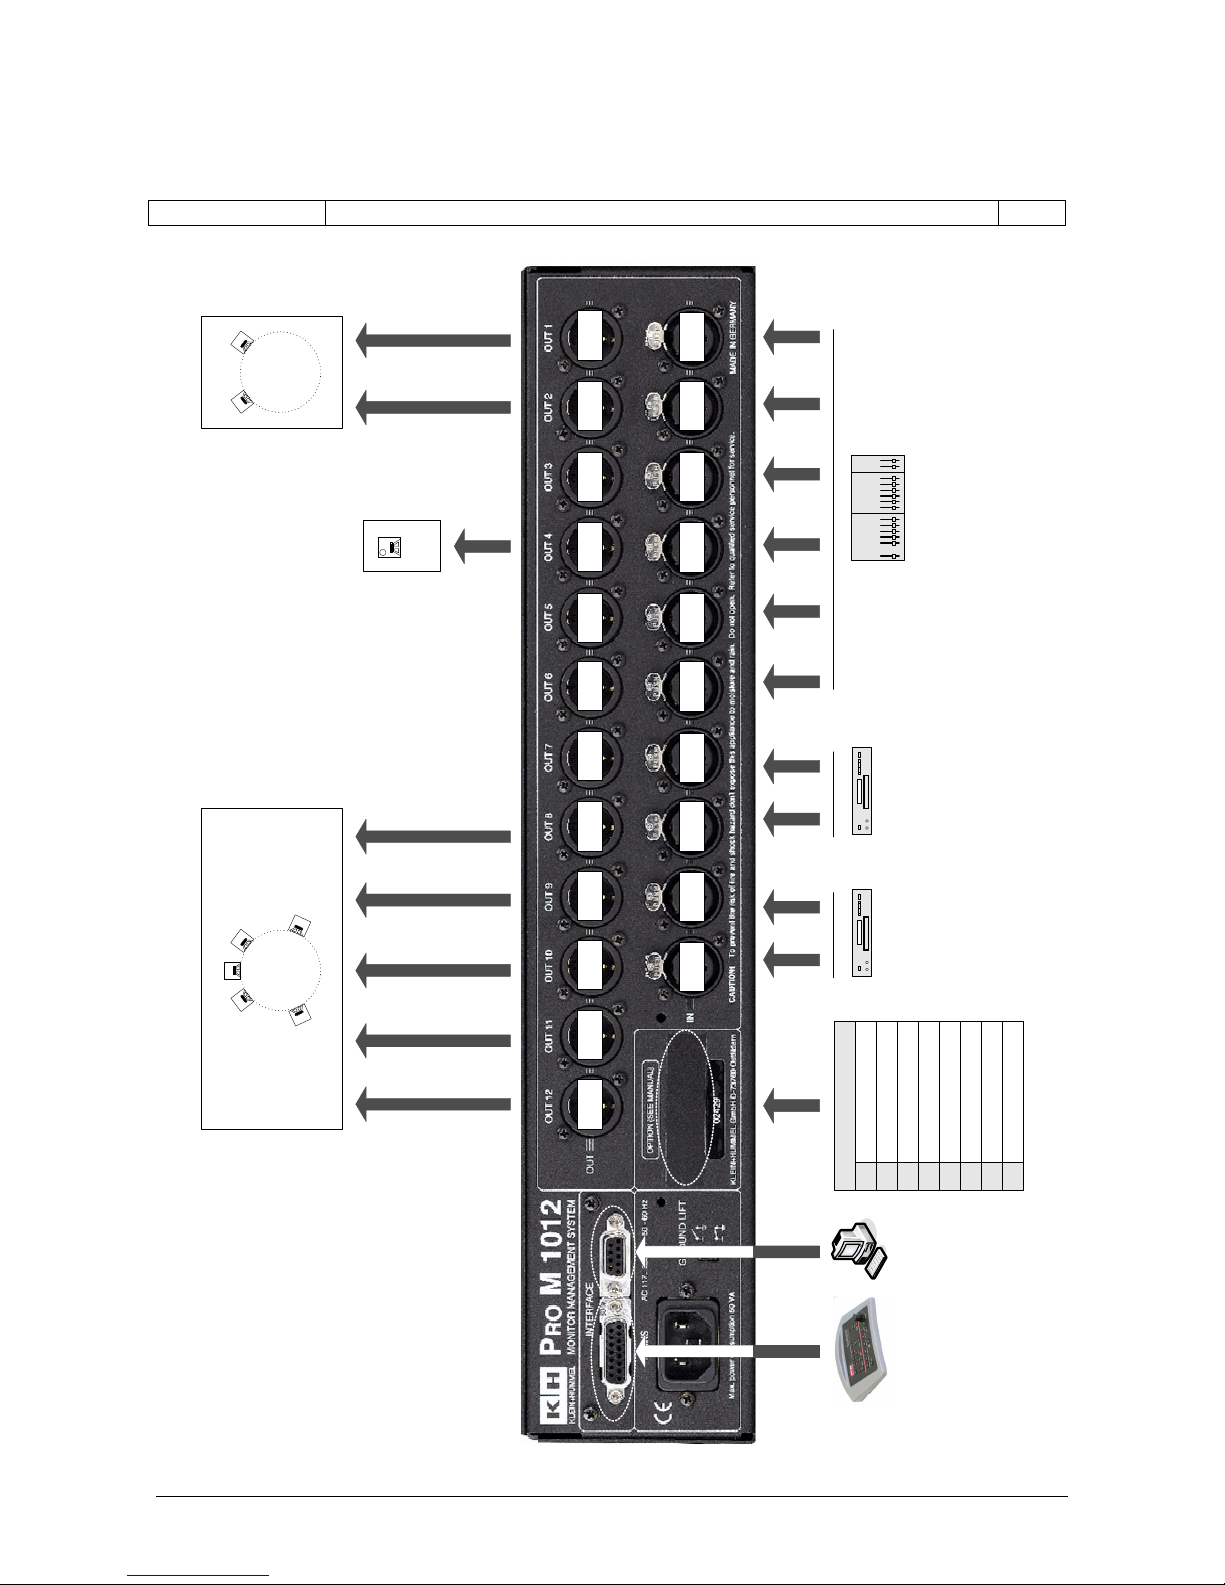
• Connect the 9-Pin D-SUB RS-232 connector on the rear panel of the PRO M 1012 to the
PC
• Double-click the ProM1012ConfigMan.exe file to start installation of the PRO M 1012
Configuration Manager and follow the instructions given during the installation process.
(File is included on the CD-ROM that is supplied with the Pro M 1012 or may be
downloaded from www.klein-hummel.com)
• After successful installation, start Configuration Manager and apply power to the PRO M
1012
• In File => Open Project, open the new Project File
• In Trans it/Receive => Connection, set the correct COM Port (typically COM2, however,
when using USB-to-RS-232 adapter cables the correct Port can be checked in the
Hardware menu of the Windows® Control Panel)
• In Trans it/Receive => Trans it to Pro M 1012, select Trans it whole Project
• Check OK to start the transfer process. Progress will be indicated by the blue bar
• The message “Project has been trans itted successfully!“ will appear, when the transfer is
complete
A2 Transferring the System’s Project File to a PC
• Start Configuration Manager and apply power to the PRO M 1012
• In Trans it/Receive, select Receive fro Pro M 1012 => Receive whole Project
• Check OK to start the transfer process. Progress will be indicated by the blue bar
• The message “Project has been trans itted successfully!“ will appear, when the transfer is
complete
• The Project File can now be opened in Configuration Manager and can be edited and
stored via File => Save Project as...