Klein Tools ET300 User manual

CUSTOMER SERVICE
KLEIN TOOLS, INC.
450 Bond Street
Lincolnshire, IL 60069
www.kleintools.com
1-877-775-5346
www.kleintools.com 139578T
Instruction
Manual
ENGLISH
ET300
Testing
Equipment
8Z25
For Professionals...Since 1857
®
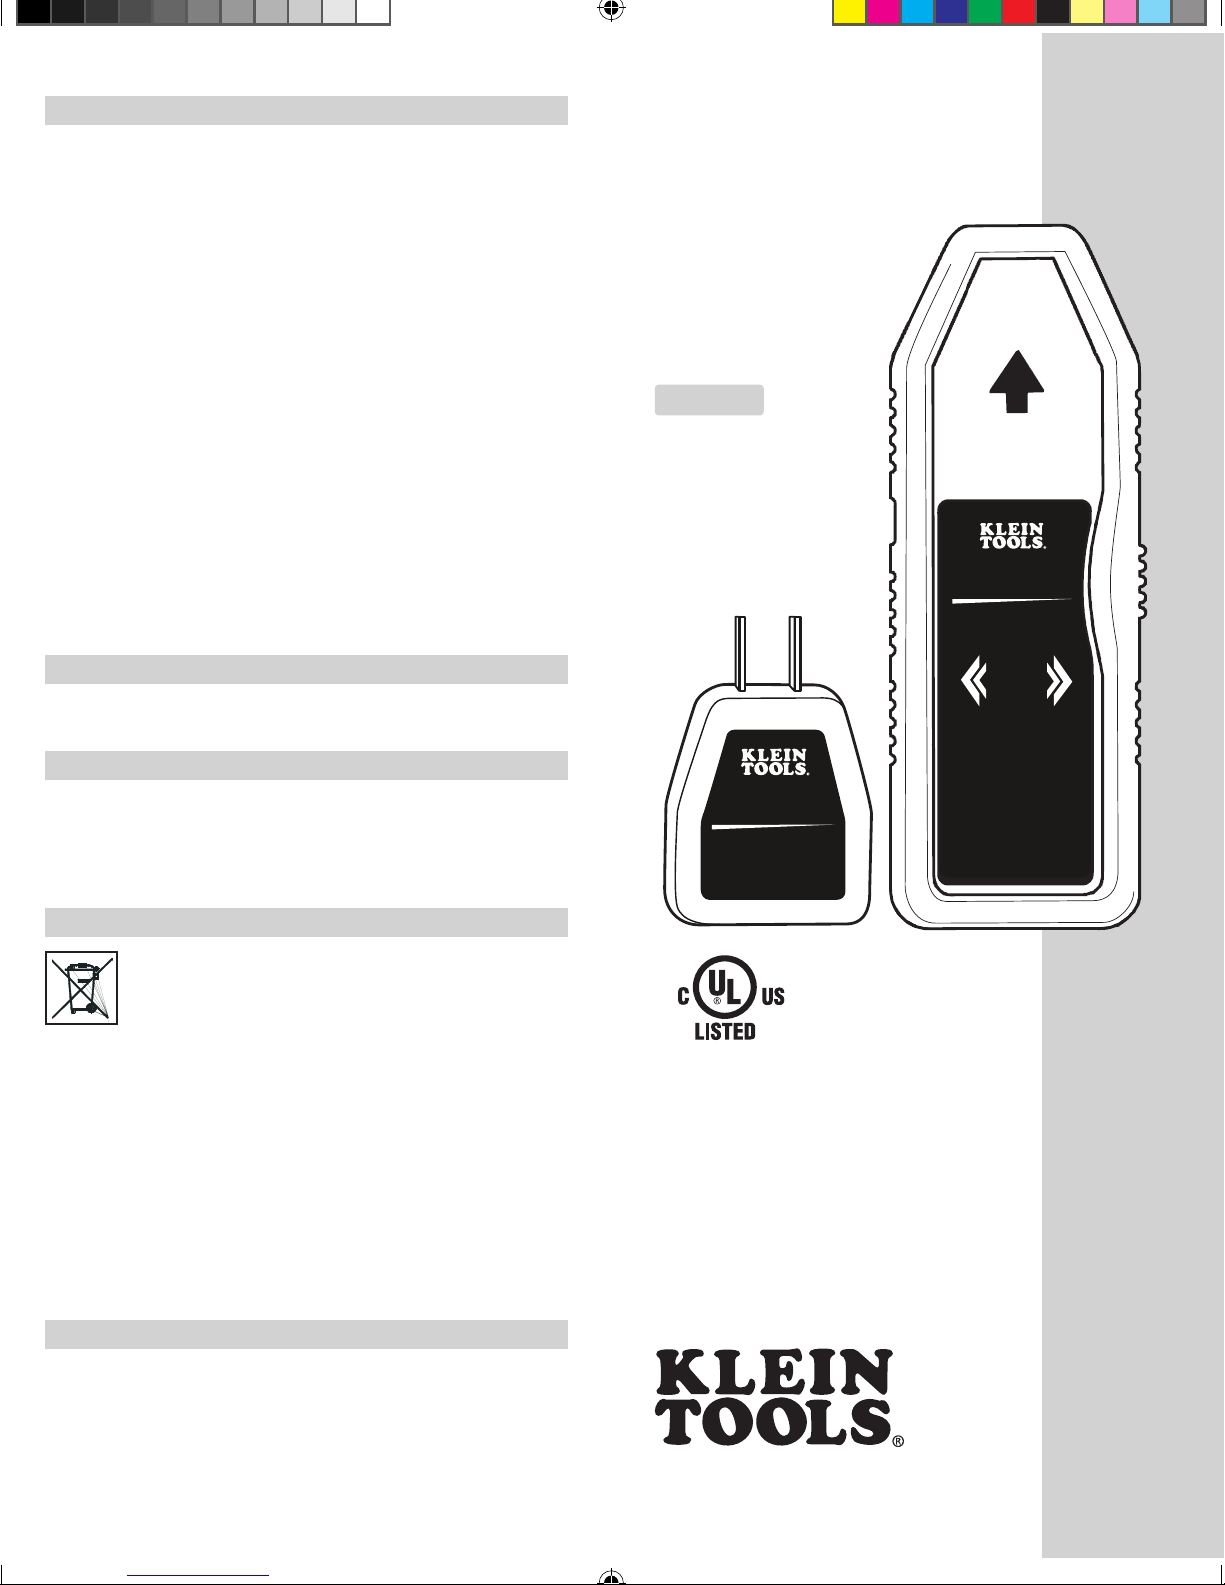
Digital Circuit Breaker
Finder
ET300
RECEIVER
Micro-Processor
Controlled
UP
Digital Circuit Breaker
Finder
ET300
TRANSMITTER
WARRANTY
This product is warranted to be free from defects in materials and workmanship
for a period of two years from the date of purchase. During this warranty period,
Klein Tools has the option to repair or replace or refund the purchase price of
any unit which fails to conform to this warranty under normal use and service.
This warranty does not cover damage which occurs in shipment or failure which
results from alteration, tampering, accident, misuse, abuse, neglect, or improper
maintenance. Batteries and damage resulting from failed batteries are not
covered by warranty. A purchase receipt or other proof of original purchase date
will be required before warranty repairs will be rendered.
Any implied warranties, including but not limited to implied warranties of
merchantability and fitness for a particular purpose, are limited to the express
warranty. Klein Tools shall not be liable for loss of use of the instrument or other
incidental or consequential damages, expenses, or economic loss, or for any
claim or claims for such damage, expenses or economic loss.
Some states or countries laws vary, so the above limitations or exclusions may
not apply to you. This warranty gives you specific legal rights, and you may also
have other rights which vary from state to state. If your Klein product requires
repair or for information on how to exercise your rights under the terms of this
warranty, please contact Klein Tools at 1-877-775-5346.
CLEANING
Clean the instrument by using a damp cloth. Do not use abrasive cleaners
or solvents.
STORAGE
Remove the batteries when instrument is not in use for a prolonged period of
time. Do not expose to high temperatures or humidity. After a period of storage
in extreme conditions exceeding the limits mentioned in the Specifications
section, allow the instrument to return to normal operating conditions before
using it.
DISPOSAL /RECYCLE
Caution: This symbol indicates that equipment and its accessories
shall be subject to a separate collection and correct disposal.
Designer/Production: Sandra ex 15612
Client Contact: Chris Trott, ex 13267
Client Sign off:
Project Name: MKT121707 -ET300- Instructions-139578TART
Product: ET300
Producr number: 139578
Date: 4/6/10
ET300-Instructions-139578TART.indd 1-2 4/6/10 10:14 AM

ENGLISH
Designer/Production: Sandra ex 15612
Client Contact: Chris Trott, ex 13267
Client Sign off:
Project Name: MKT121707 -ET300- Instructions-139578TART
Product: ET300
Producr number: 139578
Date: 2/23/10
OPTIONAL ACCESSORIES
ET300
Instruction Manual
GENERAL SPECIFICATIONS
• Operating Voltage: 90 ~ 120V AC
• Operating Frequency: 50 ~ 60Hz
• Tracking Distance: Up to 1000 ft.
• Operating Temperature: 0°C (32°F) to 40°C (104°F)
• Relative Humidity: 50%
• Altitude: < 2000m
• Environment: For indoor use only
• Power: 9 volt alkaline battery
• Auto Power Off: Approximately 4 minutes
• Transmitter Dimensions: 2.8" x 1.9" x 1.2"
• Receiver Dimensions: 6.0" x 2.0" x 0.9"
• Transmitter Weight: 1.6 oz.
• Receiver Weight: 3.2 oz.
• Sensitivity: Indication at 4mm (0.16")
distance from a wire carrying 120 V AC.
• Safety Rating: UL listed
SAFETY PRECAUTIONS
To ensure safe operation and service of the tester, follow these instructions.
Failure to observe these warnings can result in severe injury or death.
• Understand the risks of working around live voltage.
• Turn off power before inspecting, applying, or removing
the transmitter (when using the optional 'Leads Adapter').
• Exercise extreme caution around live, bare wires, especially
in an open breaker panel.
• Consult with an experienced electrician when necessary.
A
Light Fixture Adapter:
Screw this adapter into an empty light socket.
Make sure the fixture is live. Plug in the
transmitter and follow the instructions
starting at step 4.
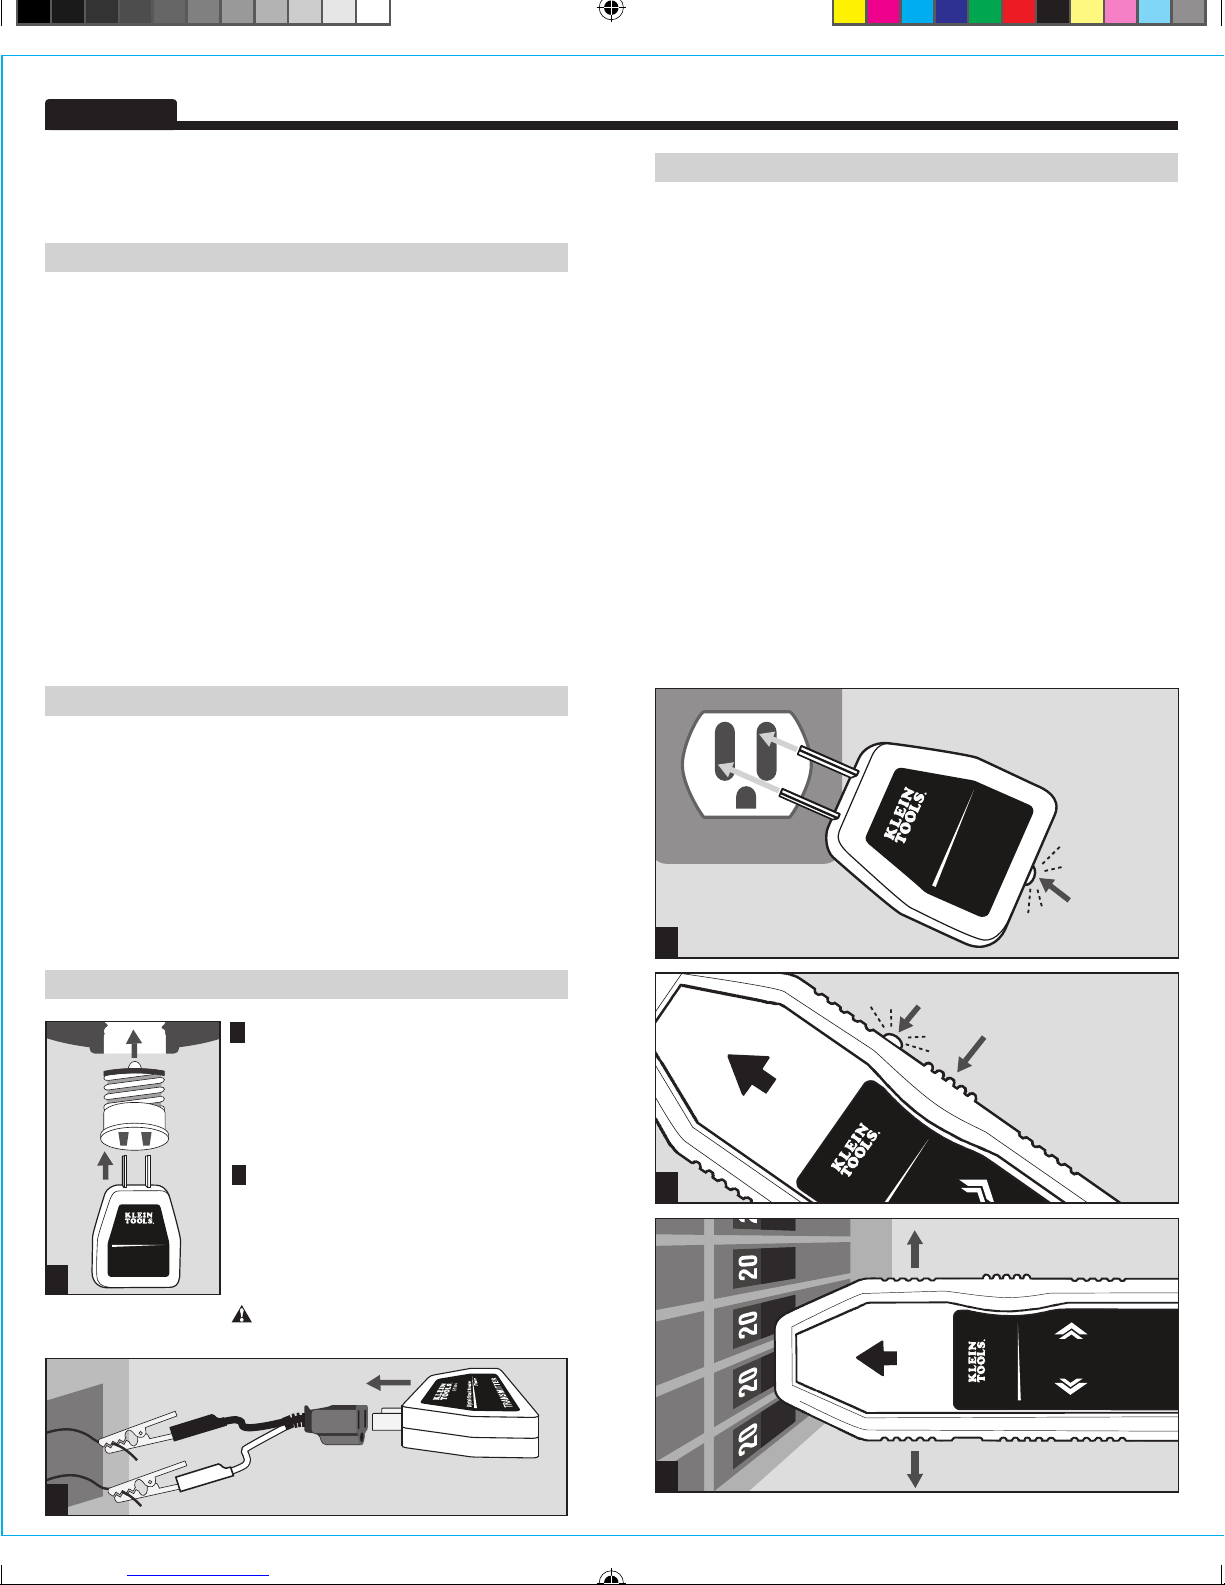
INSTRUCTIONS
1. Identify the wall outlet or fixture for which the
breaker must be determined.
2. Safely check that the outlet or fixture is live.
3. Plug in the transmitter. Its LED will light if it is receiving power.
4. Move to the breaker panel with the receiver.
5. Turn on the receiver by pressing, but not holding, the power button.
You will hear a beep and see its LED lit.
6. Position the receiver perpendicularly on the breakers
in the panel with the power button pointing up.
7. Slowly scan all breakers in the panel once. Ignore any beeps
or indications, as the receiver is learning the panel.
8. Scan all breakers a second time. This time, the receiver will beep
and illuminate the green arrow only at the correct breaker.
9. Power off the receiver by pressing and holding the power button.
Return to the outlet or fixture and remove the transmitter.
B
Leads Adapter:
Carefully attach leads to the correct wires.
Plug in transmitter to adapter. Follow the
instructions starting at step 4.
Exercise extreme caution around live wires.
Digital Circuit Breaker
Finder
ET300
Micro-Processor
Controlled
UP
7
Digital Circuit Breaker
Finder
ET300
Micro-Processor
Controlled
UP
When you press
down on the
Power Button
LED will light up
5
Digital Circuit Breaker
Finder
ET300
TRANSMITTER
Once plugged in, the LED
will light up when
socket is live
3
Digital Circuit Breaker
Finder
ET300
TRANSMITTER
A
B
ET300-Instructions-139578TART.indd 3-4 4/6/10 10:14 AM
www.kleintools.com
SERVICIO AL CLIENTE
KLEIN TOOLS, INC.
450 Bond Street
Lincolnshire, IL 60069
1-877-775-5346
www.kleintools.com 139579T
Manual de
Instrucciones
ESPAÑOL
ET300
Testing
Equipment
8Z25
Para Profesionales... Desde 1857
®
Digital Circuit Breaker
Finder
ET300
RECEIVER
Micro-Processor
Controlled
UP
Digital Circuit Breaker
Finder
ET300
TRANSMITTER
Designer/Production: Sandra ex 15612
Client Contact: Chris Trott, ex 13267
Client Sign off:
Project Name: MKT121707 -ET300- Inst-SPAN-139579TART
Product: ET300
Product Number: 139579
Date: 4/6/10
GARANTÍA
Se garantiza que este producto estará libre de defectos de materiales y
fabricación durante un período de dos años a partir de la fecha de compra.
Durante este período de garantía, Klein Tools tiene la opción de reparar,
reemplazar o reembolsar el precio de compra de cualquier unidad que no
cumpla con esta garantía bajo uso y servicio normales. Esta garantía no cubre
los daños que ocurran en el envío o las fallas que ocurran debido a alteración,
manipulación indebida, accidente, uso incorrecto, abuso, negligencia o
mantenimiento inapropiado. Las pilas y los daños que ocurran por causa de
pilas que fallen no están cubiertos por esta garantía. Se requerirá un recibo de
compra u otro comprobante de la fecha de compra original antes de que se
realicen las reparaciones bajo garantía.
Todas las garantías implícitas, incluyendo pero sin estar limitadas a las garantías
implícitas de comerciabilidad e idoneidad para un propósito específico, están
limitadas a la garantía expresa. Klein Tools no será responsable por la pérdida de
uso del instrumento u otros daños incidentales o emergentes, gastos o pérdida
económica, ni por cualquier reclamo o reclamos por dichos daños, gastos o
pérdida económica.
Las leyes de algunos estados o países varían, por lo que es posible que las
limitaciones o exclusiones que anteceden no tengan aplicación en el caso de
usted. Esta garantía le confiere a usted derechos legales específicos y es posible
que usted tenga también otros derechos que varían de un estado a otro. Si su
producto Klein requiere reparación, o para obtener información sobre cómo
ejercer sus derechos bajo los términos de esta garantía, sírvase contactar a
Klein Tools llamando al 1-877-775-5346.
LIMPIEZA
Limpie el instrumento utilizando un paño húmedo. No utilice limpiadores
abrasivos ni solventes.
ALMACENAMIENTO
Retire las pilas cuando el instrumento no se vaya a usar durante un período
prolongado. No lo exponga a altas temperaturas o humedad. Después de un
período de almacenamiento en condiciones extremas que excedan los límites
mencionados en la sección Especificaciones, deje que el instrumento regrese a
las condiciones de funcionamiento normales antes de utilizarlo.
ELIMINACIÓN / RECICLAJE
Precaución: Este símbolo indica que el equipo y sus accesorios
estarán sujetos a recogida y desecho correcto por separado.
ET300-Inst-SPAN-139579TART.indd 1-2 4/6/10 10:33 AM
ESPAÑOL
Designer/Production: Sandra ex 15612
Client Contact: Chris Trott, ex 13267
Client Sign off:
Project Name: MKT121707 -ET300- Inst-SPAN-139579TART
Product: ET300
Product Number: 139579
Date: 2/23/10
ACCESORIOS OPCIONALES
ET300
Manual de Instrucciones
ESPECIFICACIONES GENERALES
• Tensión de funcionamiento: 90 ~ 120 V CA
• Frecuencia de funcionamiento: 50 ~ 60Hz
• Distancia de rastreo: Hasta 1000 pies
• Temperatura de funcionamiento: 0°C (32°F) a 40°C (104°F)
• Humedad relativa: 50%
• Altitud: < 2000m
• Entorno: Para uso en interiores solamente
• Alimentación: Pila alcalina de 9 V
• Autoapagado: Aproximadamente 4 minutos
• Dimensiones del transmisor: 2,8 x 1,9 x 1,2 pulgadas
• Dimensiones del receptor: 6,0 x 2,0 x 0,9 pulgadas
• Peso del transmisor: 1,6 oz.
• Peso del receptor: 3,2 oz.
• Sensibilidad: Indicación a 4 mm (0,16 pulgadas) de distancia
de un cable que lleve 120 V CA.
• Clasificación de seguridad: Catalogado por UL
PRECAUCIONES DE SEGURIDAD
Para asegurar un funcionamiento y servicio seguros del probador, siga
estas instrucciones. Si no se hace caso de estas advertencias, el resultado
puede ser lesiones graves o muerte.
• Entienda los riesgos de trabajar alrededor de tensión viva.
• Apague la alimentación eléctrica antes de inspeccionar, aplicar o
retirar el transmisor (cuando utilice el “adaptador de conductores de
prueba” opcional).
• Tenga suma precaución alrededor de cables desnudos con corriente,
especialmente en un panel de cortacircuitos abierto.
• Consulte con un electricista experimentado cuando sea necesario.
A
Adaptador para elementos de iluminación:
Enrosque este adaptador en un portabombilla
vacío. Asegúrese de que el elemento de ilumi-
nación tenga corriente. Enchufe el transmisor y
siga las instrucciones comenzando en el paso 4.
INSTRUCCIONES
1. Identifique el tomacorriente de pared o elemento de iluminación
para el cual se debe determinar el cortacircuito.
2. Compruebe de manera segura que el tomacorriente o el elemento
de iluminación tiene corriente.
3. Enchufe el transmisor. Su luz LED se encenderá si está recibiendo
alimentación eléctrica.
4. Vaya hasta el panel de cortacircuitos con el receptor.
5. Encienda el receptor presionando el botón de alimentación, pero sin
mantenerlo presionado. Escuchará un pitido y verá que su luz LED
se enciende.
6. Posicione el receptor perpendicularmente en los cortacircuitos del
panel con el botón de alimentación orientado hacia arriba.
7. Escanee lentamente todos los cortacircuitos del panel una vez.
Ignore cualquier pitido o indicación, ya que el receptor está
aprendiendo el panel.
8. Escanee todos los circuitos una segunda vez. Esta vez, el receptor
pitará e iluminará la flecha verde solamente en el cortacircuito
correcto.
9. Apague el receptor presionando y manteniendo presionado el botón
de alimentación. Regrese al tomacorriente o elemento de iluminación
y retire el transmisor.
B
Adaptador de los conductores de prueba:
Conecte cuidadosamente los conductores de
prueba a los cables correctos. Enchufe el trans-
misor en el adaptador. Siga las instrucciones
comenzando en el paso 4.
Tenga suma precaución alrededor de
cables con corriente.
Digital Circuit Breaker
Finder
ET300
Micro-Processor
Controlled
UP
7
Digital Circuit Breaker
Finder
ET300
Micro-Processor
Controlled
UP
Cuando usted
presione el
botón de
alimentación
La luz LED se encenderá
5
Digital Circuit Breaker
Finder
ET300
TRANSMITTER
Una vez que esté enchufado, la
luz LED se encenderá cuando el
tomacorriente
tenga corriente
3
Digital Circuit Breaker
Finder
ET300
TRANSMITTER
A
B
ET300-Inst-SPAN-139579TART.indd 3-4 4/6/10 10:33 AM

www.kleintools.com
SERVICE À LA CLIENTÈLE
KLEIN TOOLS, INC.
450 Bond Street
Lincolnshire, IL 60069
1-877-775-5346
www.kleintools.com 139580T
Mode
d'Emploi
FRANÇAIS
ET300
Testing
Equipment
8Z25
Pour les Professionnels...Depuis 1857
®
Digital Circuit Breaker
Finder
ET300
RECEIVER
Micro-Processor
Controlled
UP
Digital Circuit Breaker
Finder
ET300
TRANSMITTER
Designer/Production: Sandra ex 15612
Client Contact: Chris Trott, ex 13267
Client Sign off:
Project Name: MKT121707 -ET300- Inst-FREN-139580TART
Product: ET300
Date: 4/6/10
GARANTIE
Ce produit est garanti sans défauts de matériau ou de fabrication pendant une
période de deux ans à compter de la date de l’achat. Pendant cette période de
garantie, à son choix, Klein réparera ou remplacera tout produit qui ne serait
pas conforme à cette garantie dans des conditions normales d’utilisation et de
service, ou en remboursera le prix d’achat. Cette garantie ne couvre pas les
dommages qui surviennent pendant l’expédition ou les défaillances qui résultent
d’une altération, d’une falsification, d’un accident, d’une utilisation non conforme
ou abusive, de négligence ou d’une maintenance incorrecte. Les piles et les
dommages résultant de piles défectueuses ne sont pas couverts par la garantie.
Un reçu d’achat ou un autre justificatif indiquant la date de l’achat initial sera
exigé avant que des réparations ne soient effectuées dans le cadre de la garantie.
Toutes garanties implicites, y compris, entre autres, les garanties implicites
de qualité marchande et d’adéquation à un but particulier, sont limitées à la
garantie expresse. Klein Tools n’assumera aucune responsabilité au titre de la
perte d’utilisation de l’instrument ou pour d’autres dommages, frais ou pertes
économiques secondaires ou accessoires, ou en cas de réclamation ou de
réclamations pour de tels dommages, frais ou pertes économiques.
Étant donné que les lois de certains États, de certaines provinces ou de certains
pays varient, les limitations ou exclusions ci-dessus ne s’appliquent peut-être
pas à vous. Cette garantie vous confère des droits particuliers, et vous pouvez
aussi avoir d’autres droits qui varient selon l’État ou la province où vous résidez.
Si votre produit Klein nécessite des réparations ou pour connaître la façon
de faire valoir vos droits en vertu des termes de la présente garantie, veuillez
contacter Klein Tools au 1-877-775-5346.
NETTOYAGE
Nettoyez l'instrument en utilisant un tissu humide. N’utilisez pas de solvants ou
de produits de nettoyage abrasifs.
RANGEMENT
Retirez les piles lorsque l'instrument ne va pas être utilisé pendant une période
prolongée. N'exposez pas à une température ou une humidité élevée. À la suite
d'une période de rangement dans des conditions extrêmes dépassant les limites
mentionnées dans la section consacrée aux spécifications, laissez l'instrument
retourner dans des conditions de mesure normales avant de vous en servir à
nouveau.
MISE AU REBUT/RECYCLAGE
Mise en garde: Ce symbole indique que l'équipement et ses
accessoires doivent faire l'objet d'une élimination distincte et d'une
mise au rebut conforme aux règlements.
ET300-Inst-FREN-139580TART.indd 1-2 4/6/10 10:48 AM

FRANÇAIS
Designer/Production: Sandra ex 15612
Client Contact: Chris Trott, ex 13267
Client Sign off:
Project Name: MKT121707 -ET300- Inst-FREN-139580TART
Product: ET300
Date: 2/23/10
ACCESSOIRES EN OPTION
ET300
Mode d’Emploi
SPÉCIFICATIONS GÉNÉRALES
• Tension de fonctionnement : 90 ~ 120 V c.a.
• Fréquence de fonctionnement : 50 ~ 60Hz
• Distance de poursuite : Jusqu’à 1 000 pi.
• Température de service : 0°C (32°F) à 40°C (104°F)
• Humidité relative : 50%
• Altitude : < 2 000m
• Environnement : Pour emploi intérieur seulement
• Puissance : Pile alcaline de 9 volts
• Mise hors tension automatiquement : Approximativement 4 minutes
• Dimensions du transmetteur : 2,8 po x 1,9 po x 1,2 po
• Dimensions du récepteur : 6,0 po x 2,0 po x 0,9 po
• Poids du transmetteur :1,6 oz
• Poids du récepteur : 3,2 oz
• Sensibilité : Indication à une distance de 4 mm (0,16 po)
depuis un fil sous tension de 120 V c.a.
• Valeur nominale pour la sécurité : Label UL
MESURES DE SÉCURITÉ
Pour assurer un fonctionnement et un service sans danger du testeur,
suivez les instructions ci-après. Le non-respect des ces avertissements
risquerait de causer des blessures graves ou même la mort.
• Comprenez les risques du travail sur des circuits sous tension.
• Mettez le circuit hors tension avant d’inspecter, d’appliquer ou
de retirer le transmetteur (lorsque vous utilisez l’« adaptateur de
conducteurs » en option).
• Faites extrêmement attention à proximité de fils sous tension
dénudés, tout particulièrement sur un panneau de disjoncteur ouvert.
• Consultez un électricien expérimenté quand cela est nécessaire.
A
Adaptateur d’appareil d’éclairage :
Vissez cet adaptateur dans un culot d’ampoule
vide. Assurez-vous que l’appareil est sous
tension. Branchez le transmetteur et suivez les
instructions en commençant à l’étape 4.
INSTRUCTIONS
1. Identifiez la prise de courant mural ou l’appareil d’éclairage pour
lequel le disjoncteur doit être déterminé.
2. Assurez-vous que la prise de courant ou l’appareil d'éclairage est
sous tension en prenant les précautions nécessaires.
3. Branchez le transmetteur. Sa DEL s’allumera s’il est sous tension.
4. Passez au panneau de disjoncteur avec le récepteur.
5. Allumez le récepteur en appuyant sur son interrupteur, mais sans
le maintenir enfoncé. Vous entendrez un bip et vous verrez sa DEL
s’allumer.
6. Positionnez le récepteur de façon qu’il soit perpendiculaire aux
disjoncteurs du panneau, avec l’interrupteur orienté vers le haut.
7. Passez lentement une fois au-dessus de tous les disjoncteurs du
panneau. Ignorez tous les bips sonores ou autres indications,
car le récepteur est en train d’apprendre le panneau.
8. Passez une seconde fois au-dessus de tous les disjoncteurs.
Cette fois-ci, le récepteur émettra un bip sonore et la flèche verte
ne s’allumera que sur le disjoncteur correct.
9. Éteignez le récepteur en appuyant sur son interrupteur et en le
maintenant enfoncé. Retournez à la prise de courant ou à l’appareil
d’éclairage, et retirez le transmetteur.
B
Adaptateur de conducteurs :
Attachez les conducteurs aux fils corrects en
prenant les précautions nécessaires. Branchez
le transmetteur sur l’adaptateur. Suivez les
instructions en commençant à l’étape 4.
Faites extrêmement attention à proximité
de fils sous tension.
Digital Circuit Breaker
Finder
ET300
Micro-Processor
Controlled
UP
7
Digital Circuit Breaker
Finder
ET300
Micro-Processor
Controlled
UP
Lorsque vous
enfoncez le
bouton de
l’interrupteur
Le voyant à DEL s’allumera
5
Digital Circuit Breaker
Finder
ET300
TRANSMITTER
Après le branchement, le voyant
à DEL s’allumera lorsque la prise
sera sous tension.
3
Digital Circuit Breaker
Finder
ET300
TRANSMITTER
A
B
ET300-Inst-FREN-139580TART.indd 3-4 4/6/10 10:48 AM
Other manuals for ET300
4
Table of contents
Languages:


