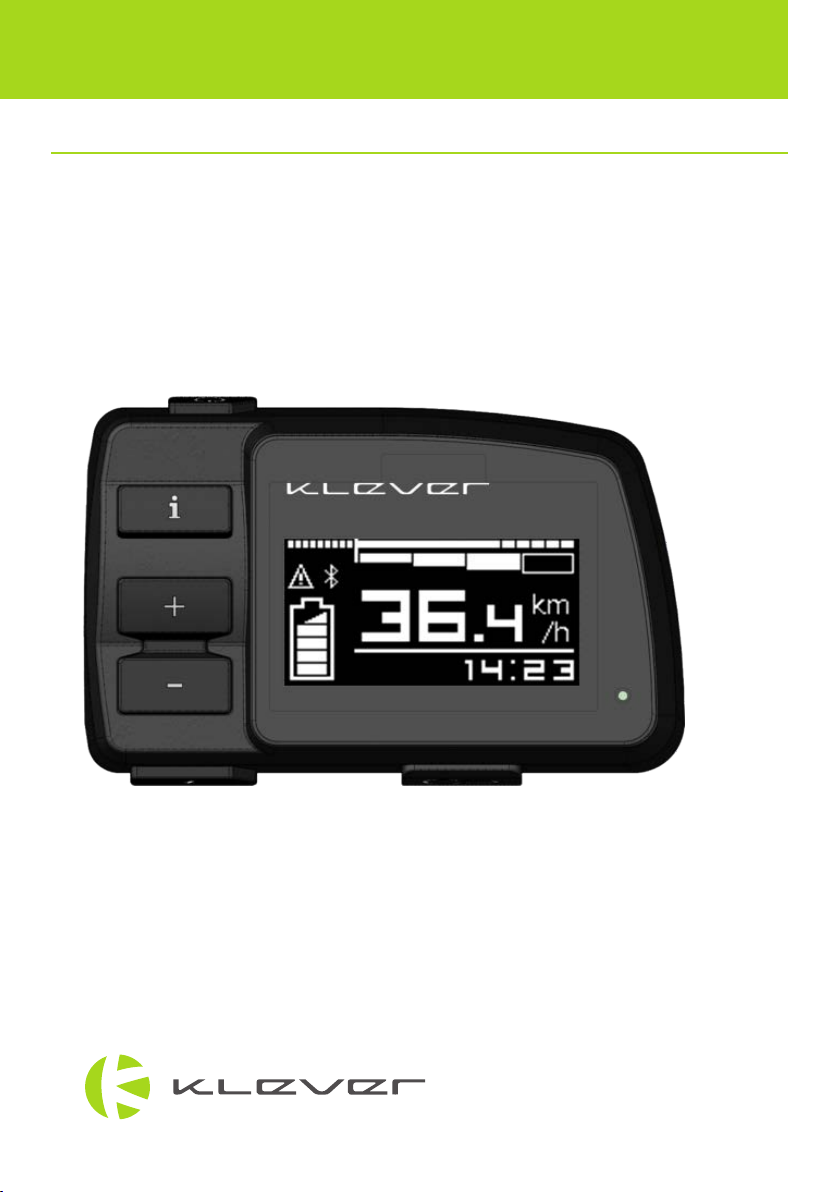
6www.klever-mobility.com
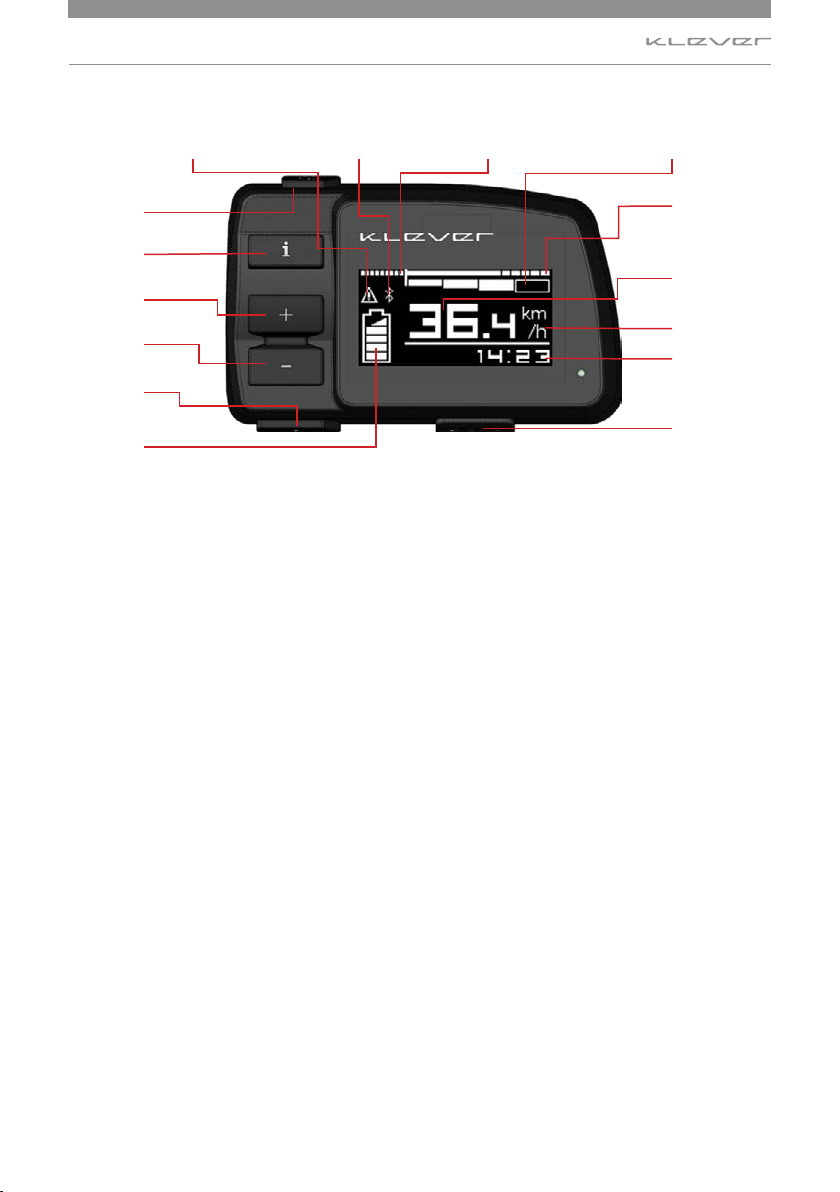
Function of each button
2. Function of each button
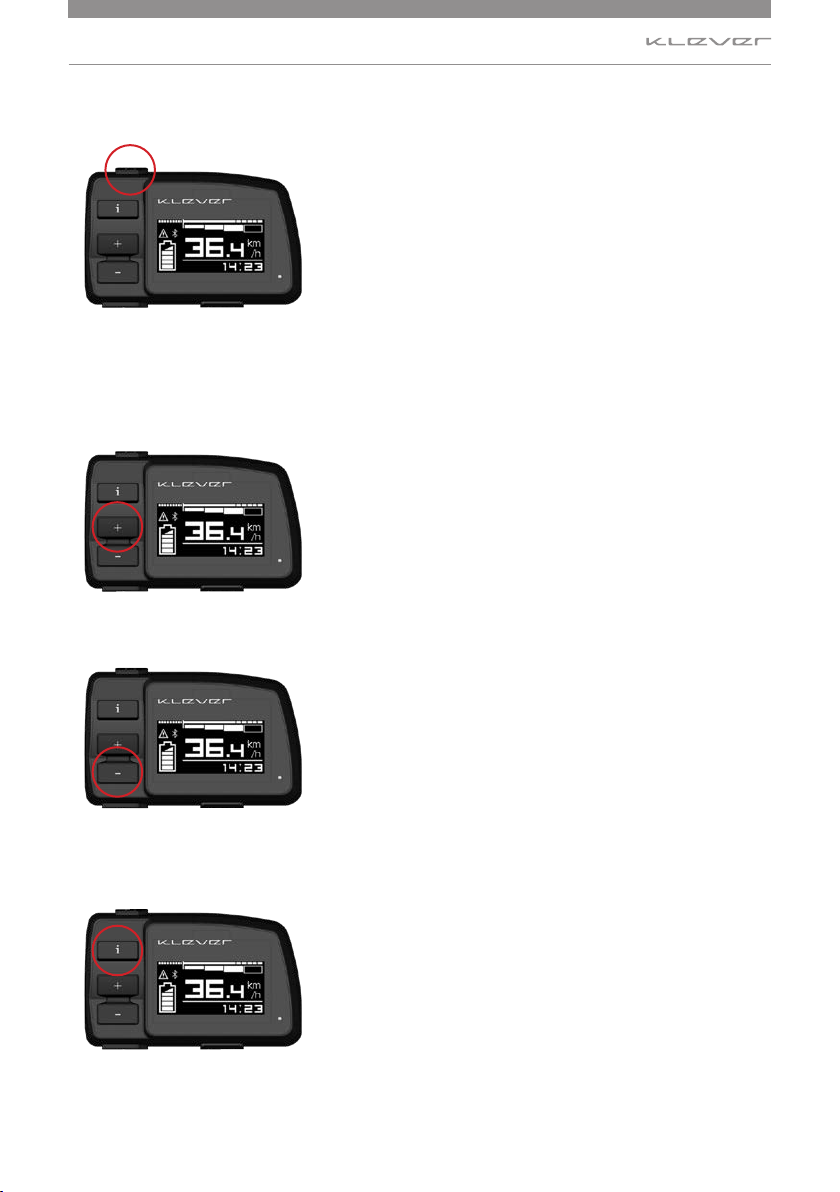
Start/ stop button (Image 2)
By pressing the POWER button you’ll boot the system. The
system performs a system check of 3 seconds, and the drive
system is ready to operate. The electric drive will start to
support depending on the level of assistance chosen.
By pressing this button again, the system will be turned o
and all settings are being stored.
Press the button again, the system starts and all previous
settings and levels of support are enabled again.
PLUS (+) Button (Image 3)
By pressing the PLUS (+) button you can increase the support
level. For instance, when the selected level is M (medium) and
you press the PLUS (+) button, the support level of the motor
will increase to H (high).
MINUS (-) Button (Image 4)
By pressing the MINUS (-) button you can reduce the support
level. For instance, when the selected level is M (medium)
and you press the MINUS (-) button, the support level of the
motor will decrease to L (low).
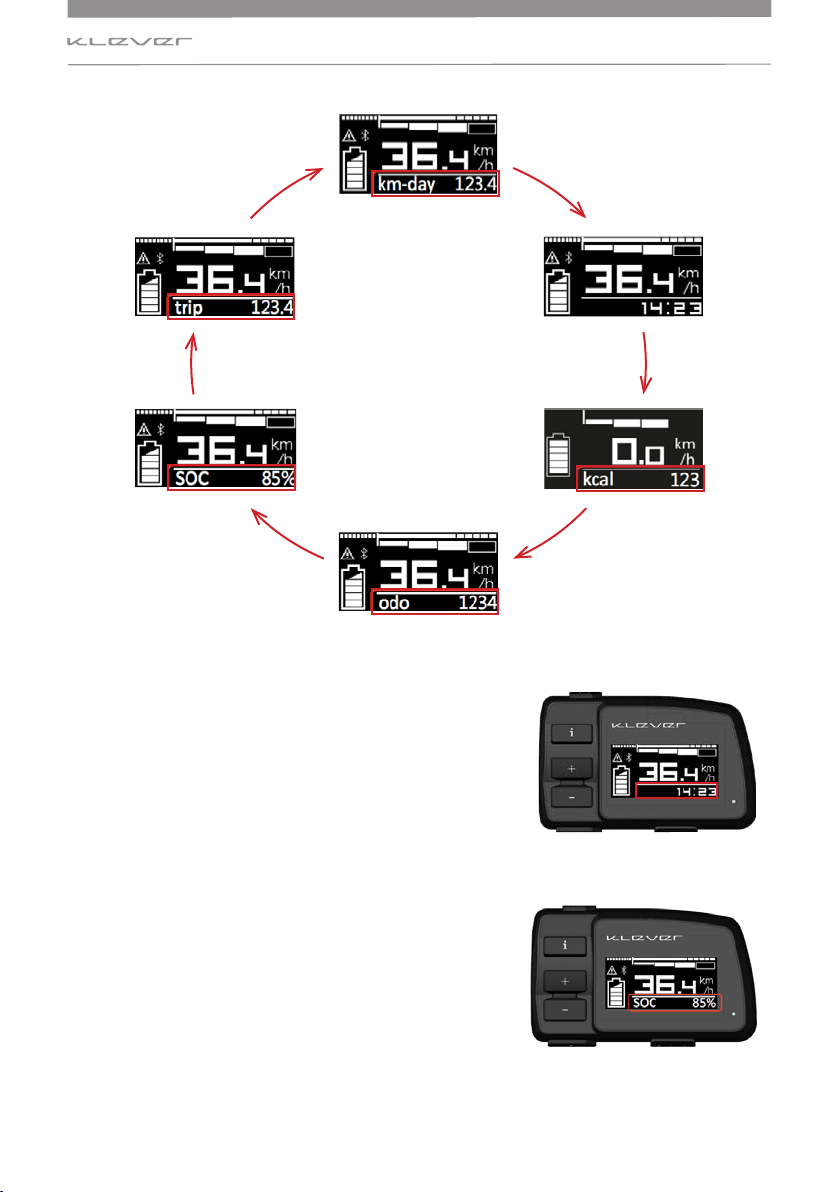
INFO Button (Image 5)
By pressing the INFO button, subsequently all rider’s
information can be displayed on the LCD-screen.
Press the INFO button shortly in order to go through the
available rider’s data: Time, SOC, trip, km-day, odo, kcal.
kcal. See below.
Please note: the available data may vary depending on bike
model and software version.
Image 2
Image 3
Image 4
Image 5