KLIM TALK User manual

KLIM TALK MICROPHONE
USER MANUAL

KLIM Talk User Manual www.klimtechs.com
2
0. INTRODUCTION
On behalf of the entire KLIM Team, thank you for purchasing our KLIM Talk desktop
microphone. We hope it meets your expectations and that you enjoy using this device.
Features
High quality microphone
Background noise reduction filter
Flexible and adjustable neck
Mute button with light indicator
Compatible with PC, Mac, PS3, PS4
I. KLIM TALK MICROPHONE
Removable anti-pop filter
Flexible neck
Freely adjust the neck to find the optimal
position for your recordings.
It is recommended to be between 5 and
25 cm from the microphone for optimal
volume and clarity.
Mute button
Push the button to activate or deactivate
the microphone. The red light will be on
when the microphone is active.
Technical specifications
Sensitivity
-58 ± 2 dB
Frequency
100 Hz - 10 KHz
Impedance
110 ±3 dB
Cable length
1.8 m
Voltage
DC 4.5 V

KLIM Talk User Manual www.klimtechs.com
3
II. INSTALLATION
The microphone does not require any drivers. You just have to plug it in and it works.
However, in some cases the microphone is not prioritized compared to the in-built
microphone on a laptop, or to other recording devices previously connected to your
computer.
Follow these steps to set up your microphone in case it is not active when you plug it in:
Windows
1. Go to your Control Panel > Hardware & Sound > Sound > Recording tab (at the top).
You can also access this screen by right clicking the Speaker symbol located at the
bottom right corner of your screen, in the toolbar, and clicking "Recording devices".
2. Check that the the correct microphone (KLIM Talk) is set as the default recording
device. If it isn't, right click on it, and click Set as default device. Also, click on "Set
as default communications device".
3. Next, click on Properties. Under the Levels tab, adjust the microphone volume (we
recommend 75 or more) and verify that the device is not muted (square button next
to the slider). After you have made the necessary adjustments, click Apply, then
Accept.
1. Sound Settings > Recording tab
2. Microphone Properties > Levels

KLIM Talk User Manual www.klimtechs.com
4
MacOS
1. Access your System Preferences > Sound. Open the Input tab and select KLIM Talk.
2. Adjust the input volume on the lower part of the screen.
PS4
1. With the microphone unplugged, access the Settings screen of the PS4
2. Access Devices > Audio Devices
3. Plug in your microphone to a USB port on your PS4
4. The PS4 should recognize the microphone. If it is not selected automatically, you may
select it under Input device.
5. Enter Adjust Microphone level and choose the volume of your preference.
2. Adjust microphone level
1. Devices > Audio devices

KLIM Talk User Manual www.klimtechs.com
5
III. USING THE MICROPHONE
Once the microphone is set up correctly, you may use it on any recording software, voice
chat or speech-to-text utilities. Make sure that the correct microphone is selected within
each software's settings.
Voice recordings
Each operating system has some default programs that you can use to make recordings:
Windows: Voice Recorder
MacOS: QuickTime Player (File > New Audio Recording)
Speech recognition
You can also use the microphone to give commands using your voice, or dictate text to your
computer. Here is how you can set up Speech Recognition on each Windows and MacOS:
Windows: Control Panel > Ease of Access > Speech Recognition
MacOS: System Preferences > Dictation and Speech
As with any speech recognition software, it is strongly recommended that you speak clearly
and loudly, avoiding any external noise if possible. There can also be a "learning" period for
the software, so accuracy and recognition tends to improve with use.

KLIM Talk User Manual www.klimtechs.com
6
Using Audacity to reduce background noise
Whenever you use the microphone, it is strongly recommended that you do it in a quiet
area. However, sometimes there can be some background noise which you might want to
remove from your recordings. You can do this easily by using Audacity, a free open-source
audio recording and editing software (https://www.audacityteam.org/)
Step 1 - Find some background noise
To filter out the ambient background noise, you’ll need to find a section of audio where it
can be heard alone, isolated. This might involve splitting a stereo track to two mono tracks
(via the down-arrow on the Track Control Panel, and selecting Split Stereo Track).
Once you’ve found the audio — which Audacity will use as an example —you should select
it with the mouse. Make sure the Selection tool is selected, then left-click and drag the
section of background, ambient audio.
This audio selection will be used by the Noise Reduction feature in Audacity to find similar
background ambient audio, and remove it from the track(s). Not only is it pretty clever, the
end results are almost always superb.

KLIM Talk User Manual www.klimtechs.com
7
Step 2 - Use Noise Reduction
With the audio selected (it will be highlighted in blue), open the Effects > Noise Reduction
feature. You’ll see a dialogue box with a two-step tool. First, head to Step 1 and click the
Get Noise Profile button. You have your profile selected already, so proceed to click this.
At this point, the Noise Reduction box will close. Don’t let this confuse you. Instead, select
the portion of audio that you wish to remove the ambient sound from. If this is an entire
track, simply left-click the track header to select it all.
With this selected, return to Effects > Noise Reduction, and look at Step 2. In most cases,
the default Noise Reduction, Sensitivity and Frequency Smoothing settings will work, so
you can go ahead and click OK to accept these. It may take a while for the noise reduction
to be applied; this will depend on the track duration.

KLIM Talk User Manual www.klimtechs.com
8
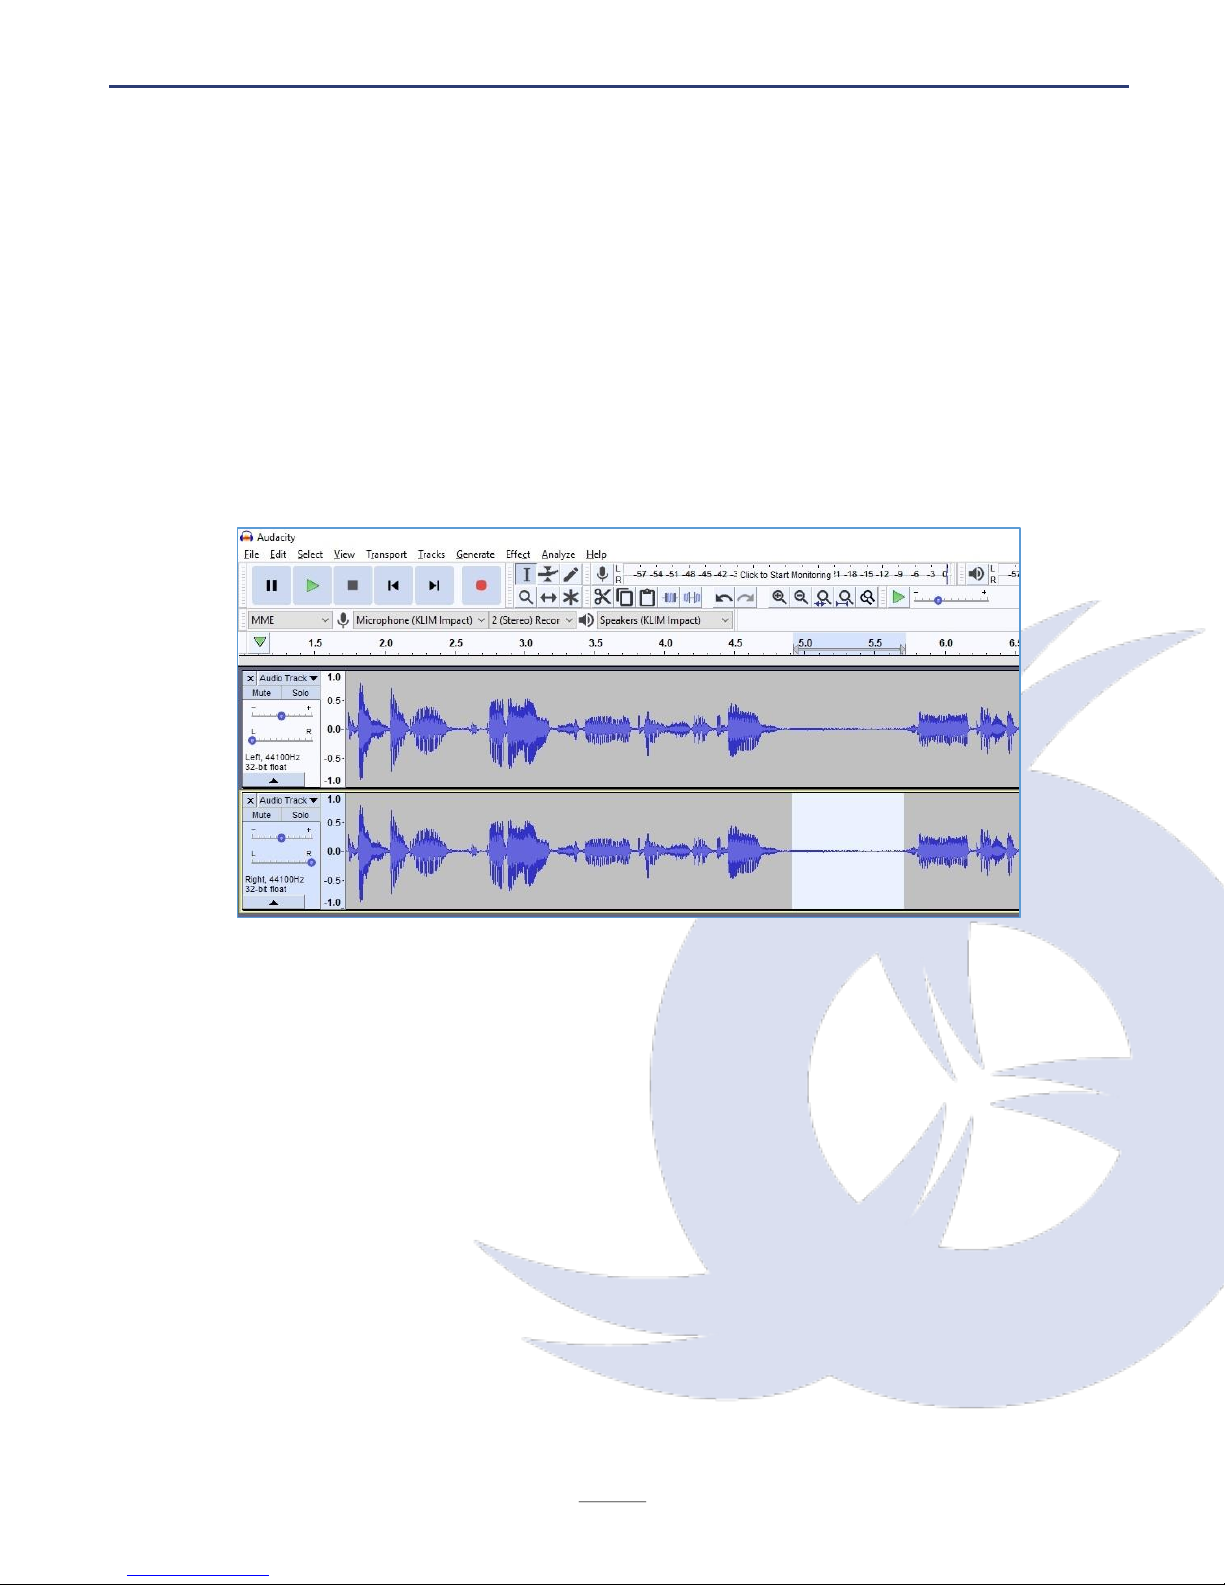
Of course, you’re free to alter the Noise Reduction, Sensitivity and Frequency Smoothing
Settings, and if you have the time to play with them (this can be tricky with longer tracks,
due to the processing time), it can be worth your while to achieve a superior result.
Once this is done, preview the results. If you’re happy with them, hit File > Save to save
the changes.
IV. TROUBLESHOOTING
If you ever encounter any problems, remember that we remain at your disposal to help you
with any type of issue. Do not hesitate to contact us at support@klimtechnologies.com for
additional support.
My computer recognizes the microphone but it does not work
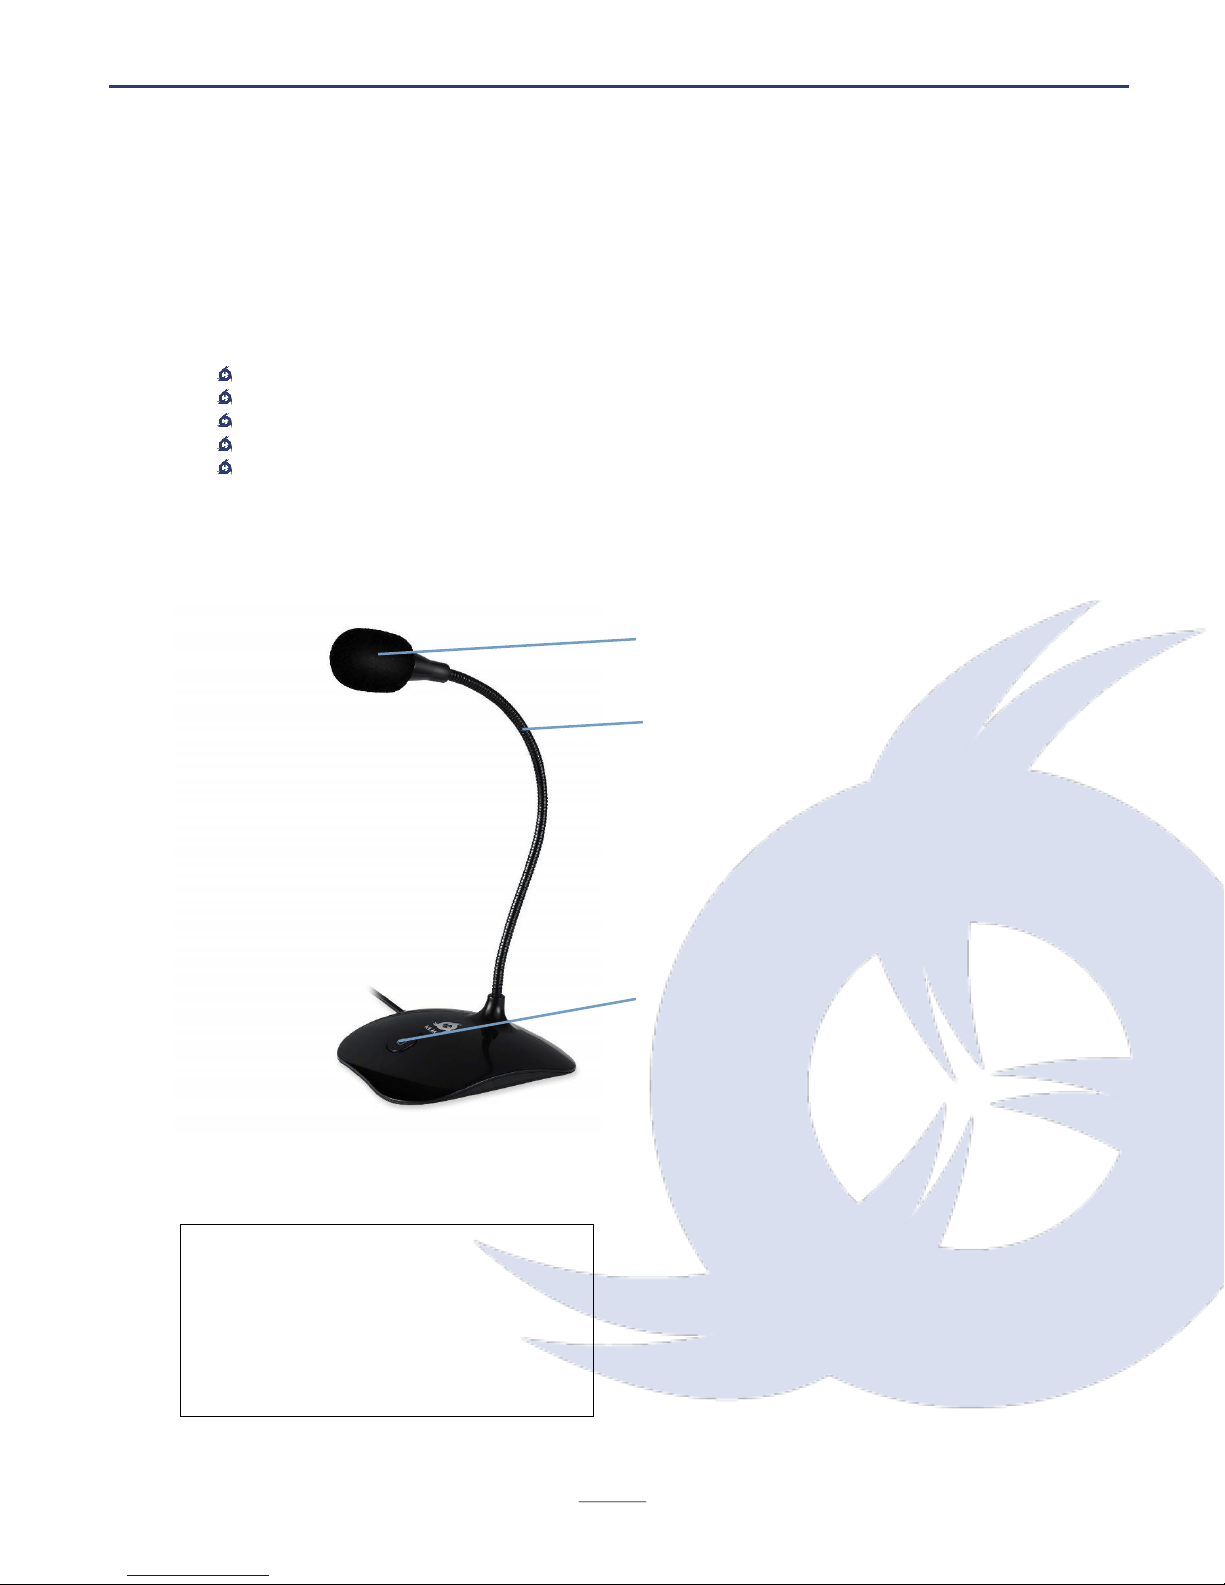
Doublecheck that the microphone is not muted via the button located at the base. Refer
to the Setup section in this manual to verify that the KLIM Talk is selected as the active
device on your Windows or MacOS sound settings.
Other people can't hear me on PS4
Access your Settings > Devices > Audio Devices. Check that the microphone is selected as
the input device, and that its volume is at an adequate level on the Adjust Microphone Level
screen. Check your Party Settings and make sure that the microphone mute is not active.
Other people can't hear me on my voice chat software (Discord, Skype, Teamspeak...)
Make sure that the microphone is selected as the communications device on your software
settings (usually under Audio or Voice). If you have Push-To-Talk activated, make sure it is
working correctly. If you are using automatic voice detection, check that the sensitivity
threshold is low enough for the software to transmit your voice.

KLIM Talk User Manual www.klimtechs.com
9
The microphone is missing many words when I use speech recognition software
It can take a while for the software to "get used" to your voice and accent. Make sure you
are speaking clearly into the microphone and that no background noise is present. Also,
some software has utilities to improve the accuracy of speech recognition, or tutorials to
improve these skills.
Sometimes there is a loud crackling noise or intermittent noise
Other devices such as mobile phones or routers may cause interference with the
microphone. Please make sure that it is not positioned next to these devices. You can also
try activating Airplane Mode on your phone.
When I plug in my microphone, it is not recognized
Try plugging it into a different USB port or use it on a different computer. Check the Device
Manager for any error messages and update the drivers manually. If the problem persists,
please contact us at support@klimtechnologies.com.
We thank you again for your purchase and hope that you enjoy using our KLIM Talk
microphone. Do not hesitate to leave a comment on the site you purchased it from, it will
help us tremendously :)
The KLIM team
Table of contents
Other KLIM Microphone manuals