knapp DEKLICK K010/S Instructions for use
Other knapp Cables And Connectors manuals

knapp
knapp RICON 40 Instructions for use

knapp
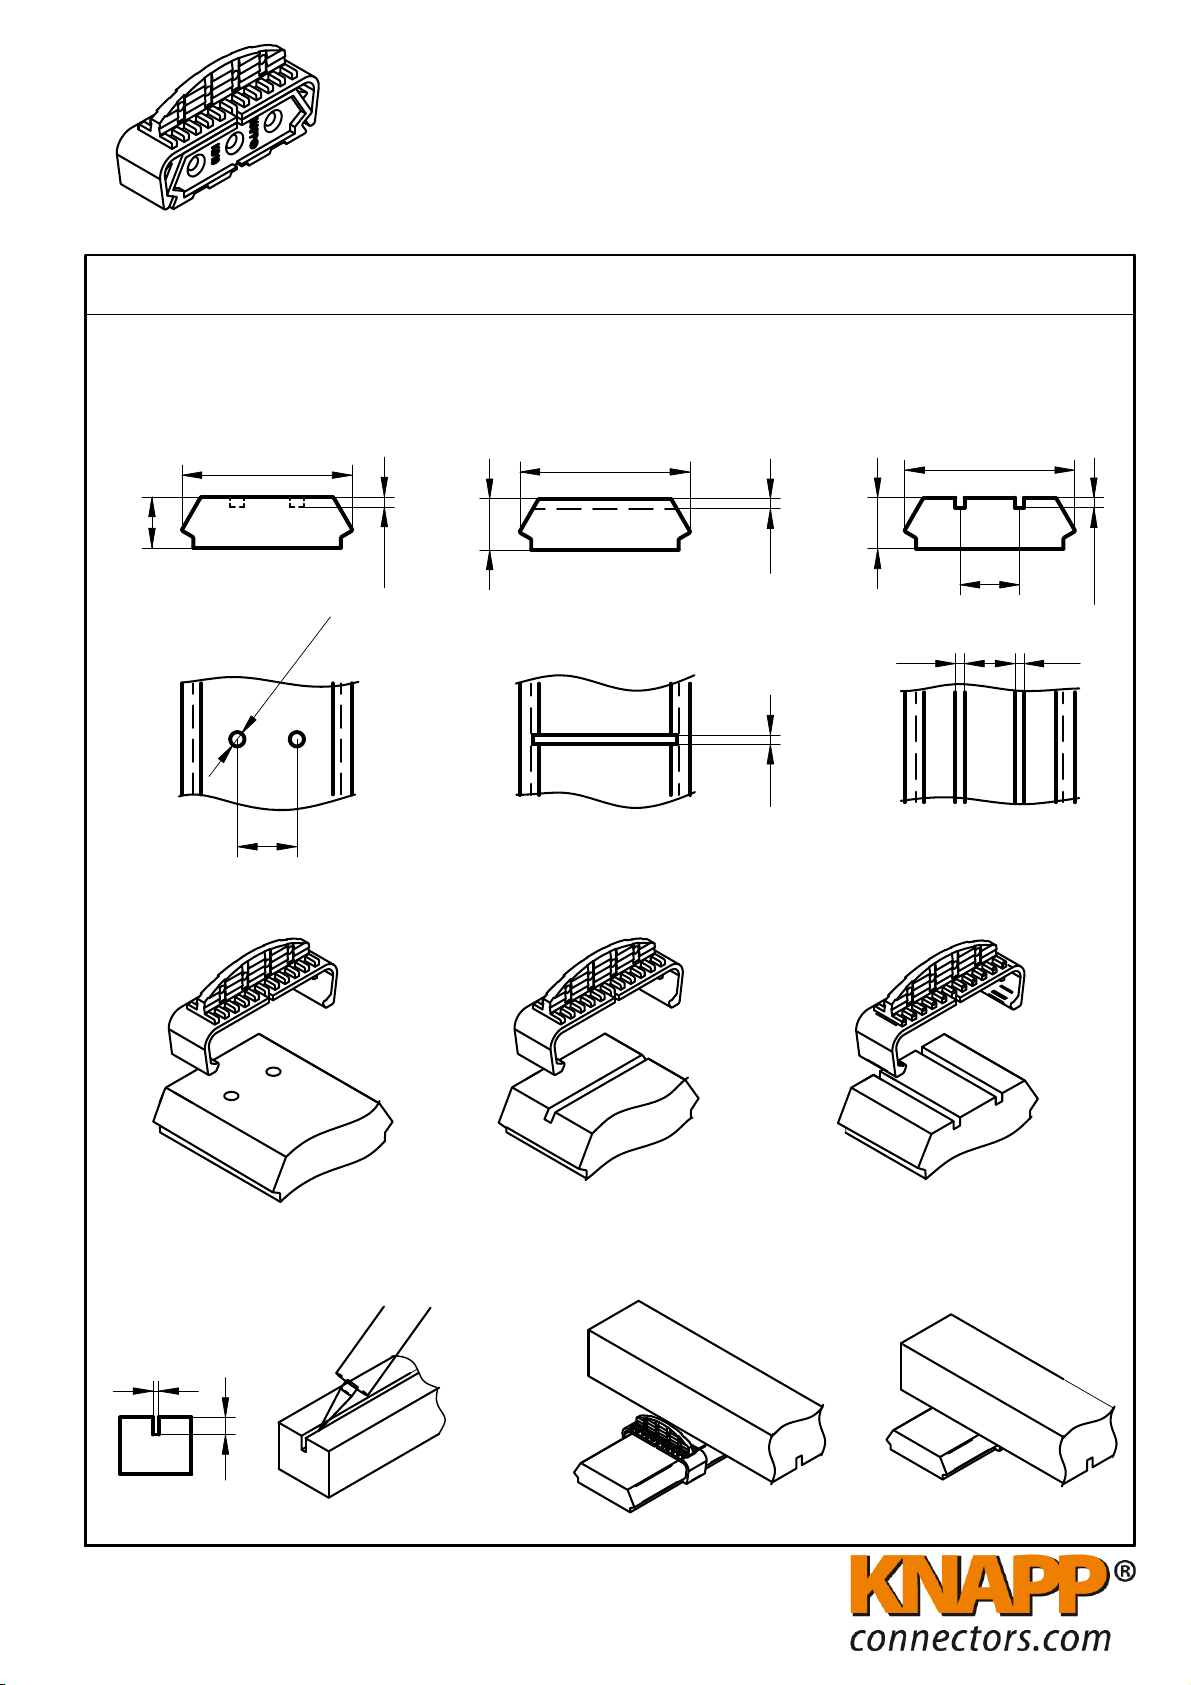
knapp DEKLICK K010/S Instructions for use

knapp
knapp KLICK User manual

knapp
knapp Walco V60 Instructions for use

knapp
knapp FIXclip H12 User manual

knapp
knapp miniKLICK User manual

knapp
knapp Chico User manual

knapp
knapp UNO 30 User manual

knapp
knapp sKLICK User manual

knapp
knapp SUNNY User manual