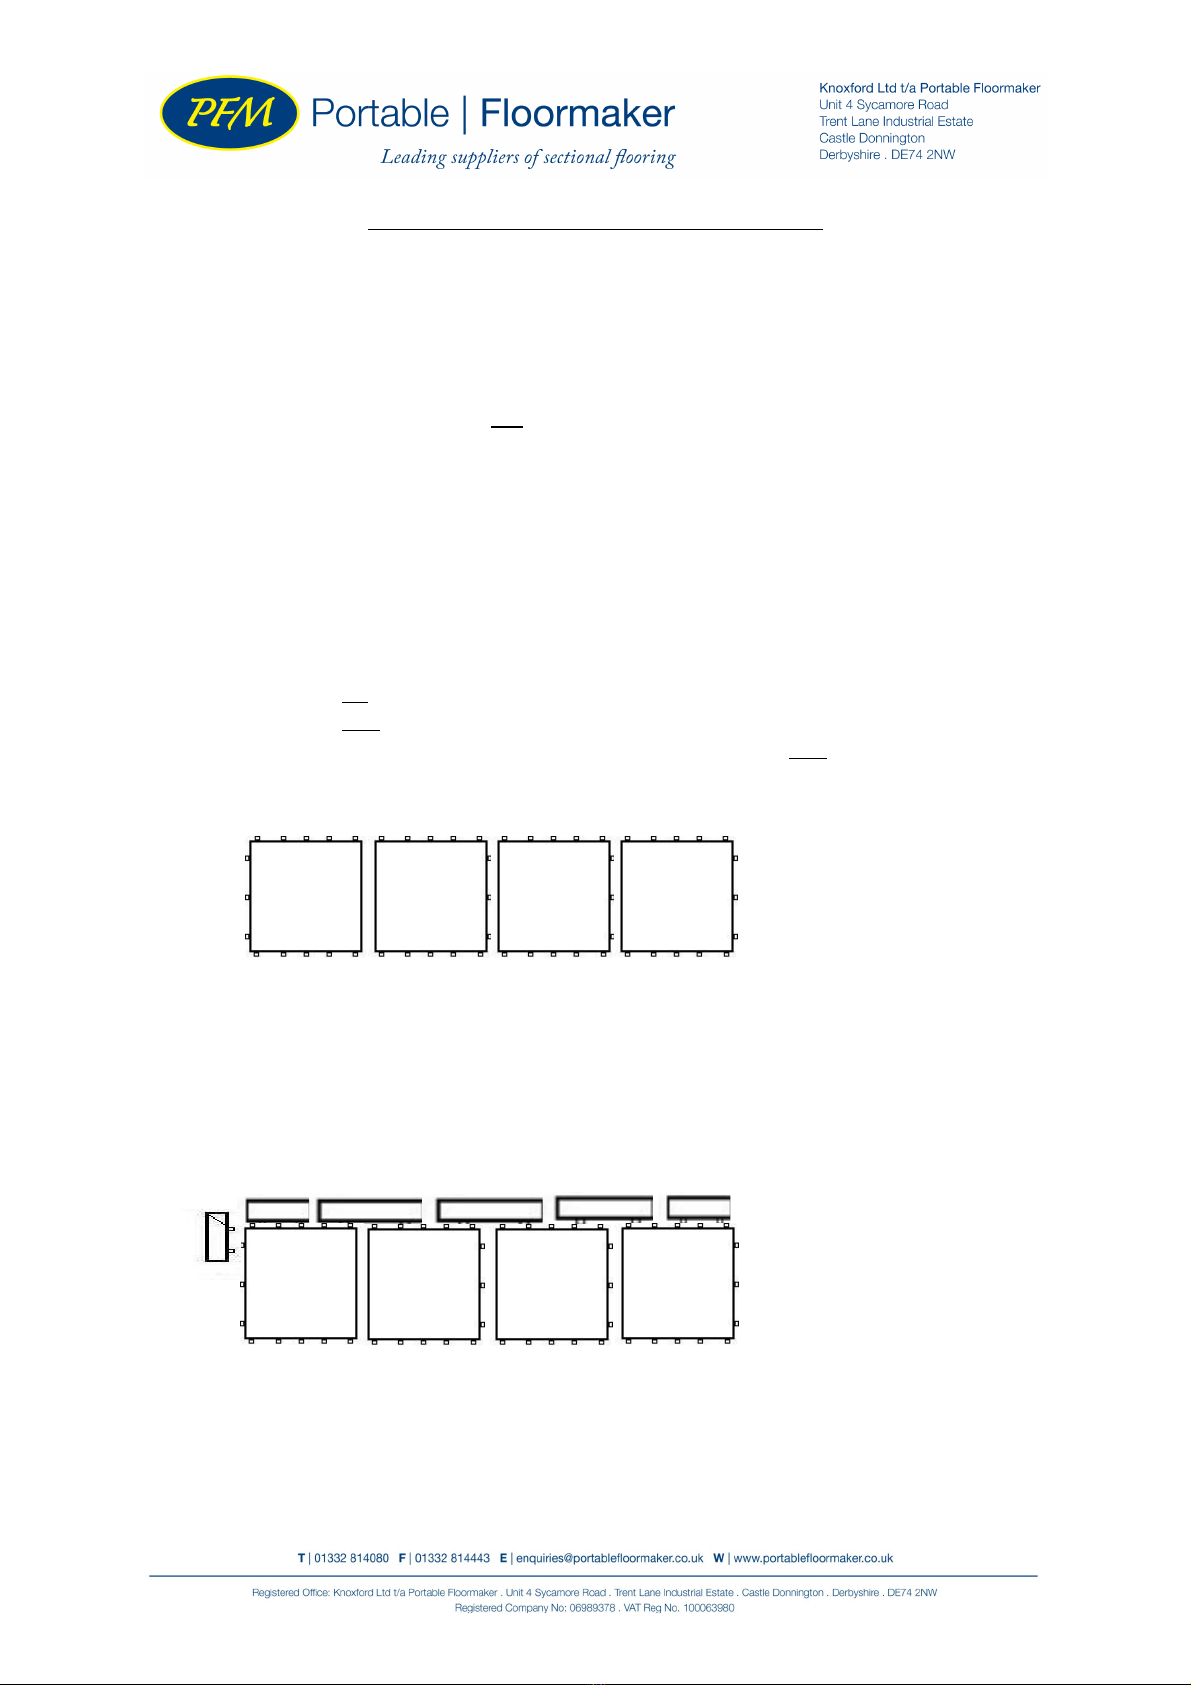
FLORLOK® Portable Dance Floor laying instructions
WARNING: Do not use or allow the floor to be used if:
•The floor is wet
•Without edging sections
•If the surface is uneven or has missing parquet fingers or panels
•If a gap of more than 5mm is apparent between the panels/edging
Failure to adhere to these instructions could cause fall or injury.
Caring for your new portable dance floor:
Your Florlok® portable dance floor is manufactured form a mix of natural wood and aluminium parts. Although
the floor is designed and manufactured to be used in highly paced environment such as hotels and event
management activities, it is predominantly a product manufactured form a natural source. Care should be
used when handling the equipment and the more it is looked after the longer it will last. All wood species have
a tendency to darken and /or alter in shade over time and also sometimes when new.
1. NEVER use excessive amounts of water to clean the panels but rather a lightly damp mop or rag,
stubborn marks and scuffs are normally removed with a damp rag.
2. ALWAYS clean up spills and water immediately.
3. ALWAYS store the product in a well-ventilated area and never in a hot and dry or damp environment.
4. AVOID excessive exposure to moisture.
5. NEVER use water or water-based cleaners or waxes on your wooden floor
6. NEVER use alcohol, ammonia, kerosene or turpentine on your wooden floor
Health & Safety tips on using the equipment:
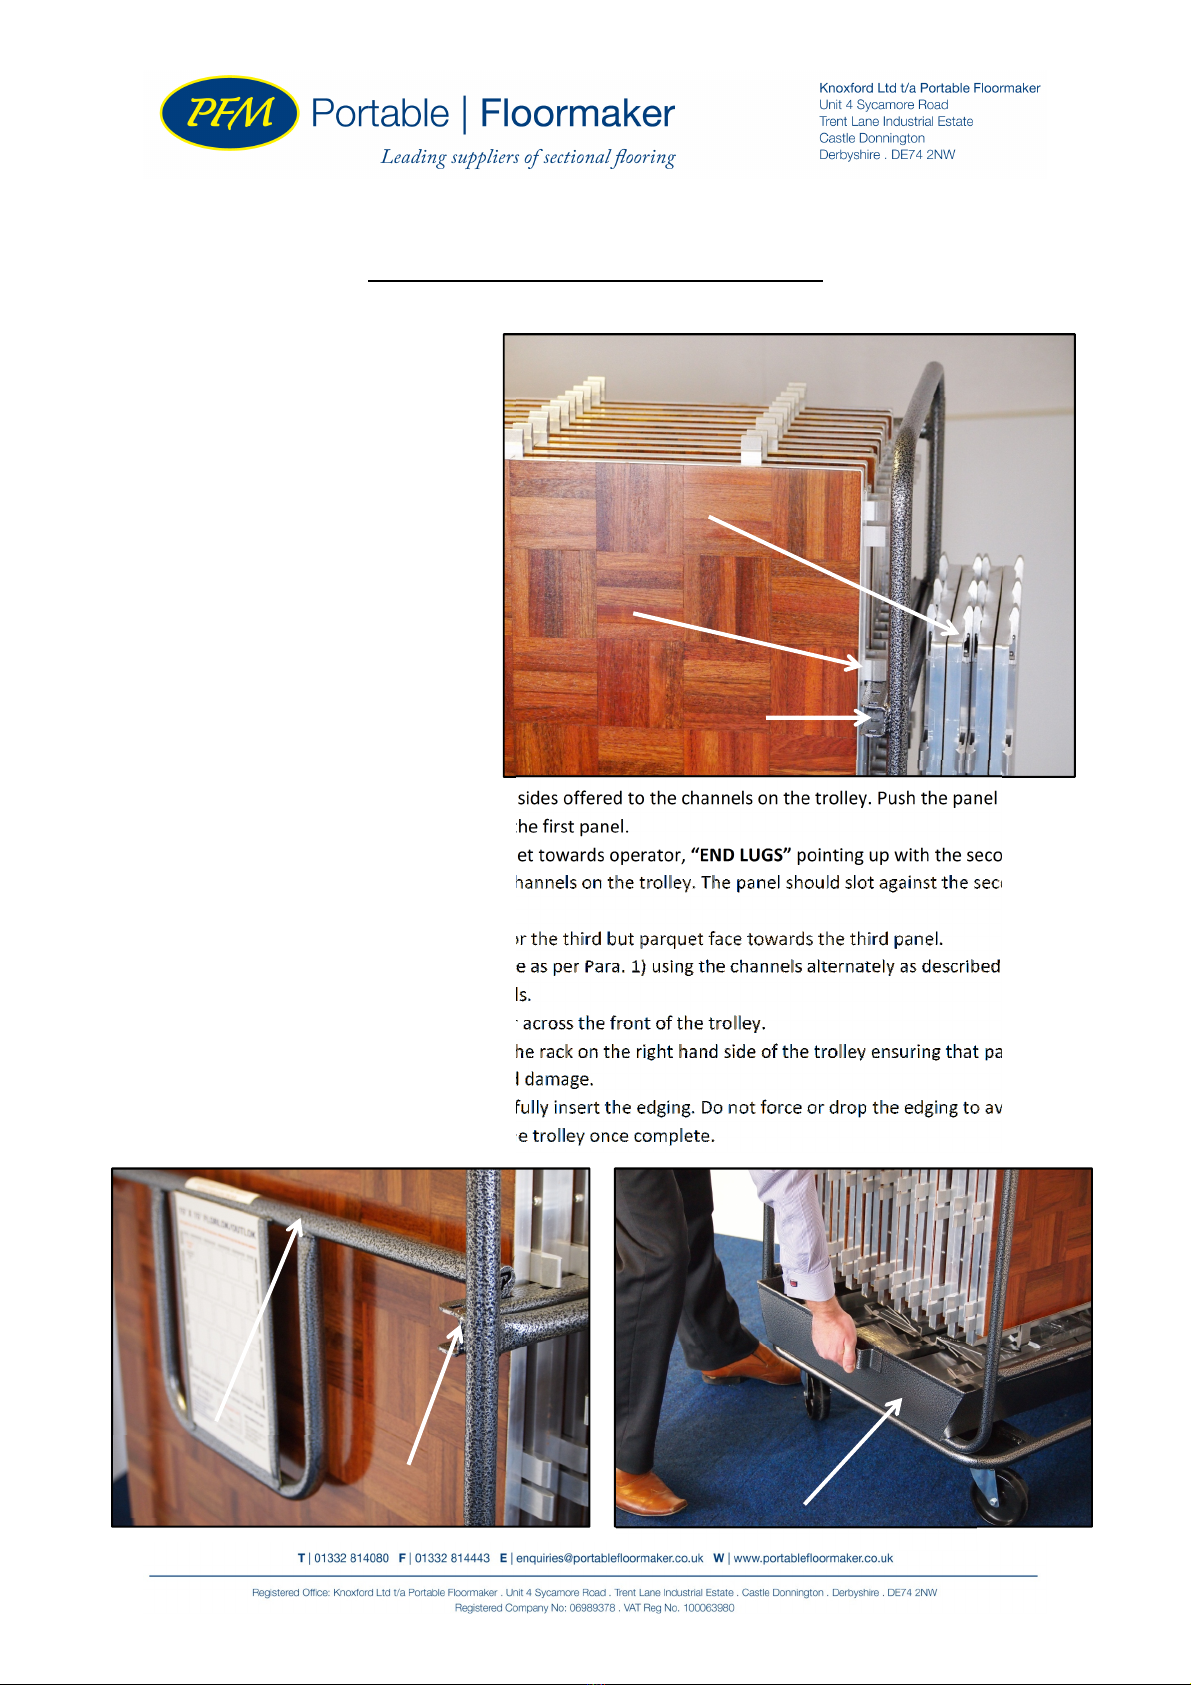
1. The Florlok® portable dance floor including trolley and panels is designed to be used by one person
but please consult your company’s Health & safety policy with regards to manual handling before
using the equipment.
2. NEVER attempt to move the trolley without the transit bar fitted
3. NEVER move, pull or push the trolley from the front or back but rather from the sides.
4. ENSURE the edging tray is fully pushed back and locked into position before moving the trolley.
5. ALWAYS bend from the knees when lifting panels or edging
6. NEVER leave the trolley unattended on an incline and ensure the trolley is secure in any other area.
Reconditioning
Portable Floormaker offers a floor refurbishment service. If you decide to refurbish yourself or with a third
party, the warranty if still applicable) becomes void and Portable Floormaker cannot be held responsible for
any problems that may arise. Please call for details.
The user assumes full responsibility for installation and use of the dance floor and associated components.
Inspect the individual and assembled components periodically and repair as necessary. This product is
manufactured using wood, glue and lacquers which, if subjected to heat or flame will burn possibly causing
heat, fumes and consumption of oxygen. This could cause injury or death.