manuals.online logo
Brands
  1. Home
  2. •
  3. Brands
  4. •
  5. Knuckleduster
  6. •
  7. Toy
  8. •
  9. Knuckleduster Gunfighter's Ball Boarding House User manual

Knuckleduster Gunfighter's Ball Boarding House User manual

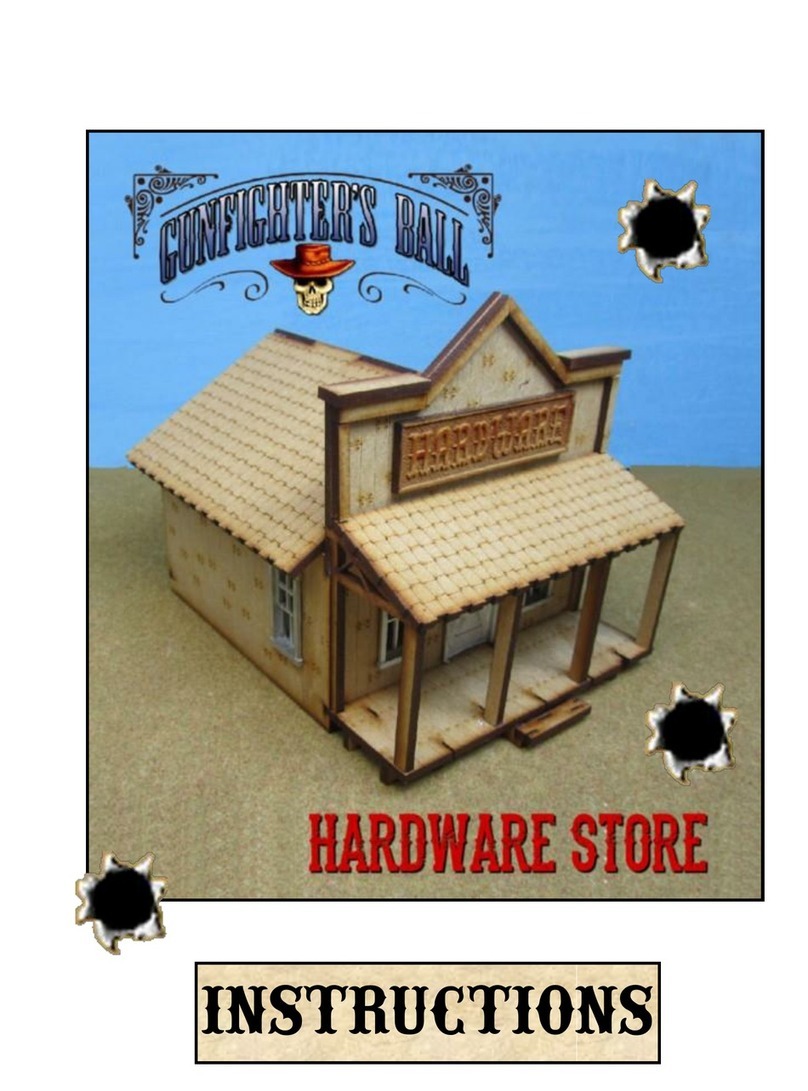
INSTRUCTIONS
STOP! READ THIS FIRST!
1. Test fit all parts and make sure you know how everything goes together before gluing. If
you are contemplating cutting a part to make it fit, please re-examine your assembly plan—
you’ve probably misunderstood some aspect of the design. Parts have been tested and
should fit together in a fairly straightforward manner without modification. DO NOT TRY
TO FORCE PARTS TOGETHER!
2. BE PATIENT! Do not try to glue too many pieces together at one time! Try to do small
sub-assemblies (for instance, the floor and two walls instead of 4) that can be set aside and
allowed to dry before moving on to the next step. This way, you won't have to risk destroy-
ing the model with poorly-conceived clamping schemes or overly-tight rubber banding.
3. The little tabs in the corner of floor
pieces are for alignment, not for
strength. Do not saturate them with
glue or they might distort! Glue
should be used along the wall edges
where there is a lot more surface area
to glue to.
4. Most roofs are made to be re-
moved. A few buildings have no floor
(assumed dirt floor), so if you have a
base to glue it to, go ahead and make
the roof removable. If you want it to
be free-standing and sturdy, glue the
roof truss to the middle of the top of
the side walls and at least glue at least
one roof panel in place.
5. Metal doors and windows are pro-
vided. They have interior woodwork;
the interior and exterior pieces sand-
wich the wall between them. All metal
parts require priming to paint.
6. Use white glue for most assembly;
TIPS FOR BUILDING LASER CUT MODELS
if you use superglue or a similar adhesive, be very careful not to let sticky fingers damage the model! In certain
places, you might find superglue very useful, for instance where you are trying to get a warped piece to grab and
stay straight.
7. Prime all parts with a good black hobby primer to protect the MDF and keep it from absorbing water-based
paints, which can cause swelling and warping of the material. DO NOT GET THE MDF WET, EVEN WITH
ACRYLIC PAINT, BEFORE IT HAS BEEN PRIMED.
8. You may wish to paint parts individually before assembly; this works well for small parts that are hard to paint
neatly when glued in place. Be mindful, however, of parts that fit tightly--they should not be pre-painted or they
might not fit correctly.
9. To simulate weathered wood, dry brush layers over the black primer. Start with medium brown, then a mus-
tard-brown, and a final dry-brushing of tan. For other colors, the first coat over the black primer should be one
shade darker than the desired final color. Dry brush a lighter shade in the middle of the area of color to give it
the look you see in the wargame magazines!
10. Experiment with your own assembly methods. Most of the models are fairly simple to figure out, but if you
need help, contact Knuckleduster through our website, www.knuckleduster.com.
11. Instructions for all models have or will soon be posted on www.knuckleduster.com in the downloads section
(under "information").
WARNING! CHOKING HAZARD.
This kit contains small parts; it is not a toy and must be kept
out of reach of children under the age of 3 or adults and chil-
dren at-risk of choking.
KNUCKLEDUSTER MINIATURES
PO BOX 1024
NORMAL, IL 61761
(309)838-9871
WWW.KNUCKLEDUSTER.COM
ASSEMBLY INSTRUCTIONS
1. Start the building by making two boxes from the parts pic-
tured on the left side. Each box has four sides and a top, but
no bottom.
2. Glue the two boxes together as pictured. The tallest of the
two is pictured on the right with the shorter at a 90-degree
angle to the left, the pair forming a V (or L). Part K is a plate
that is glued on top of part J, but with the letter DOWN so
it’s not visible (unless you want a giant K monogram on your
stair landing!
3. The stairs are built in levels of consecutively smaller stacked
plates. They aren’t in letter-order, but in size order as shown
below:
ASSEMBLY INSTRUCTIONS
4. Begin assembling interior walls around the stairs. Be
sure to use white glue to give yourself time to make ad-
justments to get things to fit properly!
5. The tall plate with railing at the top goes up against the
back box of the stair unit, then the stack of stair treats is
snugged up against it as shown.
6. Another wall is glued in place perpendicular to the tall
wall, and also snugs up against the stairs.
7. Put together the top flight of stairs, numbered as shown.
8. Build the back side of the stair block by
bluing the rear wall against the stairs., the
glue the top flight of stair treads in place.
NOTE: If you plan on doing extensive painting or wallpapering on the inside, it is best to wait to install
the windows and doors until after the walls are decorated. In that case, you would prime and paint the
doors and windows/frames before installing them in the building.
ASSEMBLY INSTRUCTIONS
9. Assemble the three wall pieces of the other side
of the downstairs so that you have two subas-
semblies.
10. Put together the outside walls and floor of the
first floor.
11. Put the two interior subassemblies together,
then glue the entire unit in place inside the
downstairs. Don’t try to assemble the down-
stairs walls INSIDE the downstairs.
ASSEMBLY INSTRUCTIONS
12. Build the upstairs walls and floor.
13. BE CAREFUL: THE HOLE FOR THE
STAIRWELL IS CLOSER TO THE
BACK THAN THE FRONT. THE WALL
WITH THE MOST WINDOWS GOES IN
THE FRONT!!!!!!!!!!!
14. Build the two-piece assembles for each end of
the upstairs. The long wall goes to the left and
the short wall to the right.
15. Once the interior walls are glued in place,
build the stair railing as shown.
ASSEMBLY INSTRUCTIONS
16. Build the porch frame. As with all of
the porches in this building series, the
longer two supports go in the middle
and form both the pegs that connect to
the house and the supports for the front
step.
17. The front of the building has two peg
holes below the front door. This is
where the porch frame is pegged in
place. Add the floor plank unit to the
porch and glue the back edge of it to
the building to make the entire porch
structure secure.
18. Glue the porch roof supports in place.
19. Glue the porch roof in place.
ASSEMBLY INSTRUCTIONS
20. Windows and doors are cast in metal and glued in place. They
consist of two parts, the main window or door piece and the inte-
rior woodwork frame. They glue in place on either side of the in-
tervening wall.
21. The exterior windows are glued in place with the frames on the
inside and the main unit on the outside. Remember that top win-
dow sashes overhand the bottom sashes (that’s how we keep wa-
ter out of our homes!).
22. The exterior doors have windows in them. Build them with the
main door unit on the outside and the frame on the inside.
23. The interior doors are solid. Watch the position of the doorknobs
and think about which way the door would theoretically swing if
it were able to move.
24. Put the roof together. Glue the trusses on one side and let them
cure before attempting to do the final assembly.
ASSEMBLY INSTRUCTIONS
25. When finished, the building should look like this:
When finished, be sure to seal the building thoroughly with automotive primer (black works best, because it
shades the cracks and crevices) to keep the MDF from soaking up paint and potentially warping. Paint the
primed building with craft acrylics. Very nice effects can be achieved with dry-brushing over the engraved
details so they remain dark.
As mentioned in an earlier sidebar, wallpapering and, for some, painting is best done prior to the insertion of
the metal detail parts, especially if the windows and doors will be a different color than the wall.

Other Knuckleduster Toy manuals

Knuckleduster Gunfighter's Ball The Alamo Saloon User manual

Knuckleduster

Knuckleduster Gunfighter's Ball The Alamo Saloon User manual

Knuckleduster GUNFIGHTER'S BALL SHERIFF'S OFFICE User manual

Knuckleduster

Knuckleduster GUNFIGHTER'S BALL SHERIFF'S OFFICE User manual

Knuckleduster GUNFIGHTER'S BALL HARDWARE STORE User manual

Knuckleduster

Knuckleduster GUNFIGHTER'S BALL HARDWARE STORE User manual

Knuckleduster GUNFIGHTER'S BALL COWTOWN SMITTY User manual

Knuckleduster

Knuckleduster GUNFIGHTER'S BALL COWTOWN SMITTY User manual

Popular Toy manuals by other brands

Chicos My 1st Ride-on Starkids quick start guide

Chicos

Chicos My 1st Ride-on Starkids quick start guide

TA HORIZONS STOL X Assembly & instruction manual

TA HORIZONS

TA HORIZONS STOL X Assembly & instruction manual

LEGO 8109 TECHNIC manual

LEGO

LEGO 8109 TECHNIC manual

Ready 2 Folo The Party Stadium Assembly instructions

Ready 2 Folo

Ready 2 Folo The Party Stadium Assembly instructions

Hobbico Superstar 40 ARF user guide

Hobbico

Hobbico Superstar 40 ARF user guide

Phoenix Model Tucano Electric instruction manual

Phoenix Model

Phoenix Model Tucano Electric instruction manual

Fisher-Price FPF84 instruction sheet

Fisher-Price

Fisher-Price FPF84 instruction sheet

JR Venture CP Assembly instructions

JR

JR Venture CP Assembly instructions

Stadt im Modell Sylt Modell 9026 manual

Stadt im Modell

Stadt im Modell Sylt Modell 9026 manual

Krick Modelltechnik ro marin Happy Hunter Assembly and operating instructions

Krick Modelltechnik

Krick Modelltechnik ro marin Happy Hunter Assembly and operating instructions

Topmodel Baia manual

Topmodel

Topmodel Baia manual

GRAUPNER Agusta A119 Koala manual

GRAUPNER

GRAUPNER Agusta A119 Koala manual

Contixo DR1 user manual

Contixo

Contixo DR1 user manual

Eduard MiG-21F-13 undercarriage quick start guide

Eduard

Eduard MiG-21F-13 undercarriage quick start guide

Monogram B-52 Stratofortress Assembly manual

Monogram

Monogram B-52 Stratofortress Assembly manual

Beyblade Wolborg 2 instructions

Beyblade

Beyblade Wolborg 2 instructions

roco 70374 operating manual

roco

roco 70374 operating manual

PIKO SM42 PKP Instructions for use

PIKO

PIKO SM42 PKP Instructions for use

manuals.online logo
manuals.online logoBrands
  • About & Mission
  • Contact us
  • Privacy Policy
  • Terms and Conditions

Copyright 2025 Manuals.Online. All Rights Reserved.