manuals.online logo
Brands
  1. Home
  2. •
  3. Brands
  4. •
  5. Knuckleduster
  6. •
  7. Toy
  8. •
  9. Knuckleduster Gunfighter's Ball The Alamo Saloon User manual

Knuckleduster Gunfighter's Ball The Alamo Saloon User manual

INSTRUCTIONS
STOP! READ THIS FIRST!
1. Test fit all parts and make sure you know how everything goes together before gluing. If
you are contemplating cutting a part to make it fit, please re-examine your assembly plan—
you’ve probably misunderstood some aspect of the design. Parts have been tested and
should fit together in a fairly straightforward manner without modification. DO NOT TRY
TO FORCE PARTS TOGETHER!
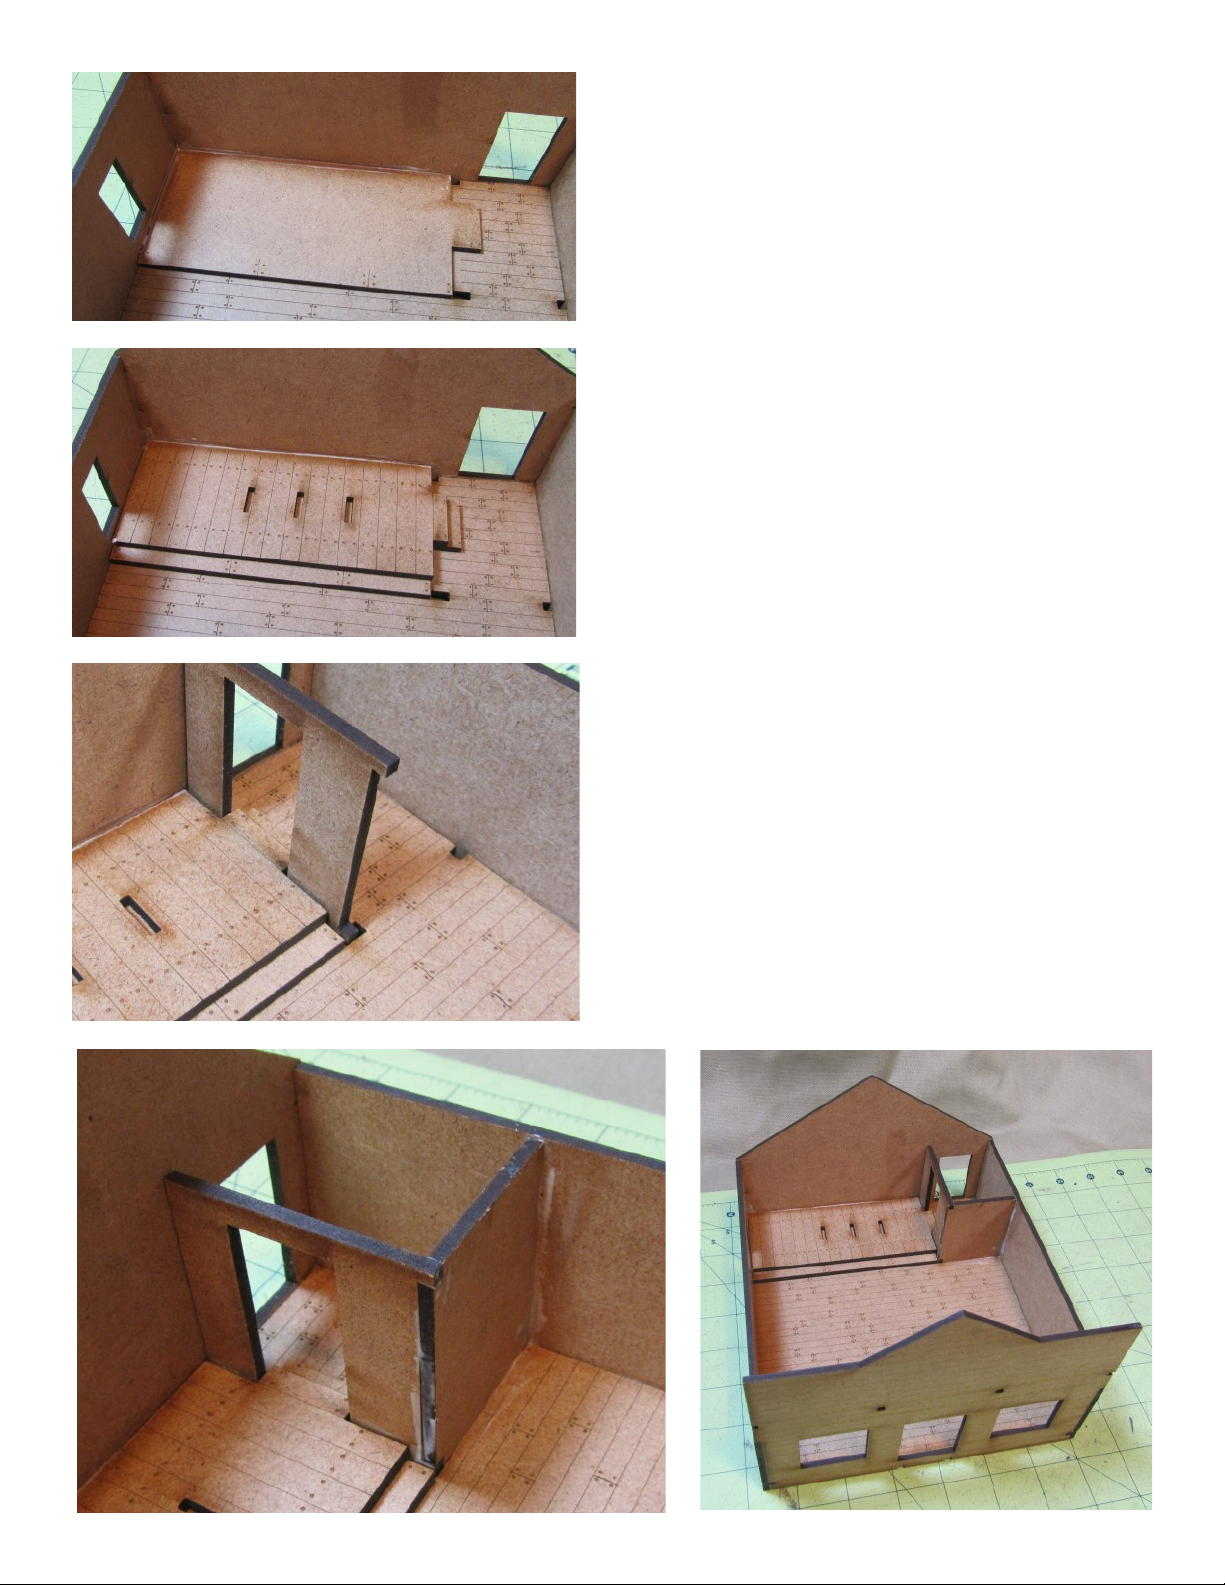
2. BE PATIENT! Do not try to glue too many pieces together at one time! Try to do small
sub-assemblies (for instance, the floor and two walls instead of 4) that can be set aside and
allowed to dry before moving on to the next step. This way, you won't have to risk destroy-
ing the model with poorly-conceived clamping schemes or overly-tight rubber banding.
3. The little tabs in the corner of floor
pieces are for alignment, not for
strength. Do not saturate them with
glue or they might distort! Glue
should be used along the wall edges
where there is a lot more surface area
to glue to.
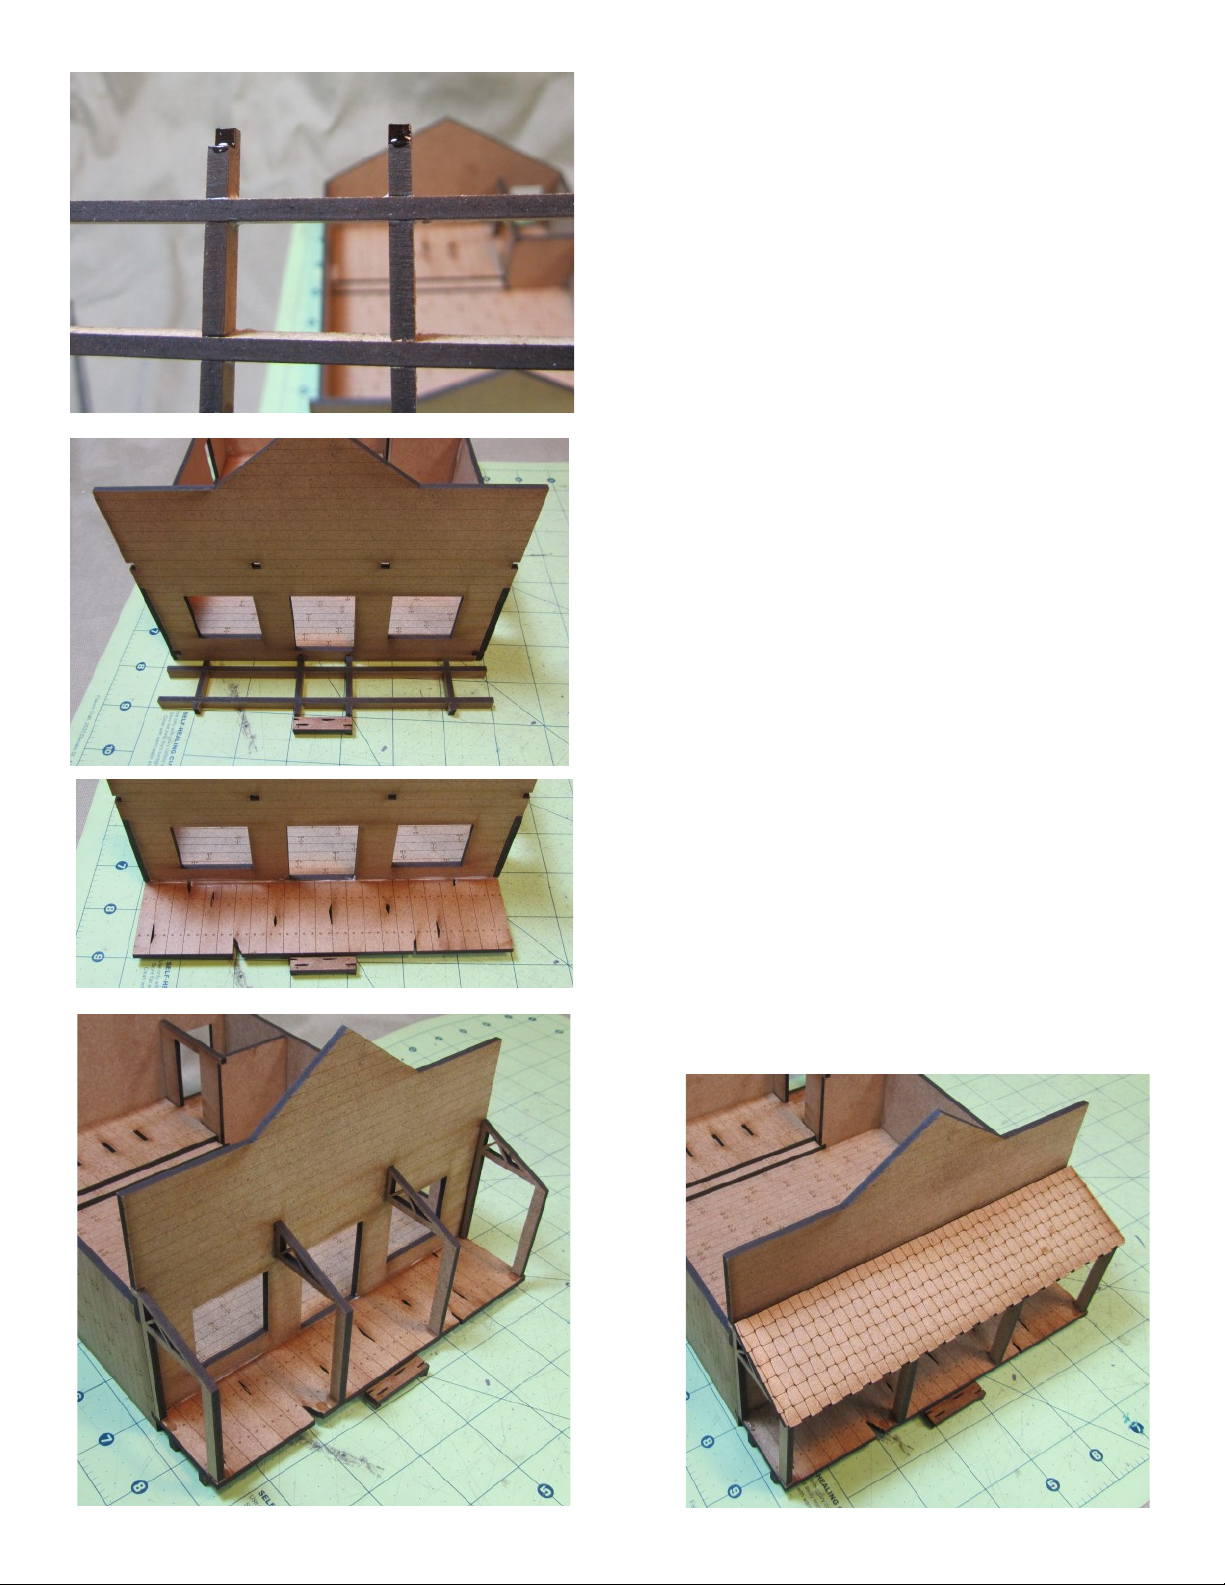
4. Most roofs are made to be re-
moved. A few buildings have no floor
(assumed dirt floor), so if you have a
base to glue it to, go ahead and make
the roof removable. If you want it to
be free-standing and sturdy, glue the
roof truss to the middle of the top of
the side walls and at least glue at least
one roof panel in place.
5. Metal doors and windows are pro-
vided. They have interior woodwork;
the interior and exterior pieces sand-
wich the wall between them. All metal
parts require priming to paint.
6. Use white glue for most assembly;
TIPS FOR BUILDING LASER CUT MODELS
if you use superglue or a similar adhesive, be very careful not to let sticky fingers damage the model! In certain
places, you might find superglue very useful, for instance where you are trying to get a warped piece to grab and
stay straight.
7. Prime all parts with a good black hobby primer to protect the MDF and keep it from absorbing water-based
paints, which can cause swelling and warping of the material. DO NOT GET THE MDF WET, EVEN WITH
ACRYLIC PAINT, BEFORE IT HAS BEEN PRIMED.
8. You may wish to paint parts individually before assembly; this works well for small parts that are hard to paint
neatly when glued in place. Be mindful, however, of parts that fit tightly--they should not be pre-painted or they
might not fit correctly.
9. To simulate weathered wood, dry brush layers over the black primer. Start with medium brown, then a mus-
tard-brown, and a final dry-brushing of tan. For other colors, the first coat over the black primer should be one
shade darker than the desired final color. Dry brush a lighter shade in the middle of the area of color to give it
the look you see in the wargame magazines!
10. Experiment with your own assembly methods. Most of the models are fairly simple to figure out, but if you
need help, contact Knuckleduster through our website, www.knuckleduster.com.
11. Instructions for all models have or will soon be posted on www.knuckleduster.com in the downloads section
(under "information").
WARNING! CHOKING HAZARD.
This kit contains small parts; it is not a toy and must be kept
out of reach of children under the age of 3 or adults and chil-
dren at-risk of choking.
KNUCKLEDUSTER MINIATURES
PO BOX 1024
NORMAL, IL 61761
(309)838-9871
WWW.KNUCKLEDUSTER.COM
ALAMO SALOON PARTS LIST
1. Floor
2. Front wall
3. Back wall
4. Right wall
5. Left wall
6. Stage lower level
7. Stage upper level
8. Backstage doorway
9. Backstage wall
10. Roof, left side
11. Roof, right side
12. Front truss
13. Back truss
14. Front porch planks
15. Porch step supports
16. Porch braces
17. Porch rails
18. Front porch step tread
19. Rear step treads
20. Read step supports
21-24 Invisible parts (skipped numbers
by accident!).
25. Porch roof
26. Inside porch posts
27. Outside porch posts
28. Sign
29. Front trip pieces (three).
30. Crowns (two).
Metal parts:
Front door w/interior trim
2 front windows w/interior trim
2 side windows w/interior trim
Back door w/trim
Stage door w/trim (identical to above)
ASSEMBLY INSTRUCTIONS
1. Glue the front wall and right side
wall to the floor. Allow to dry
completely!
2. While waiting for step 1 to dry,
glue trusses to one side of the roof,
observing how they are positioned
when both halves are together. Al-
low to dry completely before han-
dling.
3. Build porch framework. Front
porch steps have 2 sizes of tabs, a
long tab and a short tab. Make sure
they are going in the same direc-
tion, since a stair tread tread glues
to the long tab.
4. When the first two walls are dry,
glue the remaining two walls on
and let dry thoroughly. Do not use
tape or strong clamping as this will
damage the MDF (a light rubber
band is acceptable).
5. Glue the bottom stage layer in place.
Make sure the nail holes and tread
marks are visible (smooth side-
down). Glue not only the bottom
side, but also the rear edge to add
support to the rear and side walls.
6. Glue the upper stage layer in place,
also applying glue to the rear edge.
7. Locate the tabs and holes for the
doorway wall of the backstage room
and glue down the bottom and side
edges as well as where it contacts
the stage.
8. Locate the holes for aligning the sol-
id wall of the backstage room and
glue it in place.
9. The finished interior should look
like the bottom photo. Set aside and
allow to dry completely before mov-
ing on.
10. Apply “superglue” to the two short
tabs in the middle of the porch fram
and insert them into the notches be-
low the front door of the saloon. Be
careful not to glue the saloon to the
table doing this!
11. Glue the stair tread and plank assem-
bly in place, and use white glue to
secure the back edge of the plank to
the front wall of the saloon.
12. Glue the roof supports in place. The
supports with one leg go in the cen-
ter two positions and the ones with
two legs go on the outside. Observe
that the rear leg of the outside sup-
ports act as the corner trim for the
front wall. You may use superglue,
but be sure not to touch any other
part of the building with sticky fin-
gers or risk destroying surface detail.
Make sure the posts are absolutely
square and plumb!
13. Glue the porch roof plate in place
with white glue.
14. Glue the front trim pieces in place
with white glue. These include 1 top
and 2 side pieces. Glue the Alamo
saloon sign in place, being very
careful to center it in both dimen-
sions.
15. Glue the two crown pieces on either
side of the peak to finish the cornice
of the false front.
16. Build the back steps by inserting the
supports into the back wall using the
short tabs. The long tabs support the
stair treads.
17. Glue the exterior windows and doors
in place. Superglue may be used, but
using an abundance of caution to
avoid damaging the MDF’s finish.
TIP: Apply only a few drops and
completely skip putting glue on the
edge you hold with your fingers.
Glue on the top and bottom of the
inside of a window is enough to hold
it in place if superglue is used.
18. Windows with sashes
19. WORK WITH THE WALL FAC-
ING UPWARD AND ALLOW THE
GLUE TO HARDEN COMPLETE-
LY BEFORE WORKING ON AN-
OTHER SET OF HARDWARE. DO
NOT TRY TO HANDLE THE
OUTSIDE AND INDSIDE PIECES
OF A WINDOW OR DOOR SIM-
ULTANEOUSLY!
PROPER ORIENTATION
OF WINDOW. TOP SASH
OVERHANGS BOTTOM
SASH SO WATER
DOESN’T GET IN THE
BUILDING!
20. Each window and door has an inside woodwork
element, and the wall of the building is sandwiched be-
tween the two pieces. The door between the stage and
back room also has two elements; glue the door ele-
ment facing the stage, and the trim piece on the back-
side.
21. The finished building, ready for action! Prime with
a good hobby spray-primer before painting in order to
protect the MDF and help the paint cover well.
21. For the ultimate in presentation and durability, glue
your building down to a hardboard base and decorate it with
sand or flocking. This helps protect the building from exces-
sive handling, and allows you to add scene-setting details
such as rain barrels and watering troughs.
Add more detail by using Knuckleduster’s detail parts
such as chimney pipes and interior furniture, available as
separate kits.
As always, we’re glad to help! Contact us through the web-
site, KNUCKLEDUSTER.COM.

Other Knuckleduster Toy manuals

Knuckleduster GUNFIGHTER'S BALL SHERIFF'S OFFICE User manual

Knuckleduster

Knuckleduster GUNFIGHTER'S BALL SHERIFF'S OFFICE User manual

Knuckleduster GUNFIGHTER'S BALL HARDWARE STORE User manual

Knuckleduster

Knuckleduster GUNFIGHTER'S BALL HARDWARE STORE User manual

Knuckleduster Gunfighter's Ball Boarding House User manual

Knuckleduster

Knuckleduster Gunfighter's Ball Boarding House User manual

Knuckleduster GUNFIGHTER'S BALL COWTOWN SMITTY User manual

Knuckleduster

Knuckleduster GUNFIGHTER'S BALL COWTOWN SMITTY User manual

Popular Toy manuals by other brands

MTHTrains 263E STEAM ENGINE CONTEMPORARY VERSION operating instructions

MTHTrains

MTHTrains 263E STEAM ENGINE CONTEMPORARY VERSION operating instructions

Fisher-Price GJP11 instruction sheet

Fisher-Price

Fisher-Price GJP11 instruction sheet

Beyblade Driger G instructions

Beyblade

Beyblade Driger G instructions

Faller 282709 manual

Faller

Faller 282709 manual

Hornby CLASS 153 Operating and maintenance instructions

Hornby

Hornby CLASS 153 Operating and maintenance instructions

Mattel Barbie M0785-0920 instructions

Mattel

Mattel Barbie M0785-0920 instructions

marklin 37504 instruction manual

marklin

marklin 37504 instruction manual

BMI Aquila manual

BMI

BMI Aquila manual

marklin 76394 manual

marklin

marklin 76394 manual

Black Horce Model Explosion BH40 Instruction manual book

Black Horce Model

Black Horce Model Explosion BH40 Instruction manual book

THE WORLD MODELS Aure EP instruction manual

THE WORLD MODELS

THE WORLD MODELS Aure EP instruction manual

RBC kits F35 manual

RBC kits

RBC kits F35 manual

Fisher-Price Sparkling Symphony Star Beads 71662 manual

Fisher-Price

Fisher-Price Sparkling Symphony Star Beads 71662 manual

Topmodel CZ SWIFT S-1 DE-LUXE manual

Topmodel CZ

Topmodel CZ SWIFT S-1 DE-LUXE manual

GRAUPNER ACRO MAXIE Building instructions

GRAUPNER

GRAUPNER ACRO MAXIE Building instructions

Playskool Batman 16" Power Cycle instructions

Playskool

Playskool Batman 16" Power Cycle instructions

Fisher-Price CHM40 manual

Fisher-Price

Fisher-Price CHM40 manual

Trix BR 218 manual

Trix

Trix BR 218 manual

manuals.online logo
manuals.online logoBrands
  • About & Mission
  • Contact us
  • Privacy Policy
  • Terms and Conditions

Copyright 2025 Manuals.Online. All Rights Reserved.