manuals.online logo
Brands
  1. Home
  2. •
  3. Brands
  4. •
  5. Knuckleduster
  6. •
  7. Toy
  8. •
  9. Knuckleduster GUNFIGHTER'S BALL HARDWARE STORE User manual

Knuckleduster GUNFIGHTER'S BALL HARDWARE STORE User manual

INSTRUCTIONS
STOP! READ THIS FIRST!
1. Test fit all parts and make sure you know how everything goes together before gluing. If you are contem-
plating cutting a part to make it fit, please re-examine your assembly plan—you’ve probably misunder-
stood some aspect of the design. Parts have been tested, and should fit together in a fairly straightforward
manner without modification.
2. Most roofs are made to be removed. A few buildings have no floor (assumed dirt floor), so if you have a
base to glue it to, go ahead and make the roof removable. If you want it to be free-standing and sturdy,
glue the roof truss to the middle of the top of the side
walls and at least glue at least one roof panel in place.
3. Metal doors and windows are provided. They have inte-
rior woodwork; the interior and exterior pieces sand-
wich the wall between them. All metal parts require
priming to paint.
4. Use white glue for most assembly; if you use superglue
or a similar adhesive, be very careful not to let sticky
fingers damage the model!
5. Prime all parts with a good black hobby primer to pro-
tect the MDF and keep it from absorbing water-based
paints, which can cause swelling and warping of the
material.
6. You may wish to paint parts individually before assem-
bly; this works well for small parts that are hard to
paint neatly when glued in place.
7. To simulate weathered wood, dry brush layers over the
black primer. Start with medium brown, then a mus-
tard-brown, and a final dry-brushing of tan. For other
colors, the first coat over the black primer should be
one shade darker than the desired final color. Dry
brush a lighter shade in the middle of the area of color
to give it the look you see in the wargame magazines!
8. Experiment with your own assembly methods. The
models are dead simple to figure out, but if you need
help, contact Knuckleduster through our website,
www.knuckleduster.com.
WARNING! CHOKING HAZARD.
This kit contains small parts; it is not a toy and must be kept
out of reach of children under the age of 3.
TIPS FOR BUILDING LASER CUT MODELS
HARDWARE STORE PARTS LIST
Boardwalk framework (top),
boardwalk surface (middle),
porch roof and support posts
(bottom).
Front trim pieces and sign.
Roof and truss.
Sides and floor. Side door step
parts are in the upper left.
Metal cast windows
and doors (12 parts).
ASSEMBLY INSTRUCTIONS
Fit the 4 walls and
floor together. The foor-
boards are pointed front-
to-back (not side-to-
side). Glue and hold in
place with rubber bands
until dry.
Glue the roof truss to
the underside of the roof
pieces. Note: the back
edge of the roof has un-
even shingles and the
front has a totally flat
edge.
You may want to use a
quick-setting glue since
the angles make clamp-
ing difficult. Just be
careful not to get glue
on the etched details
(your sticky fingers can
be the culprit, by the
way).
Work on the porch as-
sembly separately. There
are two rails and four
cross-braces. The middle
two cross-braces have
short pegs on one end to
connect to the building,
and long pegs on the oth-
er to form a stair-step.
When gluing the frame-
work to the surface of
the porch, line up the
back edge so the pegs
that connect it to the
building are sticking out.
Glue the porch to the
building, using glue not
only on the pegs, but al-
so on the back edge of
the boardwalk piece.
As you can see from the
rear-view photo at left,
the back porch steps fol-
low the same logic. The
short pegs go in the
building, and the stairs
are glued to the top sur-
faces of the stair frame
pieces.
Porch posts are arranged
as shown at left. The
pieces on each end have
an additional leg which
rests against the front of
the building and acts as a
corner trim piece. The
middle two posts are “L”
shaped.
Glue metal windows and doors in place. Each win-
dow and each door have an inside woodwork element,
and the wall of the building is sandwiched between the
two pieces.
Note how the windows are positioned. In order to be
right-side-up, the upper sash on the outside of the build-
ing must overhang the lower sash. Windows are made
this way in order to shed water.
When finished, be sure to seal the building thoroughly with
automotive primer (black works best, because it shades the
cracks and crevices) to keep the MDF from soaking up paint
and potentially warping. Paint the primed building with craft
acrylics. Very nice effects can be achieved with dry-brushing
over the engraved details so they remain dark.
When finished, you may want to glue your building down to
a hardboard base and decorate it with sand or flocking. This
helps protect the building from excessive handling, and al-
lows you to add scene-setting details such as rain barrels and
watering troughs.
Add more detail by using Knuckleduster’s detail parts such
as chimney pipes and interior furniture, available as separate
kits.
As always, we’re glad to help! Contact us through the web-
site, KNUCKLEDUSTER.COM.

Other Knuckleduster Toy manuals

Knuckleduster GUNFIGHTER'S BALL SHERIFF'S OFFICE User manual

Knuckleduster

Knuckleduster GUNFIGHTER'S BALL SHERIFF'S OFFICE User manual

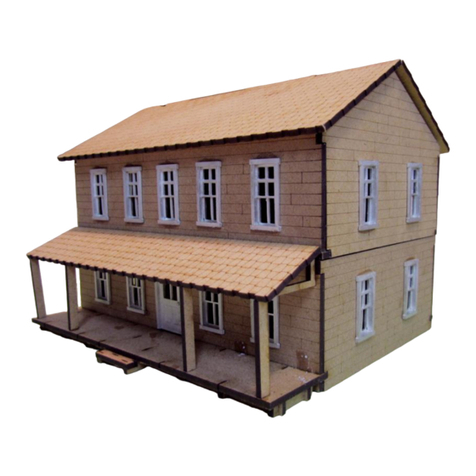
Knuckleduster Gunfighter's Ball Boarding House User manual

Knuckleduster

Knuckleduster Gunfighter's Ball Boarding House User manual

Knuckleduster GUNFIGHTER'S BALL COWTOWN SMITTY User manual

Knuckleduster

Knuckleduster GUNFIGHTER'S BALL COWTOWN SMITTY User manual

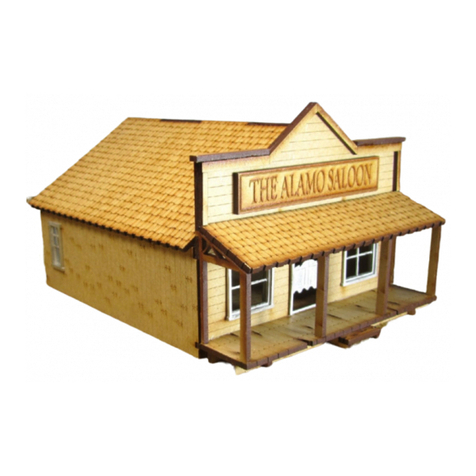
Knuckleduster Gunfighter's Ball The Alamo Saloon User manual

Knuckleduster

Knuckleduster Gunfighter's Ball The Alamo Saloon User manual

Popular Toy manuals by other brands

Mattel Barbie FXT25 instructions

Mattel

Mattel Barbie FXT25 instructions

Fisher-Price LittlePeople Chase ‘n Race Police Car instruction sheet

Fisher-Price

Fisher-Price LittlePeople Chase ‘n Race Police Car instruction sheet

Hasbro Transformers Photon T-34 83755 installation guide

Hasbro

Hasbro Transformers Photon T-34 83755 installation guide

MTHTrains RailKing 4-6-2 PRR K4 Steam Locomotive Operator's manual

MTHTrains

MTHTrains RailKing 4-6-2 PRR K4 Steam Locomotive Operator's manual

Smoby PLANCHA manual

Smoby

Smoby PLANCHA manual

LEGO MARVEL SUPER HEROES manual

LEGO

LEGO MARVEL SUPER HEROES manual

Fisher-Price Power Wheels 76920 Owner's manual with assembly instructions

Fisher-Price

Fisher-Price Power Wheels 76920 Owner's manual with assembly instructions

Trix minitrix BR 212 operating instructions

Trix

Trix minitrix BR 212 operating instructions

DELTA-SPORT 303309_1904 operating instructions

DELTA-SPORT

DELTA-SPORT 303309_1904 operating instructions

Oregon Scientific ON33-10 user manual

Oregon Scientific

Oregon Scientific ON33-10 user manual

Hobbico Bristol Bay Assembly and operation manual

Hobbico

Hobbico Bristol Bay Assembly and operation manual

Hobby 4 CH BlitzRCWorks Sky Surfer RC Trainer... user manual

Hobby

Hobby 4 CH BlitzRCWorks Sky Surfer RC Trainer... user manual

Eduard T-33A Assembly instructions

Eduard

Eduard T-33A Assembly instructions

Robotland Elami Jr. 3663 Instruction book

Robotland

Robotland Elami Jr. 3663 Instruction book

Eduard P-51D-5 exterior Assembly instructions

Eduard

Eduard P-51D-5 exterior Assembly instructions

Enabling Devices Racing Around 2258 user guide

Enabling Devices

Enabling Devices Racing Around 2258 user guide

Fisher-Price 74069 instructions

Fisher-Price

Fisher-Price 74069 instructions

Hasbro TRANSFORMERS BUMBLEBEE CYBERVERSE ADVENTURES OPTIMUS... Assembly instructions

Hasbro

Hasbro TRANSFORMERS BUMBLEBEE CYBERVERSE ADVENTURES OPTIMUS... Assembly instructions

manuals.online logo
manuals.online logoBrands
  • About & Mission
  • Contact us
  • Privacy Policy
  • Terms and Conditions

Copyright 2025 Manuals.Online. All Rights Reserved.