Kogan KAMETANDETA User manual


Using the metal detector, you can hunt for coins, relics, jewelry, gold, and silver
just about anywhere. The detector is versatile and easy to use.
The detector’s features include:
Targeting - pinpoint the target accurately by lowering the sensitivity.
Tone - distinctive sound tones to differentiate between types of metal.
All Metal - search for all kinds of metal objects.
Analog Meter - shows probable type of metal being detected.
Frequency Adjustment - to avoid interference from other equipment with same
frequency.
Arm Support - lets you carry and operate your detector comfortably.
Headphone Jack - lets you connect headphones not supplied).
Waterproof Search oil – use the detector even if you must put it under
water.
Adjustable Stem - lets you adjust the detector’s length for comfortable use.
Low Battery Indicator - lets you know when it is time to replace the batteries.
Power - Your metal detector requires two 9-volt alkaline batteries not supplied).
The built in DC—DC circuit can avoid wrong battery polarity connection and
prolong the battery life.
2

PREPARATION
ASSEMBLING THE DETE TOR
Assembling your detector is easy and requires no special tools. Just follow these
steps.
1. Turn the stem’s lock nut clockwise until it loosens.
2. Lengthen or shorten the stem so when you stand upright with the detector in
your hand, the search coil is sitting level with the ground, about 1/2 to 2 inches
above the ground with your arm relaxed at your side.
3. Turn the stem’s lock nut counter-clockwise to lock it in place.
4. Unscrew the knob on the search coil and remove the knob connector. Insert
the stem and align the holes on the search coil bracket and the stem. Push
the connector through the holes, then retighten the knob.
5. Wind the search coil cable around the stem. Leave enough slack in the cable.
6. Insert the search coil’s plug into the search coil jack on the detector’s control
housing.
aution:
The search coil’s plug fits into the connector only one way. Do not force the
plug or you could damage it.
3

7. Loosen the knob at the search coil’s end, then adjust the search coil to the
desired angle so that it is parallel with the ground. Then retighten the knob.
aution:
Do not overtighten the search coil or use tools such as pliers to tighten it.
8. Insert the arm support into the end of the stem and tighten the lock screw.
INSTALLING THE BATTERIES
autions:
Use only fresh alkaline batteries of required size.
Do not mix the old and new batteries or different types of batteries.
1.Set the mode switch to OFF.
2.Slide the left and right battery covers off in the direction of the arrow.
3.Place a 9V battery into the battery compartment matching the polarity symbols
+ and -) marked inside.
Warning:
Dispose of old batteries promptly and properly. Never bury or burn them.
aution:
If you don’t plan to use the unit for a week or more time, remove the
batteries. Batteries can leak chemicals that can destroy electronic parts.
To extend the battery life, exchange the left and right battery after 3~4hours
of operation.
4

USING HEADPHONES
1.Insert the headphones’ 3.5mm plug into the HEADPHONE jack. At this time the
internal speaker disconnects.
2.Set the VOLUME to the desired setting.
headphone
Listening Safely
To protect your hearing, set the volume to the lowest setting before you
begin listening. From here, adjust the volume up to a comfortable level.
Do not listen at extremely high volume levels. Extended high volume
listening can lead to permanent hearing loss.
Do not wear headphones while operating your detector near high-traffic
areas. Pay attention to traffic safety.
5

A QUI K LOOK AT THE DETE TOR
ONTROLS & INDI ATORS
A. Operating Modes
“OFF” - Power off.
“DIS ” - Discrimination mode. Works with DISC/TONE. Discriminates the
metal type based on the tone.
TONE - Works with DISC/TONE. Sounds two different tones for different
types of metal.
ALL METAL - In this mode, the detector can detect all kinds of metal with
any setting of DISC/TONE.
B. VOLUME---You can set the volume to the desired level from LOW to HIGH.
Analog Meter
6
Mode Switch LOW BATTERY
FRE ADJUST
SENSITIVITY
PHONE
Target Pin-Pointing
DISC/TONE
VOLUME

. DIS /TONE
You can set the mode switch to any desired position from rotating it from
“0”~”10”. When in DISC mode, the detector discriminates the metal type
according to the length of the tone it sounds. When in TONE mode, the
detector discriminates the metal type as per the volume of the tone.
D. Target Pinpointing
Press the red button at the top of the handle to lower the sensitivity in order to
pin-point targets more accurately.
E. PHONE jack
Connect earphones to the PHONE jack, and the speaker inside will be
disconnected.
F. SENSITIVITY.
Turn to any position from “0” to “10”. Get lowest sensitivity in “0” position and
highest sensitivity in “10” position. Turn SENSITIVITY to a higher position when
searching targets; Turn SENSITIVITY to a lower position when searching in
highly mineralized soil or a high electronic interference area and the metal
detector is not working stably.
G. FREQ ADJUST
Adjust sensitivity with FREQ ADJUST to avoid interference from any other metal
detectors in the same area.
H. LOW BATTERY
The LOW BATTERY indicator lights to indicate it’s time for user to replace the
batteries.
I. Analog Meter
When the metal detector finds a metal target, the meter pointer will turn right.
7

4. Operation
Your metal detector has four operation modes: DISC, TONE, ALL METAL and
TARGET TRACK. DISC and TONE are motion modes while TARGET TRACK is a
non-motion mode.
When searching, generally set operation mode to “DISC” and to high sensitivity
position and set “DISC/TONE” to “0”. Sweep your search coil as following picture,
move the search coil back and forth in an arc line. To ensure you do not miss a
target, it is better to keep the distance from the search coil to the earth at
between about 1 – 5cm closer to the earth for smaller target) and the distance
between two neighboring arcs at 10 – 15cm.
If there is a sound of “di-di” during moving, it indicates that there is a metal target
in the sound area. In this case, you can use “TARGET PINPOINTING” to pin-
point the target. Then use “DISC” or “DISC/TONE” to determine whether the
target is worth digging out. The followings are the four operation modes in detail.
1. TARGET PINPOINTING
If there is a sound of “di-di” during searching in DISC, it indicates that there is a
metal target in the sound area. In this case, you can use “TARGET
PINPOINTING” to pin-point the target. Hold the search coil 50cm or more away
from the earth. Hold down the TARGET PINPOINTING button, a red button at the
top of the handle. Sweep the search coil over the sound area and release the
button when you hear a sound of “di-di”. After about 1~2 seconds, hold down the
red button again, and if the “di-di” sound disappears this means the target is far
8

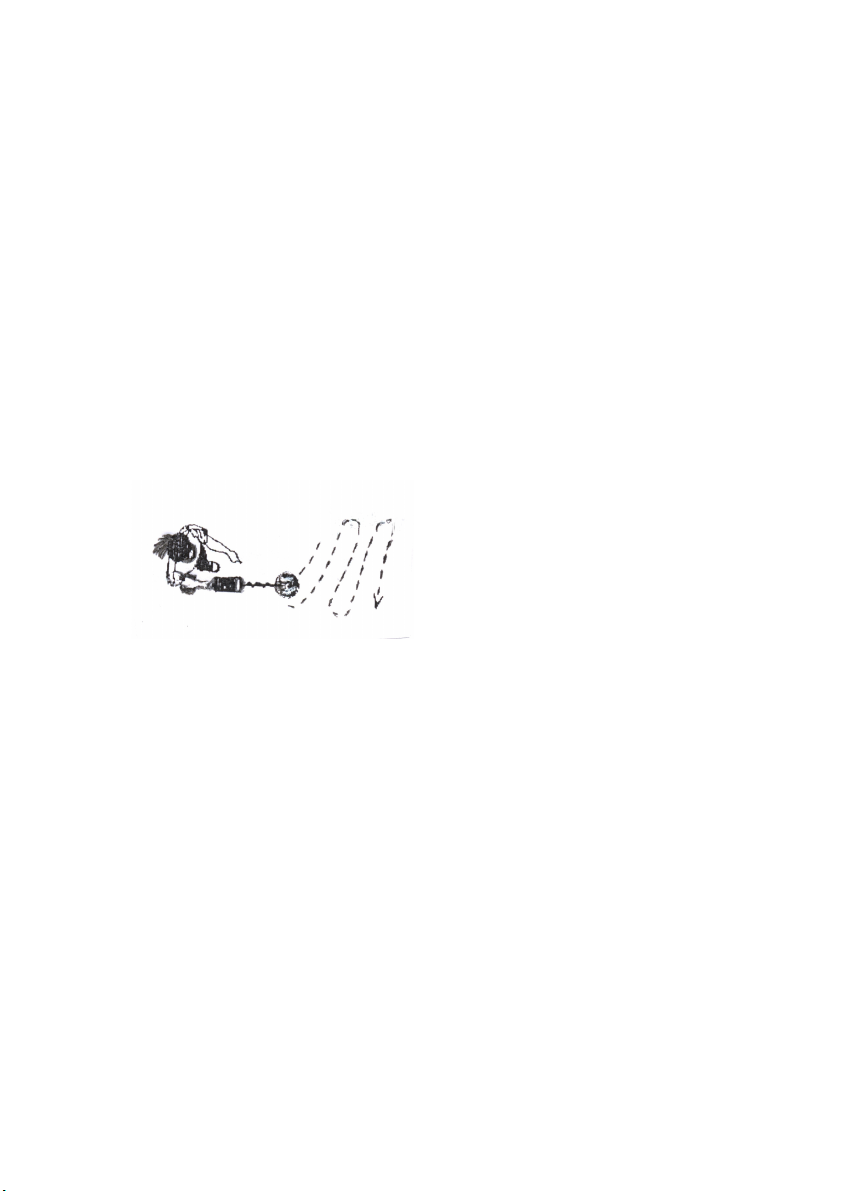
away from the search coil). In this case, put the search coil closer to the earth
and you’ll hear the sound again. Repeat the above steps until you find the target.
After you find the target, make a choice from the following three operating modes
to determine which kind of metal the target is.
2. DIS
Set the mode switch to DISC and DISC/TONE to “0”. The unit will respond with a
long “di-di” sound to both ferrous metal and non-ferrous metal. Turn the
DISC/TONE clockwise to the position near 5. A short “di-di” sound will be heard
for iron and nickel target, or a long “diii-diii” sound is for copper and silver target.
Turn the switch clockwise to the position near 10. Almost no sound will be heard
for iron and nickel target, but a short “di-di” sound will signal copper. A long “dii-
dii” sound is for silver. It will take practice to get an accurate detection.
3. TONE
Set the mode switch to TONE and DISC/TONE to “0”. The unit will respond with a
high tone to both ferrous and non-ferrous metals, while a low tone is for
mineralized metals. Turn the switch clockwise to the position near 5 and the unit
will respond with a low tone to iron, but a mixture of high and low tone is for
nickel. A medium high tone indicates copper, and a high tone is for silver.
Turn the switch to the position near 10, both ferrous and nickel metal will be
indicated by a low tone. A mixture of high and low tone is for copper, and a high
tone is for silver. This method will also take practice to have an accurate
detection. It may help to take notes while you are searching.
4. ALL METAL
Set the mode switch to ALL METAL and the DISC/TONE to any position. The unit
will respond with a tone to all metals.
9

Notes:
If there are interference from other instruments, electrical cables, TVs or
radio in your searching area, set the FREQ ADJ to another position or lower
the sensitivity. If this does not help, you may need to move to a different
search area.
When searching in highly mineralized areas, the unit will sound even if
there’s no metal. In this case, you can lower the sensitivity and increase the
height between the search coil and the ground until the false signal
disappears. If necessary, you may need to reset the DISC/TONE.
When searching in a trash filled area, it’s better to set the DISC/TONE to 5
position, so that the unit can ignore most invaluable metals such as nails
and small trashy iron.
Keep metal digging tools away when searching.
You can search for all metal targets with “Target Pin-pointing”. If you’re
searching for small targets near where a large metal object is buried, a false
signal will appear. In this case, remove the large metal object.
Sensitivity levels are generally in contradiction with that of the level of
discrimination. The higher the sensitivity level is, the worse discrimination
performance will be. You can lower the sensitivity to have better
discrimination between metals.
You can move the search coil horizontally and vertically and make a cross at
the sound point.
10

ARE AND MAINTENAN E
Your metal detector is an example of superior design and
craftsmanship. The following suggestions will help you care for your
metal detector so you can enjoy it for years.
Handle the detector gently and carefully. Dropping it can
damage circuit boards and cases and can cause the
detector to work improperly.
Use the detector only in normal temperature environments.
Temperature extremes can shorten the life of electronic
devices, damage the cases of the detector.
Keep the detector away from dust and dirt, which can cause
premature wearing of parts.
Wipe the detector with a damp cloth occasionally to keep
it looking new. Do not use harsh chemicals, cleaning
solvents, or strong detergents to clean the detector.
11
Table of contents
Other Kogan Metal Detector manuals
Popular Metal Detector manuals by other brands

Tesoro
Tesoro VAQUERO Operator's instruction manual

XP Metal Detectors
XP Metal Detectors DEUS II quick start guide

Teknetics
Teknetics Delta 4000 owner's manual

Bounty Hunter
Bounty Hunter Legacy 1500 owner's manual

Carrett
Carrett AT Gold owner's manual

Steinberg Systems
Steinberg Systems SBS-MD-20 user manual