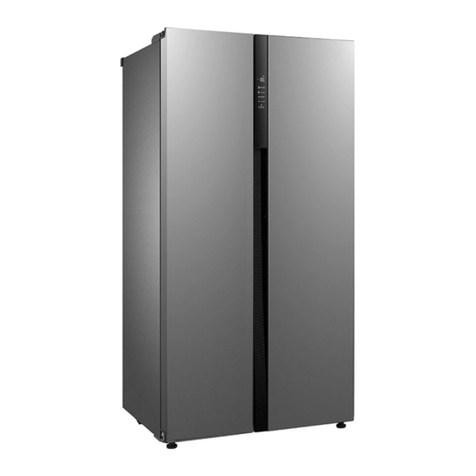
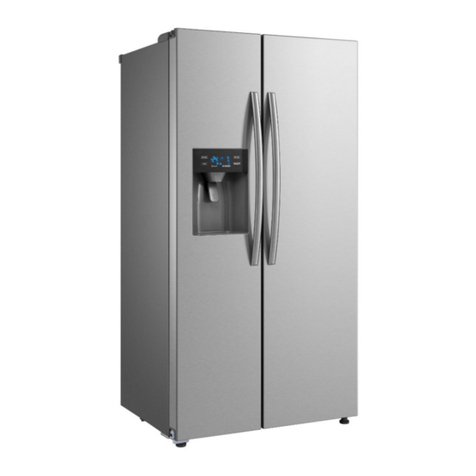
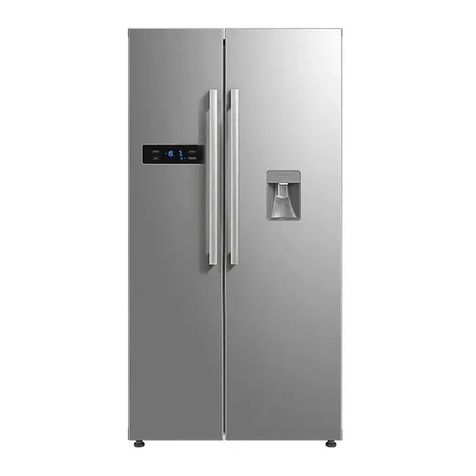
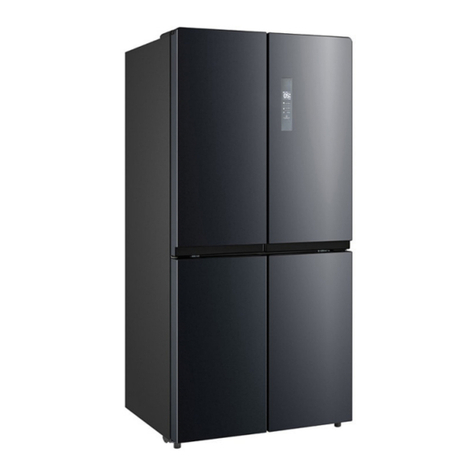
Kogan KAMSBSF532A User manual

535L SIDE BY SIDE
STAINLESS STEEL FRIDGE
WITH WATER DISPENSER
KAMSBSF532A

2
Safety & Warnings 3
Overview 7
Before First Use 8
Functions 10
Operation 12
Water dispenser 14
Cleaning & Care 16
Troubleshooting 20
Notes 22

3
ENSURE YOU HAVE READ THIS USER GUIDE CAREFULLY BEFORE USE, AND RETAIN
THE USER GUIDE FOR FUTURE REFERENCE.
Warning:
Warning: Risk of fire / flammable materials.
•This appliance is intended to be used in households and similar applications such as
staff kitchen areas in shops, offices and other working environments; farmhouses and
by clients in hotels, motels and other residential type environments; bed and breakfast
type environments; catering and similar non-retail applications.
•If the supply cord is damaged, it must be replaced by Kogan.com or an authorised
representative in order to avoid a hazard.
•Do not store explosive substances such as aerosol cans with a flammable propellant in
this appliance.
•The appliance must be unplugged when not in use and before carrying out user
maintenance on the appliance.
•WARNING: Keep ventilation openings, in the appliance enclosure or in the built-in
structure, clear of obstruction.
•WARNING: Do not use mechanical devices or other means to accelerate the
defrosting process, other than those recommended by the manufacturer.
•WARNING: Do not damage the refrigerant circuit.
•WARNING: Do not use electrical appliances inside the food storage compartments of
the appliance, unless they are of the type recommended by the manufacturer.
•WARNING: Please abandon the refrigerator according to local regulators for it use
flammable blowing gas and refrigerant.
•WARNING: When positioning the appliance, ensure the supply cord is not trapped or
damaged.
•WARNING: Do not locate multiple portable socket-outlets or portable power supplies
at the rear of the appliance.
•Do not use extension cords or ungrounded (two prong) adapters.
SAFETY & WARNINGS

4
DANGER Risk of child entrapment. Before you throw away your old refrigerator or freezer:
•Take off the doors.
•Leave the shelves in place so that children may not easily climb inside.
•The refrigerator utilises an alternating current supply (220-240V /50Hz). If large voltage
fluctuations occur (outside the scope of 198-264V), it may cause failures such as the
refrigerator failing to start, burned-out internal components, the compressor producing
abnormal noises etc. If this occurs, you must install an automatic voltage regulator
rated at above 1000W for use.
•Do not cut off or remove the third pin of the power plug under any circumstances.
•The power plug must be firmly secured in the wall socket to avoid the risk of fire.
•Do not pull the cable to unplug the refrigerator from the wall socket. Hold the plug
firmly and pull out the plug from the socket directly.
•Do not allow the power cable to become pinned by the refrigerator or trampled by
people. Do not use damaged power cables or plugs; if you note any damage to the
cable or plug, please contact Kogan support.
•This appliance can be used by children aged from 8 years and above and persons with
reduce physical sensory or mental capabilities or lack of experience and knowledge if
they have been given supervision or instruction concerning use of the appliance in a
safe way and understand the hazards involved.
•Children shall not play with the appliance. Cleaning and user maintenance shall not be
made by children without supervision. Children aged from 3 to 8 years can load and
unload refrigerating appliances.
•WARNING: To avoid a hazard due to instability of the appliance, it must be fixed in
accordance with the instructions.
Warnings for placement
•Do not put flammable, explosive, volatile and highly corrosive items in the refrigerator
to prevent damages to the product or fire accidents.
•Do not place flammable items near the refrigerator to avoid fires.
•The refrigerator is intended for household use, such as storage of foods; it shall not be
used for other purposes, such as storage of blood, drugs or biological products, etc.
WARNING: The R600a refrigerant and cyclopentane foaming
material used for the refrigerator are flammable. When the refrigerator
is disposed of, it must be kept away from any fire source and be
recovered by a specialist agency with corresponding qualifications to
prevent damage to the environment or any other harm.
5
•Do not store bottled fluids (such as beer, soft drink, etc) or enclosed containers in the
freezing chamber of the refrigerator; the bottles or enclosed containers may
crack/shatter due to freezing and cause damages.
•If gas leaks from the appliance, immediately close the gas valve and open nearby
doors and windows. Do not pull out or plug in the refrigerator or other appliances to
wall sockets.
•Do not store explosive substances such as aerosol cans with a flammable propellant in
this appliance.
•Do not use flammable solvent near refrigerator, to avoid fire.
•Do not place power boards, voltage regulated power supplies, microwave ovens or
other appliances on top of the refrigerator.
•Do not allow children to enter or climb the appliance or its shelves.
•To avoid the risk of frostbite, do not touch the icy surface of the freezer with bare hands
while it is in operation, particularly if your hands are wet.
•The gap between door and door and the gap between door and refrigerator body are
very narrow. Be careful not to stretch hands into these areas to prevent fingers from
injuring. Do not let the children near the refrigerator when open and close the doors.
•Do not spray or rinse the refrigerator with water and install the refrigerator in a dry place
free of moisture so as not to affect the electrical insulation of the appliance.
•Never attempt to dismantle or modify the refrigerator and avoid damage to the cooling
pipes.
•Remove the power plug from the wall socket in the event of a power failure or to clean
the appliance. Wait for at least 5 minutes before reconnecting the power, as
continuous restarting may damage the compressor.
•This product is for use as a household refrigerator according to the regulations of
government standards. Household refrigerators are only for food storage and are not
intended for the storage of blood, drugs and biological products.
•Adhere to the following instructions to avoid food contamination:
1. Opening the door for long periods can cause a significant increase of the
temperature in the compartments of the appliance.
2. Regularly clean accessible drainage systems and surfaces that can encounter
food.
3. Store raw meat and fish in suitable containers in the refrigerator so that it is not in
contact with or at risk of dripping onto other food.
4. The door bins in the freezer compartment are suitable for storing pre-frozen food,
storing or making ice-cream and making ice cubes.
5. The door bins in the fridge compartment are not suitable for the freezing of fresh
food.

6
6. If the refrigerating appliance is left empty for long periods; switch off, defrost,
clean, dry and leave the door open to prevent mould developing within the
appliance.
Meaning of safety warning symbols:
Prohibition symbol
This is a prohibition symbol. Any incompliance with
instructions marked with this symbol may result in damage to
the product or endanger the personal safety of the user.
Warning symbol
This is a warning symbol. It is required to operate in strict
observance of instructions marked with this symbol; or
otherwise damage to the product or personal injury may be
caused.
Caution symbol
This is a cautioning symbol. Instructions marked with this
symbol require special caution. Insufficient caution may result
in slight or moderate injury or damage to the product.
This user guide contains important safety information which shall be observed by the users.

7
A Freezer door rack E Water dispenser
B Freezer compartment shelf F Refrigerator compartment shelf
C Ice tray G Refrigerator door rack
D Freezer compartment drawer H Fruit and vegetable compartment
I Adjustable levelling foot
OVERVIEW

8
•Remove all packaging material before using the new refrigerator. This includes the
foam base and all adhesive tape holding the refrigerator accessories inside and outside.
•Clean both the inside and outside of the refrigerator with wet cloth. A small amount of
neutral detergent can be added to warm water to wash the cloth and continue wiping
the appliance with clean water.
•Locate an independent power outlet with grounding contact for the refrigerator which
does not share a multi-purpose socket with other electrical appliances.
•Do not connect a grounding wire. The grounding pole of the power plug will provide
adequate and reliable grounding.
Transportation
•Do not invert, apply pressure to the sides of or excessively vibrate the unit. When
moving, the tilt angle cannot exceed 45 degrees.
•Do not attempt to move the unit by the door.
Placement
•Ensure proper air circulation around the refrigerator. Do not place the unit near heat
sources, direct sunlight, moisture or water. Avoid rust and weakening the insulation.
•Ensure that the refrigerator has least 30cm clearance above and at least 10cm on the
sides and back. This ensures the refrigerator door can open or close conveniently and
avoids heat build-up.
•Install the refrigerator on solid, level flooring.
BEFORE FIRST USE
Notes:
•Do not allow the refrigerator any or other heavy object to be placed on the power
cable, as damaging the cable may present an electrical hazard.
•Before connecting the appliance to power, please check the voltage range of
refrigerator and power supply carefully

9
Door height adjustment
Before adjusting the height of the door, rotate the downward adjusting nut clockwise (as
shown below) with a wrench (not supplied) for two full rotations to loosen. Rotate the
upward adjusting nut to adjust the height and then tighten the downward adjusting nut
counter-clockwise. The total range of adjustment is 5mm.
1. If the refrigerator door is too low:
Open the door, use the accompanying wrench to rotate the upward adjusting nut
counter-clockwise to move it upward until it is parallel and level.
2. If the refrigerator door is too high:
Open the door, use the accompanying wrench to rotate the upward adjusting nut
clockwise to move it downward, until it is parallel and level.
Not level Fixed shaft
Upward
adjusting nut
Right
Wrench
Levelling feet
Downward adjusting nut

10
Button Operation
Display
A Freezer temperature
adjustment 1 Freezer compartment temp
B Refrigerator temperature
adjustment 2 Refrigerator compartment temp
C Mode function / setting 3 Vacation mode
D Lock/Unlock 4 Quick freezing icon
5 Quick cooling icon
6 Lock/Unlock icon
FUNCTIONS

11
Lock/Unlock
Press and hold the Lock/Unlock key (D) for 3 seconds and the refrigerator will lock, showing
the locked icon (6). Repeat this process and the refrigerator will unlock, showing the
open icon .
Vacation mode
Click the Mode button (C) button to enter into the vacation mode. The icon will light up,
the vacation mode will start after locking the control panel.
Under vacation mode, the refrigerating compartment is turned off and the fridge displays
the freezer compartment temperature which is set to -18°C.
Quick freezing mode
Click the Mode button (C) button to select quick freezing mode. The icon will illuminate
(4). Once locked, the refrigerator will run in quick freezing mode.
Quick cooling mode
Click the Mode button (C) button to select quick cooling mode. The icon will illuminate
(5). Once locked, the refrigerator will run in quick cooling mode.
Freezer temperature settings
Press the FRZ.TEMP key (A) and the temperature indicator will give a prompt by flashing.
Press the FRZ.TEMP key (A) again to adjust the setting temperature. The temperature
changes 1°C each press, ranging between -16°C to -24°C and a beep will be heard with
each press.
Once an adjustment is made, the temperature indicator flashes for 5 seconds and the new
setting temperature will take effect once the freezer is locked.
Refrigerator temperature settings
Press the REF.TEMP key (B) and the temperature indicator will give a prompt by flashing.
Press the REF.TEMP key (B) again to adjust the setting temperature. The temperature
changes 1°C each press, ranging between -2 and 8°C and a beep will be heard with each
press.
Once an adjustment is made, the temperature indicator flashes for 5 seconds and the new
setting temperature will take effect once the refrigerator is locked.
Storage upon Power Failure
In case of power failure, the instant working state will be locked and maintained till re-
electrification.
Opening Warning and Alarm Control
When the refrigerator door is opened, the opening music will play. If the door is not closed in
two minutes, the buzzer will sound once every second till the door is closed. Press any
button to stop the buzzer alarm.

12
Changing the Light
Any replacement or maintenance of the LED lamps must be made by kogan.com, an
authorised service agent or similar qualified person. Do not repair or replace LED lamps
yourself.
Starting
•Before initial start, keep the refrigerator still for two
hours before connecting it to power supply.
•Before putting any fresh or frozen foods, the
refrigerator shall have run for 2-3 hours or for above
4 hours in summer when the ambient temperature
is high.
•Spare enough space for convenient opening of the
doors and drawers.
Energy saving tips
•The appliance should be in the coolest area of the room, away from heat producing
appliances or heating ducts and out of the direct sunlight.
•Let hot foods cool to room temperature before placing in the appliance. Overloading
the appliance forces the compressor to run longer. Foods that freeze too slowly may
lose quality or spoil.
•Be sure to wrap foods properly and wipe containers dry before placing them in the
appliance. This cuts down on frost build-up inside the appliance.
•Appliance storage bin should not be lined with aluminium foil, wax paper or paper
towelling. Liners interfere with cold air circulation, making the appliance less efficient.
•Organise and label food to reduce door openings and extended searches. Remove as
many items as needed at one time and close the door as soon as possible.
OPERATION

13
First Use
•Affix the lower shelf inside the refrigerator as shown in "Cleaning & Care".
•Connect the refrigerator to the power supply. After being connected to power, the
refrigerator will show the current chilled and frozen temperature. The refrigerator has
a Power-down memory, the first time when it is power on and then every time will be
set up at the last power-down operation.
•The refrigerator will begin operation. The Temperature Control keys can be used to
set the temperature.
•Place food into the refrigerator.
After allowing the refrigerator to operate for some time to fully cool, it is ready for use.
Note:
If the door is misaligned, refer to the adjustment instructions above (also located in the
lower left comer of the refrigerator's right panel) to adjust.
Note:
When the temperature is set to change or put new food into the refrigerator, it will take
some time for the inside temperature to equalise. The length of this period depends on
the size of the temperature change, the temperature of surrounding environment, the
frequency of the door being opened and the amount of food being placed inside.
Note:
Cancel any active functions (e.g. vacation mode or quick-freezer mode) before
changing the freezer's set temperature.

14
•Only clean drinking water should be used in the water tank. It is strongly recommended
not to use anything other than water in the tank (example, carbonated soft drinks, milk,
juice, etc.).
•Do not fill the water tank past the maximum point as indicated.
•If the dispenser is not flowing as expected, check the water tank is securely in place
and flush against the door. Ensure all piping is correctly in place.
•Drain the water tank completely before removing from the refrigerator.
•Do not remove any of the dispenser’s plumbing in the refrigerator door.
•Clean the water tank before first use and when the dispenser has not been used for a
long time (after draining completely).
•It is recommended to clean the water tank every three months. Be careful when
opening and closing the door of the water dispenser and water tank to avoid spilling
water.
WATER DISPENSER

15
Filling the Water Tank
To fill the water tank, remove the water tank cover. Fill the water tank with clean drinking
water.
Using the Water Dispenser
Using a drinking cup or glass, position it under the dispenser nozzle
and push it up against the water dispenser lever (refer the image
below). Water will begin to flow from the dispenser into the cup or
glass. Once the desired amount of water has been reached, simply
move the cup or glass away from the dispenser lever and the water
will stop flowing automatically as the lever returns to its original
position.

16
Defrosting freezer
The freezer compartment will defrost automatically, with no need for manual intervention.
Overall cleaning
•Ensure dust behind the refrigerator and on the ground is cleaned regularly to improve
the cooling effect and energy saving.
•Check the door gasket regularly to make sure there are no debris. Clean the door
gasket with a soft cloth dampened with soapy water or diluted detergent.
•The interior of the refrigerator should be cleaned regularly to avoid odour.
•Turn off the power before cleaning interior, remove all foods, drinks, shelves, drawers,
etc.
•Use a soft cloth or sponge to clean the inside of the refrigerator, with two tablespoons
of baking soda and a quart of warm water. Then rinse with water and wipe clean. After
cleaning, open the door and let it dry naturally before turning on the power.
•For areas that are difficult to clean in the refrigerator (such as narrow sandwiches, gaps
or corners), it is recommended to wipe them regularly with a soft rag, soft brush, etc.
and when necessary, combined with some auxiliary tools (such as thin sticks) to ensure
no contaminants or bacterial accumulation in these areas.
•Do not use soap, detergent, scrub powder, spray cleaner, etc., as these may cause
odours in the interior of the refrigerator or contaminated food.
•Clean the bottle frame, shelves and drawers with a soft cloth dampened with soapy
water or diluted detergent. Dry with a soft cloth or dry naturally. Wipe the outer surface
of the refrigerator with a soft cloth dampened with soapy water, detergent, etc. and
•Wipe the outer surface of the refrigerator with a soft cloth dampened with soap water,
detergent, etc. and then wipe dry.
•Do not use hard brushes, clean steel balls, wire brushes, abrasives
(such as toothpastes), organic solvents (such as alcohol, acetone,
banana oil, etc.), boiling water, acid or alkaline items, which may
damage the fridge surface and interior. Boiling water and organic
solvents such as benzene may deform or damage plastic parts.
•Do not rinse directly with water or other liquids during cleaning to
avoid short circuits or affect electrical insulation after immersion.
CLEANING & CARE
WARNING: Please unplug the refrigerator for defrost and cleaning.

17
Shelf adjustment
After clearing the shelf of items;
1. Pull the shelf outwards from the fridge
2. Tilt the shelf upward towards 90° until it is
perpendicular to the original position.
3. Pull out the shelf by the direction.
Rack adjustment and removal
1. Lift the rack upwards
2. Hold the rack by both sides and then pull it
outwards.
3. After cleaning, install the rack by reversing the
steps above.
You can also adjust the position according to the
height of stored food.
Water Tank & Dispenser Maintenance
Every three months, follow the steps below to maintain the water tank and dispenser.
Note:If detergent is used to clean any part of the dispenser or water tank, flush the system
five or six times by filling the water tank and empty through the dispenser to remove any
residue that could remain before use.
1. Completely empty the water tank.
2. Remove the water tank by gently pulling forward
slightly then lifting away at a 45° angle (refer the
image below). Be careful when disconnecting from
the dispenser valve.
3. Clean the water tank and wipe the dispenser valve.
4. Allow the water tank and dispenser valve to dry.
5. Replace the water tank by sliding downward into
place and then gently push back into place. Ensure
the water tank is aligned with the dispenser valve and
is flush against the refrigerator door.
6. Flush the water dispenser five or six times by filling and empty the water tank
through the dispenser before use.

18
Cleaning the Glass Shelf
•The innermost part of the refrigerator contacts the shelves backstop. To remove the
shelves, raise them upward.
•Adjust or clean the shelves according to your requirement.
Out of Operation
Power failure: In case of power failure, even if it is in summer, foods inside the appliance
can be kept for several hours. During a power failure never open the door or add or remove
food from the appliance.
If the fridge is not going to be used for an extended period: The fridge should be
unplugged and then cleaned. The doors should be left open to prevent odour.
Moving: Before the refrigerator is moved, take all objects inside out of the fridge. Fix the
glass partitions, vegetable holder, freezing chamber drawers, etc. with tape and tighten the
levelling feet. Close the doors and fix them with tape. During moving, the appliance shall
not be laid upside down or horizontally or be vibrated. The inclination during movement
must be no more than 45°.
The appliance should run continuously once it is started. Generally, the operation of
the appliance should not be interrupted, otherwise the service life may be impaired.

19
Storage
•The appliance should be in the coolest area of the room, away from heat producing
appliances or heating ducts and out of direct sunlight.
•Let hot foods cool to room temperature before placing them in the appliance.
•Overloading the appliance forces the compressor to run longer, increasing energy
consumption.
•Foods that freeze too slowly may lose quality or spoil.
•Be sure to wrap foods properly and wipe containers dry before placing them in the
appliance to cut down on frost build-up.
•Do not line the storage bins with aluminium foil, wax paper or paper towelling. Liners
interfere with cold air circulation, making the appliance less efficient.
•Organize and label food to reduce door openings and extended searches. Remove as
many items as needed at one time and close the door as soon as possible.

20
Failed operation
•Ensure the unit is securely connected to the power socket
•Check whether the voltage is too low
•Check for a power failure or if partial circuits have tripped
Odour
•Ensure odorous foods are tightly wrapped before storage
•Check for any rotten food that may be inside
•Clean the inside of the refrigerator
Excessive
compressor
operation
This is normal in summer when the ambient temperature is
high:
•Avoid having too much food in the appliance at once
•Allow food to cool before being put into the appliance
•Avoid opening the doors too frequently
Light fails to
illuminate
•Ensure the appliance is connected to power
•Check the light for damage or a bulb failure
•Have the light replaced by a professional
Doors cannot be
properly closed
•The door is stuck on an item inside
•Too much food has been placed in the refrigerator
•The refrigerator is tilted or unlevel
Loud noise
•Ensure the floor is level and that the appliance is stable
•Ensure accessories are placed in the correct locations
Door seal fails to be
tight
•Remove foreign matters on the door seal
•Heat the door seal and then cool it for restoration (use a hair
dryer or a hot towel for heating)
Water pan
overflows
•There is too much food in the chamber or the food stored
contains too much water, resulting in heavy defrosting
•The doors are not closed properly, resulting in frosting due to
entry of air and increased water due to defrosting
TROUBLESHOOTING
Table of contents
Other Kogan Refrigerator manuals

Kogan
Kogan KAM490FRSFA User manual

Kogan
Kogan KAM372TMWFB User manual

Kogan
Kogan KAM314TMSFA User manual

Kogan
Kogan KA400TPMNTA User manual

Kogan
Kogan KAM535TMSFA User manual

Kogan
Kogan KAM323BMSFA User manual

Kogan
Kogan KAMNIBRFRGE User manual

Kogan
Kogan KAGRBAR88BA User manual

Kogan
Kogan KAM65LBRSFA User manual

Kogan
Kogan KAGRBA125BA User manual

Kogan
Kogan KAH75BARFRA User manual

Kogan
Kogan KAMSBSF527B User manual

Kogan
Kogan KAMNIBRFRGE User manual

Kogan
Kogan PFN-C-WEA-25 User manual

Kogan
Kogan KAMSBSF532B User manual

Kogan
Kogan KAM236TMSFA User manual

Kogan
Kogan KAMSBSF527A User manual

Kogan
Kogan KA323BTMNTA User manual

Kogan
Kogan KAM545FRSFA User manual

Kogan
Kogan KAM239TMWFB User manual