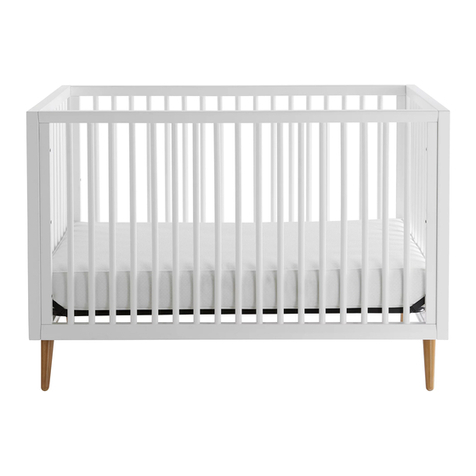
Kolcraft Brooklyn Crib User manual

Q054
Brooklyn Crib
Assembly Instructions
THIS INSTRUCTION BOOKLET CONTAINS IMPORTANT SAFETY INFORMATION. PLEASE
READ AND KEEP FOR FUTURE REFERENCE.
READ INSTRUCTIONS CAREFULLY BEFORE ASSEMBLY
Manufactured by:
Kolcraft Enterprises Inc.
1100 W Monroe St
Chicago, IL 60607
www.kolcraft.com
(800) 453-7673
Record manufacturing date and lot number
from product label here:
Conforms to
ASTM F 1169
Safety Standards

1
FAILURE TO FOLLOW THESE WARNINGS AND THE ASSEMBLY INSTRUCTIONS COULD RESULT IN
SERIOUS INJURY OR DEATH.
¢ READ ALL INSTRUCTIONS BEFORE ASSEMBLING CRIB. KEEP INSTRUCTIONS FOR FUTURE USE.
¢NEVER USE PLASTIC SHIPPING BAGS OR OTHER PLASTIC FILM AS MATTRESS COVERS
BECAUSE THEY CAN CAUSE SUFFOCATION.
¢TO REDUCE THE RISK OF SUDDEN INFANT DEATH SYNDROME (SIDS), PEDIATRICIANS
RECOMMEND HEALTHY INFANTS BE PLACED ON THEIR BACKS TO SLEEP, UNLESS OTHERWISE
ADVISED BY YOUR PHYSICIAN.
¢INFANTS CAN SUFFOCATE ON SOFT BEDDING. NEVER ADD A PILLOW OR COMFORTER.
NEVER PLACE ADDITIONAL PADDING UNDER AN INFANT.
STRANGULATION HAZARD
¢STRINGS CAN CAUSE STRANGULATION! DO NOT PLACE ITEMS WITH A STRING AROUND A
CHILD’S NECK, SUCH AS HOOD STRINGS OR PACIFIER CORDS. DO NOT SUSPEND STRINGS OVER
A CRIB OR ATTACH STRINGS TO TOYS.
¢TO HELP PREVENT STRANGULATION, TIGHTEN ALL FASTENERS. A CHILD CAN TRAP PARTS
OF THE BODY OR CLOTHING ON LOOSE FASTENERS.
¢DO NOT PLACE CRIB NEAR A WINDOW WHERE CORDS FROM BLINDS OR DRAPES MAY
STRANGLE A CHILD.
FALL HAZARD
¢WHEN CHILD IS ABLE TO PULL TO A STANDING POSITION, SET MATTRESS TO LOWEST
POSITION AND REMOVE BUMPER PADS, LARGE TOYS AND OTHER OBJECTS THAT COULD SERVE
AS STEPS FOR CLIMBING OUT.
¢STOP USING CRIB WHEN CHILD BEGINS TO CLIMB OUT OR REACHES THE HEIGHT OF
35 IN. (89 CM).
¢CHECK THIS PRODUCT FOR DAMAGED HARDWARE, LOOSE JOINTS, LOOSE BOLTS OR OTHER
FASTENERS, MISSING PARTS, OR SHARP EDGES BEFORE AND AFTER ASSEMBLY AND
FREQUENTLY DURING USE. SECURELY TIGHTEN LOOSE BOLTS AND OTHER FASTENERS. DO NOT
USE CRIB IF ANY PARTS ARE MISSING, DAMAGED, OR BROKEN. CONTACT KOLCRAFT
ENTERPRISES, INC (www.kolcraft.com/customer-service/contact-kolcraft) FOR REPLACEMENT
PARTS AND INSTRUCTIONAL LITERATURE IF NEEDED. DO NOT SUBSTITUTE PARTS.
¢IF REFINISHING, USE A NON-TOXIC FINISH SPECIFIED FOR CHILDREN’S PRODUCTS.
¢FOLLOW WARNINGS ON ALL PRODUCTS IN A CRIB.
¢INFANTS CAN SUFFOCATE IN GAPS BETWEEN CRIB SIDES AND A MATTRESS THAT IS TOO
SMALL.
¢ANY MATTRESS USED IN THIS CRIB MUST BE AT LEAST 27-1/4 IN. (69 CM) BY 51-5/8 IN. (131
CM), WITH A THICKNESS NOT EXCEEDING 6 IN. (15 CM). THE DIMENSIONS OF THE MATTRESS
SHOULD BE TAKEN FROM SEAM TO SEAM.
¢PREVENT BURNS. KEEP CRIB AWAY FROM OPEN FIRES AND OTHER HEAT SOURCES.
WARNING

2
Care and Maintenance
l After completing assembly, check that all bolts and screws are secure and tight. Hardware can
become loose over time, so it is your responsibility to periodically check the tightness of all
fasteners as long as you use the nursery furniture.
l Wood is a natural material and as such it can be affected by changes in temperature and
humidity. Extreme changes in humidity and temperature can cause the wood to warp, swell,
crack or shrink, thus compromising the structural integrity of the furniture and making it
dangerous to use.
l Furniture should always be stored indoors in climate controlled, dry locations. Use care when
using a vaporizer or humidifier around the furniture. Do not aim the vapor at the crib or any other
wooden furniture in the nursery. Avoid using vaporizers or humidifiers for extended periods of
time.
l To clean the furniture, wipe with a damp cloth and immediately dry the surface. Do not use any
chemical cleaners or polishes. Such products can leave a residue on the finish and come in
contact with your child.
l Your furniture has a durable and protective non-toxic finish, however if you decide to refinish it,
you must use a non-toxic finish specified for children's products. Do not use any toxic stripping
methods to remove the old finish.
l Please refer to your furniture’s instruction manual for proper assembly. Instruction manuals
can be downloaded from Kolcraft.com.

3
Kolcraft Nursery Furniture Limited Warranty
Thank you for purchasing a Kolcraft Enterprises, Inc. designed nursery furniture piece.
What is the warranty for my nursery furniture?
Kolcraft Enterprises, Inc. warrants all nursery furniture to be free of defects in materials and workmanship
from the date of purchase from an authorized retailer or distributor. All nursery furniture will have a ONE
YEAR warranty from the date of purchase.
What will Kolcraft Enterprises, Inc. do?
Kolcraft will repair or replace, at its option, the defective product. If you have a problem with or are not
satisfied with your product, please contact the Customer Service Department at Kolcraft. Repair or
replacement as provided under this warranty is the exclusive remedy of the consumer. Kolcraft shall not be
liable for any incidental or consequential damages for breach of any express or implied warranty on this
product, except to the extent this exclusion is prohibited by applicable law. Some states do not allow the
exclusion or limitation of incidental or consequential damages, so the above limitation or exclusion may not
apply to you. This warranty gives you specific legal rights, and you may also have other rights which vary
from state to state.
Any implied warranty of merchantability or fitness for a particular purpose on this product is limited in
duration to the duration of this warranty.
What does the nursery furniture warranty cover?
The manufacturer warrants that all structural elements of this product, including hardware, joints, bolts and
mechanical devices shall be free of any defects under normal household use and will be replaced or repaired
free of charge for ONE YEAR from the date of purchase. You must be the original owner of the item and
must properly use and care for the product as indicated in Section 2 below. Information and/or photographs
of the nursery furniture may be requested to verify correct model and condition.
What is not covered by the nursery furniture warranty?
This warranty shall not apply to damages arising from neglect, misuse, abuse, accidental damage, or
commercial use of the product. This warranty excludes the finish or paint coating, and is limited to repair or
replacement of defective parts only. Products purchased through an unauthorized retailer or distributor, any
floor models, or second-hand purchases do not qualify for the warranty.
What if I am a customer located outside of the U.S.?
Product warranties are only valid for the country in which they are purchased. Kolcraft Enterprises, Inc. may
not ship replacement products or parts to countries where such products do not comply with local
regulations, even in the event that the original product was purchased in the U.S. Replacement products that
do comply with local regulations may incur a shipping fee and are subject to customs, taxes and duties of the
country in which the product is being shipped to. If the product was sold through an authorized distributor,
Kolcraft Enterprises, Inc. will provide appropriate distributor information and replacements may only be
offered through your local distributor.
How do I contact Kolcraft Enterprises, Inc. for warranty service?
To obtain warranty service, please contact Kolcraft's Customer Service Department. If the product is
returned to Kolcraft's Customer Service Department for repair or replacement, it must be shipped prepaid
and adequately insured.
Please direct any comments, questions or requests to: Kolcraft Enterprises, Inc. Customer Service
Department, 1100 West Monroe Street, Chicago, IL 60607, 1-800-453-7673 in the U.S. and Canada, 1-312-
361-6315 outside the U.S. and Canada, Monday-Thursday 8 a.m.- 5 p.m. and Friday 8 a.m. – 3 p.m. Central
Standard Time.

4
G
B
A
H
F
Crib Parts:
Upper Headboard Upper Footboard
CLower Headboard
Mattress Support
DLower Footboard
Left Day Bed Cap Right Day Bed Cap
KAllen Wrench
I2x Headboard Brace J
E2x Crib Side

5
A. Line up the Upper Headboard (A) with the Lower Headboard (C).
B. Align the two screws connecting the two parts of the headboard and tighten with the allen
wrench.
C. Line up the screws on a Headboard Brace (I) with the holes on the back of the headboard
and tighten with the allen wrench. Repeat for the other side.
Step 1:
(I) Headboard Brace
Thread and tighten three
screws (both sides)
(I) Headboard Brace
(A) Upper Headboard
Thread and tighten
three screws
(C) Lower Headboard

6
A. Line up the Crib Sides (E) with the headboard. The mattress support holes on the crib
sides should be facing the inside of the crib.
B. Align the screws with the holes in the headboard and tighten with the allen wrench. Repeat
for the other side.
Step 2:
Thread and tighten four
screws (both sides)
(E) Crib Side
(E) Crib Side
Mattress support holes
should face the inside of
the crib
Headboard

7
A. Flip the mattress support so the “This Side Up” label is facing up. If the label is missing, the
correct orientation is with the springs at the top of the frame. The mattress support arms
should be above the mattress support.
B. With a helper to hold it at the right height, align the screws on the Mattress Support (F)
with the holes on the crib sides and tighten with the allen wrench. There are three possible
height positions. The support should start at the high position for newborns, then be moved
lower as the child grows and becomes more mobile. Once the child is able to pull up to a
standing position, the support must be set to its lowest position.
Step 3:
(F) Mattress Support
Label reading “This Side Up” should be
facing up
Low Position
Middle Position
High Position
Thread and tighten
all four screws
Mattress support arms should be
above the mattress support

8
A. Place the Lower Footboard (D) against the crib sides.
B. Turn the two bottom screws into the lower footboard holes, but don’t tighten them yet.
C. Place the Upper Footboard (B) on top of the lower footboard.
D. Turn the two upper screws into the upper footboard holes, but don’t tighten them all the
way yet. Repeat for the other side.
E. Once all the screws are started, tighten them all with the allen wrench.
Step 4:
Thread and tighten all
four screws (both sides) ( D) Lower Footboard
(B) Upper Footboard

9
A. Undo the four screws attaching the Upper Footboard (B) to the Crib Sides (D & E) and
remove the upper footboard. There are two screws on each side. It is not necessary to totally
remove them from the crib sides, just loosen until footboard can be removed.
B. Adjust the Mattress Support (F) to its lowest position, using the procedure shown in Step
2.
C. Place the Left Day Bed Cap (G) against the Left Crib Side (D) (the extra two threaded
holes should face the inside of the crib as shown), align the two screws with the holes on the
cap, and tighten with the allen wrench.
D. Repeat for the Right Day Bed Cap (H).
Converting to a Day Bed:
(G Left Day Bed Cap
(F) Mattress Support Should
be set to lowest position
Toddler guard rail holes
should face inside
(H) Right Day Bed Cap
(B) Upper Footboard
(E) Left Crib Side
Undo both screws on
each side

10
Instructions d'assemblage pour lit de
bébé transformable Brooklyn
LISEZ TOUTES LES INSTRUCTIONS AVANT D’ASSEMBLER DE LA COMMODE. CONSERVES CES INSTRUCTIONS
POUR POUVOIR LES CONSULTER ULTÉRIEUREMENT.
LISEZ ATTENTIVEMENT LES INSTRUCTIONS AVANT LE MONTAGE.
Fabriqué par:
Kolcraft Enterprises Inc.
1100 W Monroe St
Chicago, IL 60607
www.kolcraft.com
(800) 453-7673
Enregistrez la date de fabrication et le numéro
de l’étiquette du produit ici:

11
RESPECTEZ LES AVERTISSEMENTS ET INSTRUCTIONS D'ASSEMBLAGE SUIVANTS POUR ÉVITER LE RISQUE
DE BLESSURES GRAVES OU MORTELLES.
¢LISEZ TOUTES LES INSTRUCTIONS AVANT D'ASSEMBLER LE LIT DE BÉBÉ. CONSERVEZ CES
INSTRUCTIONS POUR POUVOIR LES CONSULTER ULTÉRIEUREMENT.
¢N'UTILISEZ JAMAIS LES EMBALLAGES DE PLASTIQUE D'EXPÉDITION OU LES AUTRES PELLICULES EN
PLASTIQUE POUR RECOUVRIR LE MATELAS, CAR CES MATÉRIAUX REPRÉSENTENT UN RISQUE DE
SUFFOCATION.
¢POUR RÉDUIRE LE RISQUE DU SYNDROME DE MORT SUBITE DU BÉBÉ, LES PÉDIATRES
RECOMMANDENT DE COUCHER LES BÉBÉS EN SANTÉ SUR LE DOS, SAUF SUR AVIS CONTRAIRE DE VOTRE
MÉDECIN.
¢LA LITERIE SOUPLE REPRÉSENTE UN RISQUE DE SUFFOCATION POUR LES BÉBÉS. N'AJOUTEZ JAMAIS
D'OREILLER OU D'ÉDREDON. NE PLACEZ JAMAIS UN COUSSINET ADDITIONNEL SOUS UN BÉBÉ.
RISQUE D'ÉTRANGLEMENT
¢LES CORDONS REPRÉSENTENT UN RISQUE D'ÉTRANGLEMENT! NE PLACEZ JAMAIS D'ARTICLES À
CORDON AUTOUR DU COU D'UN ENFANT COMME DES CORDONS DE CAPUCHON OU DE SUCETTE. NE
SUSPENDEZ PAS DE CORDONS AU-DESSUS D'UN LIT DE BÉBÉ OU D'ATTACHER DES CORDONS AUX
JOUETS.
¢SERREZ TOUTES PIÈCES DE FIXATION AFIN DE PRÉVENIR L'ÉTRANGLEMENT. DES PARTIES DU CORPS
DE L'ENFANT OU DE SES VÊTEMENTS PEUVENT SE COINCER DANS DES PIÈCES DE FIXATION LÂCHES.
¢NE PLACEZ PAS LE LIT DE BÉBÉ PRÈS D'UNE FENÊTRE OÙ LES CORDONS D'UN STORE OU D'UN RIDEAU
RISQUENT D'ÉTRANGLER L'ENFANT.
RISQUE DE CHUTE
¢LORSQU'UN ENFANT EST CAPABLE DE POUSSER LORSQU'IL EST DEBOUT, AJUSTEZ LE MATELAS À LA
POSITION LA PLUS BASSE ET RETIREZ LES BORDURES COUSSINÉES, LES GROS JOUETS ET AUTRES OBJETS
POUVANT SERVIR À GRIMPER ET SORTIR DU LIT.
¢N'UTILISEZ PLUS LE LIT DE BÉBÉ LORSQUE L'ENFANT COMMENCE À GRIMPER OU A ATTEINT UNE
GRANDEUR DE 89 CM (35 PO).
¢ASSUREZ-VOUS QUE LA QUINCAILLERIE EST INTACTE, QUE LES JOINTS SONT SERRÉS, QUE LES
BOULONS ET AUTRES PIÈCES DE FIXATION SONT SERRÉS, QUE TOUTES LES PIÈCES SONT INSTALLÉES, QUE
LES BORDS NE SONT PAS COUPANTS AVANT ET APRÈS L'ASSEMBLAGE ET PÉRIODIQUEMENT PENDANT
L'UTILISATION DU LIT. SERREZ FERMEMENT TOUS LES BOULONS ET TOUTES LES PIÈCES DE FIXATION
LÂCHES. N'UTILISEZ PAS LE LIT POUR BÉBÉ SI L'UNE DES PIÈCES EST MANQUANTE, ENDOMMAGÉE OU
BRISÉE. COMMUNIQUEZ AVEC KOLCRAFT ENTERPRISES, INC (www.kolcraft.com/customer-service/contact-
kolcraft) POUR OBTENIR DES PIÈCES DE RECHANGE ET LES INSTRUCTIONS, LE CAS ÉCHÉANT. NE
SUBSTITUEZ AUCUNE PIÈCE.
¢POUR REPEINDRE, UTILISEZ UN FINI NON TOXIQUE DESTINÉ AUX PRODUITS POUR ENFANT.
¢RESPECTEZ TOUS LES AVERTISSEMENTS DE TOUS LES PRODUITS UTILISÉS AVEC LE LIT.
¢LES ESPACES ENTRE LES CÔTÉS DU LIT ET UN MATELAS TROP PETIT REPRÉSENTENT UN RISQUE DE
SUFFOCATION POUR LES BÉBÉS.
¢TOUS LES MATELAS UTILISÉS DANS CE LIT DOIVENT MESURER AU MOINS 69 CM (27 1/4 PO) PAR 131
CM (51 5/8) ET AVOIR UNE ÉPAISSEUR NE DÉPASSANT PAS 15 CM (6 PO). LES DIMENSIONS DU MATELAS
DOIVENT ÊTRE PRISES D'UNE COUTURE À L'AUTRE.
¢PRÉVENTION DES BRÛLURES. GARDER LE LIT LOIN DES FEUX À CIEL OUVERT ET DES AUTRES SOURCES
DE CHALEUR.
AVERTISSEMENT

12
Soin et Entretien
l Lorsque vous aurez terminé l'assemblage, assurez-vous que toutes les vis et que tous les
boulons sont vissés correctement. Avec le temps, il est possible que le matériel se desserre, il
est donc de votre ressort de vérifier que toutes les fixations sont bien serrées et ce aussi
longtemps que vous utiliserez les meubles pour chambre d'enfants.
l Comme le bois est un matériau naturel, il peut être affecté par les variations de température et
d'humidité. Des changements de température et d'humidité extrêmes peuvent amener le bois à
se gondoler, à gonfler, à se lézarder ou à rétrécir. Ceci pourrait endommager la structure du
meuble et rendre son utilisation dangereuse.
l Les meubles doivent toujours être entreposés à l'intérieur, à l'abri de l'humidité et des
variations de température. Faites attention lorsque vous utilisez un vaporisateur ou un
humidificateur près du meuble. N'envoyez pas de vapeur directement sur le berceau ou sur
d'autres meubles en bois dans la chambre d'enfants. N'utilisez pas de vaporisateurs ou
d'humidificateurs pendant des périodes prolongées.
l Pour nettoyer le meuble, frottez-le à l'aide d'un chiffon humide puis séchez immédiatement la
surface. N'utilisez pas de produits de nettoyage ou de polissage chimiques. Ces produits
pourraient laisser des résidus sur la finition et entrer en contact avec votre enfant.
l Votre meuble possède un fini protecteur et non toxique durable. Cependant, si vous décidez de
refaire la finition, utilisez des produits non toxiques conçus spécifiquement pour les meubles
pour enfants. N'utilisez pas d'agents décapants toxiques pour enlever l'ancienne finition.
l Pour un assemblage correct, veuillez consulter le manuel d'instruction de votre meuble. Vous
pourrez télécharger les manuels d'instruction sur les sites suivants : Kolcraft.com.

13
Garantie Limitée sur les Meubles
pour Chambre d'Enfants Kolcraft
Nous vous remercions d'avoir acheté un meuble pour chambre d'enfants conçu par Kolcraft Enterprises, Inc,
incluant Mira Studios, Payson Studios, Sealy ou toute autre marque de fabricant qui s'y rattache.
Quelle est la garantie de mes meubles pour chambre d'enfants?
Kolcraft Enterprises, Inc. garantie que tous les meubles pour chambre d'enfants sont exempts de défauts de
matériel ou de fabrication à partir de la date de l'achat chez un détaillant ou distributeur autorisé. Tous les
meubles pour chambre d'enfants possèdent une garantie d'UN AN à partir de la date d'achat.
Que fera Kolcraft Enterprises, Inc?
Kolcraft réparera ou remplacera, à sa discrétion, le produit défectueux. Si vous avez un problème avec ce
produit ou si vous n'en êtes pas satisfait, veuillez contacter le service à la clientèle de Kolcraft. La réparation
ou le remplacement selon les termes de la garantie constitue le recours exclusif à la disposition du client.
Sous réserve de dispositions contraires de la loi en vigueur, Kolcraft ne peut être tenu responsable des
dommages accessoires ou consécutifs causés par la violation de la garantie expresse ou implicite de ce
produit. Certains États ne permettant pas l'exclusion ou la limitation des dommages accessoires ou
consécutifs, cette limitation ou exclusion peut ne pas vous être applicable. Cette garantie vous accorde des
droits spécifiques; vous pourriez aussi avoir d'autres droits qui varient d'un État à l'autre (d'une province à
l'autre).
Toute garantie implicite de commercialisation ou d'adaptation à un usage particulier sur ce produit est limitée
à la durée de vie de la garantie.
Que couvre la garantie des meubles pour chambre d'enfants?
Le fabricant garantit que toutes les pièces de la structure de ce produit incluant la quincaillerie, les joints, les
boulons et les dispositifs mécaniques sont exempts de défauts dans le cadre d'un usage domestique normal
et seront échangés ou réparés gratuitement pendant UN AN à compter de la date d'achat. Vous devez être le
propriétaire d'origine de l'article et devez l'utiliser de façon adéquate et avoir suivi les consignes d'entretien
qui se trouvent dans la section 2, ci-dessous. Des renseignements sur les meubles pour chambre d'enfants
ou des photographies de ceux-ci peuvent être demandés afin de vérifier le modèle et leur état.
Qu'est-ce qui n'est pas couvert par la garantie des meubles pour chambre d'enfants?
La garantie ne couvre pas les dommages causés par la négligence, une mauvaise utilisation, les dommages
accidentels ou l'usage commercial de ce produit. La garantie ne couvre pas le fini ou la couche de peinture et
n'est limitée qu'à la réparation ou au remplacement des éléments défectueux. Les produits achetés chez un
détaillant ou un distributeur non autorisé, les modèles de plancher ou les achats d'occasion ne sont pas
couverts par la garantie.
Que se passe-t-il si je suis un client n'habitant pas aux États-Unis?
Les garanties des produits ne sont valables que dans le pays où sont effectués les achats.
Kolcraft Enterprises, Inc se réserve le droit de refuser d'envoyer tout produit ou pièce de rechange dans des
pays où ces produits ne sont pas conformes aux règlementations locales, et ce même si le produit d'origine a
été acheté aux États-Unis. La livraison de produits de rechange conformes aux règlements locaux peut
encourir des frais. De plus, ces produits sont sujets aux droits de douane, aux taxes et autres impositions
exigées dans le pays où ils sont envoyés. Si le produit a été vendu par un distributeur non autorisé,
Kolcraft Enterprises, Inc fournira les renseignements nécessaires sur les distributeurs et le remplacement
pourrait n'être effectué que par votre distributeur local.

14
Garantie Limitée sur les Meubles
pour Chambre d'Enfants Kolcraft
Comment puis-je contacter Kolcraft Enterprises, Inc à propos du service de garantie?
Pour obtenir le service de garantie, veuillez contacter le service à la clientèle Kolcraft. Si vous retournez le
produit au service de consommation de Kolcraft pour réparation ou remplacement, vous devez l'assurer
suffisamment et payer les frais de poste.
Pour tout commentaire, question ou demande, veuillez-vous adresser à : Service à la clientèle
Kolcraft Enterprises, Inc., 1100 West Monroe Street, Chicago, IL 60607, 1 800 453-7673 pour les États-Unis
et le Canada, 1 312 361-6315 pour les autres pays, du lundi au jeudi entre 8 h 00 et 17 h 00 et le vendredi
entre 8 h 00 et 15 h 00. Heure normale du Centre.

15
G
E
B
A
D
H
F
Barre droite pour lit
de repos
Pied de lit relevé
Pied de lit inférieur
Barre gauche pour
lit de repos
Pièces du lit pour bébé :
Tête de lit relevé
Support de matelas
2x Côtés de lit
KClé hexagonale
ISupport de la Tête de lit
CTête de lit inférieur

16
A. Alignez la tête de lit supérieure (A) avec la tête de lit inférieure (C).
B. Alignez les deux vis qui relient les deux parties de la tête de lit et serrez avec la clé allen.
C. Alignez les vis sur un support de tête de lit (I) avec les trous à l'arrière de la tête de lit et
serrez avec la clé allen. Répétez l'opération pour l'autre côté.
Étape 1:
Serrez les trois vis
(C) Tête de lit inférieure
(A) Tête de lit supérieure
(I) Support de tête de lit
Serrez les trois vis
(I) Support de tête de lit

17
A. Alignez les côtés du lit de bébé (E) avec la tête de lit. Les trous du support de matelas sur
les côtés du lit pour bébé doivent être dirigés vers l'intérieur du lit pour bébé.
B. Alignez les vis avec les trous de la tête de lit et serrez avec la clé hexagonale.
Répétez l'étape pour l'autre côté.
Étape 2 :
Vissez et serrez les quatre vis
(de chaque côté)
(E) Côté de lit de bébé (E) Côté de lit de bébé
Les trous du support de
matelas sur les côtés du
lit pour bébé doivent être
dirigés vers l'intérieur du
lit pour bébé.
Tête de lit

18
A. Retournez le support de matelas de manière à ce que l'étiquette « This Side Up » soit placée sur
le dessus. S'il n'y a pas d'étiquette, la bonne position est déterminée lorsque les ressorts se
trouvent au haut du cadre. Les bras de support de matelas doivent être au-dessus du support de
matelas.
B. Avec l'aide d'une personne qui tient la pièce à la bonne hauteur, alignez les vis du support de
matelas (F) avec les trous sur les côtés du lit de bébé et serrez avec la clé hexagonale. Il y a trois
positions de hauteur possibles. Le support doit être placé à la position la plus élevée pour les
nourrissons puis abaissez au fur et à mesure que l'enfant grandit et bouge plus. Dès que l'enfant
est capable de se lever et se tenir debout, le support doit être placé à la position la plus basse.
Étape 3 :
(F) Support de matelas
L'étiquette « This Side Up » doit être placée
sur le dessus.
Position basse
Position du milieu
Position élevée
Vissez et serrez les
quatre vis
Les bras de support de matelas doivent
être au-dessus du support de matelas

19
A. Placez le pied de lit inférieur (D) contre les côtés du lit pour bébé.
B. Tournez les deux vis du bas dans les trous du pied de lit inférieur, mais sans les serrer.
C. Placez le pied de lit supérieur (B) sur le dessus du pied de lit inférieur.
D. Tournez les deux vis du haut dans les trous du pied de lit supérieur, mais sans les serrer
complètement. Répétez l'étape pour l'autre côté.
E. Après avoir commencé le vissage de toutes les vis, serrez-les toutes avec la clé hexagonale.
Étape 4:
Vissez et serrez les quatre
vis (de chaque côté) (D) Pied de lit inférieur
(B) Pied de lit supérieur
Table of contents
Languages:
Other Kolcraft Indoor Furnishing manuals
Popular Indoor Furnishing manuals by other brands

Regency
Regency LWMS3015 Assembly instructions

Furniture of America
Furniture of America CM7751C Assembly instructions

Safavieh Furniture
Safavieh Furniture Estella CNS5731 manual

PLACES OF STYLE
PLACES OF STYLE Ovalfuss Assembly instruction

Trasman
Trasman 1138 Bo1 Assembly manual

Costway
Costway JV10856 manual