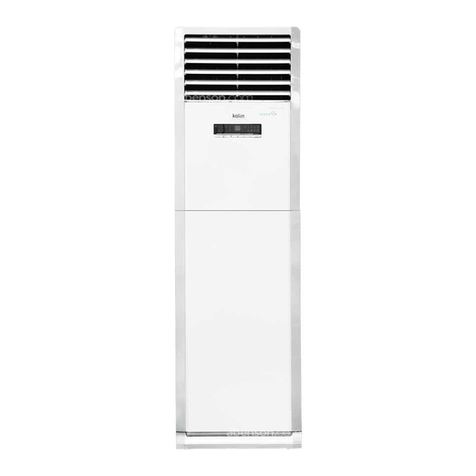
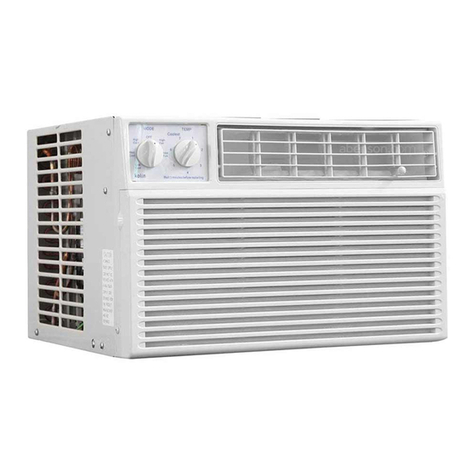
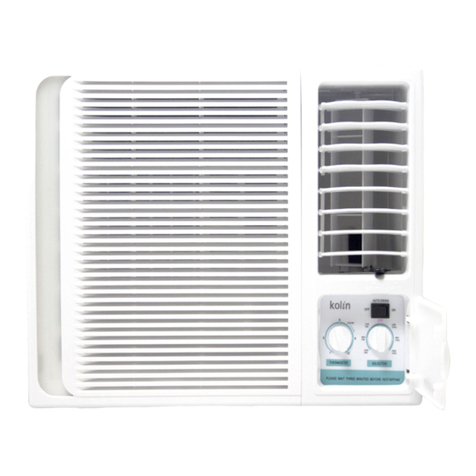
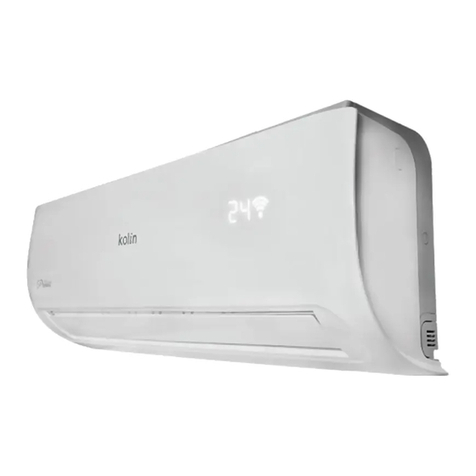
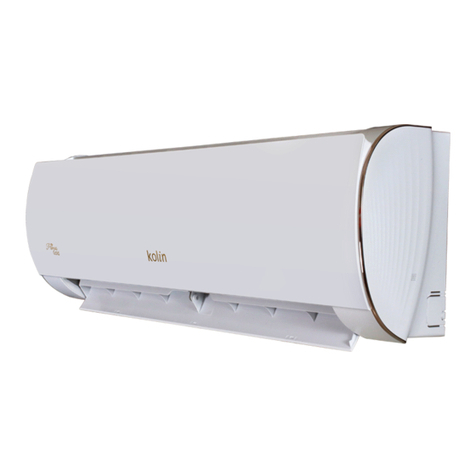
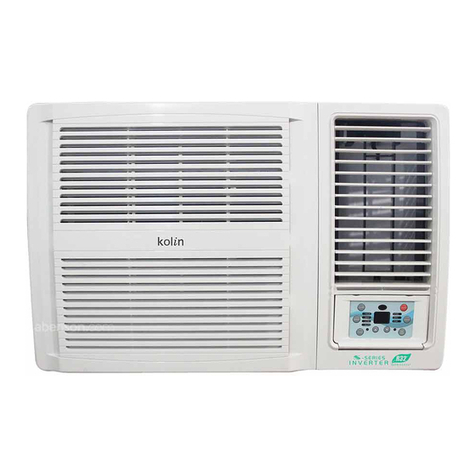
Kolin Quad Series User manual

air conditioner
works
for
years
OWNER’S MANUAL
www.kolinphil.com.ph
Thank you for choosing our air conditioner. Please read this owner’s
manual before operation and retain it for future reference. If you have lost
this manual, please contact our nearest service center or visit our website.
WINDOW TYPE AIR CONDITIONER
FULL DC
INVERTER
s e r i e s

KAG-250WCINV
KAG-200WCINV
KAG-145WCINV
KAG-100WCINV
KAG-75WCINV
MODELS:

Structure mechanism and Installation
The Refrigerant 1
Function 6
Precautions 5
7
8
Power requirement
Installation
Notes for installation 11
Operation procedure
12
12
13
17
18
Care and maintenance
19
21
22
23
CONTENTS
Thank you for choosing the air conditioner.Our design is based on the best eff-
24
iciency and the lowest noise operation and it can keep the room comfortable.
Please read this operating manual carefully before operating the unit and keep it
for consultation.
Caution
Care and maintenance
Troubleshooting guide
After service
Please read this operating manual carefully before operating the unit.
Air direction adjustment
Remote control panel
Operation Tips
Thank you for choosing our air conditioner. Our design is based on the best
efficiency, lowest noise operation and keeping the room more comfortable.
Please read this operating manual carefully before operating the unit and keep
it for reference.
Remote Control Operation Procedure
Before using the appliance, read the owner’s manual first.
Before installing the appliance, read the installation manual first.
Before repairing the appliance, read the service manual first.
Illustrations on this manual may be different from the actual appearance of the
actual material or object.
This appliance is not intended for use by persons (including children) with reduced
physical, sensory or mental capabilities or lack of experience and knowledge unless
supervised or instructed by a person responsible for their safety.

This appliance is not intended for use by persons (including children)
with reduced physical, sensory or mental capabilities or lack of experience
•Do not use means to accelerate the defrosting process or to clean, other than
those recommended by the manufacturer.
•The appliance shall be stored in a room without continuously operating ignition
sources (for example: open flames, an operating gas appliance or an operating
electric heater).
•Do not pierce or burn.
•Be aware that the refrigerants may not contain an odour.
•Appliance should be installed, operated and stored in a room with a floor area
2
larger than 4 m .
•Compliance with national gas regulations shall be observed.
•Keep ventilation openings clear of obstruction.
•The appliance shall be stored so as to prevent mechanical damage from
occurring.
•A warning that the appliance shall be stored in a well-ventilated area where the
room size corresponds to the room area as specified for operation.
•Any person who is involved with working on or breaking into a refrigerant circuit
should hold a current valid certificate from an industry-accredited assessment
authority, which authorises their competence to handle refrigerants safely in
accordance with an industry recognised assessment specification.
•Servicing shall only be performed as recommended by the equipment
manufacturer. Maintenance and repair requiring the assistance of other skilled
personnel shall be carried out under the supervision of the person competent in
the use of flammable refrigerants.
Explanation of symbols displayed on the unit ( For the unit adopts R32/R290 Refrigerant only):
WARNING
CAUTION
This symbol shows that this appliance used a flammable refrigerant.
This symbol shows that the operation manual should be read carefully.
This symbol shows that a service personnel should be handling this equipment with reference to
installation manual.
This symbol shows that information is available such as the operating manual or installation manual.
CAUTION
CAUTION
- 1 -
!
WARNINGS (for using R290/R32 refrigerant only):
The units therefore need a less filling.
has a better thermodynamic features which leads to a high energy efficiency.
to the ozonosphere. The influence upon the greenhouse effect is also lower. R32
•
Compared to common refrigerants, R32 is a nonpolluting refrigerant with no harm
low. It can be ignited only by fire.
explosion under certain conditions. But the flammability of the refrigerant is very
The refrigerant is flammable and inodorous. Furthermore, it can leads to
the system. The used refrigerant is the fluoride R32, which is specially cleaned.
•
To realize the function of the air conditioner unit, a special refrigerant circulates in
The Refrigerant

i.e. non-sparking, adequately sealed or intrinsically safe.
the leak detection equipment being used is suitable for use with all applicable refrigerants,
The area shall be checked with an appropriate refrigerant detector prior to and during work,
●Checking for presence of refrigerant
– that there is continuity of earth bonding.
purging the system;
– that no live electrical components and wiring are exposed while charging, recovering or
of sparking;
– that capacitors are discharged: this shall be done in a safe manner to avoid possibility
to ensure the technician is aware of potentially toxic or flammable atmospheres. Ensure that
●Initial safety checks shall include:
This shall be reported to the owner of the equipment so all parties are advised.
necessary to continue operation, an adequate temporary solution shall be used.
satisfactorily dealt with. If the fault cannot be corrected immediately but it is
safety, then no electrical supply shall be connected to the circuit until it is
and component inspection procedures. If a fault exists that could compromise
●Repair and maintenance to electrical components shall include initial safety checks
being corroded or are suitably protected against being so corroded.
unless the components are constructed of materials which are inherently resistant to
be exposed to any substance which may corrode refrigerant containing components,
– Refrigeration pipe or components are installed in a position where they are unlikely to
illegible shall be corrected;
– Marking to the equipment continues to be visible and legible. Markings and signs that are
the presence of refrigerant;
– If an indirect refrigerating circuit is being used, the secondary circuit shall be checked for
– The ventilation machinery and outlets are operating adequately and are not obstructed;
containing parts are installed;
– The charge size is in accordance with the room size within which the refrigerant
The Refrigerant
● The following checks shall be applied to installations using flammable refrigerants:
- 2 -

-3 -
● Maintenance notes
1. Check whether the maintenance area or the room area meet the requirements of
the nameplate.
- It’s only allowed to be operated in the rooms that meet the requirements of the
nameplate.
2. Check whether the maintenance area is well-ventilated.
- The continuous ventilation status should be kept during the operation process.
3. Check whether there is fire source or potential fire source in the maintenance
area.
4. Check whether the appliance mark is in good condition.
- Replace the vague or damaged warning mark.
Minimum
room
area( m 2)
Charge amount (kg) ≤1.2 2.52.42.32.22.121.91.81.71.61.51.41.3
oor location 53.649.445.441.537.834.33127.824.82219.316.814.5/
19.317.816.31513.612.411.2108.97.976.15.2/window mounted
65.554.64.23.83.43.12.82.42.11.91.6/wall mounted
43.73.43.12.82.62.32.11.81.61.41.31.1/ceiling mounted
table- Minimum room area (m2)
3.
Leak test is a must after installation.
room area.
2.
The air conditioner must be installed in a room that is larger than the minimum
as re source, working coal gas ware, operating heater).
1.
The air conditioner is not allowed to use in a room that has running re ( such
●
Installation notes
manufacturer.
2.
It can only be repaired by the method suggested by the equipment’s
by the person who bears the qualication for using the ammable
refrigerant.
other technician to maintain and repair the appliance, they should be supervised
for dealing with the refrigeration system recognized by this industry. If it needs
valid certication awarded by the authoritative organization and the qualication
1.
All the work men who are engaging in the refrigeration system should bear the
●
Qualication requirement for installation and maintenance man
The Refrigerant
The minimum room area is shown on the nameplate or following table.

- 4 -
●The refrigeration equipment
Where electrical components are being changed, they shall be fit for the
purpose and to the correct specification. At all times the manufacturers maintenance
and service guidelines shall be followed. If in doubt, consult the manufacturer
technical department for assistance.
●
●
Relation to electrical devices
Repair and maintenance to electrical components shall include initial safety
checks and component inspection procedures.
Initial safety checks shall include:
●
●
That capacitors are discharged: this shall be done in a safe manner to avoid
possibility of sparking;
That no live electrical components and wiring are exposed while charging,
recovering or purging the system;
That there is continuity of earth bonding
The Refrigerant

If it needs to install, move or maintain the air conditioner, please contact dealer or
local service center to conduct it at first. Air conditioner must be installed, moved or
maintained by appointed unit. Otherwise, it may cause serious damage or personal
injury or death.
When refrigerant leaks or requires discharge during installation, maintenance, or
disassembly, it should be handled by certified professionals or otherwise in compli -
ance with local laws and regulations.
Working temperature range
※
32/23 43/-
Indoor side DB/WB(°C)
Maximum cooling
Operating Temperature Range
Outdoor side DB/WB(°C)
The operating temperature range (outdoor temperature) for cooling is 18°C~ 43°C.
For installation and maintenance of the air conditioner, please contact your dealer or any
authorized service center to conduct it at first. The air conditioner must be installed, moved
or maintained by an authorized personnel, otherwise it may cause serious damage, personal
injury or death.
Warning
Precautions
- 5 -
circuit breaker.
According to the local safety regulations, use qualified power supply circuit and
tion when installing the air conditioner.
Please install the devices for short-circuit protection and electrical leakage protec
-
cause injury or damage.
Maintenance must be performed by qualified professionals otherwise,it may
Please contact your nearest authorized service center to repair your air conditioner.
Do not repair the air conditioner by yourself. It may cause electric shock or damage.
cause electric shock.
Disconnect the power supply when cleaning air conditioner. Otherwise, it may
Do not block the air outlet or air inlet. It may cause malfunction.
or
personal injury.
Do not step on or put heavy objects on the air conditioner. It may cause damage
or injury.
Do not extend fingers or any objects into air inlet or air outlet. It may cause damage
Do not spray water on air conditioner. It may cause electric shock or malfunction.
Do not spill water on the remote controller, otherwise it may result control failure
Do install an air switch. If not, it may cause malfunction.
cause fire hazard.
Do not connect the air conditioner to multi-purpose socket otherwise, it may
shock.
Conditioner
should be properly grounded. Incorrect grounding may cause electric
air conditioner should be installed in accordance with national wiring regulation.Air
Cleaning and troubleshooting shall not be made by children without supervision.The
prohibited from playing with the appliance.
appliance in a safe way and understand the hazards involved. Also, children should
knowledge if they have been given supervision or instruction concerning use of the
with reduced physical, sensory or mental capabilities, or lack of experience and
This appliance can be used by children aged from 8 years and above and persons
-6-
Function
Introduction
Window type room air conditioners can
regulate the room temperature and dry
the room. It is convenient for your work, study
and life. It can be widely used in residences,
shops, hotels, offices, libraries and
laboratories and so on.
Room
temp.
Spring Autumn
Winter
Wind
direction
Summer
Cooling in summer Dehumidifying in rainy or
humid season
In hot summer, Air conditioner can
cool down the room air by
transferring the heat out.
Without reducing the room temp., air
conditioner can dehumidify and make
the room air dry and comfortable.
Dry
Window-type room air conditioners can regulate the
room temperature and dry the room.
It is convenient for your work, study, and daily life.
It can be widely used in residences, shops, hotels,
offices, libraries, and laboratories, etc.

-7 -
Power requirement
Rated voltage : 230V~ 60Hz
To ensure the reliable earthing, please do not connect earth
wire to the following places:
Earth wire
Water pipe
protection switch of enough power capacity
and air switch with enough space.
components not work.
easily cause the
compressor and electric
which may damage the refrigerant system and
too low,the compressor will vibrate violently
when
the voltage is too high.If the voltage is
●
The electric components will be damaged
reliable.
regulations and the earthing method must be
socket and wiring must conform to the wiring
●
A special socket must be used. Furthermore, the
The ground must be connected.

Installation
Location:
The condensation water must be drained away conveniently.
Install the air conditioner unit far away from TV set or radio etc. to avoid
shower or a swimming pool.
that is far away from electromagnetic disturbance. Contact the seller
in advance to avoid the unit from malfunctioning.
Don't use the unit in the immediate surroundings of a laundry,a bath,a
How to install:
Choose a location where there are
no any obstacle surrounding the
unit, and the plug is accessible.
cording to the following diagram.
Over
1500 mm
500mm 500mm
300mm
300mm
video or voice disturbance.
In salty and coastal areas or places near from thermal springs and
polluted by sulphurous gas, or any special areas, please contact the
seller before using
Otherwise, will not be responsible for the possible damage on the unit.
Service Center near you to install the unit and don't install it by yourself.
place where it is easy for children to reach.
Avoid other heat sources or direct sun light.
Avoid a
(rear
side)
.
1500mm(front
side)
and
over
500mm
side),
over
500mm
(righ
tside),
over
300mm
(upper side), over 500mm (left
conditioner
and
the obstacles
should
The
distance
between
the
air
Please contact Kolin Service Hotlines or Kolin Authorized
Avoid a place where it is possible for inflammable gas to leak out.
conditioner can cause a lot of damage.
Improper installation for window type air
Installation precaution:
meet
the
requirement
asbelow:
over
- 8 -
htly bigger than the unit size.

-9 -
Installation procedure:
Remove the sticker from the front panel.
1)
Put the unit into the installation hole.2)
The installation place should be strong
enough to avoid the enlargement of
noise or vibration.
Installation assistance:
Wall Sunshade
board
Rubber
plate
Support
Horizontal line
●
condensation water can be drain
When installing the unit, it should slant
down to the back to make sure the
away conveniently.(Slant about 3
(Shown at right figure.)
。
ed 。
1 )
+
-
。 。
+
-
3 1
mandatory
fixed
on the building (shown at the right
not, iron support / bracket has to be used
enough to support the air conditioner.if
figure).Using an iron support / bracket is
outdoors then the iron support should be
inlet at the side grille.
sunshade
board,
don’t
let it block the air
The installation hole should be strong
●Use Iron Support
Using a sunshade board is optional though
●
Use Sunshade Board
sponge
or foam.
3)
Fill up the sews in the cabinet with
●
sunshade board. When installing the
should contact the
seller
for
installing the
sunlight. If there is no cover on it,you
be dropped into it and avoid direct
an air conditioner
should
avoid
anything to

-10 -
Drain water :
Drain pan and drain hose need to be installed before using. If drain hose is
not included in the product, you need to purchase it locally to satisfy your
particular needs. Use the following procedure to install drain pan and drain
hose.
1. Slide out the chassis from the cabinet.
2. Install the drain pan to the corner of the cabinet with 2 screws.
3. Connect the drain hose to the outlet on the drain pan bottom.
4. Slide the chassis into its original place in the cabinet.
To obtain maximum cooling efficiency , the air conditioner is designed to
splash the condensation water on the condenser coil . If the splashing sound
annoys you , you can remove the rubber plug from the chassis to lower the
noise, which also causes a bit of loss of performance.

-11 -
Notes for installation
Noise
● Don’t pull the power cord forcibly.
● Air switch (thermal-magnetic breaker) should be installed in the circuit.
● If the supply cord is damaged,it must be replaced by the manufacturer or
● done according to the local wiring regulations.
● Install in a location where it is strong enough to avoid
increase of noise and vibration.
● Use correct power outlet for air conditioner. Do not use plug
adaptor because it can overheat and cause fire.
All the electrical work must be
addition, charges to this must be paid.
the direction of an Authorized Kolin Technician. In
contact the seller first. Then it must be done under
Before relocating the air conditioner, you should
Relocate
●
Please use the safety support.
●
Please contact the seller as soon as there is strange noise during operation.
●
Be sure that the hot air or noise will not cause inconvenience to the neighbors.
to avoid increasing of noise.
●
Don’t put anything in front of the outlet of the unit
●
An all-pole disconnection switch having a contact separation of at least 3mm
regulation.
●The air conditioner should be installed in accordance with national wiring
with wiring diagram on the unit.
necting method of each individual element with one another should accord
●
Connecting method between air conditioners and power cord and intercon-
and leakage current should be less than 30mA.
●
Must be connected with ground reliably.
Electric wiring

- 12 -
Air direction adjustment
Remote
control
panel
Air inlet
louver
Cabinet
Front intake
grille
(behind the
front intake
grille)
Panel outlook picture, just for reference, please take the real unit as standard.
Horizontal Louver
upwards,
downwards or straight out.
positioning manually the louver to discharge the air
The Horizontal Louver is controlled by

- 13 -
Remote control operation procedure
Dry HeatCoolAuto
Fan
Only
1On/Off button
Press this button to turn on the unit.
Press this button again to turn off the unit.
2
●Cool: Under this mode, air conditioner operates under cooling mode. Cooling
indicator will be on. Press “Fan Speed” button can adjust the fan speed.
●Auto: Under this mode, the unit will operate automatically according to
1On/Off button
2Mode button
3
4Swing button
5Fan button
6Sleep button
7Timer button
8Health button
9 WiFi button
2
4
7
9
8
6
5
3
1
+ / - button
Note: This is a general use remote controller for air conditioners. For some
function, which the model doesn't have, if the corresponding button on the
remote controller was pressed the unit will just keep its original running status.
the ambient temperature. In this case, set temperature cannot be adjusted.
Mode Button
(for some models only)
selecting.
below. A corresponding icon will appear on the remote display after
You can select your preferred operation mode on the following illustration

, , to then back to Auto.
Auto
Speed 2Speed 1
Speed 3
reached..
on dual-8 nixie tube will change quickly. Release the button once the set time is
●
Under timer setting status, after each press of “+” or “-” button, time will
Release the button after your required
set temperature is reached.
quickly.
Hold “+” or “-” button for 2s, set temperature on remote controller will change
- 14 -
heating function) mode to maintain the most comfortable temperature for you.
this function. This function is available in COOL, HEAT (Only for models with
Press this button to go into the Sleep operation mode. Press it again to cancel
6
Sleep button
NOTE: There are 3 speed levels of fan mode for this model.
This button is used for setting Fan Speed in the sequence that goes from AUTO,
5
Fan button
Press this button to turn “ON” & “OFF” swing.
4
Swing button
increase or decrease
by
0.5h (30 minutes) . Hold the “
+
” or “-” button, 2s then later, the time displayed
by 1°F(°C).
●
Pressing “+” or “-” button once will increase or decrease set temperature
3
+ / - button
Note:
This mode is applicable in some units only.
remote controller or manually press the ON/OFF button to start the unit again.
mode, the unit will not start. Under ON status, change the mode setting on the
speed can
be
adjusted under this mode. If the unit was turned off while under heat
●
Heat:
Under this mode, the air conditioner will operate under heating mode. Fan
settings.
run to
circulate
the
air. Fan indicator will be on. Press “Fan” button to
adjust the fan
●
Fan Only:
Under this mode, air conditioner will not cool or heat, only the fan will
corresponding indicator is on; under dry mode, the fan speed cannot be adjusted.
●
Dry:
Under this mode, the unit will run in low fan speed for dehumidification and the

LCD displays " ". Press the button for the second time to start health and
scavenging functions simultaneously; LCD displays " " and " ". Press this
button for the third time to quit health and scavenging functions simultaneously.
Press the button for the fourth time to start health function; LCD display " ".
Press this button again to repeat the operation above.
Press "WiFi" button to turn on WiFi function, "WiFi" icon will be displayed on the
● This function is only available for some models.
remote controller;
Hold "WiFi" button for 5s to turn off WiFi function and "WiFi" icon will disappear.
Under off status, press "MODE" and "WiFi" buttons simultaneously for 1s, WiFi
module will restore factory settings.
Function introduction for combination buttons
-15 -
the lamp is defaulted on.
simultaneously to set the lamp on or off and send the code. After being energized
Under switch-on or switch-off state, you may hold "+"and "FAN" buttons
Light function
erature display between °C and °F
Under OFF status, press "-" and "Mode" buttons simultaneously to switch temp-
Temperature display switchover function
Press this button to turn on or turn off the health and scavenging functions in
8
Health button
timer.
status will disengage after 5s.If timer is confirmed, press this button again to cancel
If the characters are flashing but you haven’t press the timer button, timer setting
HOUR ON(OFF) will stop flashing.
0.5~24hours.
Press this button again to confirm timer setting and the characters of
(timewill change quickly if holding “+” or “-” button). Time setting range is
remote display. Meanwhile, press “+” button or “-” button to adjust timer setting
Press this button once and the characters of HOUR ON (OFF) will flash on the
this button to set timer ON.
Under ON status, press this button to set timer OFF; Under OFF status, press
7
Timer button
9
WiFi button
●This function is only available for some models.

-16 -
Replacement of batteries in remote controller
●The distance between signal sender and receiving window should be no more
than 8m, and there should be no obstacles between them.
●
NOTICE
1. Press the back side of remote controller marked
the cover of battery box along the arrow direction.
2. Replace two 7# (AAA 1.5V) dry batteries, and
make sure the position of "+" polar and "-" polar
are correct.
3. Reinstall the cover of battery box.
batterysignal sender
Cover of battery box
remove
reinstall
the
batteries.
●
When you don’t use the remote controller
for a long time, please take out
●
Replace new batteries of the same model when replacement is required.
conditioner when using the remote controller.

- 17 -
2
Select the fan speed LOW, MID, HIGH and AUTO in sequence.
4TEMP/TIMER BUTTON
5MODE BUTTON
6FILTER BUTTON
1ON/OFF BUTTON
Select the operation mode, COOL, DRY, FAN (for reverse cycle model)
Operation starts when pressing this button, and stops when pressing this button again.
Press the keypad to increase the set (operating) temperature of the unit. and
Press the keypad to decrease the set (operating) temperature of the unit. The tem -
perature setting range is from 16~30℃.
Timer can be set by pressing / button. Timer can be set in 0.5hour increments
between 1 and 10 hours, or in 1 hour increments for 10 hours or above after each
push on or button.
This feature is a reminder to clean the Air Filter (See Care and Cleaning) for more
efficient operation and cooling. The LED (light) will illuminate after 250 hours of opera-
tion. To reset after cleaning the filter, press the "Filter" button and the light function
will go off.
Note: If wireless remote control is lost or broken, unit can be manually operated using
its surface display panel.
Control panel
3FAN SPEED BUTTON
Activates the automatic air swing function
SWING BUTTON
This manual suits for next models
5
Table of contents
Other Kolin Air Conditioner manuals

Kolin
Kolin KLG-SF70-4D3M User manual

Kolin
Kolin KEA-60BDRDCA User manual

Kolin
Kolin KAM-55CMC32 User manual

Kolin
Kolin Primus Gold KSG-IWF-10WFY-8K1M32 User manual

Kolin
Kolin KLG-IF40-3D1M User manual

Kolin
Kolin E Series User manual

Kolin
Kolin KLG-SF40-5G1M User manual

Kolin
Kolin KLM-IS70-3D3M User manual

Kolin
Kolin KSM-IW10WAE-7J1M User manual

Kolin
Kolin KLM-SS40-4F1M User manual