Kolin KAM-75BMC User manual

Before using your air conditioner, please read
this manual carefully and keep it for future reference.
WINDOW/WALL TYPE
ROOM AIR CONDITIONER
-
Before using your air conditioner, please read
this manual carefully and keep it for future reference.
WINDOW/WALL TYPE
ROOM AIR CONDITIONER
-
Before using your air conditioner, please read
this manual carefully and keep it for future reference.
WINDOW/WALL TYPE
ROOM AIR CONDITIONER
-
Before using your air conditioner, please read
this manual carefully and keep it for future reference.
WINDOW/WALL TYPE
ROOM AIR CONDITIONER
-
Before using your air conditioner, please read
this manual carefully and keep it for future reference.
WINDOW/WALL TYPE
ROOM AIR CONDITIONER
-
Before using your air conditioner, please read
this manual carefully and keep it for future reference.
WINDOW/WALL TYPE
ROOM AIR CONDITIONER
-
Before using your air conditioner, please read
this manual carefully and keep it for future reference.
WINDOW/WALL TYPE
ROOM AIR CONDITIONER
-
Before using your air conditioner, please read
this manual carefully and keep it for future reference.
WINDOW/WALL TYPE
ROOM AIR CONDITIONER
-
Before using your air conditioner, please read
this manual carefully and keep it for future reference.
WINDOW/WALL TYPE
ROOM AIR CONDITIONER
-
Before using your air conditioner, please read
this manual carefully and keep it for future reference.
WINDOW/WALL TYPE
ROOM AIR CONDITIONER
-
Before using your air conditioner, please read
this manual carefully and keep it for future reference.
WINDOW/WALL TYPE
ROOM AIR CONDITIONER
-
Before using your air conditioner, please read
this manual carefully and keep it for future reference.
WINDOW/WALL TYPE
ROOM AIR CONDITIONER
-
Before using your air conditioner, please read this manual
carefully and keep it for future reference.
Prior to installation this air-conditioning unit must be
submitted for approval by the utility service which provides
electricity.
KAM-75BMC
KAM-95BMC
WINDOW TYPE AIR CONDITIONER
USER MANUAL
www.kolinphil.com.ph

SOCIABLE REMARK
The following contents apply only the countries of Europe.
DISPOSAL: Do not dispose this product as unsorted municipal waste. Collection
of such waste separately for special treatment is necessary.
It is prohibited to dispose of this appliance in domestic household waste.
For disposal, there are several possibilities:
A) The municipality has established collection systems, where electronic waste can
be disposed of at least free of charge to the user.
B) When buying a new product, the retailer will take back the old product at least
free of charge.
C) The manufacture will take back the old appliance for disposal at least free of
charge to the user.
D) As old products contain valuable resources, they can be sold to scrap metal
dealers.
Wild disposal of waste in forests and landscapes endangers your health when
hazardous substances leak into the ground-water and find their way into the food
chain.

Inside you will find many helpful hints on how to use and maintain your air conditioner
properly. Just a little preventive care on your part can save you a great deal of time
and money over the life of your air conditioner. You'll find many answers to common
problems in the chart of troubleshooting tips. If you review our chart of Troubleshooting
Tips first, you may not need to call for service at all.
This appliance can be used by children aged from 8 years and above and persons
with reduced physical, sensory or mental capabilities or lack of experience and
knowledge if they have been given supervision or instruction concerning use of the
appliance in a safe way and understand the hazards involved. Children shall not play
the appliance. Cleaning and user maintenance shall not be made by children without
supervision. ( be applicable for the European Countries )
This appliance is not intended for use by persons (including children) with reduced
physical ,sensory or mental capabilities or lack of experience and knowledge, unless
they have been given supervision or instruction concerning use of the appliance by a
person responsible for their safety.(be applicable for other countries except the
European Countries )
Children should be supervised to ensure that they do not play with the appliance.
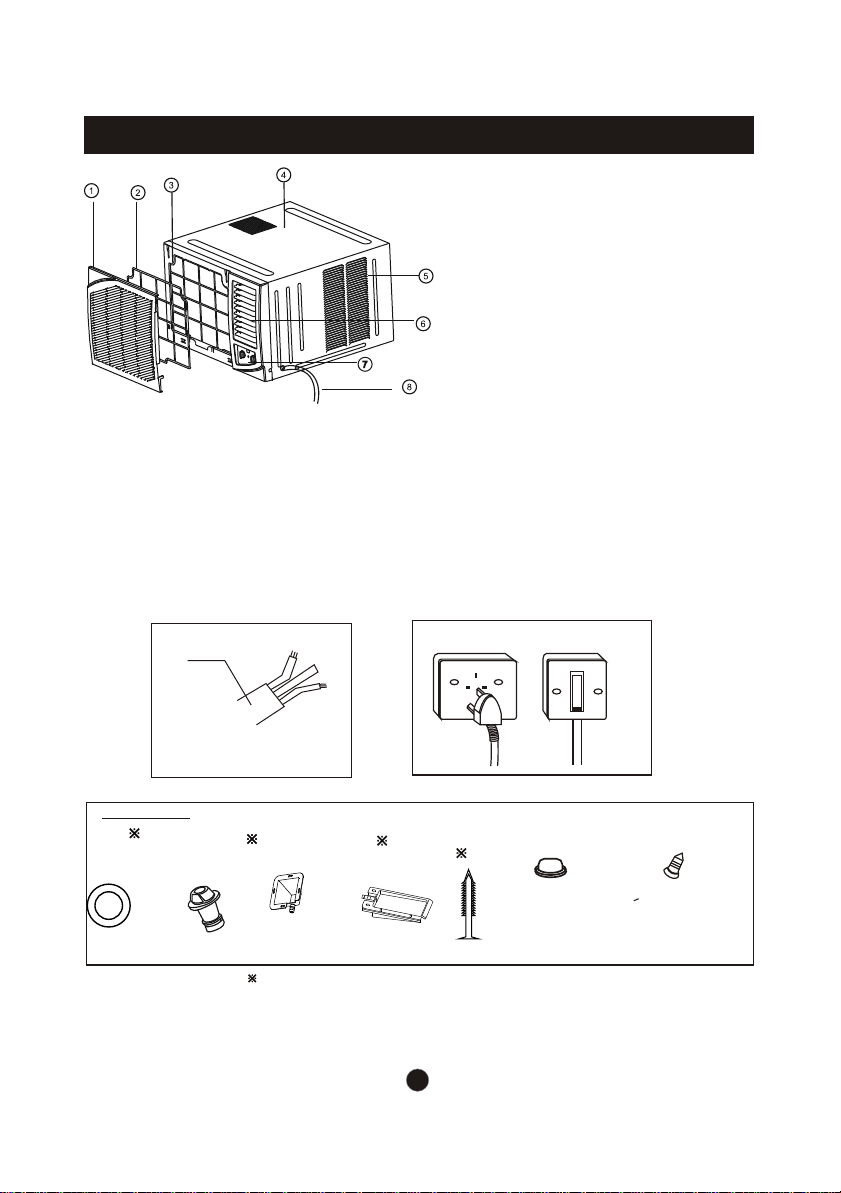
If the supply cord is damaged, it must be replaced by the manufacturer, its service
agent or similarly qualified persons in order to avoid a hazard.
The appliance shall be installed in accordance with national wiring regulations.
Donot operate your air conditioner in a wet room such as a bathroom or laundry room.
The appliance with electric heatershallhaveatleast 1 meter space tothecombustible
materials.
Contact the authorised service technician for repair or maintenance of this unit.
Contact the authorised installer for installation of this unit.
If the air conditioner is knocked over during use, turn off the unit and unplug it from the
main power supply immediately. Visually inspect the unit to ensure there is no damage.
If you suspect the unit has been damaged, contact a technician or customer service for
assistance.
In a thunderstorm, the power must be cut off to avoid damage to the machine due to
lightning.
To reduce the risk of fire or electric shock, do not use this fan with any solid-state speed
control device.
Do not run cord under carpeting. Do not cover cord with throw rugs, runners, or similar
coverings. Do not route cord under furniture or appliances. Arrange cord away from
traffic area and where it will not be tripped over.
The unit is shut down and immediately start will lead to voltage fluctuation, lighting
equipment flash, it is recommended to start after 3 minutes.
To be in compliance EN61000-3-11, the product MWT2F-21CM-QB4 shall be connected
only to a supply of the system impedance: |Zsys|=0.156 ohms or less; the product
MWT2F1-22CM-QB4 shall be connected only to a supply of the system
impedance: |Zsys|=0.132 ohms or less. Before connect the product to public power
network, please consult your local power supply authority to ensure the power network
meet above requirement.
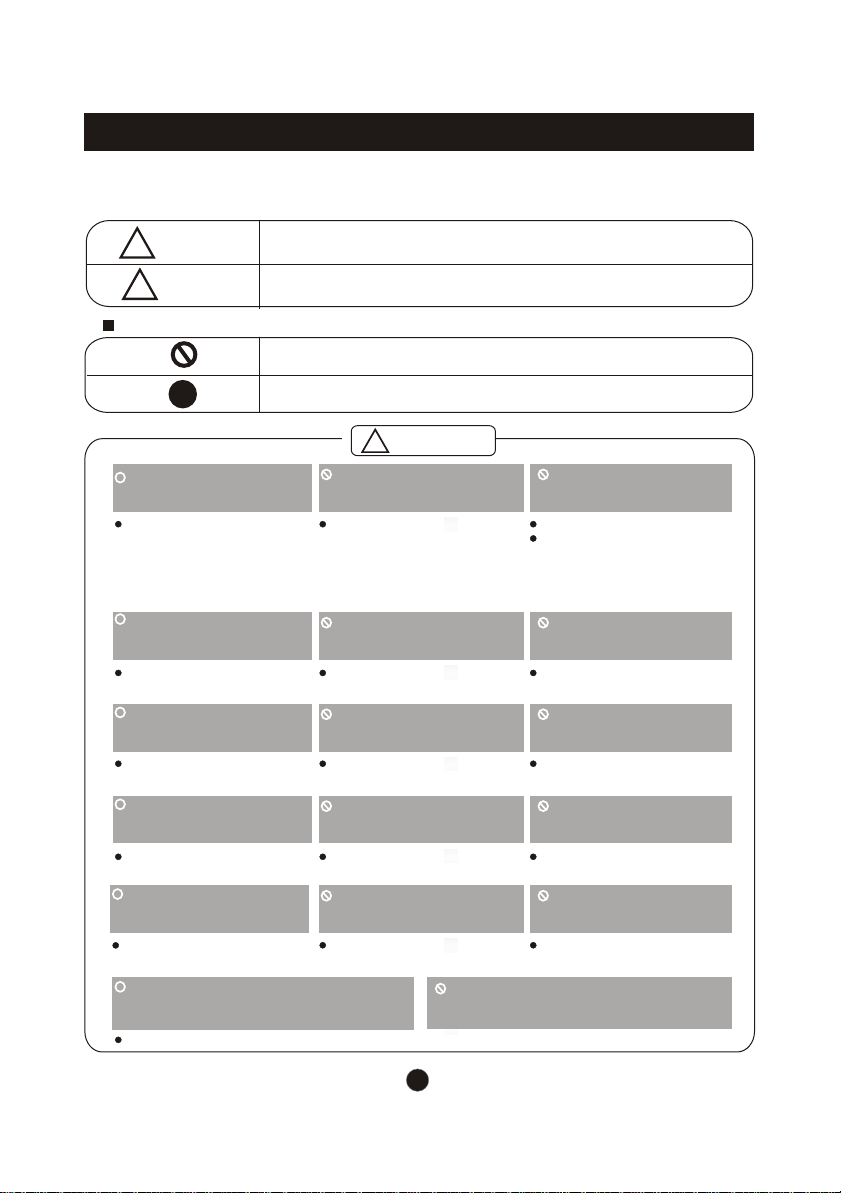
CAUTION
Read ThisManual
!

CONTENTS
1.SAFETY PRECAUTIONS...................................................................1
2. UNIT PARTS IDENTIFICATION ................................................................4
3. OPERATING INSTRUCTIONS..................................................................5
4. INSTALLATION INSTRUCTIONS.............................................................9
5. TROUBLESHOOTING TIPS.................................................................13
6. SPECIFICATIONS ................................................................................14

To prevent injury to the user or other people and property damage, the following instructions
must be followed. Incorrect operation due to ignoring of instructions may cause harm or damage.
The seriousness is classified by the following indications.
SAFETY PRECAUTIONS
This symbol indicates the possibility of death or serious injury.
Meanings of symbols used in this manual are as shown below.
!
!
WARNING
Always do this.
Never do this.
!
CAUTION
This symbol indicates the possibility of injury or damage to property.
Plug in power plug
properly.
Do not modify power cord
length or share the outlet
with other appliances.
Always ensure effective
earthing.
Unplug the unit if strange
sounds, smell, or smoke
comes from it.
Ventilate room before operating air
conditioner if there is a gas leakage from
another appliance.
Otherwise, it may cause electric
shock or fire due to excess heat
generation.
It may cause electric shock or
fire due to heat generation.
Incorrect earthing may cause
electric shock.
It may cause fire and electric
shock.
It may cause explosion, fire and, burns.
It may cause electric shock or fire
due to heat generation.
It may cause electric shock.
It may cause failure of machine
or electric shock.
It may cause fire and electric
shock.
It may cause fire and electric
shock.
It may cause electric shock or fire.
If the power cord is damaged, it
must be replaced by the manufac-
turer or an authorised service
centre or a similarly qualified per-
son in order to avoid a hazard.
This could damage your health.
Incorrect installation may cause
fire and electric shock.
It may cause electric shock.
It may cause an explosion or fire.
It may cause failure and electric shock.
Do not operate or stop the
unit by inserting or pulling
out the power plug.
Do not operate with wet
hands or in damp
environment.
Do not allow water to run
into electric parts.
Do not use the socket if it is
loose or damaged.
Do not use the power cord
close to heating appliances.
Do not damage or use an
unspecified power cord.
Do not direct airflow at
room occupants only.
Always install circuit
breaker and a dedicated
power circuit.
Do not open the unit
during operation.
Do not use the power cord near
flammable gas or combustibles, such
as gasoline, benzene, thinner, etc.
Do not disassemble or modify unit.
!!
!!
!!
!!
!!
WARNING
!
Leave the door closed
while the air conditioner
is running.
It is not designed to cool the
entire house.
!!
11

!
CAUTION
When the air filter is to be
removed, do not touch the
metal parts of the unit.
It may cause an injury.
Do not clean unit when
power is on as it may cause
fire and electric shock, it may
cause an injury.
Operation with windows
opened may cause wetting
of indoor and soaking of
household furniture.
When the unit is to be
cleaned, switch off, and turn
off the circuit breaker.
Stop operation and close
the window in storm or
hurricane.
Use caution when unpacking and
installing. Sharp edges could cause injury.
Do not clean the air
conditioner with water.
Water may enter the unit and
degrade the insulation. It may
cause an electric shock.
This could injure the pet or
plant.
It may cause electric shock
and damage.
Do not put a pet or house
plant where it will be
exposed to direct air flow.
Hold the plug by the head
of the power plug when
taking it out.
Ventilate the room well when
used together with a stove,
etc.
An oxygen shortage may occur.
Do not use this air conditioner to
preserve precision devices, food,
pets, plants, and art objects.
It may cause deterioration of
quality,etc.
It may cause failure of product
or fire.
Do not use for special
purposes.
Turn off the main power
switch when not using the
unit for a long time.
If water enters the unit, turn the unit off at the power
outlet and switch off the circuit breaker. Isolate
supply by taking the power-plug out and contact a
qualified service technician.
!!
!!
!!
!!
!!
!!
!!
It may cause failure of
appliance or accident.
Appearance may be
deteriorated due to change
of product color or
scratching of its surface.
Do not place obstacles
around air-inlets or inside
of air-outlet.
Do not use strong deter-
gent such as wax or
thinner but use a soft cloth.
If bracket is damaged, there
is concern of damage due to
falling of unit.
There is danger of fire or
electric shock.
Ensure that the installation bracket of
the outdoor appliance is not damaged
due to prolonged exposure.
Do not place heavy object on the
power cord and ensure that the cord
is not compressed.
Operation without filters may
cause failure.
It contains contaminants and
could make you sick.
Always insert the filters
securely. Clean filter once
every two weeks.
Do not drink water drained
from air conditioner.
!!
!!
!!
22

Preparing for operation
Usage
Cleaning and maintenance
Service
1. Contact an installation specialist for installation.
2. Plug in the power plug properly.
3. Do not use a damaged or non-standard power cord.
4. Do not share the same outlet with other appliances.
5. Do not use an extension cord.
6. Do not start/stop operation by plugging/unplugging the power cord.
1. Exposure to direct airflow for an extended period of time could be hazardous to your
health. Do not expose occupants, pets, or plants to direct airflow for extended
periods of time.
2. Due to the possibility of oxygen deficiency, ventilate the room when used together
with stoves or other heating devices.
3. Do not use this air conditioner for non-specified special purposes (e.g. Preserving
precision devices, food, pets, plants, and art objects). Usage in such a manner could
harm such property.
1. Do not touch the metal parts of the unit when removing the filter. Injuries can occur
when handling sharp metal edges.
2. Do not use water to clean inside the air conditioner. Exposure to water can destroy
the insulation, leading to possible electric shock.
3. When cleaning and maintenance the unit, first make sure that the power and circuit breaker
are turned off.
For repair and maintenance, contact your authorised service dealer.
SAFETY PRECAUTIONS(prior to operation)
Note: Performance maybe reduced outsideof theseoperating temperatures.
33
Operating Temperature
Cooling operation
Outdoor temp:
Indoor temp:
Heating operation
Outdoor temp:
Indoor temp:

1. Front panel
2. Air filter
3. Frame
4. Cabinet
5. Air inlet grille (outdoor side)
6. Air outlet grille
7. Operation knob
8. Power supply cord
UNIT PARTS IDENTIFICATION
1. Power cord conductors are distinguished according to color as follows (see Fig.a)
2. For your safety and protection, this unit is earthed through the power cord (see Fig.b)
Please contact the manufacturer or its service agent or a similar qualified person if
you want to replace it.
3. Be sure that the unit being correctly grounded. The wall outlet (Air-break switch)should be
provided with reliable earth wire.
4. The unit should be provided with an individual circuit and the circuit breaker/fuse
rating should be the same as that of the power cord and wall outlet.
POWER
CORD
A
E
N
E-Earth wire, yellow/green
N-Neutral wire, blue
A-Active wire, brown
Fig.a Fig. b
Wall outlet Air-break switch
44
NOTE:All the illustrations in the manual are for explanation purpose only.Your airconditionar
may be slightly different.The actual shape shall prevail.
Accessories
( )
Seal
(Used on
drain joint)
1
1
Screw
2 (For >18000Btu/h models only:
Used to fasten the front panel)
2 or 4 (Used to install the drain
tray)
Drain Joint
1pec
Drain Tray Rubber Plug
1or 2
(depend on model
you purchased)
( ) ( )
or
8
Wooden screw
( )
NOTE: Optional parts( ), depending on model you purchased.

NOTE: The outline of the operation panel is based on typical model, the function is the
same with your air conditioner while some difference may exist in appearance.
SELECTOR
POWER indicator(some models without): This indicator light remains on when the unit
is on and goes off when the SELECTOR is on OFF position.
OPERATING INSTRUCTIONS
THERMOSTAT AUTO SWINGSELECTOR
OFF
ON
POWER
COOLER
HIGH
COOL
MED
COOL
LOW
COOL
HIGH
FAN
MED
FAN
LOW
FAN
WAIT THREE MINUTES
BEFORE RESTARTING
OFF
SELECTOR
OFF
HIGH
COOL
MED
COOL
LOW
COOL
HIGH
FAN
MED
FAN
LOW
FAN
The controls featured in this manual are representative
of many available models. Your model may offer slightly
different features.
Cool Mode
The desired cool setting is selected by rotating the knob
to the right to the appropriate location.
HIGH COOL has maximum cooling effect and airflow.
LOW COOL has minimum cooling effect and airflow.
MED COOL has the intermediate cooling effect and
airflow.
OFF will completely shut off the unit.
THERMOSTAT SELECTOR
OFF
COOLER
HIGH
COOL
LOW
COOL
HIGH
FAN
LOW
FAN
WAIT THREE MINUTES
BEFORE RESTARTING
OFF
HIGH
COOL
LOW
COOL
HIGH
FAN
LOW
FAN
OFF
HIGH
COOL
MED
COOL
LOW
COOL
HIGH
FAN
LOW
FAN
6
3
112
9
55
THERMOSTAT AUTO SWINGSELECTOR
OFF
ON
POWER
COOLER
HIGH
COOL
MED
COOL
LOW
COOL
HIGH
FAN
LOW
FAN
WAIT THREE MINUTES
BEFORE RESTARTING
OFF
WAIT THREE MINUTES
BEFORE RESTARTING

THERMOSTAT
THERMOSTAT
COOLER
To set the desired room temperature, rotate the
thermostat switch to the desired setting.After
the set temperature is achieved the thermostat
will automatically start and stop the compressor
in order to maintain the desired set temperature.
Rotate the thermostat selector clockwise for
higher cool settings. Higher cool settings will
provide lower room temperature. Rotate the
thermostat selector counter clockwise for lower
cool settings. Lower cool settings will provide
higher room temperature.
Thermostat
The thermostat is used to set the desired room
temperature when the unit is being operated in
the COOL MODE.
NOTE: During the cooling operation of the unit, when the
thermostat knob is rotated clockwise, allow at least three
minutes before turning back the knob to the COOLER
direction. Otherwise the fuse may blow due to an overload
of the unit.
AUTO SWING
OFF ON
AUTO SWING(on some models)
Horizontal air flow adjustment (automatically)
When the AUTO SWING switch is turned to ON
position, the vertical louvers automatically oscillate
right and left sweeping the cold air alternately to
obtain comfortable cooling. The vertical louvers may
be stopped at any position when the AUTO SWING
switch is turned OFF .
Note
When turning the SELECTOR knob from "LOW COOL" to "HIGH COOL", keep your speed slow as far as
possible. Do not change the operation mode between "LOW COOL" and "HIGH COOL" too often.
Fan Mode
Rotate the knob to the left to select your choice of fan
speeds for air circulation.
Note: When selecting a fan speed, the compressor will
not run.
6
3
112
9
66

Vertical air flow adjustment (manually)
To adjust vertical air flow direction, adjust any one of the
horizontal louver blades. When turning up or down the
horizontal louver blades, always keep horizontality the top
or bottom blades. This can effectively prevent water drops
condensed on the front panel of the unit.
Vent Control
The vent control is located above the control knobs. The operation method is different
on different models (see the following figures).
For maximum cooling efficiency, CLOSE the vent. This will allow internal air circulation.
OPEN the vent to discharge stale air.
CLOSE VENT OPEN
Toopen the vent, pull the lever toward you
Toclose it, push it in. Toopen the vent, set the lever to the right position
Toclose it, set the lever in the left position.
CLOSE OPEN
NOTE: The VENTILATION LEVER should normally be kept in the CLOSED position during
cooling for maximum cooling effect. The "OPEN" position is used only for ventilation.
77
The air filter behind the inlet grille should be checked and
cleaned at least once every 2 weeks (or as necessary) to
maintain optimal performance of the air conditioner.
Air Filter
How to remove the air filter
1. Hold the slot under the front panel, then uplift it outwards,
and remove the front panel.
2. Pinch the handle under the air filter and make the air filter
arched, remove it from the slot from underside to upside.
3. Clean the filter with warm, soapy water. The water
O
should be below 40 C to prevent distortion of the filter.
4. Rinse off and gently shake off excess water from the
filter. Allow the filter to dry before replacing it. To prevent
distortion of the filter, do not dry in direct sunlight.
NOTET:Be sure to unplug the unit before cleaning to
prevent chock or fire hazards.
NEVER operate the air conditioner without the
air filter, as dust/dirt particles can contribute to
equipment failure.
CAUTION !!

88
To meet different requirement of different typeof air conditioner,therea re threekinds of methods
for your choice to treat the condensed water.
Drainage
1. Remove the rubber plug from the bottom of the cabinet and
attach to the back drain hole (on some models the rubber
plug provided with your air conditioner accessory). For the
units without the bottom rubber plug and the back drain hole,
just install the drain tray.
2. Take out the drain tray and screws (which provided with
your air conditioner accessory).
3. Install the drain tray at the bottom of the unit and secure with
screws provided.
4. Connect the drain hose to the outlet located at one side of the
drain tray. You can purchase the drain hose or tubing locally to
satisfy your particular needs (Drain hose is not supplied).
Suggestion: To ensure the condensed water drain off smoothly, always keep the drain oulet of the
the drain tray downward when install the drain tray.
When cooling or heating,you can choose bottom drainage ,
See the following procedures to perform bottom drainage:
RUBBER
PLUG
SCREW
DRAIN PAN
DRAIN
OUTLET
Note:When you choicebottom drainage theair conditioner willeffect cooling efficiencylittle and
have no voiceof hit water.
When cooling you can choose back drainage (on models
with back drain hole).
See the following procedures to perform back drainage:
1. Fit the seal onto the drain joint (which provided with
your air conditioner accessory).
2. Remove the rubber plug from the back of the unit.
(If applicable),and insert the rubber plug(which
provided with your air conditioner accessory on
some models) into the bottom drain hole of the unit.
3. Attach the drain joint to the back of the cabinet
O
where you remove the plug and rotate 90 to
securely assemble them.
SEAL
DRAIN
JOINT RUBBER
PLUG
4. Connect the drain joint with a extension drain hose
(Locally purchased)
Note:When you choiceback drainage theair conditioner willmake a voiceof hit water.
Note:If you choosenon-drainage when cooling,boththe bottom andthe back drainholes of theunit
should be insertedwith rubber plugs.
When you choicenon-drainage the airconditioner will be
perfect cooling efficiency, but theunit will makea big voiceof hit water. Does notrecommend
to use.
Note:Cooling efficiency ofthe unit istested under hitwater.

99
1. To avoid vibrationand noise, make sure the unit is installed securely and firmly.
2. Install theunit where thesunlight does notshine directly onthe unit.
If the unitreceives direct sunlight,build an awningto shade thecabinet.
3. There should be noobstacle, such asa fence or wall, within 50cm from the back of the
cabinet because itwill prevent heat radiation of the condenser.
Restriction of outsideair will greatlyreduce the coolingand heating efficiency of the
air conditioner.
4. Install theunit a littleobliquely outward notto leak thecondensed water intothe room
O
(about 3~4 with level).
5. Install theunit with itsbottom portion 75~150cmabove the floorlevel.
6. The power cord mustbe connected toan independent circuit. The yellow/green
wire must begrounded.
All side louvers of the cabinet must remain exposed to the outside of the structure.
CAUTION
Select the best location
INSTALLATION INSTRUCTIONS
75~150cm
Over 50cm
O
About 3~4
AWNING FENCE
75~150cm
Over 50cm
O
About 3~4
AWNING FENCE
Step 1
Remove the air conditioner from it's packaging, remove fixing
screws and slide the air conditioner out of it's housing (Refer
to Installation Steps).
Step 2
Prepare the hole in the wall so that the bottom of the housing
is well supported, the top has minimum clearance and the air
inlet louvers have clearance as shown below in options A and
B. Holes from the outside through to the cavity should be
sealed. The housing should slope down towards the rear by
about 5mm to allow water formed during operation to drain.
Step 3
Install the housing into the wall and secure. Ensure the foam
seals are not damaged. Flash, seal or fill gaps around the
inside and outside to provide satisfactory appearance and
protection against the weather, insects and rodents.
Installation of the Housing
NOTE: UNIT MAY BE SUPPORTED BYA
SOLID FRAME FROM BELOW OR
BY A HANGER FROM A SOLID
OVERHEAD SUPPORT.
Preferred method of installation into a timber
framed wall, partition or window.
FLASH OR SEALAROUND EXTERNAL
WALL FRAME OR ARCHITRAVE
STURDY TIMBER
FRAME ALL ROUND
UNIT
TIMBER FRAMED
WALL OR PARTITION
EXTERNAL SUPPORT
FRAME AT BALANCE
POINT OF A/C
ALTERNATIVELY, BRACKETS
AS ILLUSTRATED BELOW
MAY BE USED.
DRAIN PAN

Installation of the unit into the Housing
Installations of the unit into the wall
1. Slide the unit into the housing until it is firmly against the
rear of the housing. Care is required to ensure the foam
sealing strips on the housing remain in position.
2. Connect the air conditioner to the power and position
excess cord length beneath the air conditioner base.
3. Engage the chassis fixing brackets into the bottom housing
rail and secure to the base with the screw provided.
4. Remove the front panel from it's carton and plastic bag
and fit as per the Installation lnstruction.
5. Switch unit on. Check for operation of the unit and check
for vibration in the installation.
6. Fit the drain pan to the housing and run a drain line to a
suitable location if required. Alternative method of installation if external
support cannot be provided.
FLASH OR SEAL AROUND EXTERNAL
WALL FRAME OR ARCHITRAVE
STURDY TIMBER
FRAME
TIMBER FRAMED
WALL OR PARTITION SOLID TIMBER SUPPORT
STEADYING BRACKET
(ONE PER SIDE)
DRAIN PAN
ENSURE LOUVRES
ARE ENTIRELY
OUTSIDE THE WALL
AIR IN
AIR IN
AIR OUT
100mm minimum
OPTION A
AIR IN
LOUVRE
BRICK
WALL
O
45 BRICK CUT AWAY
TO CLEAR LOUVRES
FRONT
AIR OUT
AIR INAIR IN
TOP
VIEW
O
45 BRICK CUT AWAY
TO CLEAR LOUVRES
100mm
BRICK
WALL
100mm
OPTION B
1010

4
1111
Installation Steps
Step 1. Remove the front panel and the air filter
1. Hold the slot under the front panel, then uplift it outwards, and remove the front panel (See Fig.1).
2. Pinch the handle under the air filter and make the air filter arched, remove it from the slot from underside
to upside (See Fig.2).
A
B
C
D
Step 2. Remove the frame.
1. To meet different requrement of different type of air conditioner,there are four kinds of emoving the
frame.
-Remove the four screws located on both sides and the back of the cabinet as shown in Fig.3A.
-Remove one screw on the chassis fixing bracket, then remove the chassis fixing bracket. Remove
the two screws located on the back of the cabinet as shown in Fig.3B.
-Remove the two screw on the letf and right chassis fixing brackets, then remove the two chassis
fixing brackets as shown in Fig.3C.
-Remove one screw on the chassis fixing bracket, then remove the chassis fixing bracket as shown
in Fig.3D.
2. Grasp the left corner of the frame's underside, release the coupler plugs, then loosen the frame
(See Fig.4).

1212
Before calling for service, review this list. It may save you time and expense. This list
includes common occurrences that are not the result of defective workman-ship or
materials in this appliance.
Solution
Air conditioner
does not start
Wall plug disconnected. Push plug firmly into wall outlet.
House fuse blown or circuit breaker tripped. Replace fuse with time delay type or
reset circuit breaker.
Selector Control in OFF position. Turn selector to the desired FAN or COOL setting.
TROUBLESHOOTING TIPS
Problem
Unit turned off by moving thermostat to a higher number and then immediately
turning back to a colder number. Wait approximately 3 minutes. Listen for compressor
to start.
Unit turned off and then on too quickly. Turn unit off and wait 3 minutes before
restarting.
Thermostat set too low. Adjust thermostat to higher number for cooling.
Step 3. Installation.
1. Grasp the handle on the chassis and carefully slide the air conditioner out of the cabinet (See Fig.5).
2. Remove shipping pad from around compressor before operation and make sure the discharge points
to the drain pan are aligned before the chassis is pushed into the cabinet (See Fig.6).
3. Push the unit chassis into the cabinet (See Fig.7).
Step 4. Install the frame.
1. Install the frame and connect the coupler plugs, making sure not to interfere with the temperature
sensor cable (See Fig.8).
2. Fix the screws on the frame (See Fig.3A,3B,3C,3D).
Step 5. Install the air filter and front panel.
1. Install the air filter into the frame's slot from upside to underside (See Fig.2).
2. Hang the front panel on the frame's buckle, then press the front panel into the frame's slot until you
hear a click (See Fig9).
Fig.5 Fig.6 Fig.7
Fig.8 Fig.9

1313
Solution
Problem
Air conditioner turns on
and off rapidly
Noise when unit is
cooling
Water dripping
INSIDE when
unit is cooling.
Improper installation. Tilt air conditioner slightly to the outside to
allow water drainage. Refer to installation instructions - check with
installer.
Dirty air filter- air restricted. Clean air filter.
Air movement sound. This is normal . If too loud, turn selector to
lower FAN setting.
Outside temperature extremely hot. Set to high cool to bring air
past cooling coils more frequently.
Sound of fan hitting water-moisture removal system. This is normal
when humidity is high. Close doors, windows and registers.
Window vibration - poor installation. Refer to installation instructions
or check with installer.
Water dripping
OUTSIDE when
unit is cooling.
Unit removing large quantity of moisture from humid room. This is
normal during excessively humid days.
Dirty air filter- air restricted. Clean air filter. Refer to Care and Cleaning section.
Unit recently turned on in hot room. Allow additional time to remove Stored heat from
walls, ceiling, floor and furniture.
Air conditioner
cooling, but room
is too warm- NO
ice forming on
cooling coil behind
decorative front.
Thermostat set too warm. Turn thermostat clockwise to a colder setting.
Air directional louvers positioned improperly. Position louvers for better air distribution.
Front of units is blocked by drapes, blinds, furniture, etc. - restricts air distribution.
Clear blockage in front of unit.
Doors, windows, registers, etc. Open- cold air escapes. Close doors, windows, registers.
Air from unit does
not feel cold
enough
Thermostat set too warm. Set thermostat to colder temperature.
Turn selector to a higher COOL position.
Room temperature below 18 C(64 F). Cooling may not occur until room temperature
rises above 18 C(64 F).
Temperature sensing tube touching cold coil, located behind air filter. Straighten
tube away from coil.
OO
O
O
Thermostat set too cold for night-time cooling. To defrost the coil, set selector to a
FAN position. Then, set thermostat to a warmer position.
Air filter may be dirty.Clean filter. Refer to Care and Cleaning section. To defrost,
set selector to FAN.
Air conditioner
cooling, but room
is too warm- ice
forming on cooling
coil behind
decorative front.
Outdoor temperature below 18 C(64 F). To defrost the coil, set selector to FAN
position. Then, set thermostat to warmer position.
OO

1414
SPECIFICATIONS
Unit dimensions:
Minimum norminalcross-sectional area ofconductors:
Rated current of appliance
(A) Nominal cross-sectional area
2
(mm )
0.75
1
1.5
2.5
Suggest MinimumWire Size(AWG: ):American WireGage
Appliance Amps AWG WireSize
10
13
18
25
18
16
14
12
30 10
NOTE:Valueof D isonly referenced.
3 and 6
6 and 10
10 and 16
16 and 25
MODEL
(Btu/h) BODY DIMENSION(mm)
(W X H X D)
5000~6000 445X320X415
450X346X535
15000~16000
560X400X640
660X434X620
660X428X680
15000~24000 660X428X780
7000~9000 450X346X535
9000~12000 600X380X560
450X346X585

The design andspecifications are subjectto change withoutprior notice for
product improvement. Consult withthe sales agencyor manufacturer for
details.
KPII20190423
This manual suits for next models
1
Table of contents
Other Kolin Air Conditioner manuals

Kolin
Kolin KSM-IW10WAE-7J1M User manual

Kolin
Kolin KLM-IF70-3D3M User manual

Kolin
Kolin KAM-55CMC32 User manual

Kolin
Kolin Primus Gold KSG-IWF-10WFY-8K1M32 User manual

Kolin
Kolin KLG-SF40-5G1M User manual

Kolin
Kolin KEA-60BDRDCA User manual

Kolin
Kolin KLG-IF70-2C1M User manual

Kolin
Kolin e Series User manual

Kolin
Kolin KLM-IS70-3D3M User manual

Kolin
Kolin KAG-110RSINV User manual