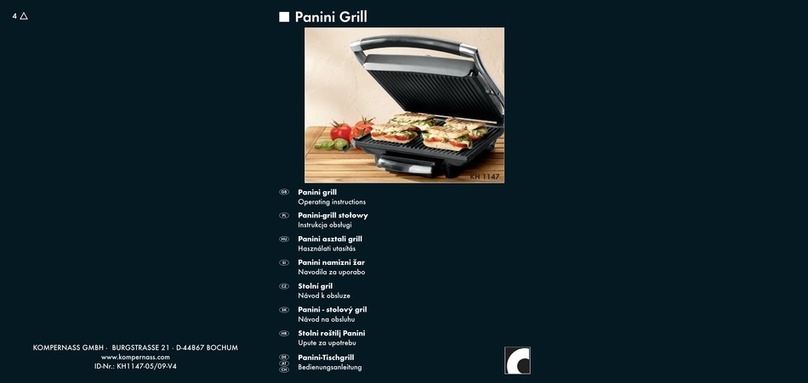
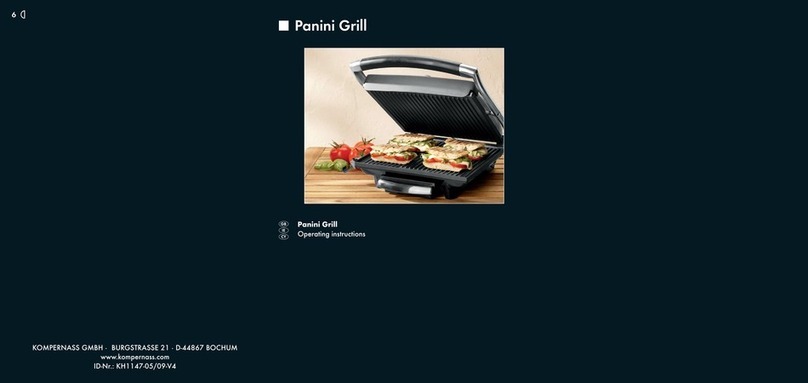
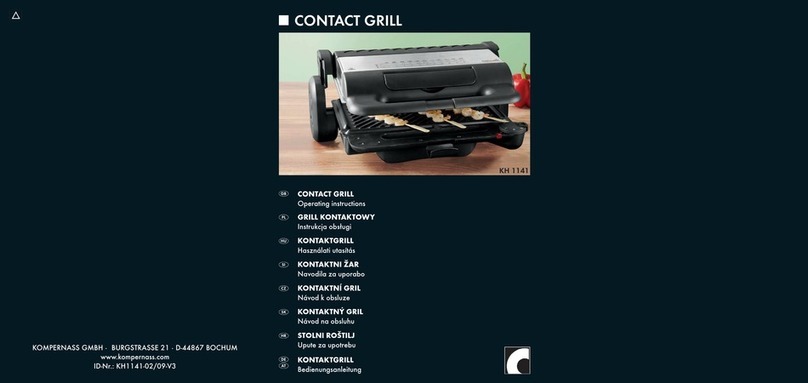
Kompernass Silver Crest SPM 2000 A1 User manual

IAN 72222 IAN 72222
KOMPERNASS GMBH
Burgstraße 21
D-44867 Bochum
www.kompernass.com
Last Information Update · Stanje informacija · Versiunea informaţiilor
Актуалност на информацията · Έκδοση των πληροφοριών
Stand der Informationen: 01/2012 · Ident.-No.: SPM2000A1112011-1
PANINI MAKER SPM 2000 A1
PANINI MAKER
Operation and Safety Notes
ПАНИНИ ГРИЛ
Инструкции за обслужване и безопасност
GRĂTAR PANINI
Instrucţiuni de utilizare şi de siguranţă
Ψηστιέρα-PANINI
Υποδείξεις χειρισμού και ασφάλειας
PANINI-ROŠTILJ
Upute za posluživanje i za Vašu sigurnost
GB Operation and Safety Notes Page 1
HR Upute za posluživanje i za Vašu sigurnost Stranica 9
RO Instrucţiuni de utilizare şi de siguranţă Pagina 17
BG Инструкции за обслужване и безопасност Cтраница 25
GR Υποδείξεις χειρισμού και ασφάλειας Σελίδα 33
DE/ AT /CH Bedienungs- und Sicherheitshinweise Seite 41
Before reading, unfold the page containing the illustrations and familiarise yourself with all functions of
the device.
Prije nego što pročitate tekst, otvorite stranicu sa slikama i upoznajte se na osnovu toga sa svim funkcijama
uređaja.
Înainte de a citi instrucţiunile, priviţi imaginile şi familiarizaţi-vă cu toate funcţiile aparatului.
Преди да прочетете отворете страницата с фигурите и след това се запознайте с всички функции
на уреда.
Πριν ξεκινήσετε την ανάγνωση, ανοίξτε τη σελίδα με τις εικόνες και εξοικειωθείτε με όλες τις λειτουργίες
της συσκευής.
Klappen Sie vor dem Lesen die Seite mit den Abbildungen aus und machen Sie sich anschließend mit allen
Funktionen des Gerätes vertraut.
PANINI-GRILL
Bedienungs- und Sicherheitshinweise
CV_72222_SPM2000A1_LB7.indd 1-3CV_72222_SPM2000A1_LB7.indd 1-3 09.01.12 11:0709.01.12 11:07

12
3
5 4
6
7
9
8
0
CV_72222_SPM2000A1_LB7.indd 4-6CV_72222_SPM2000A1_LB7.indd 4-6 09.01.12 11:0709.01.12 11:07

- 1 -
CONTENT PAGE
Intended Use 2
Safety instructions 2
Technical data 3
Items supplied 3
Description of the appliance 3
Commissioning 3
Operation 4
Tips and Tricks 4
Cleaning and Care 5
Storage 5
Recipes 6
Spinach & Cheese Panini ................................................................................................................6
Chickenbreast Panini........................................................................................................................6
Mustard Baguette.............................................................................................................................7
Disposal 7
Warranty and Service 7
Importer 7
Read the operating instructions carefully before using the device for the first time and preserve this booklet
for later reference. Pass this manual on to whoever might acquire the device at a future date.
IB_72222_SPM2000A1_LB7 08.02.2012 15:15 Uhr Seite 1

- 2 -
Panini Maker
Intended Use
This Panini Grill is intended for toasting small bread
rolls and sandwiches or for grilling other foodstuffs.
It is intended for domestic use only, it is not intended
for use in commercial applications.
Safety instructions
How to avoid the risks of an
electrical shock
• The Panini Maker may only be used in dry rooms
indoors. Protect the appliance from spray water –
even when it is switched off.
• Use the appliance only if the local mains voltage
complies with the rated voltage of the appliance.
• Do not connect the appliance to a multiple con-
nection power socket on which other electrical
devices are operating at the same time; this could
lead to an overload of the power circuit.
• Switch the appliance off after every use.
Additionally, disconnect the power plug.
• When cleaning, ensure that water cannot permeate
into the appliance. NEVER clean the appliance
under running water.
NEVER submerse the appliance in water or
other liquids.
• Protect the power cable from damage. Be careful
not to pinch/squeeze it, and keep it away from
hot objects. Do not allow the power cable to
hang freely from a table or workcounter.
• NEVER open the housing of the appliance.
• Arrange for defective power plugs and/or cables
to be replaced at once by qualified technicians
or our Customer Service Department.
• Repairs may only be carried out by experienced
specialists or workshops authorised to do so by
the manufacturer.
How to avoid the risk of fire and
injury
• Place your Panini Maker on a flat, non-slip and
heat-resistant surface and not on or close to other
appliances that could emit a significant level of
heat (e.g. toasters, kitchen ovens).
• Do not operate the appliance close to easily
flammable objects, such as curtains or next to
rolls of paper towels.
Even when used properly, some parts of the
appliance become very hot (such as the top
and bottom housing plates). After switching the
appliance off, take care not to touch these sur-
faces until they have cooled down completely.
• To avoid a dangerous overheating, ALWAYS
unwind the full length of the power cable.
• During use, the Panini Maker can be opened and
closed without risk by using the heat-insulated grip.
• This appliance is not intended for use by indivi-
duals (including children) with restricted physical,
physiological or intellectual abilities or deficiences
in experience and/or knowledge unless they are
supervised by a person responsible for their safety
or receive from this person instruction in how the
appliance is to be used.
• Children should be supervised to ensure that
they do not play with the appliance.
IB_72222_SPM2000A1_LB7 08.02.2012 15:15 Uhr Seite 2

- 3 -
• Do not operate this appliance by means of an
external time switch or a separate remote control
system.
• After switching it off, allow the appliance to cool
completely before cleaning and storing it.
You can thus prevent the appliance
from being damaged
• To avoid damaging the non-stick coating of the
Sandwich Maker, remove your cooked foods
only with a plastic or wooden spatula or some
other suitable, non-metallic implement.
• For the same reason, do not use abrasive cleaners
and sharp objects to clean the appliance.
Technical data
Power rating: 220-240 V ~, 50 Hz
Power consumption : 2000 W
Items supplied
• Panini Grill
• Grease catchment tray
• Cleaning scraper
• Operating Instructions
Description of the appliance
1Heat level regulator
2Red control lamp “Power”
3Power cable
4Safety closure
5Green control lamp “Ready”
6Handle
7Grease catchment tray
8Grease drainage outlet
9Hotplates
0Cleaning scraper
Commissioning
1. Take the appliance out of the packaging. Remove
all additional transport packing, e.g. plastic wrap
or cable holders.
2. Before the first usage, check that all items have
been delivered and there are no visible damages.
3. Read these operating instructions carefully.
4. Set up the appliance according to the safety
instructions.
5. Open the safety lock 4 .
6. Clean the appliance with a damp cloth as de-
scribed in "Cleaning and Care".
7. Close the appliance.
8. Insert the plug into a power socket and allow the
appliance to heat up at its maximum temperature
setting for approx. 5 minutes.
Note:
Due to manufacturing residues, this initial heating up
could result in a light production of odour and smoke.
This is completely normal and is not dangerous.
Provide for sufficient ventilation, for example, open
a window.
IB_72222_SPM2000A1_LB7 08.02.2012 15:15 Uhr Seite 3

- 4 -
9. After being heated up, remove the plug from
the wall socket and allow the appliance to
cool down.
10. Clean the appliance once more with a damp
cloth.
Operation
1. Close the appliance lid at the grip 6.
2. Push the grease catchment tray 7into the app-
liance.
3. Insert the power plug into a wall power socket.
The red control lamp “Power” 2glows.
4. Select the desired level with the heating level se-
lector 1. As soon as the selected heating level
has been reached, the green control lamp “Rea-
dy” 5glows.
Note:
The green control lamp „Ready“ 5also lights up
when the heat level regulator 1is at position „0“.
As soon as you have set the heat level regulator 1
to the required position, the green control lamp
“Ready” 5will go off until the desired temperature
has been attained.
Note:
The green control lamp “Ready” 5can repeatedly
switch itself off. This means that the programmed
temperature has fallen, and the appliance is auto-
matically heating itself up again!
5. Open the appliance lid and place the foodstuff
to be toasted/grilled on the lower hotplate 9.
6. Close the appliance lid. Due to the positioning
of the upper hotplate 9being variable, even
with thick items it is always parallel to the lower
hotplate 9. This ensures an optimal cooking result.
7. After a short period check the browning of the
foodstuff. To do this, open the appliance lid.
Note:
Start with short cooking times and expand on them
until you have discovered the ideal duration.
8. When you are satisfied with the browning, open
the lid and remove the foodstuff.
Warning:
Do not use sharp or pointed objects to remove the
foodstuff. They could damage the surfaces of the
hotplates 9!
9. Turn the heat level regulator 1to “0” and
remove the plug from the power socket.
Warning:
When the appliance is not in use, always remove
the plug from the power socket. It is not sufficient
to simply place the heat level regulator 1 in the
position “0”!
Tips and Tricks
• To make meat softer and to speed up grilling, it
can be marinaded beforehand. Suitable as the
basis for this are, for example, sour cream, red
wine, vinegar, buttermilk, or the fresh juice from
papayas or pineapples. Subject to taste, add
herbs and spices. Do not add salt, salt extracts
water from the meat and makes it hard. Place
the meat in the marinade so that it is completely
covered and then close the receptacle. It is best
to let it stand overnight.
IB_72222_SPM2000A1_LB7 08.02.2012 15:15 Uhr Seite 4

- 5 -
• The heating plates 9are non-stick coated, so
extra fat is not necessary. If you still want to use
fat anyway, ensure that it is a fat/oil suitable for
frying, such as canola oil.
• If you are not sure if the foodstuff is cooked in
the middle, use a standard commercial meat
thermometer.
Cleaning and Care
Important!
Before cleaning, remove the plug from the wall socket
and wait until the appliance has cooled down com-
pletely. Risk of injury!
Important!
Never clean the appliance under running water,
and never submerge it in water. The appliance
could be irreparably damaged!
• Draw the cleaning scraper 0, after the hotpla-
tes 9have cooled, over the hot plates 9so
that the fat and other residues are gathered to-
gether so that you can better remove it.
• Wipe the hotplates 9with a moist cloth. For
stubborn soiling use a mild detergent on the
cloth. To avoid destroying the non-stick coating,
do not use aggressive detergents, rough spon-
ges or sharp objects.
• It is best to lay a wet dish cloth on encrusted re-
sidues in order to soften them.
A damp cloth is also sufficient for cleaning the outer
surfaces of the appliance.
Be sure to allow all parts to dry completely before
using the Panini Maker again.
Wipe the cleaning scraper 0with a moist cloth.
For stubborn soiling, apply a mild detergent to the
cloth.
Storage
Store the cleaned appliance at a dry location.
Close the safety lock 4 .
Wrap the power cable 3around the cable retainers
on the underside of the appliance.
IB_72222_SPM2000A1_LB7 08.02.2012 15:15 Uhr Seite 5

- 6 -
Recipes
A Panini is a warm sandwich prepared with fresh
white bread. It is freshly toasted and then served.
Spinach & Cheese Panini
250 g Spinach leaves
1 Onion
1 Garlic clove
1 tbsp. oil
2 tbsp Lemon juice
1 Pinch of salt (and pepper)
4 Slices of white bread
40 g Herb butter
75 g Mozzarella
20 g Pine nuts
• Sort and wash the spinach leaves.
• Peel and finely hack the onion and garlic clove,
then steam them in hot oil until glassy. Add the
spinach. Flavour with lemon juice, salt and pepper.
• Spread herb butter on the bread.
• Cut the mozzarella into slices, spread them over
the two bread slices with the drained spinach.
Bestrew with pine nuts.
• Cover the Panini with a second slice of white
bread.
• Carefully place the Panini on the Panini Maker,
already pre-heated to a middle heat level, and
close the lid.
• Wait until the Panini is toasted to a golden-brown.
Then take it from the Panini Maker.
Chickenbreast Panini
400 g chicken breast fillet
20 g butter
Pepper, salt, paprika powder
120 g Bacon, in strips
6 Slices of white bread
3 Tbsp Salad dressing (Yoghurt)
30 g Lettuce
2 Tomatoes
1 Avocado
1 Tsp Lemon juice
50 g Cucumber
• Rinse the chicken breast fillets under running water
then pat them dry with kitchen paper. Heat some
butter in a non-stick pan and then roast the chicken
breast fillets well on both sides. Turn the cooker
down to a medium heat and then roast the chicken
breast fillets thoroughly for approx. 10 minutes.
After roasting, flavour with salt, pepper and pa-
prika, take them from the pan and place them to
the side.
• Heat the fat up in the pan once again and then
fry the bacon strips until crispy.
• Spread the salad dressing onto 3 slices of white
bread, garnish with lettuce, cut the tomatoes into
slices, spice them and place them on the lettuce.
• Slice the chicken breast fillets along their length
and lay them on the tomatoes.
• Cut the avocado along its length all around and,
with a twist, detach it from its core. Peel it and slice
it into strips. Spread the lemon juice over the a-
vocado so that it does not turn brown. Lay the
strips on the Panini.
• Cut the cucumber into slices and lay them on the
avocado.
• Cover the Panini with a second slice of white
bread.
• Carefully place the Panini on the Panini Maker,
already pre-heated to a middle heat level, and
close the lid.
• Wait until the Panini is toasted golden-brown and
then carefully remove it from the Panini-Maker.
IB_72222_SPM2000A1_LB7 08.02.2012 15:15 Uhr Seite 6

- 7 -
Mustard Baguette
1 Baguette
1 Garlic clove
50 g Gherkin in piccalilli
40 g Pecorino Romano
1 Tbsp Mustard
2 Tbsp Sweet mustard
50 g Butter
2 Tbsp Chive rolls
Salt, pepper
• Cut, but do not separate into pieces, the baguette
laterally at distances of approx. 2-3 centimeters.
• Peel and crush the garlic, cube the gherkin very
finely and grate the Pecorino Romano.
• Blend the sharp and sweet mustards with the soft
butter, garlic, gherkin cubes, Pecorino Romano
and chives, flavour with salt and pepper.
• Fill the mustard butter into the baguette cuts and
wrap in aluminium foil.
• Pre-heat the Panini Maker to a medium level, place
the baguettes on it and close the lid. The baguette
should be golden-brown.
Disposal
Do not dispose of the appliance in your
normal domestic waste. This product is
subject to the European directive
2002/96/EC.
Dispose of the appliance through an approved dis-
posal centre or at your community waste facility.
Observe the currently applicable regulations.
In case of doubt, please contact your waste disposal
centre.
Dispose of all packaging materials in an
environmentally friendly manner.
Warranty and Service
The warranty for this appliance is for 3 years from
the date of purchase. The appliance has been ma-
nufactured with care and meticulously examined be-
fore delivery. Please retain your receipt as proof of
purchase. In the event of a warranty claim, please
make contact by telephone with our Service Depart-
ment. Only in this way can a post-free despatch for
your goods be assured.
The warranty covers only claims for material and
maufacturing defects, but not for transport damage,
for wearing parts or for damage to fragile compo-
nents, e.g. buttons or batteries. This product is for
private use only and is not intended for commercial
use. The warranty is void in the case of abusive and
improper handling, use of force and internal tampe-
ring not carried out by our authorized service
branch. Your statutory rights are not restricted in any
way by this warranty.
The warranty period will not be extended by repairs
made under warranty. This applies also to replaced
and repaired parts. Any damage and defects extant
on purchase must be reported immediately after un-
packing the appliance, at the latest, two days after
the purchase date. Repairs made after the expira-
tion of the warranty period are subject to payment.
Service Great Britain
Tel.: 0871 5000 720 (£ 0.10/Min.)
E-Mail: [email protected]
Importer
KOMPERNASS GMBH
BURGSTRASSE 21
44867 BOCHUM, GERMANY
www.kompernass.com
IAN 72222
IB_72222_SPM2000A1_LB7 08.02.2012 15:15 Uhr Seite 7

- 8 -
IB_72222_SPM2000A1_LB7 08.02.2012 15:15 Uhr Seite 8

- 9 -
SADRŽAJ STRANA
Uporaba u skladu sa namjenom 10
Sigurnosne napomene 10
Tehnički podaci 11
Obim isporuke 11
Opis uređaja 11
Prvo puštanje u pogon 11
Rukovanje 11
Savjeti i trikovi 12
Čišćenje i održavanje 13
Čuvanje uređaja 13
Recepti 13
Panini sa špinatom i sirom . . . . . . . . . . . . . . . . . . . . . . . . . . . . . . . . . . . . . . . . . . . . . . . . . . . .13
Panini sa pilećim prsima . . . . . . . . . . . . . . . . . . . . . . . . . . . . . . . . . . . . . . . . . . . . . . . . . . . . .14
Baget sa senfom . . . . . . . . . . . . . . . . . . . . . . . . . . . . . . . . . . . . . . . . . . . . . . . . . . . . . . . . . . .14
Zbrinjavanje 15
Jamstvo i servis 15
Uvoznik 16
Upute za rukovanje prije prve upotrebe pažljivo pročitajte i sačuvajte ih za kasnije korištenje. Ukoliko uređaj
dajete trećim osobama, priložite i ove upute.
IB_72222_SPM2000A1_LB7 08.02.2012 15:15 Uhr Seite 9

- 10 -
Panini-roštilj
Uporaba u skladu sa namjenom
Uređaj za izradu sendviča (Panini-Maker) namijenjen
je za pečenje malih žemički i sendviča i za grilanje
drugih vrsti namirnica.
Namijenjen je isključivo za privatna domaćinstva i
nije koncipiran za gospodarske uporabne svrhe.
Sigurnosne napomene
Na taj način ćete spriječiti opasnosti
uslijed strujnog udara
• Uređaj smije samo biti korišten u unutrašnjosti
suhih prostorija. Uređaj držite podalje od vode
koja prska - čak i kada je on isključen.
• Uređaj koristite samo onda, kada lokalni mrežni
napon odgovara nominalnom naponu uređaja.
• Uređaj ne priključujte preko višestruke utičnice,
preko koje su istovremeno priključeni i drugi
uređaji u radu, jer to može dovesti do preoptere-
ćenja strujnog kruga.
• Uređaj isključite nakon svake uporabe. U tu
svrhu izvucite mrežni utikač.
• Prilikom čišćenja obratite pažnju na to, da voda
ne dospije u unutrašnjost uređaja. Uređaj nikada
ne smijete čistiti pod mlazom tekuće vode.
Uređaj nikada ne zaronite u vodu ili u druge
tekućine!
• Zaštitite mrežni kabel od oštećenja. Obratite pažnju
na to, da se kabel ne gnječi i držite ga dalje od
vrućih predmeta. Mrežni kabel ne pustite da labavo
visi sa ruba stola ili radne ploče.
• Nikada ne otvarajte kućište uređaja.
• Oštećene mrežne utikače ili oštećen mrežni kabel
neizostavno dajte zamijeniti od strane autoriziranog
stručnog osoblja ili servisa za kupce, kako biste
izbjegli nastanak opasnosti.
• Popravke smiju vršiti isključivo od trgovci i iskusni
stručnjaci ovlašteni od strane proizvođača.
Ovako ćete izbjeći opasnost od
požara i od ozljeda
• Uređaj postavite na ravnu podlogu koja ne klizi
i koja je otporna na visoke temperature, a ne na
ili pokraj drugih uređaja, koji mogu zračiti veliku
količinu toplote (npr. toster, štednjak).
• Nikada ne radite ovim uređajem u blizini lako
zapaljivih predmeta, na primjer ispod zavjesa ili
pokraj valjaka kuhinjskog papira.
I u slučaju propisnog rukovanja pojedini dijelovi
uređaja postaju vrlo vrući (primjerice gornja i
donja ploča kućišta). Obratite pažnju na to, da
ove površine ne dotaknete, sve dok se one nakon
isključivanja uređaja potpuno ne ohlade.
• Da biste spriječili opasno pregrijavanje, uvijek
odmotajte punu dužinu mrežnog kabela.
• Za vrijeme rada uređaj možete bez opasnosti
otvarati i zatvarati hvatajući za termoizolirani
rukohvat.
• Ovaj uređaj nije namijenjen da bude korišten od
strane osoba (uključujući djecu) sa ograničenim
fizičkim, senzoričnim i mentalnim osobinama i
nedostatkom iskustva ili znanja, osim ako ove
osobe stoje pod nadzorom druge osobe zadu-
žene za njihovu sigurnost, ili ako su od nje primili
upute za ispravno korištenje uređaja.
• Djeca bi trebala biti pod nadzorom, čime treba
biti osigurano da se ne mogu igrati ovim
uređajem.
IB_72222_SPM2000A1_LB7 08.02.2012 15:15 Uhr Seite 10

- 11 -
• Ovaj uređaj ne pogonite sa eksternim rasklopnim
satom ili preko odvojenog sustava za daljinsko
upravljanje.
• Uređaj nakon isključivanja ostavite da se potpuno
ohladi, prije nego što ga očistite i spremite.
Ovako ćete spriječiti oštećenje
uređaja
• Sve vrste namirnica izvadite isključivo sa plastič-
nom ili drvenom lopaticom ili pomoću drugog
prikladnog, nemetalnog predmeta, kako ne biste
uništili protulijepljivi sloj uređaja.
• Iz istog razloga za čišćenje ne upotrebljavajte
agresivna sredstva ili šiljate predmete.
Tehnički podaci
Nominalni napon: 220-240 V ~, 50 Hz
Snaga: 2000 W
Izjava o sukladnosti za ovaj proizvod dostupna je
na internet stranici www.lidl.hr.
Obim isporuke
• Uređaj za pripremanje sendviča (Panini-Maker)
• Zdjela za prihvat masnoće
• Lopatica za čišćenje
• Upute za uporabu
Opis uređaja
1Regulator stupnja zagrijavanja
2crvena kontrolna lampica “Power”
3Mrežni kabel
4Sigurnosni zatvarač
5zelena kontrolna lampica “Ready”
6Rukohvat
7Zdjela za prihvat masnoće
8Ispust za mast
9Grijače ploče
0Lopatica za čišćenje
Prvo puštanje u pogon
1. Izvadite uređaj iz pakiranja. Otklonite sve dodatne
transportne osigurače, na primjer folije ili držače
kabela.
2. Prije prvog puštanja u rad provjerite kompletnost
obima isporuke i provjerite, da li postoje vidljiva
oštećenja.
3. Ove upute za uporabu pažljivo pročitajte.
4. Uređaj postavite u skladu sa sigurnosnim napo-
menama.
5. Otvorite sigurnosni zatvarač 4 .
6. Očistite uređaj pomoću vlažne krpe na način
opisan u poglavlju "Čišćenje i održavanje".
7. Zatvorite uređaj.
8. Utaknite mrežni utikač u utičnicu i uređaj zagrijte
ca. 5 minuta na maksimalnoj podešenoj temperaturi.
Napomena:
Kod prvog zagrijavanja uređaja zbog naslaga pre-
ostalih prilikom izrade uređaja može doći do pojave
blagog dima i mirisa. To predstavlja potpuno nor-
malnu i bezopasnu pojavu. Osigurajte dostatnu
ventilaciju, primjerice možete otvoriti jedan prozor.
9. Mrežni utikač nakon zagrijavanja izvucite iz
mrežne utičnice i ostavite uređaj da se ohladi.
10. Očistite uređaj još jednom pomoću vlažne krpe.
Rukovanje
1. Zatvorite poklopac uređaja pomoću rukohvata 6.
2. Gurnite zdjelu za prihvat masnoće 7u uređaj.
3. Utaknite mrežni utikač u mrežnu utičnicu. Crvena
kontrolna lampica “Power” 2se pali.
IB_72222_SPM2000A1_LB7 08.02.2012 15:15 Uhr Seite 11

- 12 -
4. Željeni stupanj podesite pomoću regulatora
stupnja zagrijavanja 1. Čim je dostignut
podešeni stupanj zagrijavanja, zelena
kontrolna lampica “Ready” 5počinje svijetliti.
Napomena:
Zelena kontrolna lampica “Ready” 5svijetli i
onda, kada regulator stupnja zagrijavanja 1stoji u
položaju „0“. Čim regulator stupnja zagrijavanja
1postavite u željeni položaj, zelena kontrolna
lampica „Ready” 5se gasi, sve dok ne bude do-
stignuta odgovarajuća temperatura.
Napomena:
Zelena kontrolna lampica “Ready” 5se može pov-
remeno ponovo ugasiti. To znači, da je temperatura
pala ispod podešene vrijednosti, te uređaj ponovo
vrši zagrijavanje!
5. Otvorite poklopac uređaja i postavite namirnice
za pečenje/grilanje na donju ploču za zagrija-
vanje 9.
6. Zatvorite poklopac uređaja. Uslijed okretne
gornje ploče za zagrijavanje 9ista se uvijek
nalazi paralelno u odnosu na donju ploču, čak
i kada pripremate deblje vrste namirnica 9. Na
taj način ćete postići optimalan rezultat grilanja.
7. Nakon nekog vremena kontrolirajte stupanj ru-
menila namirnica, koje grilate. U tu svrhu otvorite
poklopac uređaja.
Napomena:
Započnite sa kratkim razdobljima grilanja i ista
postupno povećavajte, sve dok ne ne pronađete
ispravno vrijeme trajanja postupka pripremanja.
8. Kada ste zadovoljni sa postignutim rumenilom,
otvorite poklopac i izvadite namirnice.
Pažnja:
Ne koristite šiljate ili oštre predmete za vađenje na-
mirnica. Ovi predmeti bi površine grijačih ploča 9
mogli oštetiti!
9. Okrenite regulator stupnja zagrijavanja 1u
položaj “0” i izvucite mrežni utikač iz mrežne uti-
čnice.
Pažnja:
Uvijek izvucite mrežni utikač iz mrežne utičnice, kada
ne koristite uređaj. Nije dovoljno postaviti regulator
stupnja zagrijavanja 1u položaj “0”!
Savjeti i trikovi
• Da biste meso načinili mekšim i ubrzali postupak
grilanja, meso možete prethodno marinirati. Kao
podloga za to prikladni su primjerica kiselo vrhnje,
crno vino, ocat, mlaćenica ili svježi sok papaje ili
ananasa. Prema ukusu dodajte začinsko bilje ili
začine. Ne dodavajte soli, jer ona izvlači vodu
iz mesa, koje uslijed toga postaje tvrđe. Meso
postavite tako u marinadu, da bude potpuno po-
kriveno. Zatvorite posudu. Najbolje je, da meso
preko noći ostavite u posudi.
• Grijače ploče 9su obložene protuljepljivim
slojem, zbog čega dodatna mast nije potrebna.
Ukoliko ipak želite koristiti masnoću, obratite
pažnju na to, da dotična mast/ulje bude priklad-
no za pečenje, na primjer ulje iz uljane repice.
• Ukoliko niste sigurni, da li je unutrašnjost namirnica
kuhana, koristite toplomjer za meso, kakav je
uobičajen u trgovinama.
IB_72222_SPM2000A1_LB7 08.02.2012 15:15 Uhr Seite 12

- 13 -
Čišćenje i održavanje
Pažnja!
Prije čišćenja izvucite mrežni utikač i čekajte, dok se
uređaj potpuno ne ohladi. Opasnost od ozljeđivanja!
Pažnja!
Uređaj nikada ne čistite pod mlazom tekuće vode i
nikada ga ne uranjajte u vodu. Uređaj u tom slučaju
može biti nepopravljivo oštećen!
• Prevucite lopaticu za čiščenje 0, nakon što su
se grijače ploče 9ohladile, preko grijačih
ploča 9, tako da masnoća i naslage mogu biti
skupljene i lakše odstranjene.
• Prebrišite ploče za grijanje 9sa vlažnom krpom.
U slučaju tvrdokornih onečišćenja dodajte blago
sredstvo za pranje suđa na krpu. Za čišćenje ne
koristite agresivna sredstva, hrapave spužve ili
šiljate predmete, kako biste izbjegli uništenje pro-
tuljepljivog sloja.
• U slučaju izraženih naslaga postavite vlažnu
krpu na zapekle naslage, kako biste ih razmekšali.
Za čišćenje vanjskih površina uređaja dovoljna je
vlažna krpa.
Obratite pažnju na to, da prije ponovne uporabe
uređaja svi dijelovi budu potpuno suhi.
Prebrišite lopaticu za čišćenje 0sa vlažnom
krpom. U slučaju tvrdokornih onečišćenja dodajte
blago sredstvo za pranje posuđa na krpu.
Čuvanje uređaja
Očišćen uređaj čuvajte na suhom mjestu.
Zatvorite sigurnosni zatvarač 4 .
Omotajte mrežni kabel 3oko namotača kabela
na donjoj strani uređaja.
Recepti
Panini je topli sendvič pripremljen od svježeg bijelog
kruha. Panini se prži i zatim servira.
Panini sa špinatom i sirom
250 g špinata u listu
1 Luk
1 češanj češnjaka
1 VŽ ulja
2 MŽ soka od limuna
Malo soli (i papra)
4 ploške tosta/bijelog kruha
40 g maslaca sa začinskim biljkama
75 g Mocarele
20 g koštica pinija
• Listove špinata proberite i operite.
• Luk i češnjak oljuštite i fino isjeckajte, u vrućem
ulju pirjajte dok ne poprimi stakleni izgled. Dodajte
špinat. Začinite sa limunovim sokom, soli i paprom.
• Tost premažite sa maslacom sa začinskim biljkama.
• Mocarelu izrežite u ploške i zajedno sa ocijeđenim
špinatom podijelite na dvije ploške tosta. Pospite
sa košticama pinije.
• Panine prekrite sa drugom ploškom tosta.
• Panine oprezno postavite na uređaj za izradu
sendviča, koji ste prethodno zagrijali na srednjoj
temperaturi, te zatvorite poklopac.
• Pričekajte, dok panini ne poprime zlatno-rumenu
boju. Zatim sendviče izvadite iz uređaja.
IB_72222_SPM2000A1_LB7 08.02.2012 15:15 Uhr Seite 13

- 14 -
Panini sa pilećim prsima
400 g fileta od pilećih prsa
20 g maslaca
Papar, sol, paprika u prahu
120 g špeka izrezanog
6 ploški bijelog kruha/tosta
3 VŽ umaka za salatu (jogurt)
30 g ledene salate
2 rajčice
1 Avokado
1 MŽ soka od limone
50 g krastavca za salatu
• Filet od pilećih prsa kratko operite pod mlazom
tekuće vode i osušite pomoću kuhinjskog papira.
U tavi zagrijte maslac i u njemu filete pilećih prsa sa
obje strane dobro zapecite. Štednjak vratite na
srednju vatru i filete pilećih prsa ca. 10 minuta
pecite. Nakon toga začinite sa soli, paprom i
paprikom, izvadite iz tave i stavite na stranu.
• Mast u tavi još jednom zagrijte i u njoj pržite
izrezani špek, dok ne porumeni.
• Na 3 ploške tosta/bijelog kruha raspodijelite umak
od jogurta, ploške obložite sa ledenom salatom,
rajčice izrežite na kriške, začinite i takođe stavite
na sendviče.
• Filete od pilećih prsa po dužini rasjecite i postavite
na rajčice.
• Avokado po dužini rasjecite i okretanjem odvojite
od koštice. Koru svucite i avokado izrežite u plo-
ške. Avokado pospite sa sokom od limone, kako
ne bi potamnio. Ploške stavite na panine.
• Krastavac izrežite na ploške i stavite na avokado.
• Panine prekrite sa drugom ploškom tosta.
• Panine oprezno postavite na uređaj za izradu
sendviča, koji ste prethodno zagrijali na srednjoj
temperaturi, te zatvorite poklopac.
• Pričekajte, dok panini ne budu zlatnorumeno
pečeni, a zatim ih oprezno izvadite iz uređaja.
Baget sa senfom
1 Baget (francuski kruh)
1 češanj češnjaka
50 g krastavaca
40 g Pecorino
1 VŽ senfa
2 VŽ slatkog senfa
50 g maslaca
2 VŽ vlasca
Sol, papar
• Baget zarežite u razmacima od ca. 2-3 cm, ali
ne prorežite sasvim.
• Češnjak oljuštite i zgnječite, krastavce isjecite
na vrlo sitne kockice, a pecorino naribajte.
• Ljuti i slatki senf pomiješajte sa mekanim maslacem,
češnjakom, kockicama od krastavaca, pecorinom
i vlascem, te začinite sa soli i paprom.
• Maslac umetnite u otvore u bagetu i umotajte u
aluminijsku foliju.
• Bagete postavite na uređaj za izradu sendviča,
koji ste prethodno na srednjoj vatri zagrijali, te
zatvorite poklopac. Baget bi trebao biti zlatnožute
boje.
IB_72222_SPM2000A1_LB7 08.02.2012 15:15 Uhr Seite 14

- 15 -
Zbrinjavanje
Uređaj nikako ne bacajte u obično kućno
smeće. Ovaj proizvod podliježe europ-
skoj smjernici 2002/96/EC.
Uređaj zbrinite preko autoriziranog poduzeća za
zbrinjavanje otpada ili preko Vašeg komunalnog
poduzeća.
Obratite pažnju na aktualno važeće propise.
U slučaju dvojbe se povežite sa svojim mjesnim
poduzećem za zbrinjavanje otpada.
Sve materijale ambalaže zbrinite na način
neškodljiv za okoliš.
Jamstvo i servis
Na ovaj uređaj vrijedi jamstvo u trajanju od 3 godi-
ne od datuma kupovine. Uređaj je pažljivo proizve-
den i prije isporuke brižljivo kontroliran. Molimo sa-
čuvajte blagajnički račun kao dokaz o kupnji.
Molimo da se u slučaju ostvarivanja prava na jamst-
vo telefonski povežete sa Vašom servisnom isposta-
vom. Samo na taj način vaša roba može biti be-
splatno uručena.
Jamstvo vrijedi samo za greške materijala i izrade,
a ne za transportne štete, potrošne dijelove ili ošte-
ćenja lomljivih dijelova, na primjer prekidača ili ba-
terija.
Proizvod je namijenjen isključivo za privatnu, a ne
za gospodarstvenu uporabu.
U slučaju nestručnog rukovanja, rukovanja protiv-
nog namjeni uređaja, primjene sile i zahvata, koji
nisu izvršeni od strane našeg ovlaštenog servisnog
predstavništva, važenje jamstva prestaje. Vaša za-
konska prava ovim jamstvom ostaju netaknuta.
Jamstveni rok se ne produžava uslijed ostvarivanja
prava na jamstvo. To vrijedi i za zamijenjene i po-
pravljene dijelove. Eventualno već prilikom kupovi-
ne prisutna oštećenja i nedostaci moraju biti javlje-
na neposredno nakon raspakiranja, ali najkasnije
dva dana nakon datuma kupovine. Popravke vršene
nakon isteka jamstvenog roka podliježu obavezi
plaćanja.
Servis Hrvatska
Tel.: 0800 777 999
E-Mail: [email protected]
IAN 72222
IB_72222_SPM2000A1_LB7 08.02.2012 15:15 Uhr Seite 15

- 16 -
Uvoznik
Lidl Hrvatska d.o.o. k.d.,
p.p. 61
10020 Novi Zagreb
Proizvođač:
KOMPERNASS GMBH
BURGSTRASSE 21
D-44867 BOCHUM, Njemačka
www.kompernass.com
IB_72222_SPM2000A1_LB7 08.02.2012 15:15 Uhr Seite 16

- 17 - R
CUPRINS PAGINA
Utilizarea conform destinaţiei 18
Indicaţii de siguranţă 18
Date tehnice 19
Furnitura 19
Descrierea aparatului 19
Prima punere în funcţiune 19
Operarea 20
Sfaturi şi sugestii 20
Curăţarea şi îngrijirea 21
Depozitarea 21
Reţete 21
Panini cu spanac şi caşcaval . . . . . . . . . . . . . . . . . . . . . . . . . . . . . . . . . . . . . . . . . . . . . .21
Panini cu piept de pui . . . . . . . . . . . . . . . . . . . . . . . . . . . . . . . . . . . . . . . . . . . . . . . . . . . .22
Baghete cu muştar . . . . . . . . . . . . . . . . . . . . . . . . . . . . . . . . . . . . . . . . . . . . . . . . . . . . . .22
Eliminarea aparatelor uzate 22
Garanţia şi service-ul 23
Importator 23
Citiţi cu atenţie instrucţiunile de utilizare înainte de prima utilizare şi păstraţi-le pentru o consultare ulterioară.
Dacă înmănaţ iaparatul unor terţi, ataşaţi şi instrucţiunile de utilizare.
IB_72222_SPM2000A1_LB7 08.02.2012 15:15 Uhr Seite 17

- 18 -
R
Grătar panini
Utilizarea conform destinaţiei
Grillul de masă pentru panini este destinat rumenirii
chiflelor şi sandvişurilor sau pentru prăjirea pe grill
a altor alimente.
Aparatul este destinat exclusiv utilizării în locuinţele
private, şi este interzisă utilizarea în scopuri profesio-
nale.
Indicaţii de siguranţă
Astfel evitaţi pericolul de
electrocutare
• Aparatul poate fi utilizat numai în încăperi închise
şi uscate. Ţineţi aparatul, chiar dacă este oprit,
departe de apa pulverizată.
• Utilizaţi aparatul numai dacă tensiunea reţelei
locale de curent coincide cu tensiunea nominală
a aparatului.
• Nu conectaţi aparatul la o priză multiplă la care
sunt conectate simultan mai multe aparate, acest
lucru putând provoca suprasolicitarea circuitului
de curent.
• Opriţi aparatul după fiecare utilizare. Scoateţi
ştecărul din priză.
• La curăţare asiguraţi-vă că în aparat nu se infil-
trează apă. Nu curăţaţi aparatul niciodată sub
jet de apă.
Nu introduceţi niciodată aparatul în apă sau
alte lichide.
• Protejaţi cablul contra deteriorărilor. Fiţi atenţi să nu
striviţ i cablul şi ţineţi-l la depărtare de obiectele
fierbinţi. Nu lăsaţi cablul să atârne liber de pe
masă sau blatul de lucru.
• Nu deschideţi niciodată carcasa aparatului.
• Dacă ştecărul sau cablul de alimentare se defec-
tează, solicitaţi imediat repararea de către personal
specializat sau de către serviciul clienţi, pentru a
evita periclitările.
• Reparaţiile pot fi realizate numai în atelierele auto-
rizate de către producător, sau de către specialişti
cu experienţă.
Astfel evitaţi pericolele de incendiu
şi rănire
• Aşezaţi aparatul pe un suport plan, antiderapant şi
rezistent la căldură şi nu pe sau lângă alte aparate
care emit căldură (de ex., tostere sau cuptoare).
• Nu utilizaţi aparatul în apropierea obiectelor uşor
inflamabile, de exemplu, sub draperii sau rulouri
de hârtie.
Chiar dacă aparatul este utilizat reglementar,
componentele sale devin foarte fierbinţi (de ex.
plăcile de sus şi de jos ale carcasei). Evitaţi să
atingeţi aceste suprafeţe până după oprirea şi
răcirea aparatului.
• Pentru a evita supraîncălzirile periculoase, desfăşu-
raţi complet cablul.
• În timpul funcţionării, aparatul poate fi deschis şi
închis fără pericol cu ajutorul mânerului izolat.
• Acest aparat nu este destinat utilizării de către
persoane (inclusiv copii) cu capacităţi fizice, sen-
zoriale sau mentale limitate sau cu o experienţă
limitată şi/sau cunoştinţe limitate, cu excepţia ca-
zului în care sunt supravegheate de către o perso-
ană responsabilă cu siguranţa lor sau au primit
instrucţiuni de la aceasta privind modul de utiliza-
re a aparatului.
• Copiii trebuie supravegheaţi, pentru a împiedica
utilizarea aparatului ca jucărie.
IB_72222_SPM2000A1_LB7 08.02.2012 15:15 Uhr Seite 18
This manual suits for next models
1
Table of contents
Languages:
Other Kompernass Grill manuals
Popular Grill manuals by other brands

Weber
Weber Genesis 310 owner's guide

Napoleon
Napoleon ROGUE 425SB-1 quick start guide

Nexgrill
Nexgrill G5NEX Assembly instructions

Empire Comfort Systems
Empire Comfort Systems Broilmaster OPTIONS PCB1-3 owner's manual

Renaissance Cooking Systems
Renaissance Cooking Systems Premier Series owner's manual

Kasanova
Kasanova AIK000001 instruction manual