4
Safety messages
MAIN CORDSET SELECTION
(THE FOLLOWING NOTE ONLY APPLIES ONLY TO THE UNITS
RATED 230V 50Hz, AND LOCATED IN THE EUROPEAN UNION)
CAUTION: WHEN CHOOSING A DETACHABLE LINE
CORD FOR USE WITH YOUR PUNCH G2, ALWAYS
FOLLOW THE FOLLOWING PRECAUTIONS
The cordset consists of three parts: the attachment plug, the cord and
the appliance inlet. Each of these components must have European
regulatory safety approvals.
The following minimum electrical ratings for the specific cordset are
published for safety purposes.
DO NOT USE CORDSETS THAT DO NOT MEET THE FOLLOWING
MINIMUM ELECTRICAL REQUIREMENTS.
PLUG: 3 amperes, 250 volts, 50/60 Hz, Class 1, 3 conductor,
European safety approved.
CORD: Type H05VV-F3G0.75, Harmonized (< HAR >). The “< >”
symbols indicate cord approved according to appropriate European
standard (NOTE: “HAR” may be substituted for approval mark of
European safety agency that approved the cord. An example would be
“< VDE >”).
APPLIANCE CONNECTOR: 3 amperes, 250 volts, 50/60 Hz,
European safety approved, Type IEC 320. The cordset shall not
exceed 3 meters in length. A cordset with component electrical ratings
greater than the minimum specified electrical ratings may be
substituted.
Service, PUNCH G2
Do not attempt to service your PUNCH G2 yourself. Contact an
authorized service representative for any required repairs or major
maintenance for your PUNCH G2.
DO NOT REMOVE THE MACHINE’S COVER.
There are NO user-serviceable parts inside the machine in order to
avoid potential personal injury and/or damage to property or the
machine itself.
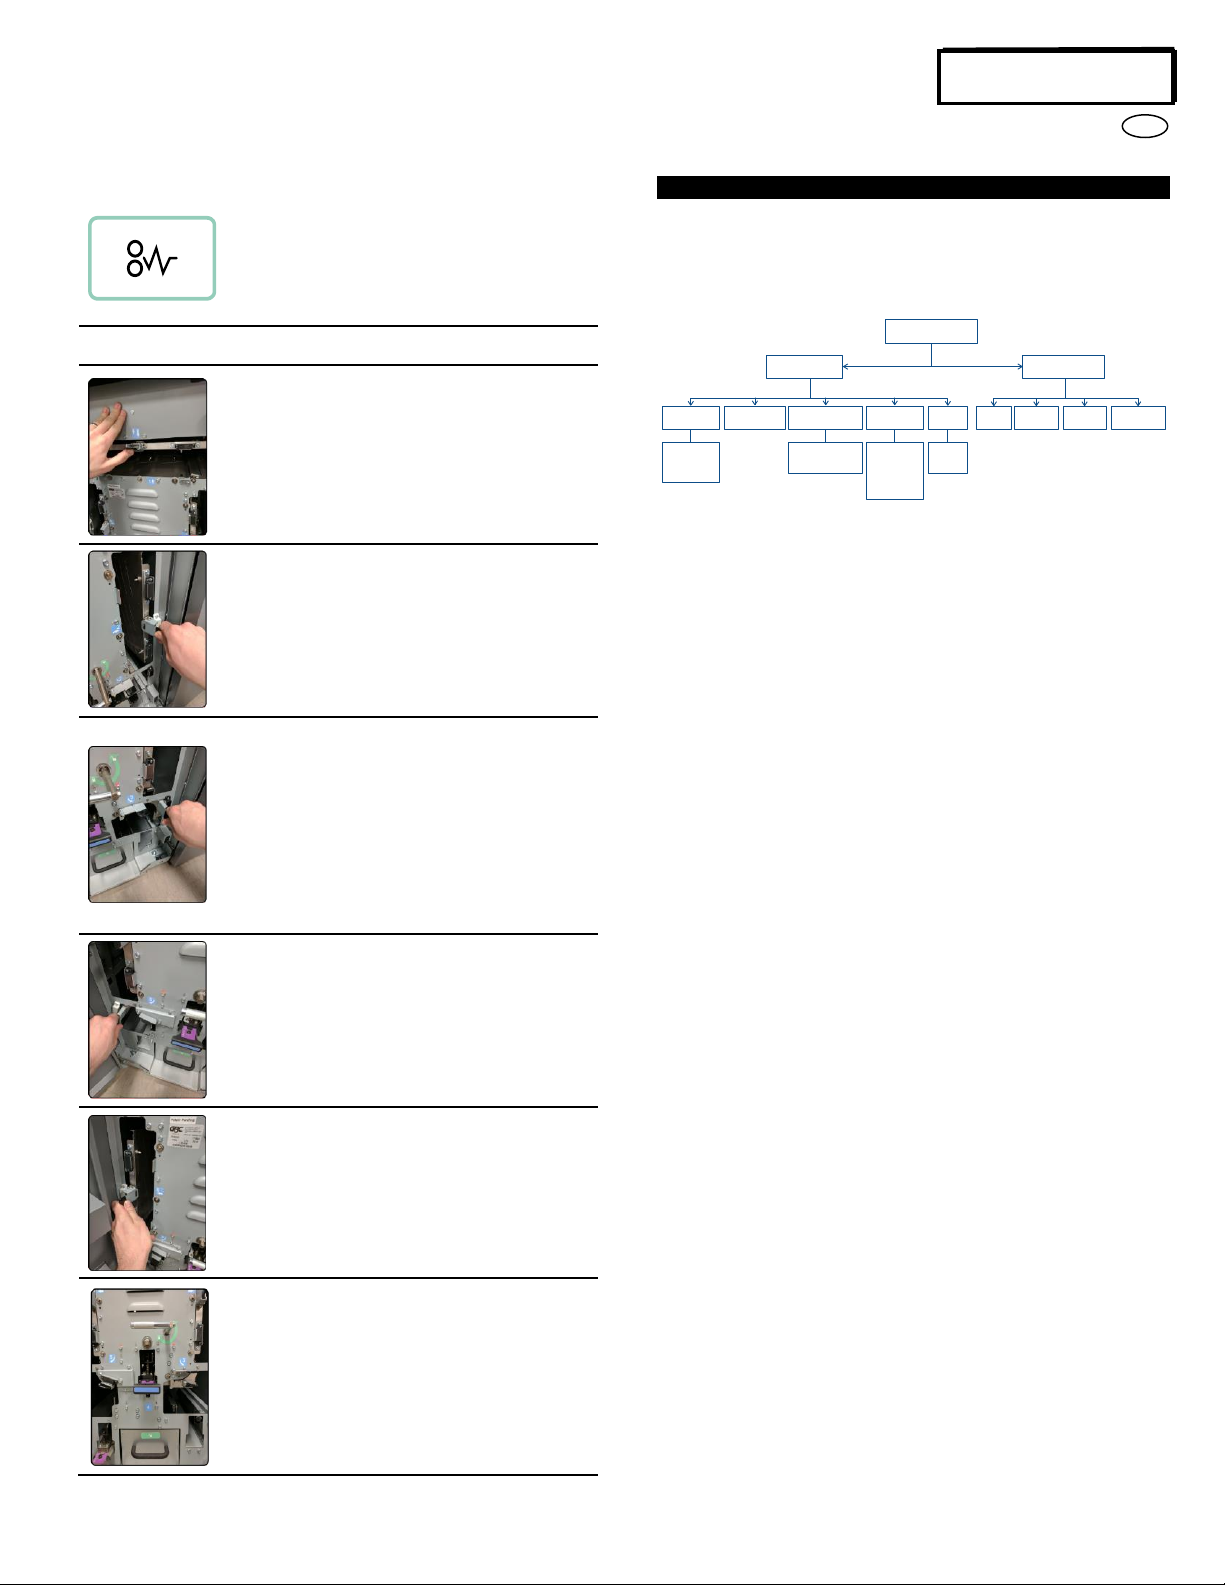
Service, Diesets
Every dieset is thoroughly oiled at the factory prior to shipping. Please
note that it is normal for oil to be present on the first few punched
sheets. During normal use this oil will be exhausted and should be
replaced. As part of regular maintenance, each dieset should be oiled
after approximately 250K punch cycles or sooner. GBC recommends
use of brand 3-IN-ONE oil as it is readily available. Other light machine
oils can also be used.
To oil the dieset, refer to Section 8- Die Set User manual. Please note
that it is normal for oil to be present on the first set of sheets punched
after oiling the dieset. After approximately 25 to 50 sheets oil will no
longer be found on the punched sheet. At this time the PUNCH G2 can
be utilized for punching of print jobs.
Refer to Section 8 - Die Set User manual for detailed cleaning
instructions of the crease die.
See Section 8 PUNCH G2 Dieset Manual for further instructions on
servicing the Diesets.
Safety messages
FCC NOTE
(THE FOLLOWING NOTE ONLY APPLIES TO THE UNITS RATED
115V 60Hz.)
This equipment has been tested and found to comply with the limits for
a Class A digital device, pursuant to Part 15 of the FCC Rules. These
limits are designed to provide reasonable protection against harmful
interference when the equipment is operated in a commercial
environment.
This equipment generates, uses, and can radiate radio frequency
energy and, if not installed and used in accordance with the Operation
Manual, may cause harmful interference with radio communications.
Operation of this equipment in a residential area is likely to cause
harmful interference in which case the user will be required to correct
the interference at his/her own expense.
CAUTION: CHANGES OR MODIFICATIONS NOT
EXPRESSLY APPROVED BY GENERAL BINDING
CORPORATION COULD VOID YOUR AUTHORITY TO
OPERATE THE EQUIPMENT.
2. INTRODUCTION
Thank you for purchasing the PUNCH G2. It is a versatile production
system that will enable you to punch documents for a variety of binding
styles by means of a simple die change. It has also been designed for
easy operation.
The PUNCH G2 is an innovative solution for punching paper and offers
the following design features:
Quick-change die sets that can be interchanged without any tools.
All PUNCH G2 die sets include an Identification Label providing
the user with the hole pattern and name.
Convenient storage area for two extra Die Sets located above the
sheet bypass.
Duty Cycle and Product Positioning
The GBC PUNCH G2 provides a flexible, cost effective punching
solution for light to medium level punching production environments. It
is designed for production print users that typically punch their
documents at an average of 20-30% of their overall workflow. For
customers that run continuous punching for long runs of over 4 hours,
performance may vary or degrade due to a wide range of media
weights and environmental conditions that can occur.
Maximum Recommended Monthly Volume - The maximum
recommended monthly punch volume should NOT exceed 400,000.
Operating Die Set Supplies
Dies are considered consumables and when worn, must be replaced
since sharpening is not possible.
Each die set has a 90-day warranty from the date of purchase. The
warranty is void if the die is used beyond its specifications.
Punch die life will be maximized if oiled every 100,000 punch cycles
(see Dieset Service for details)
Die sets have an expected use life of 750,000 punches using
20 lb/75 gsm paper. This is a minimum life expectation only. Die life is
NOT guaranteed due to a wide range of media weights and
environmental conditions that the dies may endure. If you are going to
be punching extended runs that exceed the die use life, it is strongly
recommended that you have sufficient numbers of the appropriate die
sets on hand to continue with minimal downtime.