8
Anwendung:
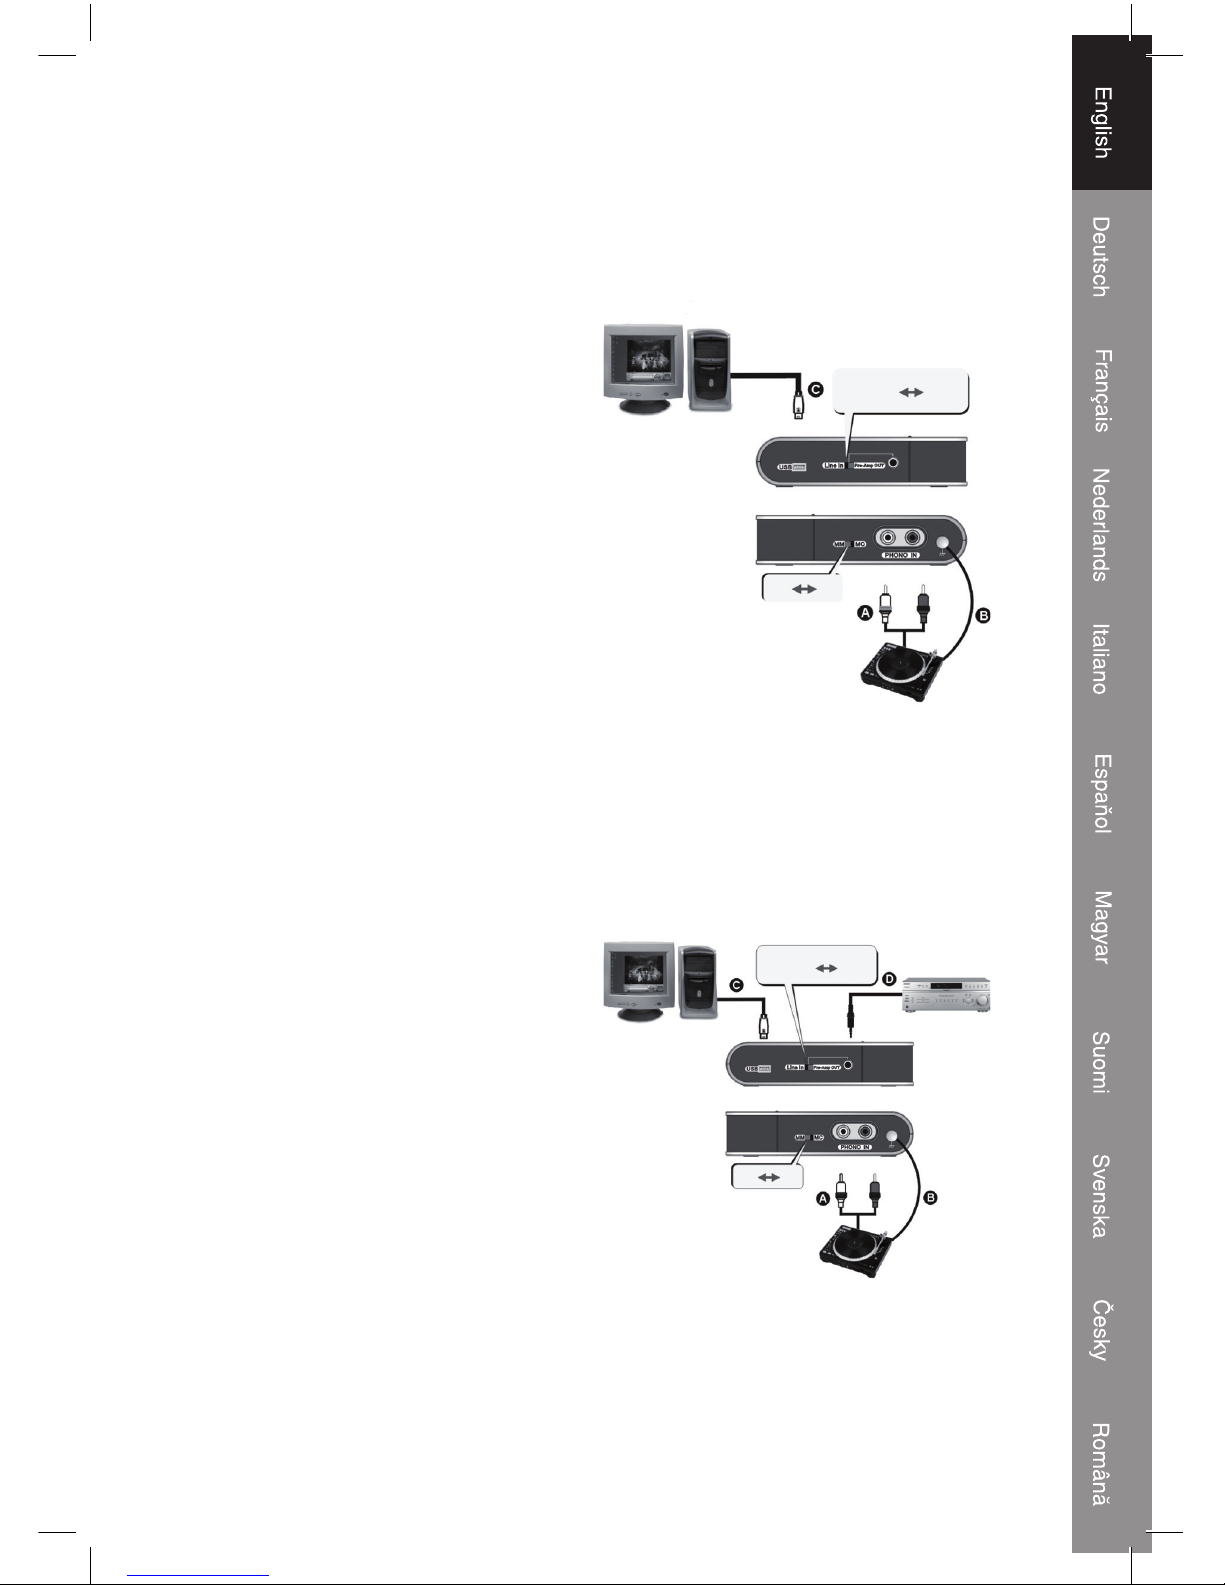
• Wandeln Sie analoge Musik auf Schallplatten ins digitale Format um.
Befolgen Sie die Beschreibung, um Musik von der Schallplatte aufzunehmen.
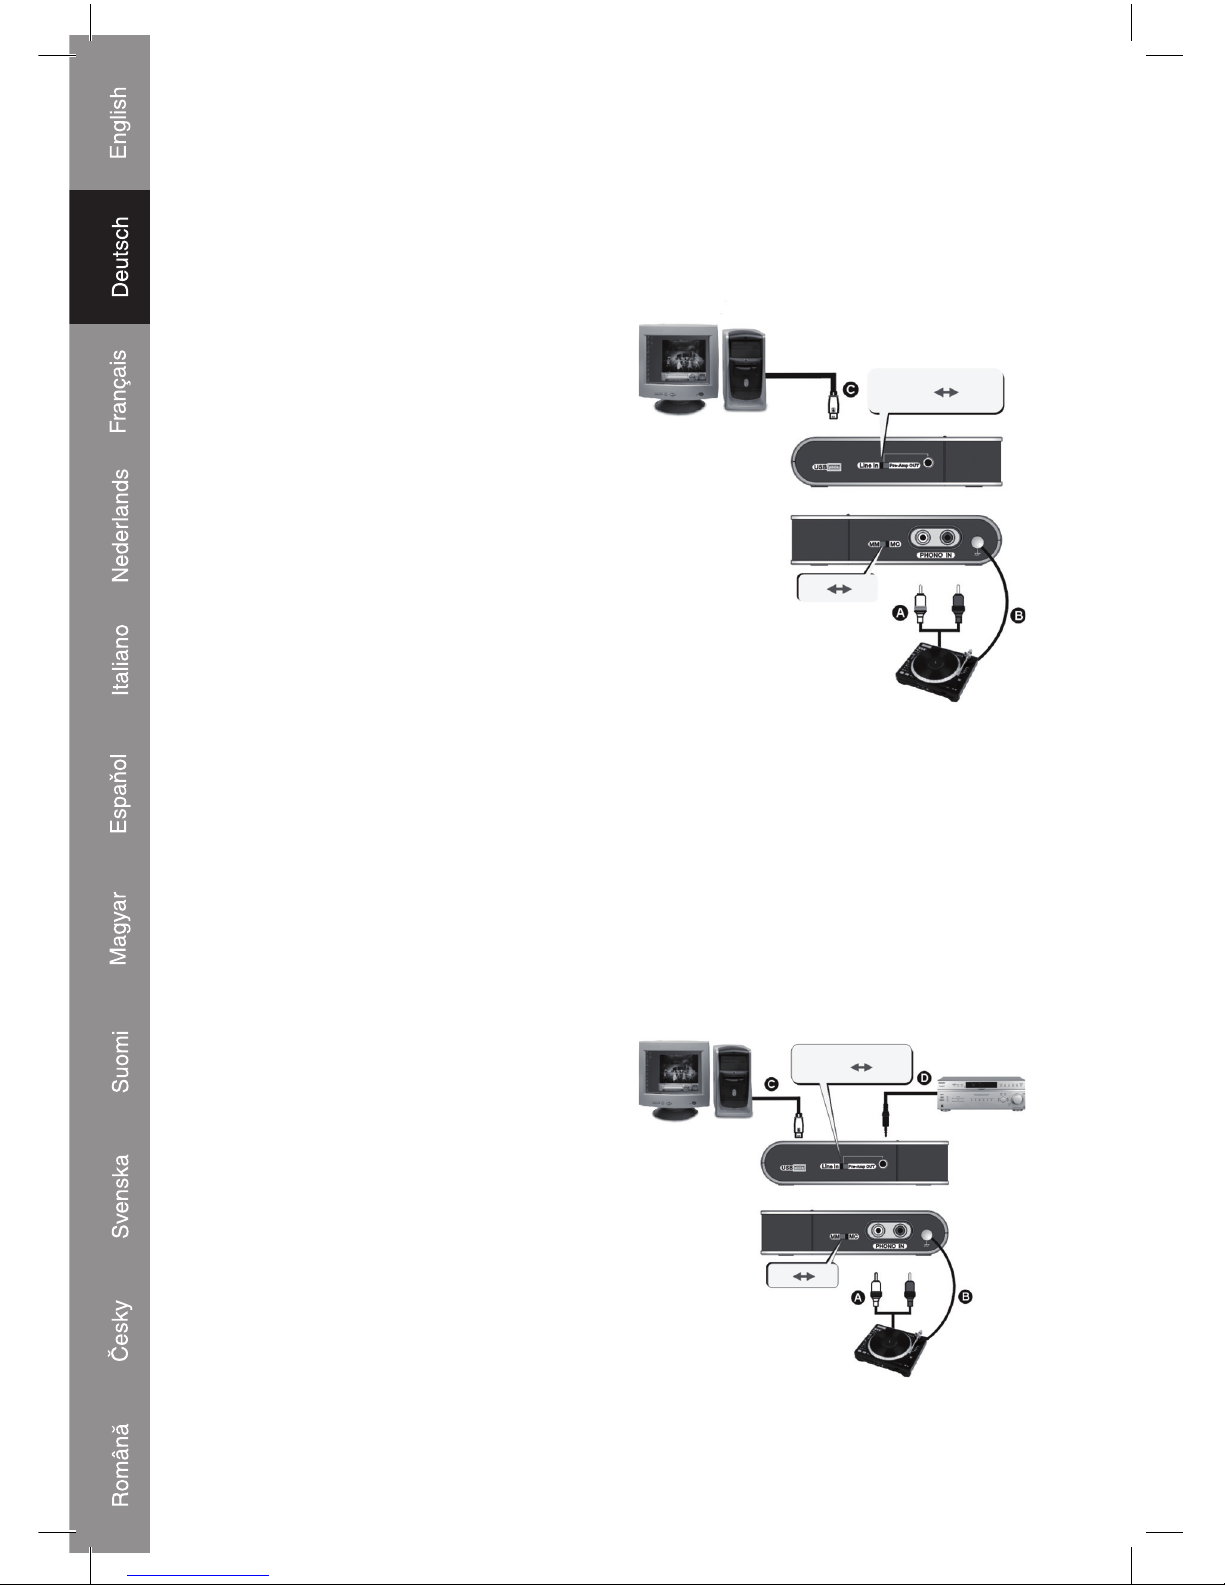
PC
Pre-Amp
Out Line
In
USB
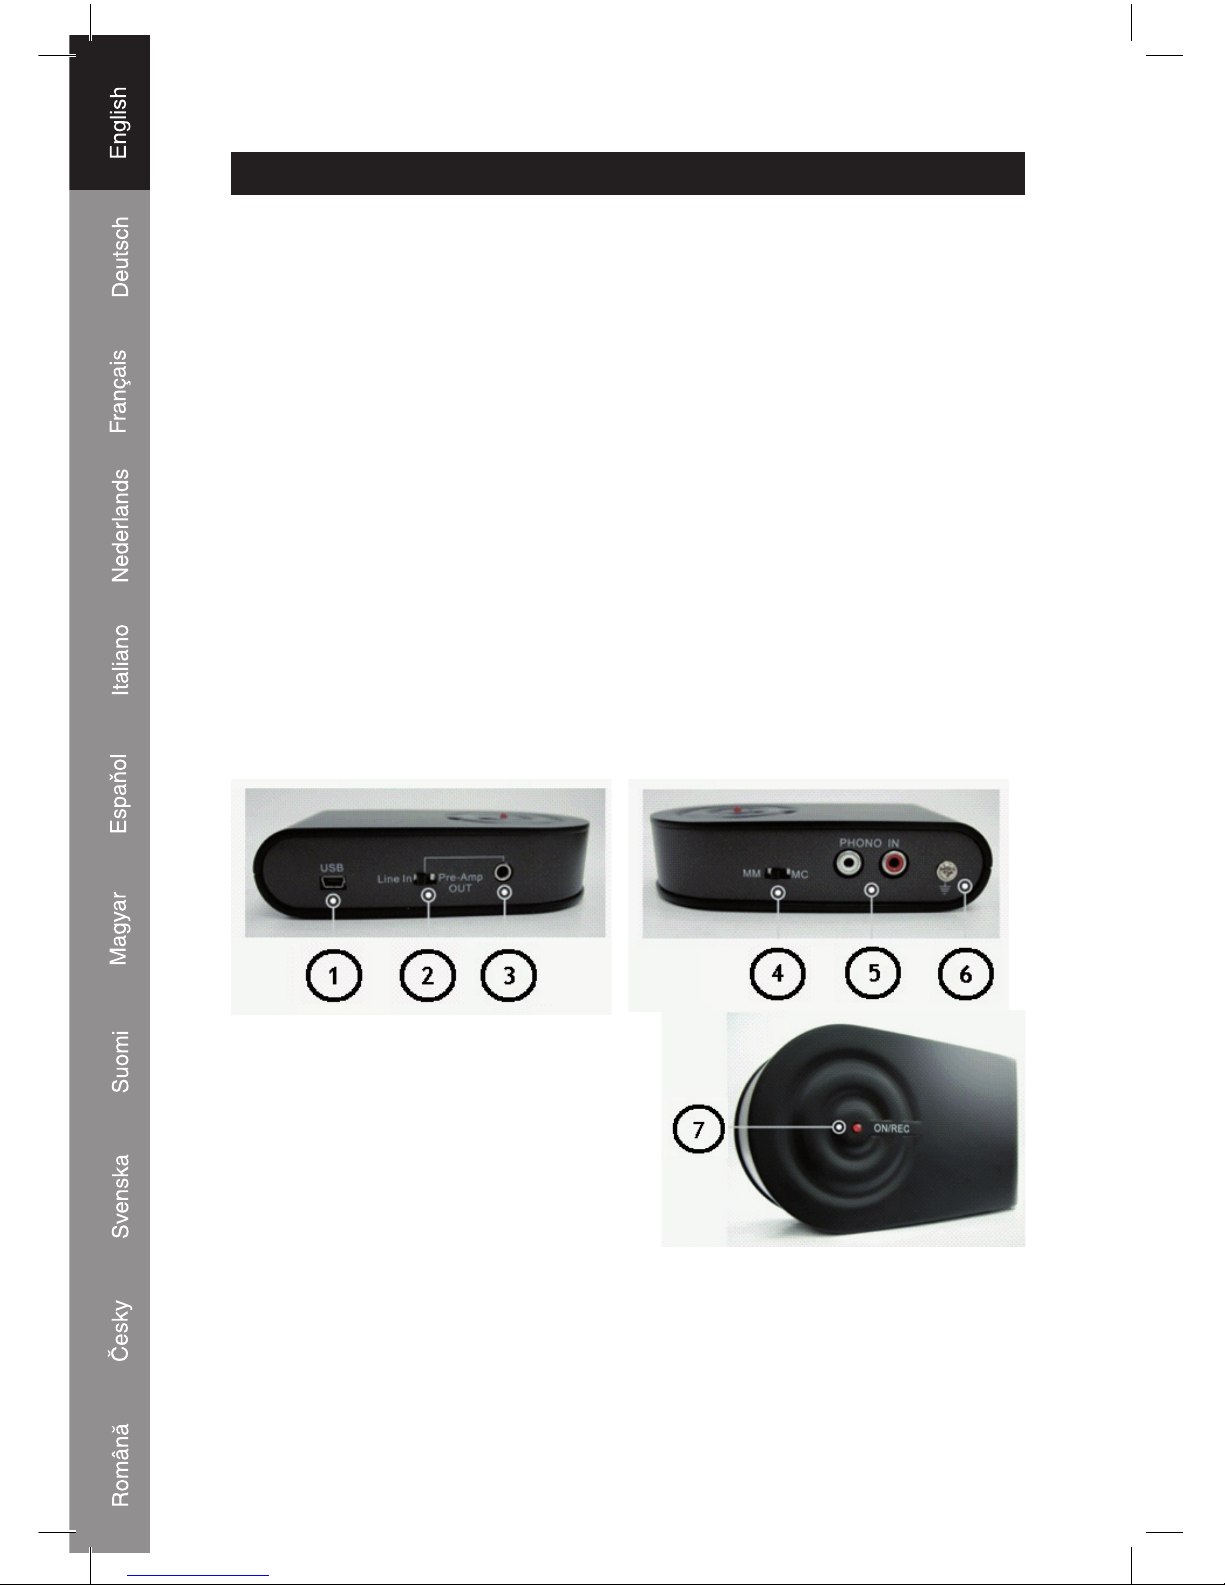
Vorderseite
Rückseite
Phono In
Plattenspieler
MM MC
A. Schließen Sie das R,L →R,L-Kabel an
den Schallplattenspieler und den USB-
Vorverstärker an.
B. Um ein BRUMM-Geräusch zu
vermeiden, das durch schlechte
Anpassung des Plattenspielers an den
USB-Vorverstärker entstehen kann, wird
empfohlen, den Erdungspunkt zwischen
den beiden Geräten anzuschließen.
C. Schließen Sie das USB-Kabel an
den PC (oder das Notebook) und
USB-Vorverstärker an, wie es in der
Abbildung gezeigt ist.
Wenn der USB-Anschluss in Ordnung
ist, erkennt der PC es automatisch als
"USB PREAMP". Dann können Sie
beginnen, das Gerät an Ihrem Computer
zu benutzen.
Bedienung:
A. Schließen Sie den Plattenspieler an den USB-Vorverstärker an.
B. Spielen Sie die Schallplatte ab.
C. Wählen Sie die MM/MC-Position für die verschiedenen Typen von Tonabnehmern für
Plattenspieler.
D. Nun können Sie die Aufnahme mit Ihrer Audio-Grabbing-Software auf einem PC/
Notebook beginnen.
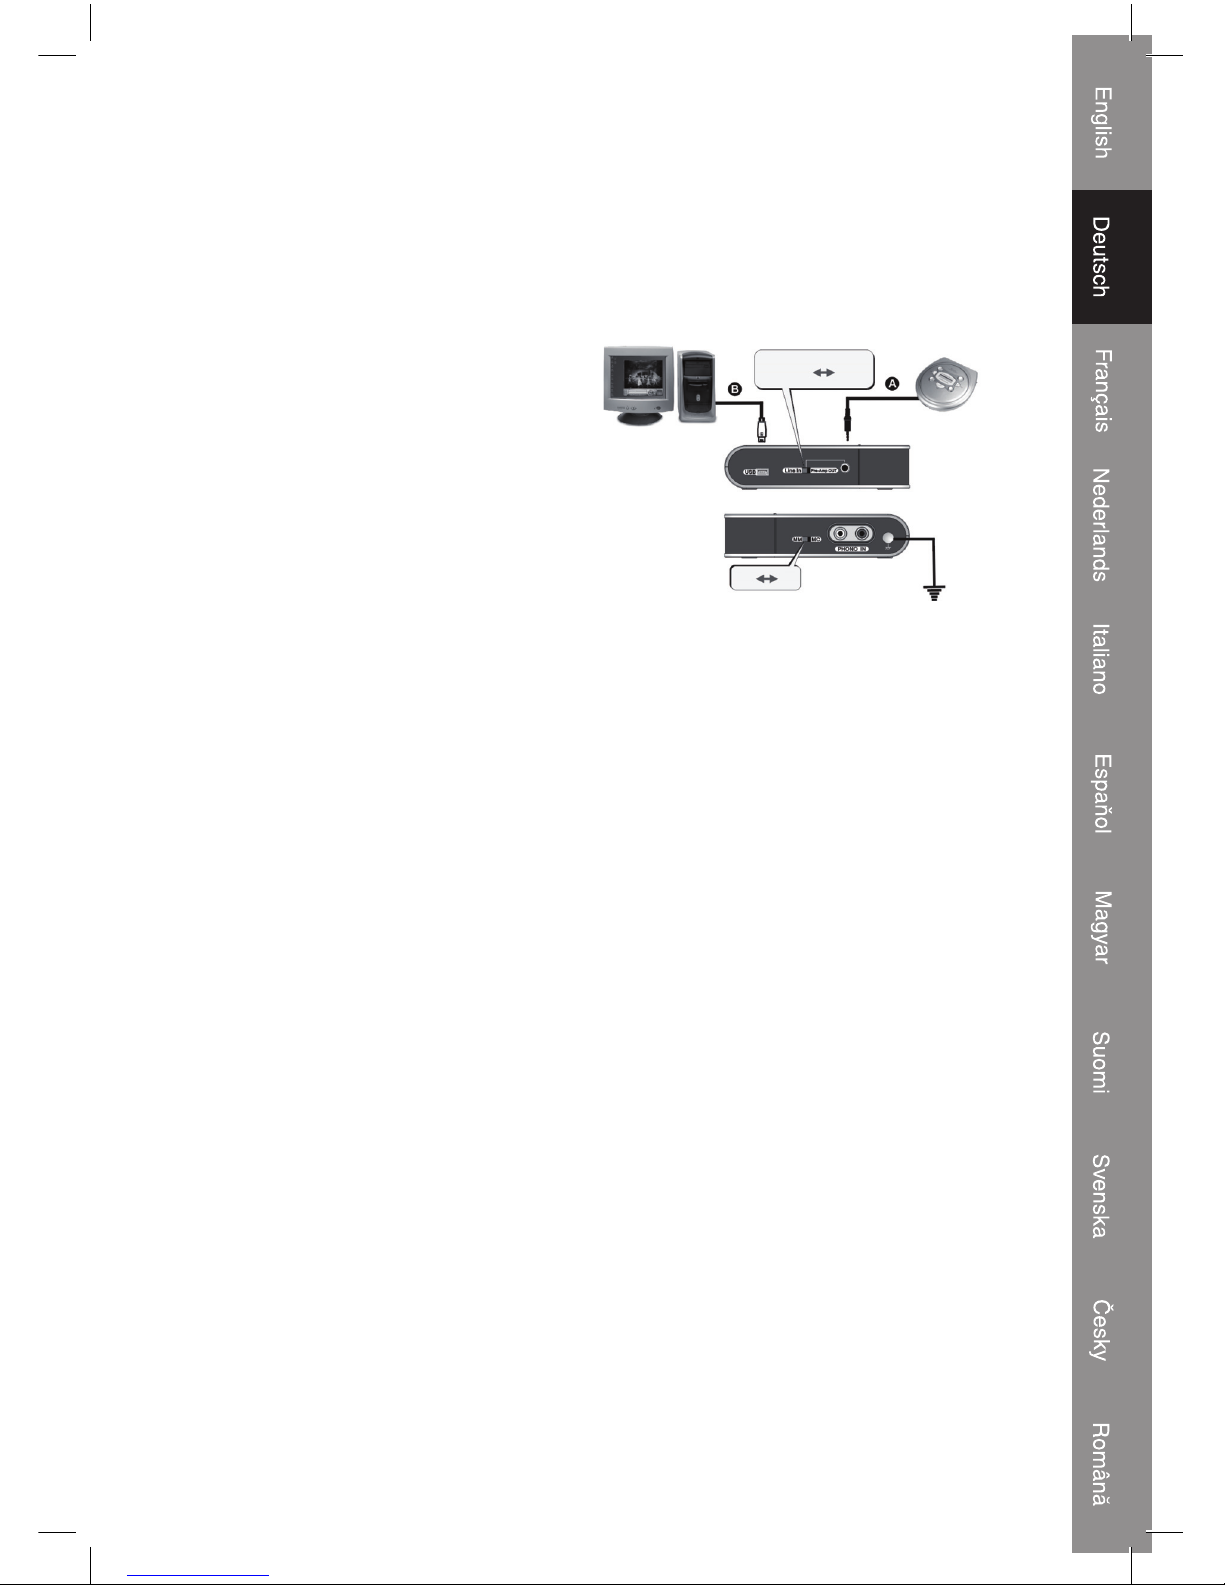
• PHONO-Vorverstärker (Unabhängig oder gleichzeitig mit PC betrieben):
PC
Pre-Amp
Out
Line
In
USB
Vorderseite
Rückseite
Phono In
Plattenspieler
MM MC
Verstärker
A. Schließen Sie das R,L →R,L-Kabel an
den Schallplattenspieler und an USB
Pre-Amp an.
B. Um ein BRUMM-Geräusch zu
vermeiden, das durch schlechte
Anpassung des Plattenspielers an den
USB-Vorverstärker entstehen kann, wird
empfohlen, den Erdungspunkt zwischen
den beiden Geräten anzuschließen.
C. Schließen Sie mit dem USB →mini USB-
Kabel Ihren PC an USB-Vorverstärker
an. Überzeugen Sie sich davon, dass der
Anschluss in Ordnung ist, da der USB-
Vorverstärker über den USB-Anschluss
gespeist wird.