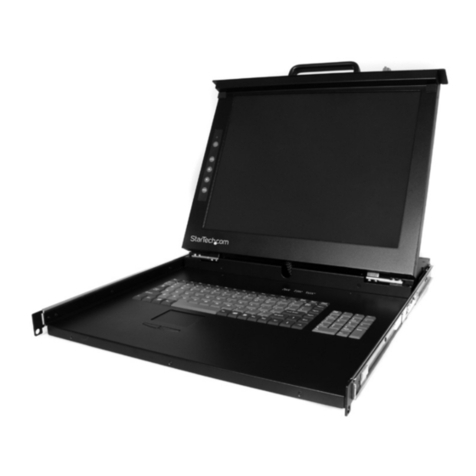
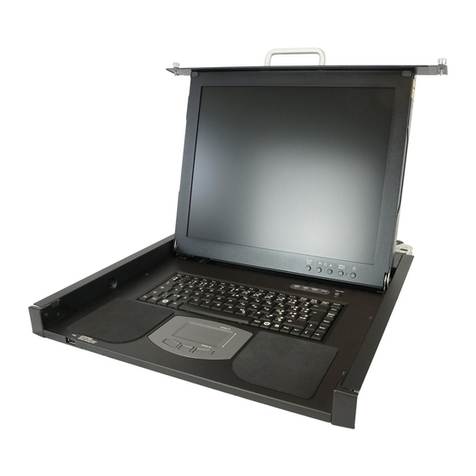
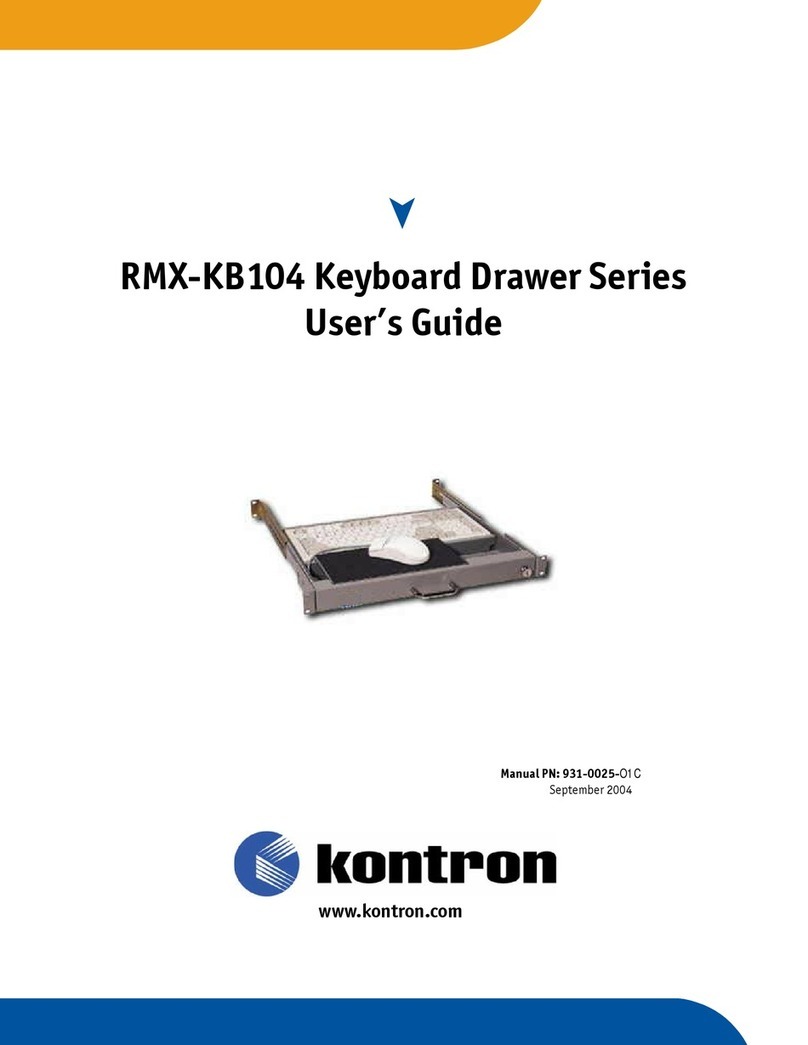
Kontron RMVS-1U User manual

RMVS-1U LCD / Keyboard Drawer Series
User’s Guide
November 2003
6260 Sequence Drive San Diego, CA 92121-4371 800-523-2320 fax 858-677-0895 www.kontron.com

Customer Service
Mailing Address: Kontron
6260 Sequence Drive
San Diego, CA 92121-4371
Post-Sales
Technical Support: 858-677-0877, option 1
800-480-0044, option 1 (in the U.S. and Canada)
+44 1243 523505 (UK)
0800-91-29-04 (France)
0800-18-30-095 (Germany)
Visit our site at: Www.kontron.com
Information in this document is subject to change without notice.
© 2003 Kontron, a California Corporation. All rights reserved.
The information in this document is provided for reference only. Kontron does not assume any liability arising out
of the application or use of the information or products described herein. This document may contain or reference
information and products protected by copyrights or patents and does not convey any license under the patent rights
of Kontron, nor the rights of others.
Kontron is a Trademark of Kontron. All trademarks and registered trademarks are the property of their
respective owners. All rights reserved. Printed in the United States of America. No part of this publication may be
reproduced, stored in a retrieval system, or transmitted, in any form or by any means, electronic, mechanical,
photocopying, recording, or otherwise, without the prior written permission of the publisher.

Contents iii
Contents
Foreword
CustomerComments......................................... vii
Guarantee and Warranty Policy
Guarantee ..................................................ix
Refunds.................................................ix
RestockingCharges........................................ix
LimitedWarranty............................................ix
ReturnProcedure............................................. x
LimitationofLiability.........................................xi
Advisory Conventions
Safety Instructions
InstallationPrecautions...................................... xv
RackMountingPrecautions.................................. xvii
ServiceandRepairPrecautions............................... xvii
SafetyStandards........................................... xvii
Beratende Hinweise
Sicherheitsanweisungen
Installationsvorkehrungen....................................xxi
Gestell-Einbau Vorsichtsmassnahmen . . .................... xxii
Wartungs-undReparaturvorsichtsmaßnahmen ..............xxiii
Regulatory Compliance Statements
FCCComplianceStatementforClassADevices.................. xxv
DeclarationofConformity........................... xxvii
IndustryCanadaComplianceStatement........................ xxvii
CEMarking............................................... xxvii
Chapter 1
DrawerSetup .................................. 1-1
System Requirements . . . .....................................1-2
SettingUptheDrawer .......................................1-3
Unpacking..............................................1-3
RackMounting ..........................................1-4
InstallingtheVideoCardandVideoDriver...................1-7
ConnectingtheMonitor ...................................1-8
Turning On the Drawer . . . . . . . . . . . . . . ....................1-12
FCCComplianceStatementforClassBDevices.................. xxvi

TestingtheDisplay......................................1-12
Self-TestFeatureCheck(STFC) ...........................1-12
Warm-upTime .........................................1-13
Chapter 2
VideoDisplayAdjustment ........................ 2-1
Guidelines .................................................2-1
Before You Make Any Adjustments. . ........................2-1
UsingtheStandardControlsfortheVideoCard...............2-1
PlugandPlay...............................................2-2
Controls for Adjusting the Video Display. ........................2-2
AutomaticSave..........................................2-3
DirectAccessFeatures....................................2-3
OnScreenDisplay(OSD)..................................2-4
Chapter 3
MaintenanceandTroubleshooting ................. 3-1
Maintaining Your RMX-1U15TFTB Keyboard/Monitor Drawer . . . . . . 3-1
InstallationProblems ........................................3-2
Additional Screen Displays . . . . . . . . . . . . ........................3-4
VideoCableNotConnected ................................3-4
Video Signal Out of Specification. . . . ........................3-4
PowerSaver................................................3-5
Video Connector Pin Assignment . . . . . . . ........................3-6
Chapter 4
Specifications.................................. 4-1
DrawerDetails..............................................4-1
Mounting...............................................4-1
DisplayType............................................4-1
DisplaySize.............................................4-1
KeyboardType ..........................................4-1
Dimensions(WxHxD)...................................4-1
Security................................................4-1
ContrastRatio...........................................4-1
ViewingAngle...........................................4-1
DisplayColors...........................................4-2
MaximumResolution.....................................4-2
Luminance(White).......................................4-2
ResponseTime...........................................4-2
Interface................................................4-2
Horizontal Scanning Frequencies . . . ........................4-2
VerticalScanningFrequencies..............................4-2
Backlight...............................................4-2
CableConnector .........................................4-2
MonitorControlType.....................................4-2
MemoryModes ..........................................4-2
iv RMVS-1U LCD/Keyboard Drawer Series User’s Guide

Contents v
VESAPlug-n-PlayLevel...................................4-2
On-Screen Adjustment . . . . . . . . . . . . . . . .....................4-2
PowerManagement ......................................4-2
Construction ............................................4-2
Color...................................................4-2
Weight.................................................4-2
MTBF..................................................4-2
Environment Conditions . .....................................4-2
OperatingTemperature...................................4-2
StorageTemperature .....................................4-2
PowerRequirements......................................4-2
OperatingHumidity......................................4-2
StorageHumidity........................................4-2
Altitude ................................................4-2
Agency Approvals . . . . . . .....................................4-3
FCCConformitywith.....................................4-3
CEConformitywith ......................................4-3
UL/cULListedto.........................................4-3
TUV...................................................4-3
Appendix A
MonitorDisplayPresetModes..................... A-1
Figures
Figure 1-1. Side View (opened) - RMVS-1U.XXXX Drawer . . ........1-1
Figure1-2.FrontView-RMVS-1U.XXXXDrawer.................1-1
Figure1-3.CablingDiagramNoKVM ..........................1-8
Figure1-5.OSDControls ....................................1-12
Figure1-6.MonitorSelfTestScreen...........................1-13
Figure2-1.AutoAdjustment ..................................2-3
Figure2-3.Brightness........................................2-4
Figure 2-4. 15” & 17” On Screen Display (OSD). . . . . . . . . . . ........2-4
Tables
Table 1-1. Video Timing and Display Resolution Specifications. . . . . . . 1-2
Table 2-1. Monitor Adjustment Controls 15” & 17” . . . . . . . . ........2-2
Table2-2.ScreenControls15”&17”............................2-6
Table3-1.PowerSavingModes ................................3-5
Table 3-2. Video Input Pin Assignment (15-pin D-sub connector) . . . . . 3-6
TableA-1.RMVS-1U-15XXPresetModes........................ A-1
Appendix B
Keyboard and Mouse Information. . . . . . . . . . . . . . . . . . B-1
Figure1-4.CablingDiagramwithintegratedKVM ...............1-8
Figure2-2.PCSettingsandRecomendations......................2-3
Figure 2-5. Screen Controls 15” & 17”. . . . . . .....................2-5
Figure2-6.Brightness19”....................................2-12
Figure2-7.Contrast 19”....................................2-12
Figure 2-8. 19” On Screen Display (OSD). .. . .....................2-13
Figure 2-9. (OSD) Sub Menu for 19”..... .......................2-14
Table 2-3. Monitor Adjustment Controls 19” . . . . . .... ..........2-11
Table2-4.ScreenControls19”. . . . ............................2-14
TableA-2.RMVS-1U-17XXPresetModes........................ A-2
TableA-3.RMVS-1U-19XXPresetModes........................ A-3

This page intentionally left blank.
Vi RMVS-1U LCD/Keyboard Drawer Series User’s Guide

Foreword vii
Foreword
This product manual describes how to set up RMVS-1U.XXXX LCD/keyboard
Drawers which involves connecting cables, adjusting the video
display, and installing the drawer in a rack.
This product manual is intended as a reference tool for the following products:
RMVS-1U.15XX
RMVS-1U.17XX
This manual assumes you have basic computer skills and know how to use the
touch pad, keyboard, choose commands from menus, open and run application
programs, and save files.
Note: Additional technical information is available from the Kontron
Web site, www.Kontron.com.
Customer Comments
If you experience any problems with this manual or just want to provide some
feedback, please send us a message using the online form under “Contact Us”
on our Web site ( www.kontron.com ) under “Technical Support.” Detail any
errors you find. We will correct the errors or problems as soon as possible and
post the revised manual in our online Support Library. Thank you.
Note: You may also use the online form on our Web site to submit comments
or concerns about our products, or request technical support.
RMVS-1U.19XX

This page intentionally left blank.
Viii RMVS-1U LCD/Keyboard Drawer Series User’s Guide

Guarantee and Warranty Policy ix
Guarantee and Warranty Policy
Guarantee
A thirty day money-back guarantee is provided on all standard products sold.
Special order products are covered by our Limited Warranty, however they
may not be returned for refund or credit. EPROMs, RAM, Flash EPROMs or
other forms of solid electronic media are not returnable for credit - but for
replacement only. An extended warranty is available. Consult the factory.
Refunds
In order to receive a refund on a product for the purchase price, the product
must not have been damaged by the customer or by the common carrier
chosen by the customer to return the goods and the product must be returned
complete (meaning all manuals, software, cables, etc.) within 30 days of
receipt and in an as-new and resalable condition. The “Return Procedure”
must be followed to assure a prompt refund.
Restocking Charges
Product returned after 30 days, and before 60 days, of the purchase will be
subject to a minimum 20% restocking charge and charges for any damaged or
missing parts. Products not returned within 60 days of purchase, or products
which are not in an as-new and resaleable condition, are not eligible for a
credit return and will be returned to the customer.
Limited Warranty
Effective April 1, 1998, all products carry a 2-year limited warranty. Within
two years of purchase, Kontron will repair or replace, at our option, any
defective product. Kontron will service the warranty for all standard
catalog products for the first two years from the date of shipment.
Please Note: the two year warranty may not apply to special promotion items.
Please consult the factory for warranty verification.
The limited warranty is void if the product has been subjected to alteration,
neglect, misuse, or abuse; if any repairs have been attempted by anyone other
than Kontron or its authorized agent; or if the failure is caused by
accident, acts of God, or other causes beyond the control of Kontron or the
manufacturer. Neglect, misuse, and abuse shall include any installation,
operation, or maintenance of the product other than in accordance with the
user’s manual.

No agent, dealer, distributor, service company, or other party is authorized to
change, modify, or extend the terms of this Limited Warranty in any manner
whatsoever. Kontron reserves the right to make changes or improvements
in any product without incurring any obligation to similarly alter products
previously purchased.
Return Procedure
For any Guarantee or Limited Warranty return, please contact Kontron
Customer Service at 800-480-0044 or 858-677-0877 and obtain a Return
Material Authorization (RMA) Number. All product(s) returned to Kontron
for service or credit must be accompanied by a Return Material Authorization
(RMA) Number. Freight on all returned items must be prepaid by the
customer who is responsible for any loss or damage caused by common carrier
in transit. Returns for Warranty must include a Failure Report for each unit,
by serial number(s), as well as a copy of the original invoice showing the date
of purchase.
To reduce risk of damage, returns of product must be in a Kontron
shipping container. If the original container has been lost or damaged, new
shipping containers may be obtained from Kontron Customer Service at a
nominal cost.
Kontron owns all parts removed from repaired products. Kontron uses
new and reconditioned parts made by various manufacturers in performing
warranty repairs and building replacement products. If Kontron repairs or
replaces a product, its warranty term is not extended.
Kontron will normally return your replacement or repaired items via
Second Day Air. Overnight delivery or delivery via other carriers is available
at an additional charge.
Shipments not in compliance with this Guarantee and Limited Warranty
Return Policy will not be accepted by Kontron.
xRMVS-1U LCD/Keyboard Drawer Series User’s Guide

Guarantee and Warranty Policy xi
Limitation of Liability
In no event shall Kontron be liable for any defect in hardware, software,
loss, or inadequacy of data of any kind, or for any direct, indirect, incidental,
or consequential damages in connection with or arising out of the performance
or use of any product furnished hereunder. Kontron’s liability shall in no
event exceed the purchase price of the product purchased hereunder. The
foregoing limitation of liability shall be equally applicable to any service
provided by Kontron or its authorized agent.
Some sales items and customized systems are not subject to the guarantee
and limited warranty. However in these instances, any deviations will be
disclosed prior to sales and noted in the original invoice. Kontron
reserves the right to refuse returns or credits on software or special
order items.

This page intentionally left blank.
xii RMVS-1U LCD/Keyboard Drawer Series User’s Guide

Advisory Conventions xiii
Advisory Conventions
Follow all instructions marked on the product and described in this document.
Pay close attention to the three types of advisories used throughout this
manual: Notes, Cautions, and Warnings. They provide helpful information or
alert you to the potential for hardware damage or personal injury. The
following is an example of each type of advisory. Use caution when servicing
any electrical component.
Note: A Note indicates information that will help you make better use of the
system.
Disclaimer: We have tried to identify all situations that may pose a warning
or caution condition in this manual. However, Kontron does not claim to
have covered all situations that might require the use of a Caution or
Warning.
CAUTION
A CAUTION indicates potential damage to hardware and
tells you how to avoid the problem.
WARNING
A WARNING indicates the potential for bodily harm and
tells you how to avoid the problem

This page intentionally left blank.
xiv RMVS-1U LCD/Keyboard Drawer Series User’s Guide

Safety Instructions xv
Safety Instructions
Before handling the RMVS-1U.XXXX keyboard monitor drawer, read the
following instructions and safety guidelines to prevent damage to the product
and to ensure your own personal safety. Refer to the “Advisories” section for
advisory conventions used in this manual, including the distinction between
Warnings, Cautions, and Notes.
Do not remove any of the covers. Only qualified, experienced,
authorized electronics service personnel should access the interior of
the computer. The power supplies produce high voltages and energy
hazards, which can cause bodily harm.
Do not use the drawer near water. Do not place any liquids (even a
wet or damp cloth) on or near the drawer. Liquids create an electrical
hazard. Do not expose the drawer to rain or moisture.
Installation Precautions
In addition, take note of these installation precautions when appropriate:
When you disconnect the power cable from the socket, pull on the plug
not the cord.
To help prevent electric shock, connect the power cable to a properly
wired and grounded power source. Do not use adapter plugs or remove
the grounding prong from the cable.
Always connect any equipment used with the drawer to properly
wired and grounded power sources. Be sure to tighten all connector
screws.
Reliable earthing of this equipment must be maintained. Particular
attention should be given to supply connections when connecting to
power strips, rather than direct connections to the branch circuit.
Do not connect or disconnect this product during an electrical storm.
WARNING
To avoid the risk of severe electric shock, do not remove
the cover or back of the monitor. There are no user
serviceable parts inside. Refer all servicing to Kontron
Technical Support.

Do not place any object on the cables that might cause the cables to
make sharp bends or that affect the integrity of the cables. Be sure
that cables are not located where they can be stepped on or tripped
over.
Route all wiring and cabling away from heat sources and sharp metal
edges to avoid damage.
Keep drawer away from direct sunlight and heat sources. Hot air may
cause damage to the cabinet and other parts.
Install the drawer in a well-ventilated area. Do not block ventilation
slots and openings with objects.
Do not allow metal pieces or objects of any kind to fall into the
ventilation holes. Keep the ventilation holes and openings clean.
Vacuum openings if you notice dirt accumulating on them.
Handle the drawer with care. The display contains glass parts.
Dropping the drawer may cause the glass parts to break.
To help protect the drawer from sudden, transient increases and
decreases in electrical power, use a surge suppressor, line conditioner,
or uninterruptible power supply (UPS).
Consideration should be given to the connection of the equipment to
the supply circuit and the effect that circuit overloading might have on
overcurrent protection and supply wiring. Appropriate consideration
of equipment nameplate ratings should be used when addressing this
concern.
The ambient temperature within the rack may be greater than room
ambient. Installation should be such that the amount of air flow
required for safe operation is not compromised. Consideration should
be given to the maximum rated ambient.
Installation should be such that a hazardous stability condition is not
achieved due to uneven loading.
xvi RMVS-1U LCD/Keyboard Drawer Series User’s Guide

Safety Instructions xvii
Rack Mounting Precautions
The following safety guidelines are provided for all rack-mountable
equipment:
Maximum operating ambient temperature is 40 °C
Never restrict the airflow through the devices' fan or vents.
When installing equipment into a rack, distribute the units evenly.
Otherwise, hazardous conditions may be created by an uneven weight
distribution.
Connect the unit only to a properly rated supply circuit.
Reliable earthing (grounding) of rack-mounted equipment should be
maintained.
Service and Repair Precautions
Unplug the product from the power outlet and refer servicing to qualified
service personnel in the event that:
Liquid is spilled in to the product or the product is exposed to rain or
water.
The product does not operate properly when the operating
instructions are followed.
The product has been dropped or the frame has been damaged.
The product exhibits a distinct change in performance, indicating a
need for service.
The power cable or plug is damaged or frayed.
Safety Standards
The product(s) described in this manual has met the safety
requirements of Underwriters Laboratories (UL) for the US and
Canadian market based on UL’s published Standards for Safety.
The product (s) described in this manual have met the safety
requirements of TUV Rheinland for the European Union and is
based on the Low Voltage Directive.

This page intentionally left blank.
xviii RMVS-1U LCD/Keyboard Drawer Series User’s Guide

Beratende Hinweise xix
Beratende Hinweise
Folgen Sie allen auf dem Gerät markierten und in diesem Dokument
beschriebenen Anweisungen. Beachten Sie genau die drei Hinweise, die in
diesem Handbuch benutzt werden: Hinweise, Vorsichtsmassnahmen und
Warnungen. Sie enthalten hilfreiche Informationen über womöglichen
Hardwareschaden oder Personenschaden. Es folgen je ein Hinweisbeispiel.
Elektrische Wartung nur mit Vorsicht durchführen.
Hinweis: Ein Hinweis enthält Informationen, die es erleichtern, das Gerät in
Gebrauch zu nehmen.
Haftungsausschluß: Es wurde versucht, alle Situationen, die eine Warnung
oder einen Vorsichtshinweis benötigen, in diesem Handbuch zu identifizieren.
Kontron behauptet jedoch nicht, alle Situationen, welche eine Warnung
oder einen Vorsichtshinweis benötigen, identifiziert zu haben.
VORSICHT
VORSICHT deutet auf womöglichen Hardwareschaden
hin und gibt Anweisungen, wie das Problem vermieden
werden kann.
WARNUNG
WARNUNG deutet auf womöglichen Personenschaden
hin und gibt Anweisungen, wie das Problem vermieden
werden kann.

This page intentionally left blank.
xx RMVS-1U LCD/Keyboard Drawer Series User’s Guide
This manual suits for next models
1
Table of contents
Other Kontron LCD Drawer manuals
Popular LCD Drawer manuals by other brands

NLS
NLS iTerm2 quick start guide

Sharp
Sharp SMD2480CS installation manual

Du Pont
Du Pont 3630 installation guide

Austin Hughes Electronics
Austin Hughes Electronics Cyberview RP-120 Specifications

Fisher & Paykel
Fisher & Paykel RB90S64MKIW Service manual

Bosch
Bosch BIE7101B1 User manual and installation instructions