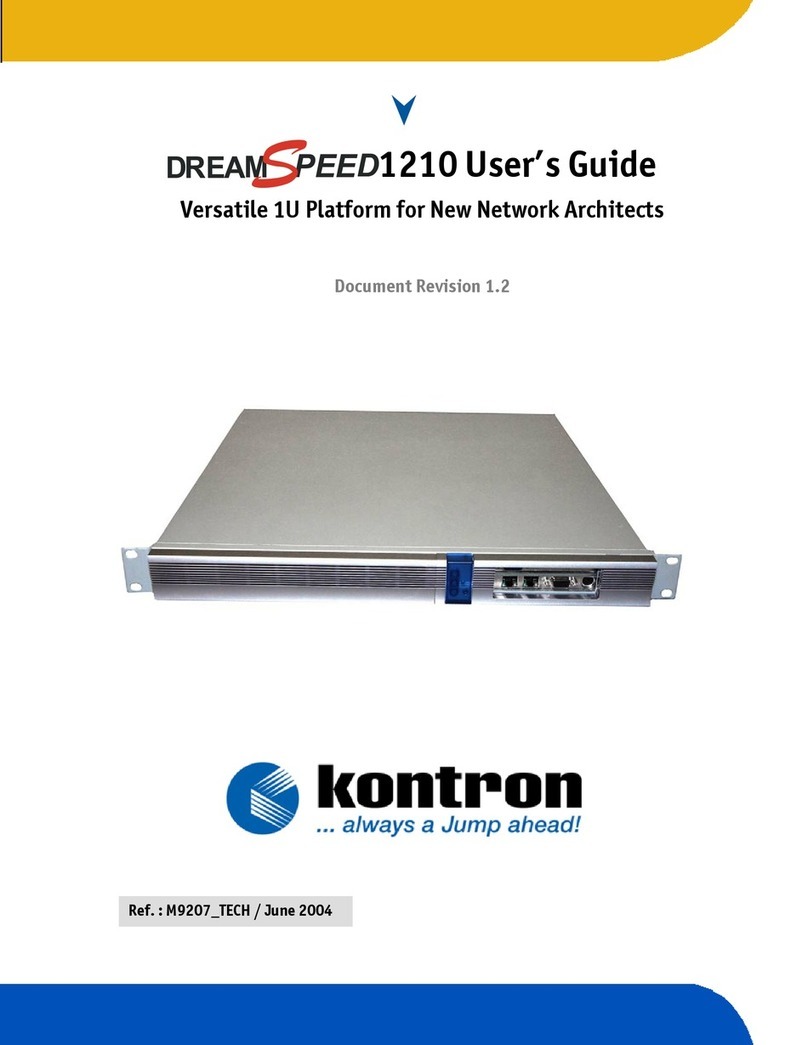
Kontron RMX-1U15L User manual

www.kontron.com
RMX-1U15L and RMX-9U15L
User’s Guide
Manual PN: 931-0065-00-A
August 2002

Customer Service
Mailing Address: Kontron - UnitedStates
6260 Sequence Drive
San Diego, CA 92121 USA
Tel: 858-677-0877
Fax: 858-677-0895
Technical Support: U.S. and Canadian Customers - 24 hours a day
Tel:800-480-0044,option1
Fax: 858-677-0898
International Customers - 9am to 4pm local time
Tel:(+49)8165-77112
Fax: (+49)8165-77110
Visit our site at: www.kontron.com
© 2002 Kontron, an International Corporation. All rights reserved.
The information in this user’s guide is provided for reference only. Kontron does not assume
any liability arising out of the application or use of the information or products described
herein. This user’s guide may contain or reference information and products protected by
copyrights or patents and does not convey any license under the patent rights of Kontron, nor
therightsofothers.
Kontron is a registered trademark of Kontron. All trademarks, registered trademarks, and
trade names used in this user’s guide are the property of their respective owners. All rights
reserved. Printed in the United States of America and Canada. This user’s guide contains
information proprietary to Kontron. Customers may reprint and use this user’s guide in other
publications. Customers may alter this user’s guide and publish it only after they remove the
Kontronname,cover,andlogo.
Kontron reserves the right to make changes without notice in product or component design as
warrantedbyevolution inuser needs orprogressinengineeringor manufacturing technology.
Changes which affect the operation of the unit willbe documented in the next revision of this
user’sguide.

iiiRMX-1U15L and RMX-9U15L User’s Guide
ä
ää
äContents
Safety Instructions
Before You Begin . . .. . . . . . . . .. . . . . . . . . .. . . . . . . .. . . . . . . . . .. . . . ix
Installation Precautions . . . .. . . . . . . . . .. . . . . . . . . .. .. . . . . . . . . . . . . x
Cleaning Precautions . . . . .. . . . . . . . .. . .. .. . . . . . . . . . . . .. . . . . . . . . xii
Rack Mounting Precautions . . . . . . .. . . . . . . . . .. .. . . . . . . . . . . . .. . . . xii
Service and Repair Precautions . . . . . . . . .. .. . .. . . . . . . . . . . .. . . . . . xiii
Safety Standards . . . . . . . . . .. . . . . . . . . .. . . . . . . . . .. .. . . . . . . .. . . xiii
Preface
How to Use This Guide . . . .. . . . . . . . .. . . . . . . . . .. . .. .. . . . . . . . . . . xvii
Customer Comments . . . . .. . . . . . . . .. . . . . . . . . .. . . . . . . . . .. . .. . xviii
Advisory Conventions . . . .. . . . . . . . . . . .. . . . . . . . . .. . . . . . . . . .. . . xix
Unpacking . . .. . . . . . . . . .. . . . . . . . .. . .. .. . . . . . . . . . . . .. . . . . . . . . xx
Regulatory Compliance Statements . . .. . . . . . . . . .. . . . . . . .. . . . . . . . xxi
FCC Compliance Statement for Class B Devices.. . .. .. . . . . . . . . . . xxi
Industry Canada Compliance Statement . . . . .. . . . . . . . . .. . .. . . xxii
CE Certification . . . . . . .. . . . . . . . . .. . . . . . . . . .. . . . . . . . . . . .. xxii
Guarantee and Warranty Policy . . . . . .. . . . . . . . . .. . . . . . . . . .. . . . . xxiii
Guarantee . . . . . . . . .. . . . . . . . .. . . . . . . . . . . . .. . . . . . . . . .. . xxiii
Limited Warranty . . . . . . . .. . . . . . . . . .. . . . . . . . . .. . . . . . . . . . xxiii
Return Procedure. . . . . .. . . . . . . . . .. . . . . . . . . .. . . . . . . . . . . . xxiv
Limitation of Liability . . . . . . . . .. . . . . . . . . .. . . . . . . . . .. . . . . . xxv
Chapter 1
Monitor Setup
Overview . . . . . . . . .. . . . . . . . .. . . . . . . . . .. . . . . . . . . . . . .. . . . . . . . 1-3
System Requirements . . . . . .. . . . . . . . . . . .. . . . . . . . . .. . . . . . . . . .. 1-6
Table 1-1. Video Timing and Resolution Specifications . . . . . . 1-6
Setting up the Monitor. . . . . .. . . . . . . . . .. . . . . . . . . . . .. . . . . . . . . .. 1-7
Unpacking . . . .. . . . . . . . .. . . . . . . . . . . . .. . . . . . . . . .. . . . . . . . 1-8
RMX-1U15LRack Mounting . . . . . . . .. . . . . . . . . . . .. . . . . . . . . .. 1-9
RMX-9U15LRack Mounting . . . . . . . .. . . . . . . . . . . .. . . . . . . . . . 1-13
Installing the Video Card and Video Driver . . . . . .. . . . . . . . . . . . 1-14
Connecting the Monitor. . . . . . . . . . .. . . . . . . . . .. . . . . . . . . .. . 1-15
Turning On the Monitor . . . . . . . .. . . . . . . . . .. . . . . . . . . .. . . . . 1-17
Testing the Monitor . . . . . .. . . . . . . . . .. . . . . . . . . .. . . . . . . . . . 1-17
Installing the Touchscreen Driver . . . . .. . . . . . . . . . . . .. . . . . . . 1-18
Calibrating the Touchscreen. . . . . . . . . .. . . . . . . . . .. . . . . . . . . . 1-19
Customizing the Touchscreen Settings. . . . . . . . . .. . . . . . . . . .. . 1-20

iv RMX-1U15L and RMX-9U15L User’s Guide
Chapter 2
Video Display Adjustment
Overview . . . . . . .. . . . . . . . . .. .. . . . . . . . . . . . .. . . . . . . . . .. . . . . . . 2-3
Guidelines . . . . . . . .. . . . . . . . . . . . .. . . . . . . . . .. . . . . . . . . .. . . . . . . 2-3
Before You Make Any Adjustments . . . .. . . . . . . . . .. . . . . . . . . .. . 2-3
Using the Standard Controls for the Video Card . . . . . .. . . . . . . . . . 2-4
Plug and Play .. . . . . . . . . . . . .. . . . . . . . . .. . . . . . . . . .. . . . . . . . . . . . 2-4
Video Display Controls . . . . . . . . . . . .. . . . . . . . . .. . . . . . . . . .. . . . . . . 2-5
Table 2-1. Monitor Adjustment Controls. . . . . . . .. . . . . . . . . . 2-5
Displaying the Options. . . . . . . .. . . . . . . . . .. . . . . . . . . .. . . . . . . 2-6
Menu Options. . . . . . . . . .. . . . . . . . . . . .. . . . . . . . . .. . . . . . . . . . 2-7
Table 2-2. Display Adjustment Options . . . . . .. . . . . . . . . .. . 2-7
Changing a Setting. . . . . . . .. . . . . . . . . .. . . . . . . . . .. . .. . . . . . . 2-8
Saving Your Changes . . . . . . . . .. . . . . . . . . .. . . . . . . . . . . .. . . . . 2-8
Displaying the Options (Video Mode). . . . . . . . .. . . . . . . . . .. . . . . 2-9
Menu Options (Video Mode). . . . . . . . .. . . . . . . . . .. . . . . . . . . .. 2-10
Table2-3.DisplayOptionsforVideo andS-VideoMode .. . .. 2-10
Chapter 3
Maintenance and Troubleshooting
Maintenance . . . . . .. . . . . . . . . .. . . . . . . . . .. . . . . . . . . .. . .. . . . . . . 3-3
Troubleshooting the Monitor . . . . . . . . .. . . . . . . . . .. . . . . . . . . . . . .. . 3-4
Troubleshooting the Touchscreen. . . . . . . . .. . . . . . . . . . . .. . . . . . . . . . 3-6
Screen Error Messages . . . . . . . . .. . . . . . . . . .. . . . . . . . . .. . . . . . . . . . 3-7
Chapter 4
Specifications
Monitor Details . . . . . . . . .. . . . . . . . . .. . . . . . . . . . . . .. . . . . . . . . .. . 4-3
Touchscreen Details . . . .. . . . . . . . . .. .. . . . . . . .. . . . . . . . . .. . . . . . . 4-7
Environment Conditions. . . . . . . .. . . . . . . . . .. . . . . . . . . . . . .. . . . . . . 4-8
Agency Approvals. . . . . .. . . . . . . . . .. . . . . . . . . . . .. . . . . . . . . .. . . . . 4-9
Power Management . . . . . .. . . . . . . . . .. . .. . . . . . . . . . . .. . . . . . . . . 4-10
Table 4-1. Power Management Specifications . . . . . .. . . . . . 4-10
Connectors. . . . . .. .. . . . . . . . . . . . .. . . . . . . . . .. . . . . . . . . .. . . . . . 4-11
Table 4-2. VGA Connector. . . . . . . . .. . .. . . . . . . . . . . .. . . . 4-11
Appendix A
Preset Display Modes
Monitor Setup . . . . . . . .. . . . . . . . . .. . . . . . . . . . . .. . . . . . . . . .. . . . . A-3
Table A-1. Preset Display Modes . . . . . .. . . . . . . . . .. . . . . . . A-3

vRMX-1U15L and RMX-9U15L User’s Guide
ä
ää
äFigures
Figure 1-1. Side View (viewing position) - RMX-1U15L(/RT) Monitor. . . . 1-3
Figure 1-2. Front View - RMX-1U15L(/RT) Monitor. . . . . . .. . . . . . . . . .. 1-4
Figure 1-3. Front View – RMX-9U15L(/RT) Monitor . . . . . .. . . . . . . . . . . 1-4
Figure 1-4. Adjusting Length of Slide Rail . . . . . . . .. . .. .. . .. .. . . . . . 1-9
Figure 1-5. Mounting Slide Rail to Back of Rack. . . . . . .. . . . . . . . . . . . 1-10
Figure 1-6. Mounting Slide Rail to Front of Rack . . . . . . . .. . . . . . . .. . 1-10
Figure 1-7. Sliding Inner Rail into Outer Rail . . . . . . . . .. . . . . . . . . . . . 1-11
Figure 1-8. Pressing Locking Tab . . . . . . . . . .. . . . . . . . . . . . .. . . . . . . 1-11
Figure 1-9. Monitor Correctly Mounted in Rack . . . . . . . . . . . .. . . . . . . 1-12
Figure 1-10. Mounting RMX-9U15L(/RT) Monitor to Rack . . . . . . . . . . . 1-13
Figure1-11. RMX-1U15L(/RT)andRMX-9U15L(/RT)CablingDiagram. . 1-16
Figure 2-1.Front Panel Control Buttons. . . . . . . .. . . . . . . . . . . .. . . . . . 2-5

ä
ää
äSafety Instructions
Contents
Before You Begin . . . . . . . .. . . . . . . . .. . .. . . . . . . . . . . .. . . . . . . . . .. . xi
Installation Precautions. . . . . . .. . . . . . . . . .. . .. .. . . . . . . . . . . . .. . . xii
Cleaning Precautions . . . . . . .. .. . . . . . . . . . . . .. . . . . . . . . .. . . . . . . . xiv
Rack Mounting Precautions . .. . . . . . . . . .. . . . . . . . . . . .. . . . . . . . . .. xiv
Service and Repair Precautions . . . .. . . . . . . . . .. .. . . . . . . .. . . . . . . . . xv
Safety Standards . . . . . . . . . .. . . . . . . . . . . .. . . . . . . . . .. . . . . . . . . .. . xv

ix
RMX-1U15L and RMX-9U15L User’s Guide
Safety Instructions
Before You Begin
ä
ää
äBefore You Begin
Beforehandlingthe RMX-1U15LandRMX-9U15L,readthe followinginstructionsandsafety
guidelinestopreventdamagetotheproductandtoensureyourownpersonalsafety.Refertothe
“Advisories” section for advisory conventions used in this manual, including the distinction
betweenWarnings,Cautions, andNotes.
JDo not remove any of the covers. Only qualified, experienced, authorized
electronicsservicepersonnelshouldaccesstheinteriorofthemonitor.Openingor
removingthecovermayexposure youtodangerousvoltagethatcould causefire
or electric shock.
JDo notuse the monitor nearwater. Do not place any liquids (evena wet or damp
cloth)onornearthemonitor.Liquids createanelectricalhazard.Do not expose
the monitor to rain or moisture.
CAUTION
Toavoidtheriskofsevereelectricshock,donotremove the coveror
backofthemonitor.Therearenouserserviceablepartsinside.Refer
all servicing to Kontron Technical Support.

x RMX-1U15L and RMX-9U15L User’s Guide
ä
ää
äInstallation Precautions
Inaddition, takenoteoftheseinstallationprecautionswhenappropriate:
JWhen you disconnect the power cable from the socket, pull on the plug not the
cord.
JAlways connect the power cable to a properly wired and grounded power source.
Do not use adapter plugs or remove the grounding prong from the cable.
JInstall the unit near an AC outlet that is easily accessible.
JOnlyuseapower cordwithavoltageandcurrentratinggreaterthanthevoltage
andcurrentrating markedontheunit.
JAlways connect any equipment used with the monitor to properly wired and
groundedpowersources. Be sureto tighten all connector screws.
JReliableearthingofthisequipmentmust bemaintained. Particularattention
should be given to supply connections when connecting topower strips, rather
than direct connections to the branch circuit.
JDonotconnector disconnect thisproduct duringanelectricalstorm.
JDo not place any object on the cables that might cause the cables to make sharp
bendsorthat affecttheintegrityofthecables.Besurethatcablesarenot located
wherethey canbestepped on ortrippedover.
JRoute allwiringandcablingawayfromheatsourcesandsharpmetaledgesto
avoiddamage.
JKeep the monitormonitor away from direct sunlight, direct heat, and humidity.
Hot air may cause damageto the cabinet and otherparts.

xi
RMX-1U15L and RMX-9U15L User’s Guide
Safety Instructions
Installation Precautions
JInstall the monitor in a well-ventilated area. Do not block ventilation slots and
openings with objects. Never place the monitor near or over a radiator or heat
register,or install inany enclosure that preventsproper ventilation.
JDonotallowmetalpiecesorobjects of any kind to fallintothe ventilationholes.
Keep the ventilation holes and openings clean. Vacuum openings if you notice dirt
accumulating onthem.
JDo not allow liquid to spill into the vent openings as this could cause a fire or
produce an electricalshock.
JHandle the monitor with care. The displaycontains glass parts. Dropping the
monitor may cause the glass parts to break.
JTo helpprotect the monitorfrom sudden, transient increases anddecreasesin
electricalpower,useasurgesuppressor,lineconditioner,oruninterruptiblepower
supply (UPS).
JConsideration should be given to the connection of the equipment to the supply
circuit and the effect that circuit overloading might have on overcurrent
protection and supply wiring. Appropriate consideration of equipment nameplate
ratings should be usedwhen addressing this concern.
JThe ambient temperature within the rack may be greater than room ambient.
Installation shouldbe suchthat the amount ofair flowrequired forsafe operation
isnotcompromised. Considerationshouldbegiventothemaximumrated
ambient.
JInstallation in a rack should be such that a hazardous stability condition is not
achieved due to uneven loading. A drop or fall could cause injury.
JDo notinstall this product in areas whereextreme vibrations may be generated.
Forexample,nearbymanufacturing equipment mayproducestrongvibrations.
Vibrations may cause the display to exhibit picture discoloration or poor video
quality.

xii RMX-1U15L and RMX-9U15L User’s Guide
ä
ää
äCleaning Precautions
Takenote of thesecleaningprecautions:
JUnplugtheproduct powercordfromthe walloutletbeforecleaning.Makesure the
monitor is in the power off mode.
JDo not use any vinegar-based solutions orabrasive detergent toclean the screen
as this may damage it.
JCleanthescreen with a moistsheetorsoft lint-freecleaningclothdampenedwith
a small amount of alcoholor non-abrasive glass cleaner. Spraythe cleaning liquid
on the cloth and not thescreen, sothatthe drippings donot seep inside the
display or stain the bezel. Wipe the screen without applying excess pressure.
JDonotplacetheproductonanunstablecart ortable.Doingsomaycausethe
product to fall, which can damage it seriously.
ä
ää
äRack Mounting Precautions
Thefollowing safety guidelines are provided for all rack-mountable equipment:
JNeverrestricttheairflowthroughthe unit’sfan(s)orvent(s).
JWheninstallingequipmentintoarack,distributetheunitsevenly.Otherwise,
hazardous conditions may be created by an uneven weight distribution.
JConnecttheunitonlytoaproperlyrated supplycircuit.
JReliableearthing(grounding)ofrackmount equipmentshouldbemaintained.

xiii
RMX-1U15L and RMX-9U15L User’s Guide
Safety Instructions
Service and Repair Precautions
ä
ää
äService and Repair Precautions
Unplugthemonitorfromthepower outletandcontactKontronTechnical Support intheevent
that:
JLiquidisspilledintothemonitororthemonitorisexposedtorainorwater.
JThemonitor does notoperateproperlywhen the operatinginstructionsare
followed. Onlyadjust those controls thatare coveredby the operating
instructions.Improperadjustmentof other controls may result in damageand will
often require extensive work by a qualified technician to restore the product to
normal operation.
JThe monitor has been dropped or the frame has been damaged.
JThe monitor exhibits a distinct change in performance, indicating a need for
service.
JThepowercableorplugisdamaged or frayed.
ä
ää
äSafety Standards
The monitor(s) described in this manual has met the safety requirements of
Underwriters Laboratories (UL) forthe US and Canadian market based on UL’s
published Standards for Safety.
WARNING
Toavoidtheriskofsevereelectricshock,donotremove the coveror
backof the monitor. There areno user serviceable parts inside.

xiv RMX-1U15L and RMX-9U15L User’s Guide
This page intentionally left blank.

ä
ää
äPreface
Contents
How to Use This Guide . . . . . .. . . . . . . . . .. . . . . . . . . .. . . . . . . . . . . .. xvii
Customer Comments. . . . . .. . . . . . . . .. . . . . . . .. . . . . . . . . .. . . . . . . xviii
Advisory Conventions. . . . .. . . . . . . . . . . .. . . . . . . . . .. . . . . . . . . .. . . xix
Unpacking . . . . . . . . . .. . . . . . . . . .. . . . . . . . . .. . . . . . . . . . . .. . . . . . . xx
Regulatory Compliance Statements . . . . . . . .. . . . . . . . . . . . .. . . . . . . . xxi
FCC Compliance Statement for Class B Devices . . . . . . . . .. .. . .. . . xxi
Industry Canada Compliance Statement. . . . . . . . .. . . . . . . . . . . . xxii
CE Certification . .. . . . . . . . . . . .. . . . . . . . . .. . . . . . . . . .. . . . . xxii
Guarantee and Warranty Policy . . . . . .. . .. . . . . . . . . . . .. . . . . . . . . . xxiii
Guarantee . . . . . .. . . . . . . . . . . .. . . . . . . . . .. . . . . . . . . .. . . . . xxiii
Limited Warranty . . . . . . . .. . . . . . . . . .. . .. . . . . . . . . . . .. . . . . xxiii
Return Procedure . . . . . . . .. . . . . . . . . .. . . . . . . . . . . . .. . . . . . . xxiv
Limitation of Liability. . . . . . . . . .. . . . . . . . . .. . . . . . . . . .. . . . . . xxv

xvii
RMX-1U15L and RMX-9U15L User’s Guide How to Use This Guide
Preface
ä
ää
äHow to Use This Guide
Thisguideisdesignedto beusedasstep-by-stepinstructionsforinstallationand videodisplay
adjustment, and provides guidelines for industrial enclosure mounting.
Thefollowingisasummary of thechaptercontents:
JChapter 1, Monitor Setup, provides an overview of the RMX-1U15L and
RMX-9U15Lmonitorfeatures,systemrequirements, and instructionsformounting
andconnectingthemonitors.
JChapter 2, Video Display Adjustment, describeshowtoadjust the videodisplay
using the front panel control buttons and on-screen display (OSD) menu.
JChapter 3, Maintenance and Troubleshooting, providesstepstomaintainthe
monitors and troubleshooting steps for the monitors and optional touchscreen.
JChapter 4, Specifications, provides specifications, power management
information, and connector pinassignments for the monitor.
JAppendix A, Preset Modes, provides the settings for the preset display modes.
Note: Additionaltechnicalinformation anddrivers areavailable on ourwebsite,
www.kontron.com, under Technical Support.

xviii RMX-1U15L and RMX-9U15L User’s Guide
ä
ää
äCustomer Comments
Ifyouhaveanydifficultiesusingthisuser’sguide,discoveranerror,orjustwanttoprovidesome
feedback, please send us a message using the online form under “Contact Us” on our web site
(www.kontron.com) under “Technical Support.”Detail any errors you find. Wewill correct the
errors or problems as soon as possible and post the revised user’s guide in our online Support
Library. Thank you.
Note: You may also use the online form on our web site to submit comments or
concerns about our products, or request technical support.

xix
RMX-1U15L and RMX-9U15L User’s Guide Advisory Conventions
Preface
ä
ää
äAdvisory Conventions
Four types of advisories are used throughout the user’s guides to provide helpful information or
toalert youto thepotentialforhardwaredamage orpersonal injury.They areNotes, Cautions,
andWarnings.Thefollowingisanexample ofeachtypeof advisory.Usecautionwhen servicing
any electrical component.
.
Disclaimer: Wehavetriedtoidentify allsituations thatmayposea warningorcaution condition
in this user’s guide. However, Kontron does not claim to have covered all situations that might
require the use of a Caution or Warning.
Note: A noteisused tomakehelpful information standout.
Important: An important note indicatesinformation that isimportant for you to
know.
CAUTION
ACAUTIONindicatespotentialdamagetohardwareandtellsyouhow
to avoid the problem.
WARNING
AWARNINGindicatesthe potential forbodily harmand tells youhow
to avoid the problem.

xx RMX-1U15L and RMX-9U15L User’s Guide
ä
ää
äUnpacking
When unpacking, follow these steps:
1) After opening thebox, save it and the packing material for possiblefuture shipment.
2) Removeallitemsfrom thebox. If any itemslistedonthepurchase order aremissing,
notifyKontroncustomerservice immediately.
3) Inspect the product for damage. If there is damage, notify Kontron customer service
immediately. Refer to “Guarantee and Warranty Policy” for the returnprocedure.
This manual suits for next models
1
Table of contents
Other Kontron Network Hardware manuals
Popular Network Hardware manuals by other brands

Cabletron Systems
Cabletron Systems WPIM T1 user guide

ADTRAN
ADTRAN HDSL4 Specifications

Riverbed
Riverbed SteelCentral NetProfiler 4270 Series Upgrade and Maintenance Guide

D-Link
D-Link MYDLINK DNR-322L Quick installation guide

Blackwire
Blackwire DMX-Bridge Quick setup

Telebyte
Telebyte 458-LM-E2-36 quick start guide

Huawei
Huawei NE-HIC-2xSTM1/POS-SFP Specifications

Paradyne
Paradyne HotWire 5246 installation instructions

D-Link
D-Link Web Smart DES-1210-28P Selection guide

Altronix
Altronix NetWay G Series installation guide

National Instruments
National Instruments PC-DIO-96 user manual

Lanner
Lanner NCA-5230 user manual