7.1
7.1.1Adjust the angle of seats to first or second gear(As tip 5.7)
7.1.2 Place the child safety seat on the vehicle's seat which is
fitted with 3-point safety belts ensuring it is firmly against the
car seat backrest.
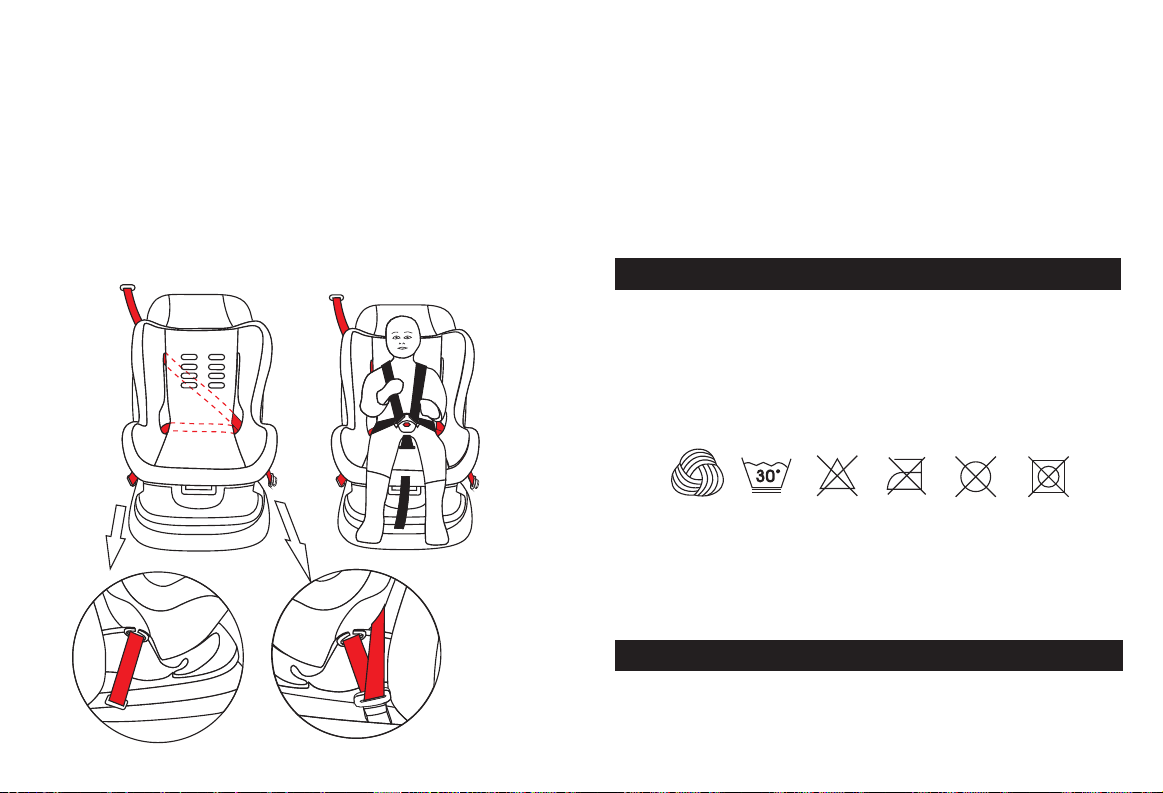
Securing the child car seat
7.1.3 Pull the vehicle's safety belt out, as long as you can.
7.1.4 Let the vehicle's shoulder belt and lap belt go through the
way as picture. (As fig 7.01and 7.02)
The vehicle's shoulder belt and lap belt should go into point C, long
and narrow opening hole that between backrest and cove and come
out of another hole, point D.
7.1.5 Load the vehicle safety buckle well.
7.1.6 Please pull the every part of vehicle's safety belt in
opposite way, check and make sure every part has no twist.
Amplify
Amplify
Fig 7.01
Fig 7.02
CD
-11--10-
8. DAILY CARING INSTRUCTIONS.
8.1 Remove the cover
8.1.1 Remove the 5-point safety belt (As 7.1).
8.1.2 So that all seat covers can be take off easily now.
8.2 Cleaning the cover
Use only neutral detergent (under 30℃) and warm water to
wash. Do not was by machine, Spin-dry or tumble-dry are
not suggested.
8.3.1 It is necessary to check components of the child car
seat whether it is complete and the functions whether is well
to avoid any accidents.
8.3.2 Please pull the harness of buckle with power to check
the buckle whether loosen, before using.
8.3.2 Avoiding storing the child car seat in wet or cold or
height position for long time.
8.3 Care and maintenance
10. 事故后的处理
After an accident with an impact speed greater than 10km/h,
the child restraint system must be sent back to the manufacturer
without fail, to be checked for possible damage and replaced at
no charge if deemed necessary.
9. STEPS TO TAKE AFTER AN ACCIDENT
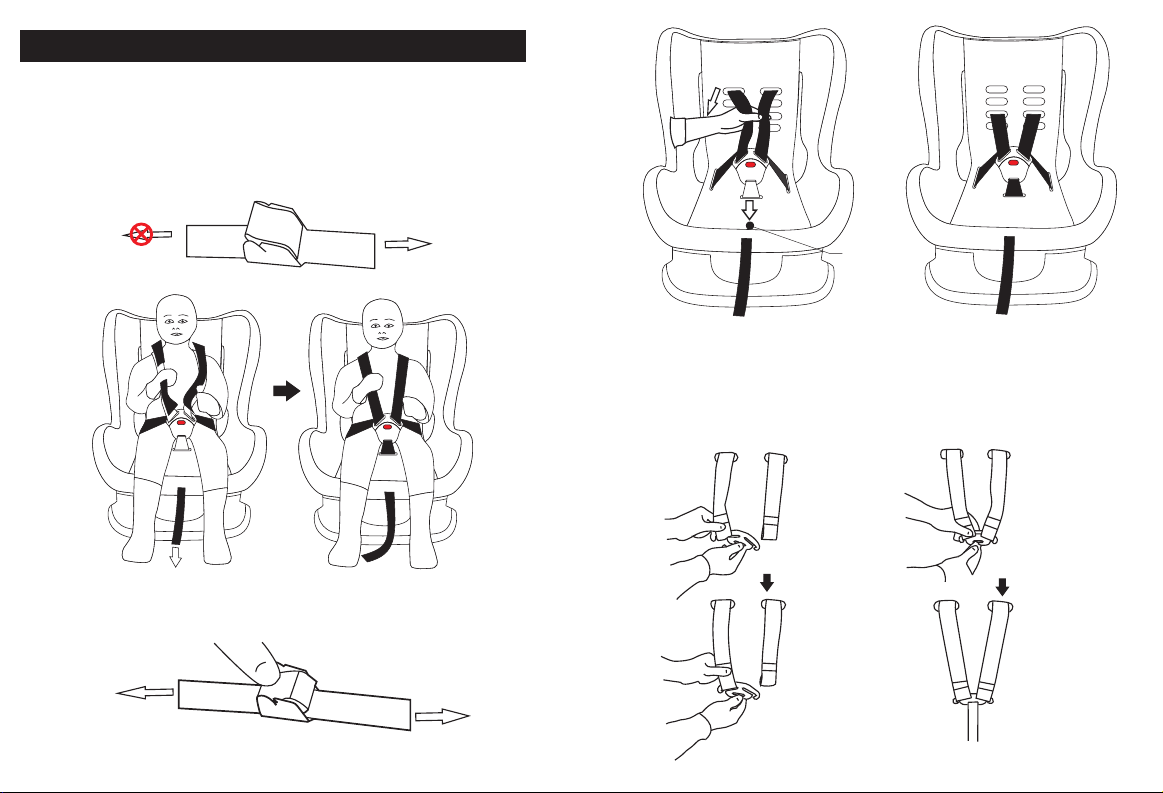
7.2 Securing the child with 5-point harness
7.2.1
right shoulder belt hole. (As 5.6)
Adjusting the height of shoulder harness well. (As 5.5)
7.2.2 Do as 7.1.2.Unlocking the buckle and put two mental
sections of the buckle connectors on the two sides of seat.
7.2.3 Put your child into the baby car seat.
7.2.4 Place the shoulder pad and harness on the top of children's
shoulder, and place the crotch pad and buckle in front of children
crotch, (As fig 7.02), then lock the buckle (As 5.4.1).
7.2.5 Push the harness adjuster belt outside, thus the 5-point
safety belt is tightened. (As 5.1.1)
7.2.6 Check and make sure any part of harness have no twist.
According to the height of children shoulder, choose the