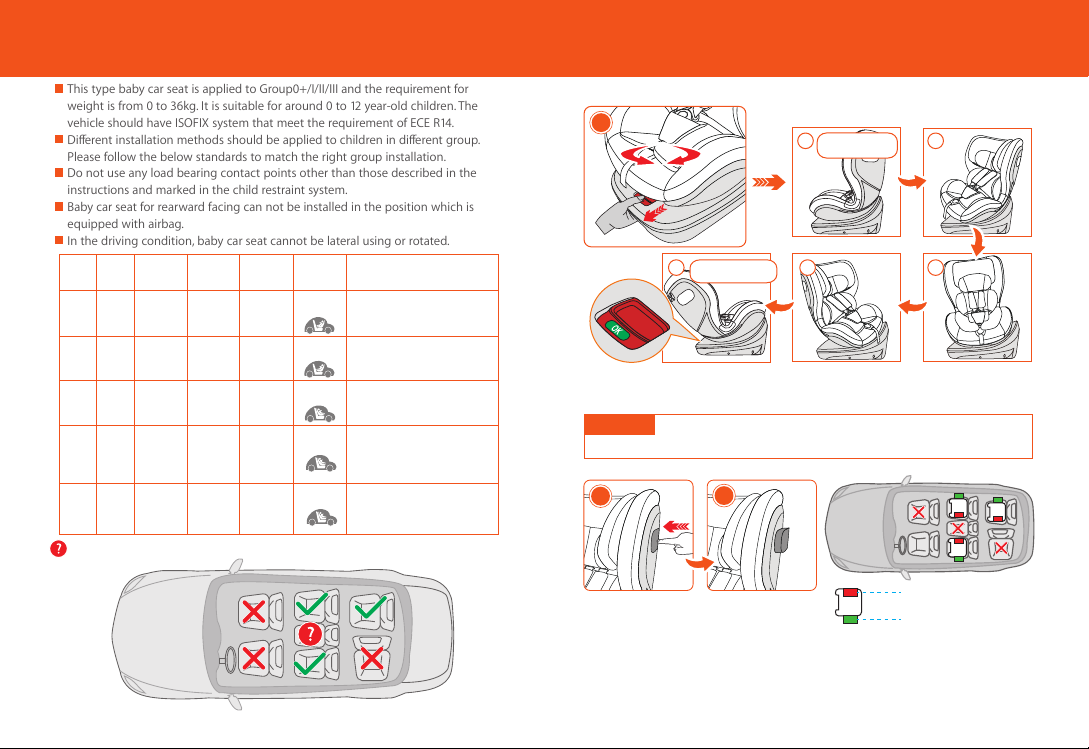
1 2
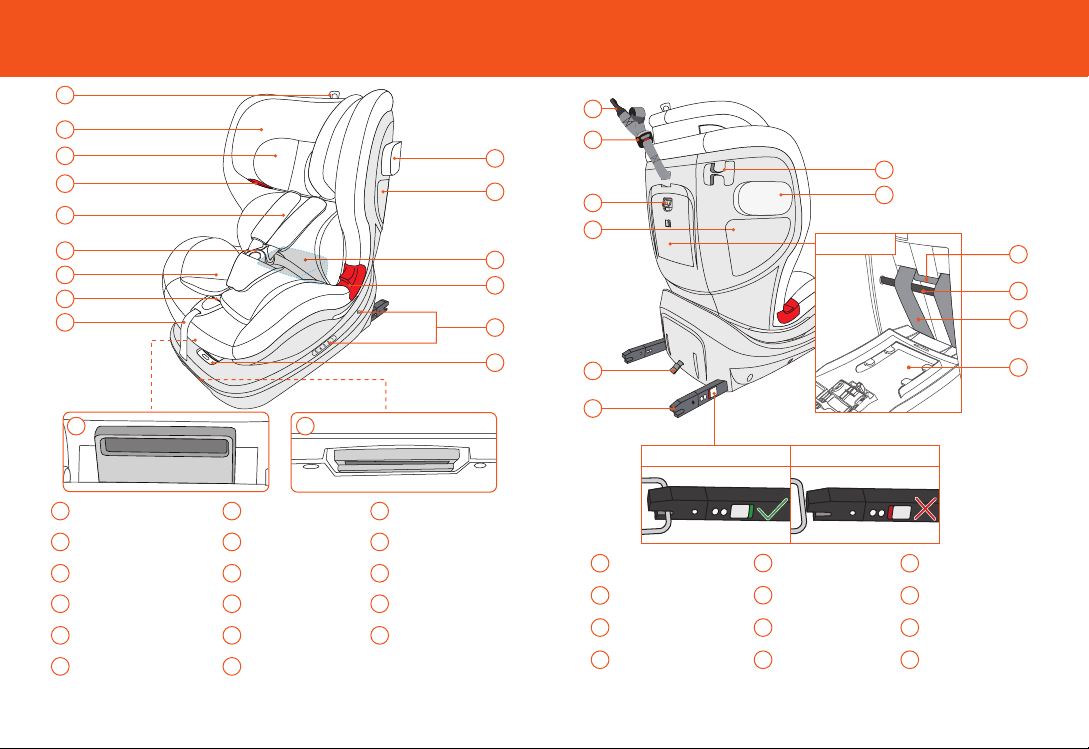
1. ISOFIX SEMI-UNIVERSAL 0+I (0-18KG):
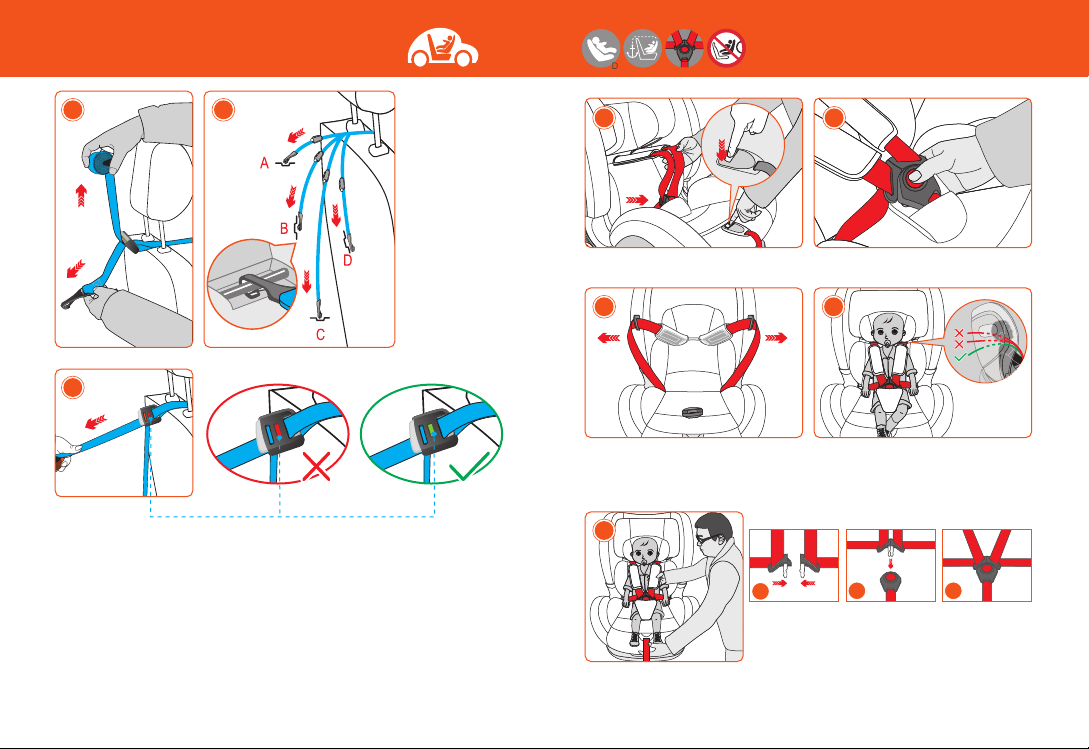
ISOFIX+TOP TETHER+HARNESS
1. This is ISOFIX CHILD RESTRAINT SYSTEM. It is approved to Regulation No.44,04
series of amendments for general use in vehicles fitted with ISOFIX anchorages
systems.
2. It will fit vehicles with positions approved as ISOFIX positions(as detailed in the
vehicle handbook), depending on the category of the child seat and of the fixture.
3.
The mass group and ISOFIX size class for which this device is intended is: 0+Igroup,
0-18kg, ISOFIX D.
This Child restraint is classified for“(Semi-Universal)”use and is suitable for fixing into the
seat positions of the following cars:
Seat positions in other cars may also be suitable to accept this child restraint. If in doubt,
consult either the child restraint manufacturer or the retailer.
?
(Apply to all vehicles with
ISOFIX anchroages)
Thank you for trust to our company and products!
For parents:
Welcome to use SisterBeBe baby car seats. Please read user manual carefully
before installing and using.
2. ISOFIX UNIVERSAL I (9-18KG):
ISOFIX+TOP TETHER+HARNESS
1. This is ISOFIX CHILD RESTRAINT SYSTEM. It is approved to Regulation No.44,04 series of
amendments for general use in vehicles fitted with ISOFIX anchorages systems.
2. It will fit vehicles with positions approved as ISOFIX positions(as detailed in the vehicle
handbook), depending on the category of the child seat and of the fixture.
3. The mass group and ISOFIX size class for which this device is intended is: I group,
9-18kg, ISOFIX B1.
4. UNIVERSAL II+III (15-36kg):
3-POINT BELT
3. SEMI-UNIVERSAL II+III (15-36kg):
ISOFIT+3-POINT BELT
1.This is a“Universal”child restraint. It is approved to Regulation No.44, 04 series of
amendments, for seneral use in vehicles and it will fit most, but not all, car seats.
2. A corrcet fit is likely if the vehicle manufacturer has declared in the vehicle handbook
that the vehicle is capable of accepting a“Universal”child restraint for this age group.
3.This child restraont has been classified as“Universal”under more stringent conditions
than those which applied to earlier designs which do not carry this notice.
4.If in doubt, consult either the child restraint manufacturer or the retailer.
Only suitable for use in the listed vehicles fitted 3 point/with retractor safety-belts,
approved to ECE Regulation No.16.
Only suitable for use in the listed vehicles fitted 3 point/with retractor safety-belts,
approved to ECE Regulation No.16.
Only can apply to the vehicle that has ISOFIX anchroages and 3-point safety belts.
This Child restraint is classified for“(Semi-Universal)”use and is suitable for fixing into the
seat positions of the following cars:
Seat positions in other cars may also be suitable to accept this child restraint. If in doubt,
consult either the child restraint manufacturer or the retailer.
?
(Apply to all vehicles with
ISOFIX anchroages)
Only can apply to the vehicle that has ISOFIX anchroages and 3-point safety belts.
The vehicle equipped with ISOFIX anchroages.
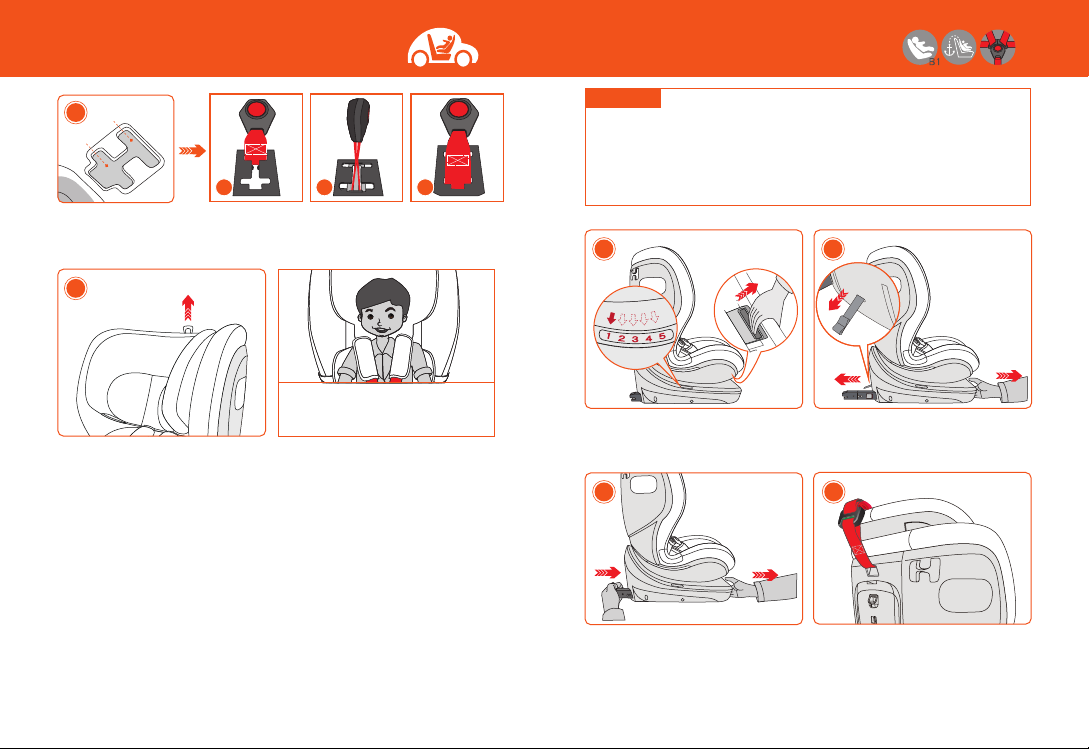
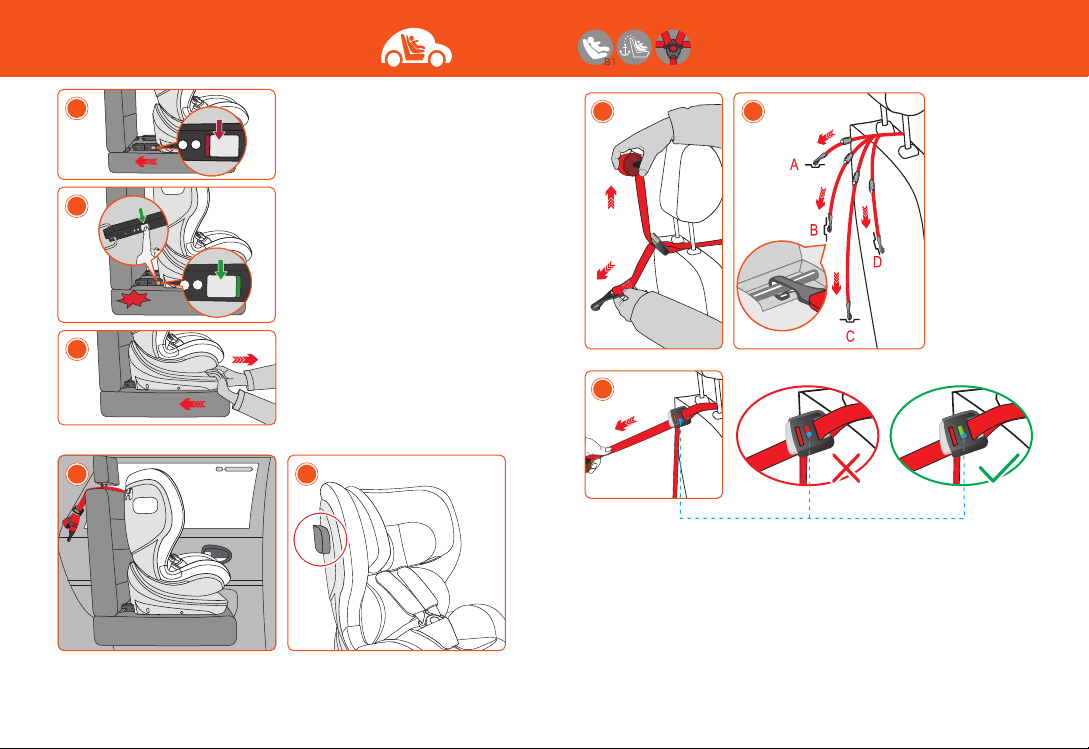
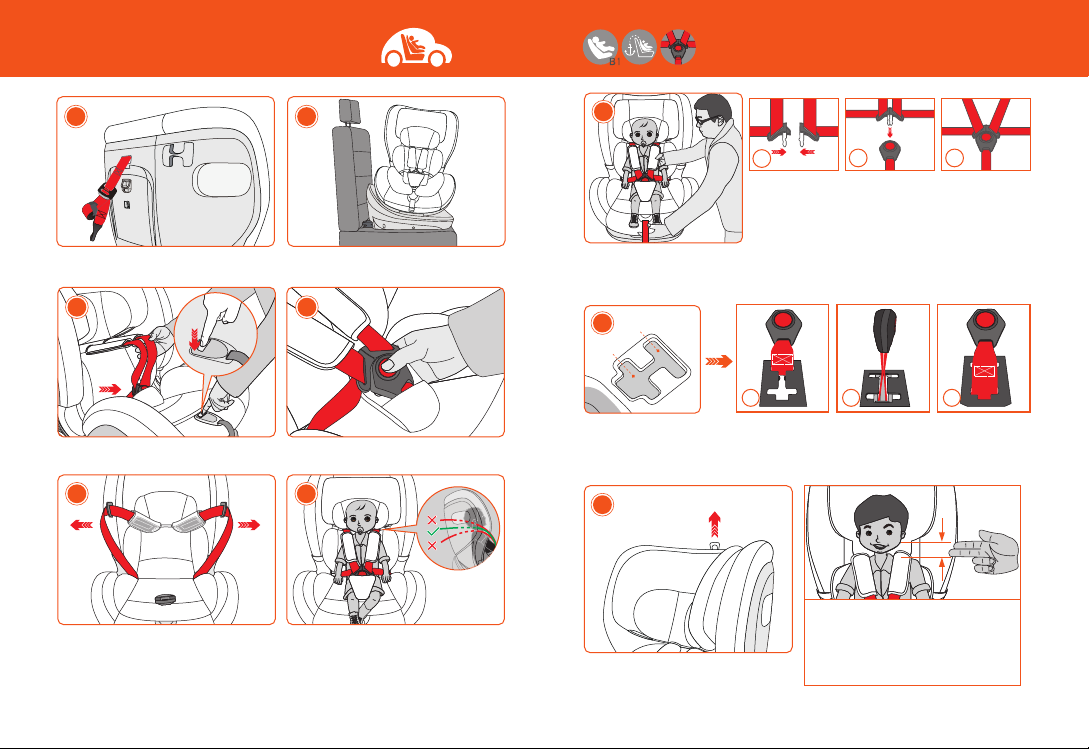
WARRING: Don’t use force-bearing points without marking!
WARRING: Don’t use forward facing before the child s weight exceeds 9kg!
The vehicle equipped with ISOFIX anchroages.