KLN Bidet Assembling Instructions
Congratulations on the purchase of your new KLN Bidet! We know you will get many
years of enjoyment out of this great product.
This instruction manual is designed to provide you with all the information necessary to
fully and properly install and operate your KOR KLN Bidet.
If you need help installing your KLN Bidet, please visit kortoilet.com/installation for
detailed instructional videos. If you need immediate support please call or text us at
TOOLS NEEDED:
What’s Included
Bidet Functions and Parts
INSTALLATION
Screwdriver Wrench
KLN Bidet Braided hose (21 5/8”)
Bidet Joint
15” Length
T-Adapter Joint
Metal T-adaptor
Rubber Washer
Wing Nut
Bidet Tube
Joint
Water Tank
Tube Joint
Water Outlet Joint
Inwall Water Outlet
Rubber Washer
Toilet Cistern Joint
Bidet Tube Joint
Toilet Tube Joint
Plastic T-adaptor
Note: if you don’t connect to the hot
water supply, you will need these
accessories to block the hot water.
Plastic End Cap
with Washer
9’ 10” Length
Connect to
Wing Nut
Bidet Joint
(Note: for hot water bidets only)
9’ 10” PU Tube
(for hot water)
Names and Functions of Parts
*Please Note: Illustration will vary depending on the product model.
Water Flow & Water Temperature Control Knob
Function Selection Knob
Cold & Hot Water Inlet
Open-Close Mounting Plate
Bidet Body
Fixed Connector
Multifunctional Combined Nozzle
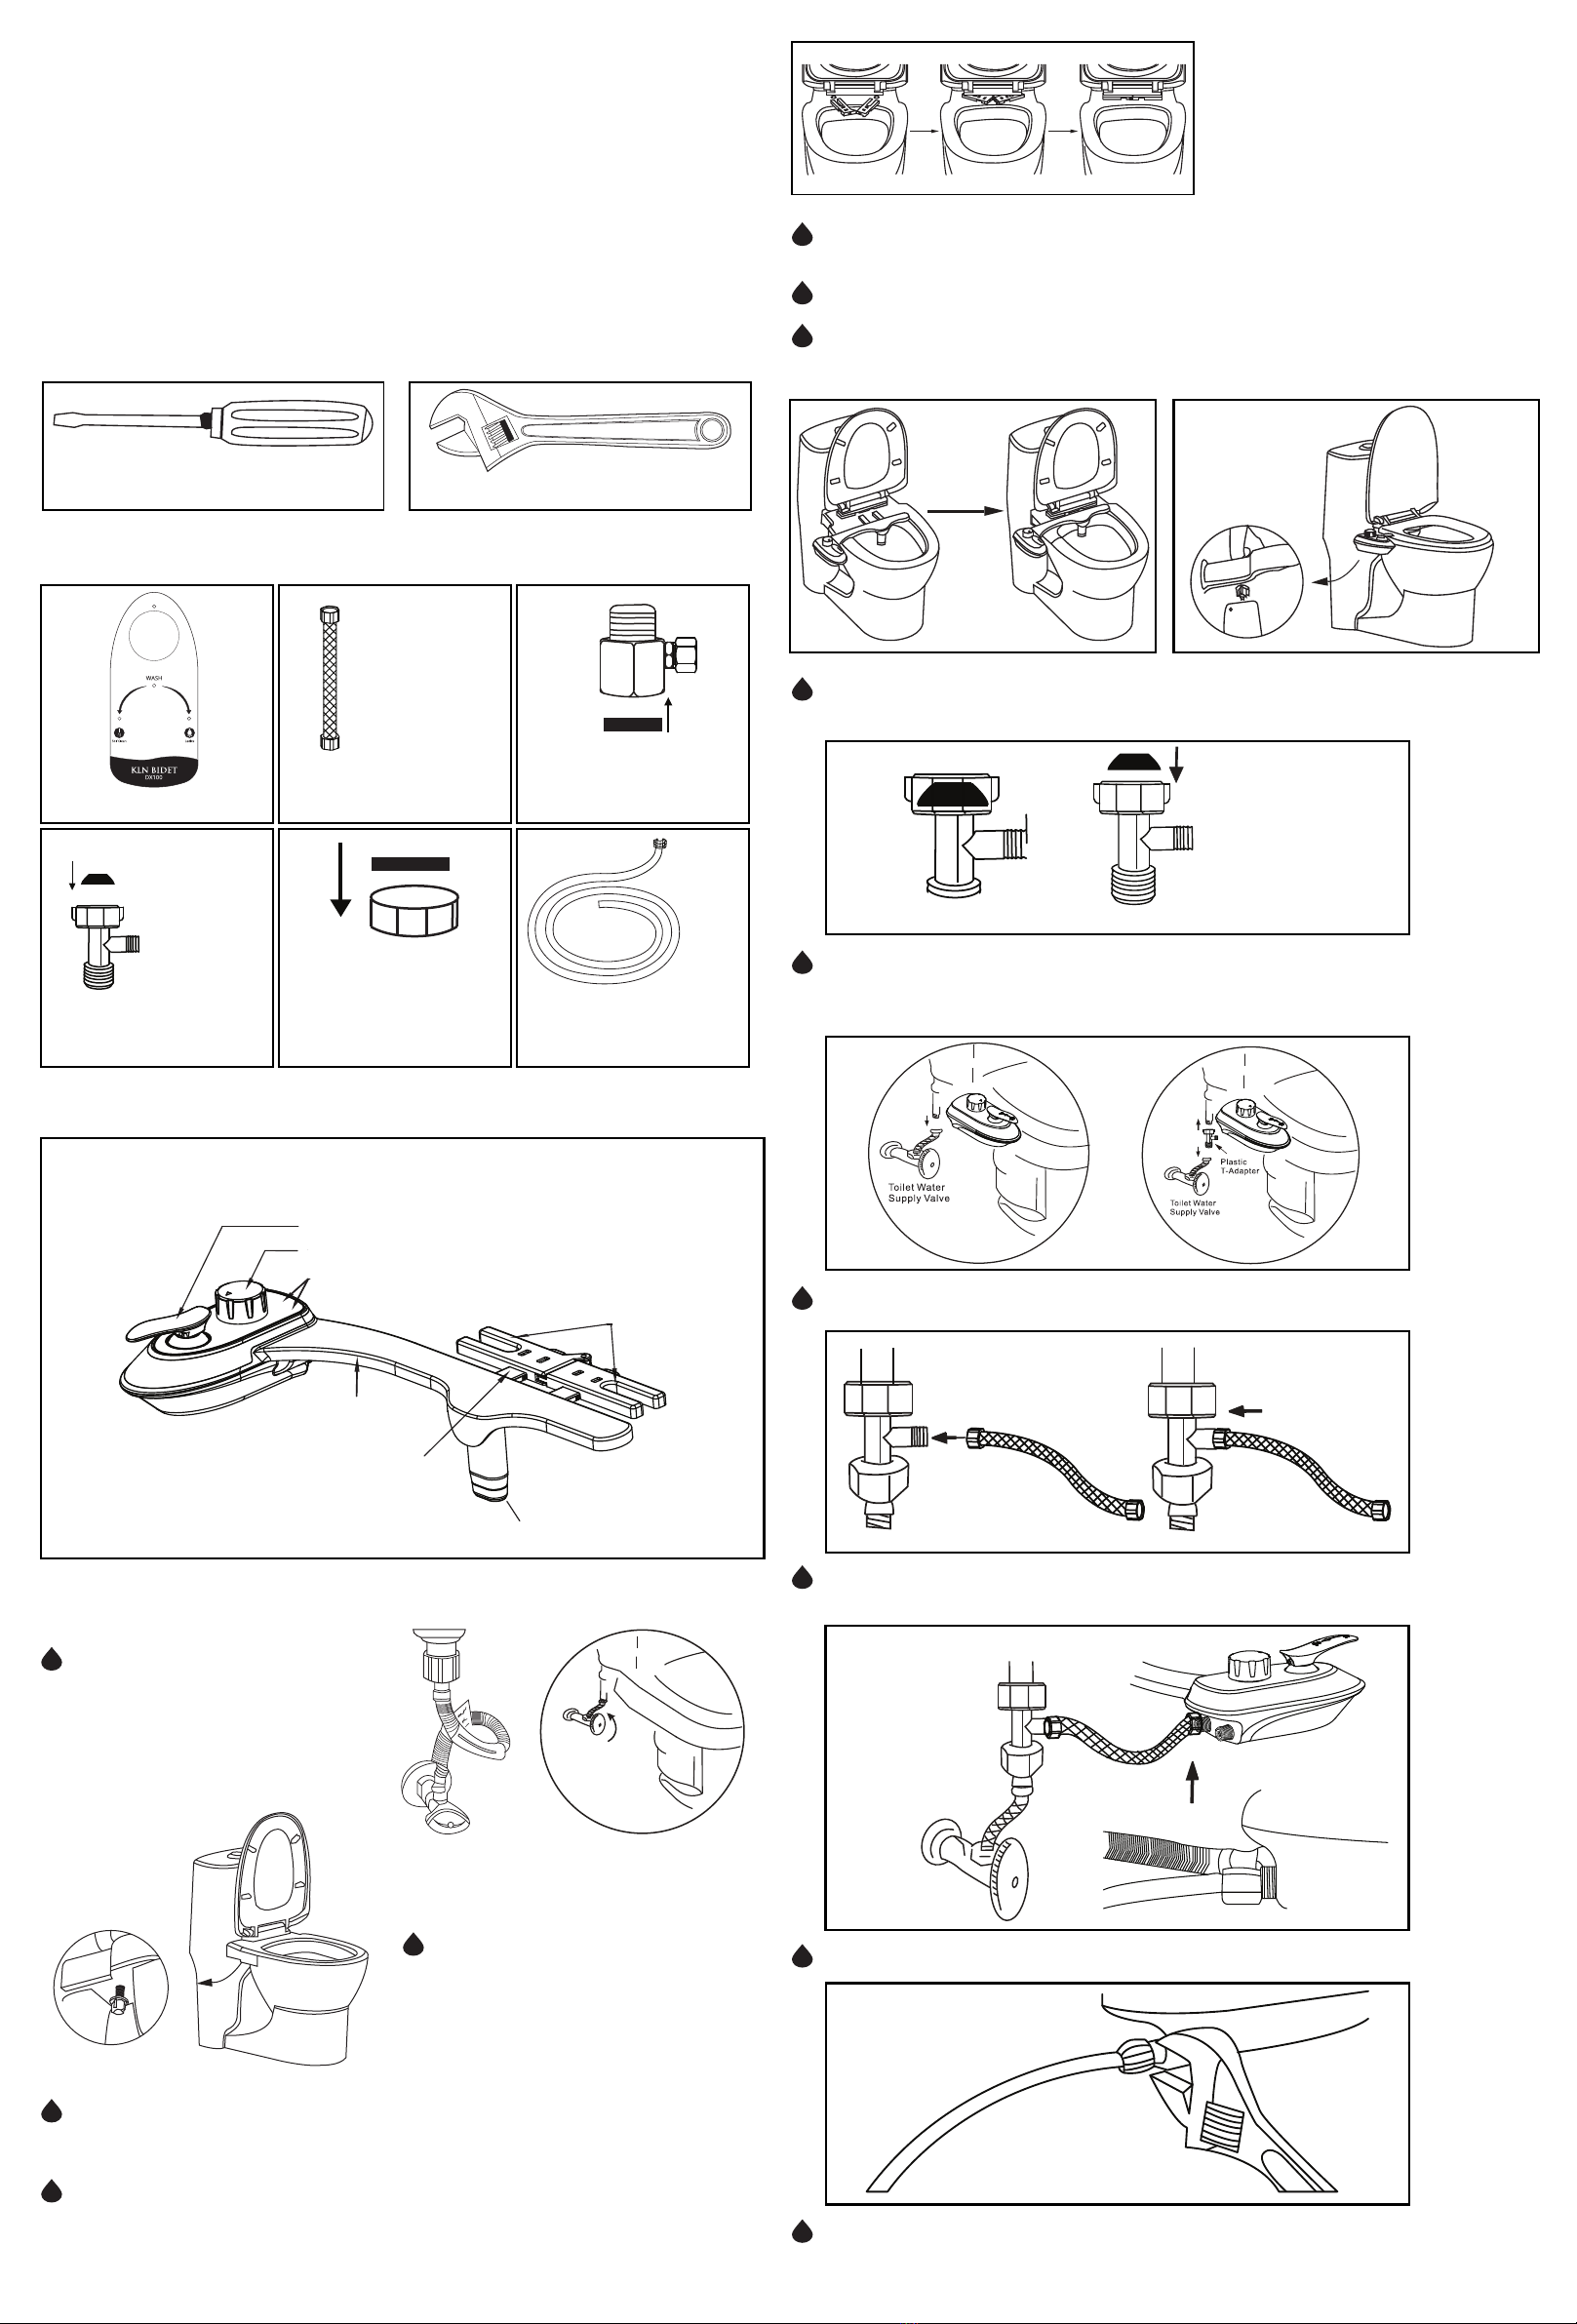
1Before you start, make sure that the
water is turned off to the toilet. Turn
the valve clockwise to turn off the
water to the toilet. You’ll know the
valve is closed when no water fills
the tank after you flush the toilet
5Align the bidet body with the grooves of the mounting plate, then push into the open
grooves (Fig. 5)
3Open the bidet mounting plate.
Aim the two U shaped prongs at the bolts which have been loosened
4Push the mounting plate forward until you hear snap.
The mounting plate is now secure
2Unscrew the screws on the toilet
seat until there is about a 3/4” gap
between the lid and the toilet base
Toilet Water
Supply Valve
Open the open-close mounting plate. Aim
the two left and right U-shaped apertures at
the two unscrewed bolts. Push the mounting
plate toward the gap between the toilet seat
and the toilet in order to make the mounting
plate to be closed. When the positioning
convex point snap into the positioning
concave hole, you can hear clicking sound.
6Adjust the bidet nozzle position so it is in the center of the toilet
7Tighten the toilet screws until snug (Fig. 7)
8Make sure the black rubber washer is inserted into the top of the plastic
T-adaptor (Fig. 8A and 8B)
9Make sure you have closed the toilet water supply valve. Flush the toilet and
make sure there is no water in the cistern. Connect the Plastic T-adaptor to the
cold water supply valve
10 Connect the metal braided hose to the Plastic T-Adaptor
11 Connect the braided metal hose (cold water) and PU Tube (hot water if
applicable) to the bidet valves
12 Screw in PU tube with wrench
13 Connect the PU tube to the hot water supply, then connect the PU Tube to
the T-adaptor
Fig 5 Fig 7
Rubber Washer
8A 8B
Toilet Water
Supply Valve


