Korg SP-280 User manual

DIGITAL PIANO
Bedienungsanleitung
E
F
G
S
C
2
Thank you for purchasing
the Korg SP-280 digital piano.
Merci d’avoir choisi la piano
numérique SP-280 de Korg.
Vielen Dank, dass Sie sich für einen SP-280
digtal-Klavier von Korg entschieden haben.
⫼᠋ݠ
ᛳ䇶ᙼ䗝ᢽ.25*63⬉ᄤ䩶⨈
Owner’s manual
Manuel d’utilisation
Manual de usuario
Gracias por su compira el
Korg SP-280 Piano digital.

2
Precautions
Location
Using the unit in the following locations can result
in a malfunction.
• In direct sunlight
• Locations of extreme temperature or humidity
• Excessively dusty or dirty locations
• Locations of excessive vibration
• Close to magnetic elds
Power supply
Please connect the designated AC adapter to an AC
outlet of the correct voltage. Do not connect it to an
AC outlet of voltage other than that for which your
unit is intended.
Interference with other electrical
devices
Radios and televisions placed nearby may experience
reception interference. Operate this unit at a suitable
distance from radios and televisions.
Handling
To avoid breakage, do not apply excessive force to the
switches or controls.
Care
If the exterior becomes dirty, wipe it with a clean,
dry cloth. Do not use liquid cleaners such as benzene
or thinner, or cleaning compounds or ammable pol-
ishes.
Keep this manual
Aer reading this manual, please keep it for later ref-
erence.
Keeping foreign matter out of your
equipment
Never set any container with liquid in it near this
equipment. If liquid gets into the equipment, it could
cause a breakdown, re, or electrical shock.
Be careful not to let metal objects get into the equip-
ment. If something does slip into the equipment,
unplug the AC adapter from the wall outlet. Then
contact your nearest Korg dealer or the store where
the equipment was purchased.
*
All product names and company names are the trade-
marks or registered trademarks of their respective own-
ers.
IMPORTANT NOTICE TO CONSUMERS
This product has been manufactured according to strict
specications and voltage requirements that are applicable in
the country in which it is intended that this product should
be used. If you have purchased this product via the internet,
through mail order, and/or via a telephone sale, you must
verify that this product is intended to be used in the country
in which you reside.
WARNING: Use of this product in any country other than
that for which it is intended could be dangerous and could
invalidate the manufacturer’s or distributor’s warranty.
Please also retain your receipt as proof of purchase otherwise
your product may be disqualied from the manufacturer’s or
distributor’s warranty.
Notice regarding disposal (EU only)
When this “crossed-out wheeled bin” symbol is dis-
played on the product, owner’s manual, baery, or bat-
tery package, it signifies that when you wish to dis-
pose of this product, manual, package or baery you
must do so in an approved manner. Do not discard
this product, manual, package or battery along with
ordinary household waste. Disposing in the correct
manner will prevent harm to human health and po-
tential damage to the environment. Since the correct method
of disposal will depend on the applicable laws and regula-
tions in your locality, please contact your local administrative
body for details. If the baery contains heavy metals in excess
of the regulated amount, a chemical symbol is displayed be-
low the “crossed-out wheeled bin” symbol on the baery or
baery package.
THE FCC REGULATION WARNING (for USA)
NOTE: This equipment has been tested and found to comply
with the limits for a Class B digital device, pursuant to Part 15
of the FCC Rules. These limits are designed to provide reason-
able protection against harmful interference in a residential
installation. This equipment generates, uses, and can radiate
radio frequency energy and, if not installed and used in ac-
cordance with the instructions, may cause harmful interfer-
ence to radio communications. However, there is no guaran-
tee that interference will not occur in a particular installation.
If this equipment does cause harmful interference to radio or
television reception, which can be determined by turning the
equipment o and on, the user is encouraged to try to correct
the interference by one or more of the following measures:
• Reorient or relocate the receiving antenna.
•
Increase the separation between the equipment and receiver.
• Connect the equipment into an outlet on a circuit dierent
from that to which the receiver is connected.
• Consult the dealer or an experienced radio/TV technician
for help.
If items such as cables are included with this equipment, you
must use those included items.
Unauthorized changes or modication to this system can void
the user’s authority to operate this equipment.

3
Table of Contents
Introduction ---------------------------------------3
Main features ------------------------------------------3
Parts and their function -----------------------4
Preparation and demo performances ----5
Before you begin playing ---------------------------5
Listening to demo performances -----------------6
Playing the SP-280 ------------------------------7
Playing a single sound (Single mode) -----------7
Playing two sounds
at the same time (Layer mode) -----------7
Performing with
another person (Partner mode) ----------8
Using pedals -------------------------------------------8
Effects ---------------------------------------------------8
The metronome ---------------------------------------9
Other functions -------------------------------- 10
Touch settings --------------------------------------- 10
Transpose --------------------------------------------10
Function mode --------------------------------------10
MIDI ------------------------------------------------ 13
What is MIDI? --------------------------------------- 13
What can you do with MIDI? --------------------13
Connections ----------------------------------------- 13
MIDI function mode -------------------------------- 13
Appendix ----------------------------------------- 15
Troubleshooting ------------------------------------- 15
Specications --------------------------------------- 15
Installing the stand --------------------------- 16
Installation precautions ---------------------------16
Other precautions ----------------------------------16
Installation procedure -----------------------------16
Adjusting front leg clearances to oor -------- 17
Check after installation --------------------------- 17
Installing optional
pedal unit (sold separately) -------------- 17
MIDI implementation chart ----------------- 99
Introduction
Main features
Thirty high-quality sounds
The SP-280 provides 30 built-in expressive high-quality
sounds, including a stereo concert grand piano. You can
use Layer mode to simultaneously play two sounds at once,
or you can use Partner mode, which allows two people to
play the same range, one on each half of the keyboard.
Effects
The SP-280 provides 3 built-in digital eects. These eects
can adjust the brightness of the tone (Brilliance), simulate
the natural ambience of a concert hall (Reverb) and add
richness to the sound (Chorus).
Pedal effects
You can obtain the same damper eect as that of an acous-
tic piano using the damper pedal that is included with the
unit. You can also add the damper resonance to the classic
piano and the grand piano tone (bank 1 and 2 of PIANO1).
Furthermore, the damper pedal can function as a half
damper pedal so that you can change the condition that
the damper is applied by the depth to which the pedal is
pressed.
Use optional pedal unit (sold separately) for so and soste-
nuto eects in addition to the damper eect.
Metronome
The built-in metronome allows you to select the time sig-
nature, tempo, and volume, and you can even choose a bell
sound as the accent.
Touch control
You can choose from three dierent seings to adjust how
the sound will respond to your keyboard playing dynamics.
Temperaments
For authentic performance of a wide range of music, the
SP-280 allows you to select from nine temperaments, in-
cluding the equal temperament, pure temperaments (ma-
jor and minor), classical temperaments (Kirnberger and
Werckmeister) as well as temperaments used with Middle
Eastern and Indian folk music. When an acoustic piano
sound is selected, the stretched tuning used on pianos is
automatically selected.
Adjustable pitch
The Transpose function lets you change the pitch of the
piano, and the Pitch Control function allows you to make
nely tuned adjustments.
Two headphone jacks
Two headphone jacks (one each on the front and back of
the SP-280) are provided, allowing two people to listen si-
multaneously.
LINE IN/LINE OUT jacks
When connecting a sound system or other electronic musi-
cal instrument to the LINE IN jack, sound from the con-
nected device will be heard through the speakers of the SP-
280. In addition, powered monitors or a recording system
can be connected by using the LINE OUT jacks.
MIDI capabilities
The SP-280 supports the MIDI protocol, the standard that
allows music data to be transferred between musical instru-
ments and computers. MIDI allows two or more devices to
control or be controlled by each other, and also allows you
to use the SP-280 as a 16-part multitimbral tone generator.

4
14.UP/DOWNbuons:These buons are used to select a
value for the various seings.
15.METRONOMEbutton/LED:This button is used to
start/stop the metronome. While the metronome is be-
ing used, the LED lights up. In addition, hold down the
button to enter the Metronome settings mode, where
various metronome seings can be specied.
16.Musicstandholes:Holes for installing the included
music stand.
17.MIDI(IN,OUT)connectors:Connectors that are used
to connect other MIDI devices (sequencer, keyboards,
etc.).
OUT: Data output (to be connected to the MIDI IN con-
nector of another MIDI device).
IN: Data input (to be connected to the MIDI OUT con-
nector of another MIDI device).
18.PEDALjack:This jack is used to connect the included
damper pedal.
19.LINEOUT(L/MONO,R)jacks:These are the main
audio output jacks. These jacks are where an external
amplifying system would be connected to amplify the
sound from the SP-280. (With a hi-fi system use the
AUX or LINE IN connectors). To amplify the SP-280 in
mono, connect the single L/MONO jack. Use the VOL-
UME knob to set the output volume.
20.LINEINjack:This is a stereo mini jack for audio in-
put. This jack is used to connect the audio output (AUX
Out) of a sound system or other electronic musical in-
strument. Adjust the input volume with the connected
device.
21.Headphone(PHONES)jack:The stereo mini plug of
headphones can be inserted. The same sound from the
headphone jack on the front of the SP-280 will be pro-
duced. When the headphone plug is inserted, no sound
will be produced from the speakers.
22.DC19Vjack: Connect the included AC adapter here.
Parts and their function
1
212 14
313
54 6
87 10 11
915
Control panel
Rear panel
20
19 22
21
16
17 18
1. Headphone( )jack[frontofSP-280]:The stereo mini
plug of headphones can be inserted into this jack. The
same sound from the headphone jack on the back of the
SP-280 will be produced. When the headphone plug is
inserted, no sound will be produced from the speakers.
2. Powerbuon:This buon turns the SP-280 on or o.
3. VOLUMEKnob:Adjusts the volume for the speakers,
the Output and the Phones connectors.
4. PIANOSONGbuon/LED:This buon is used to en-
ter the Piano song mode, aer which the LED lights up.
Simultaneously pressing this buon and the TRANS-
POSE buon enters the Sound demo song mode.
5. TRANSPOSEbuon/LED:This buon is used to ad-
just transposition. While transposing, the LED lights
up. Simultaneously pressing this button and the PIA-
NO SONG buon enters the Sound demo song mode.
6. FUNCTIONbuon/LED:This buon is used to enter
the Function mode, where pitch, temperament and
other seings can be specied. Hold down the buon
to enter the MIDI function mode, where MIDI seings
can be specified. The LED lights up when the SP-280
enters the Function mode and blinks when it enters the
MIDI function mode.
7. TOUCHbutton:This button lets you select the key-
board sensitivity.
8. BRILLIANCEbuon:This buon is used to adjust the
brightness of the tone.
9. REVERBbuon/LED:This buon is used to turn on/
off the reverb, which adds ambience to the sound.
When turned on, the LED lights up.
10.CHORUSbuon/LED:This buon is used to turn on/
o the chorus, which adds richness to the sound. When
turned on, the LED lights up.
11.BANKbuon/LEDs:This buon is used to select the
desired sound bank. The LED for the bank that’s cur-
rently selected will light up.
12.Soundbuttons:This button is used to select from 30
sounds (10 × 3 banks). Two buttons can be pressed to
play two sounds simultaneously (Layer mode).
13.Display:Shows seings, for example, for the Function
mode and the metronome.

5
Before you begin playing
About the included stand
If the stand is to be used, see the “Installing the stand” section on page 16 before con-
necting the AC adapter and aaching the music stand.
Connecting the Power
Connect the supplied AC adapter to the power cord. Insert the DC plug end into the
DC19V jack on the rear panel of the unit. Next, plug the power cord into an AC outlet.
Pass the AC adapter cord through the cord hook so that the plug won’t be re-
moved from the jack accidentally. When you unhook the cord, don’t pull the cord
with force.
Be sure to use the AC adapter that came with your unit. Using other AC adapters
may cause the unit to malfunction.
Be sure to plug the unit into an AC outlet of the appropriate voltage.
Using the headphones
Use stereo headphones with a stereo mini plug.
Since there is one headphone jack on the back (Fig. 1) and one on the front (Fig. 2), two
people can listen simultaneously.
When the headphone plug is inserted into the headphone jack on the front or back of
the SP-280, no sound will be produced from the speakers. Use headphones at night or
when you don’t want disturb others.
If your headphones feature a standard-to-mini adapter plug, be sure to hold the
adapter plug when you connect or disconnect the headphones.
To protect your hearing, do not listen to loud, high-volume sounds for a long pe-
riod of time through headphones.
Using the music stand
Insert the pins on the included music stand into the music stand holes in the rear
panel. (Fig. 2)
Do not press down on the music stand with force, otherwise it may fall o the
SP-280.
Turning the instrument on
Press the power buon to turn on the SP-280. (Fig. 3)
When the instrument is turned on, the buon LEDs on the control panel will light up.
To turn the instrument o, press the power buon again.
When the instrument is turned o, all functions and parameters, except the auto
power o function, return to their factory default seings.
Auto power off function
When 30 minutes have passed without user input or an demo performance, the
instrument will be automatically turned o. To disable this function, turn o the
auto power o function (see page 12).
Adjust the volume
Rotate the VOLUME knob that’s located next to the power switch toward “MAX” to
raise the volume level.
Rotate it le toward “MIN” to lower the level. (Fig. 3)
The VOLUME knob controls the output level of the built-in speakers, the headphones
jacks and the LINE OUT jacks.
It is always beer to start with a low volume and then increase gradually.
Be careful not to bend
this part too much when
you insert the power cord.
Fig. 1
to AC outlet
AC adapter
Power cord for
the AC adapter
Headphones Cord hook
DC plug
Headphones
Fig. 2
Fig. 3
Softer Louder
Preparation and demo performances

6
Sounddemosonglist
display
Soundbuon Songtitle Composer
d01 PIANO1 Jardins sous la pluie C.Debussy
d02 PIANO2 Danny boy Irish Folk Song
d03 E.PIANO1 Jam Session N. Nishi
d04 E.PIANO2 In Memory M.Giesel
d05 HARPSI/CLAV Invention No.8 J.S.Bach
d06 VIBES/GUITAR Jazz in Spain KORG original
d07 ORGAN1 Improvisation M.Geisel
d08 ORGAN2 Toccata in D moll J.S.Bach
d09 STRINGS Scoring Interlude M.Geisel
d10 CHOIR Autumn Flares M.Geisel
Listening to a piano song
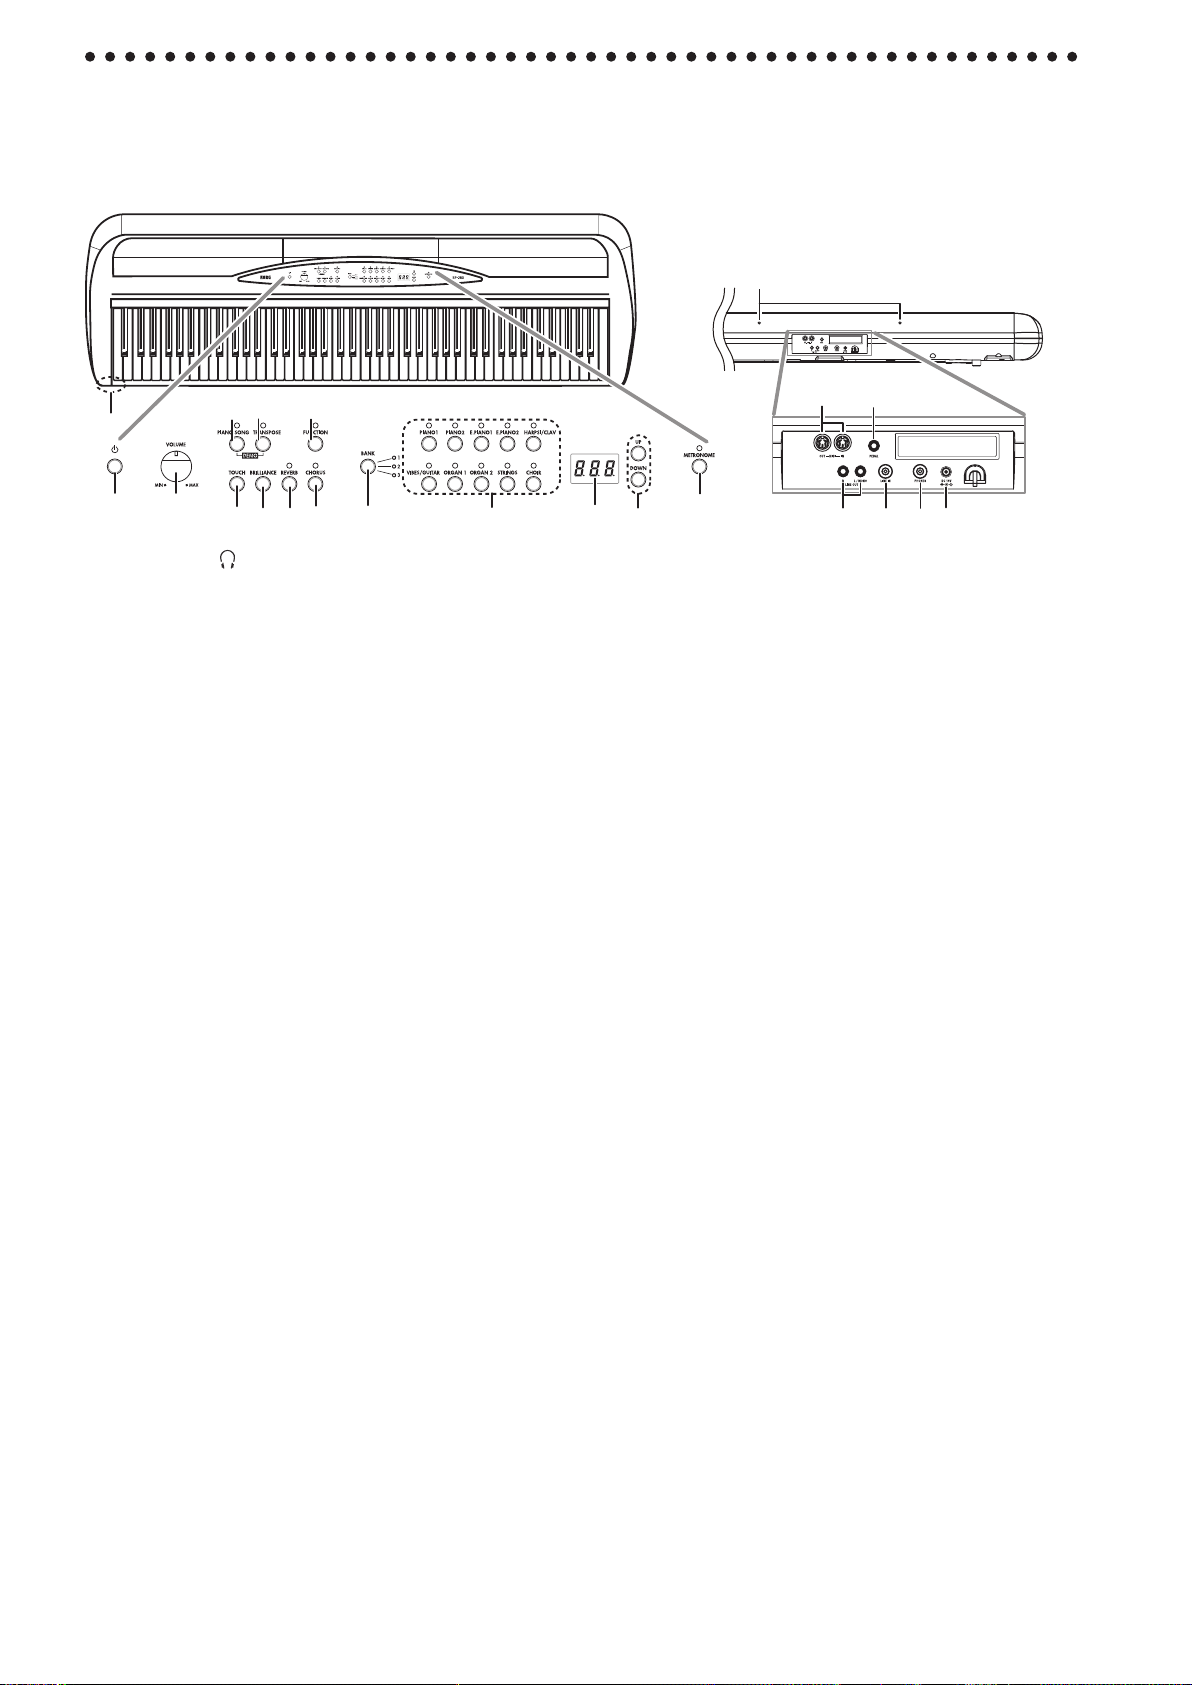
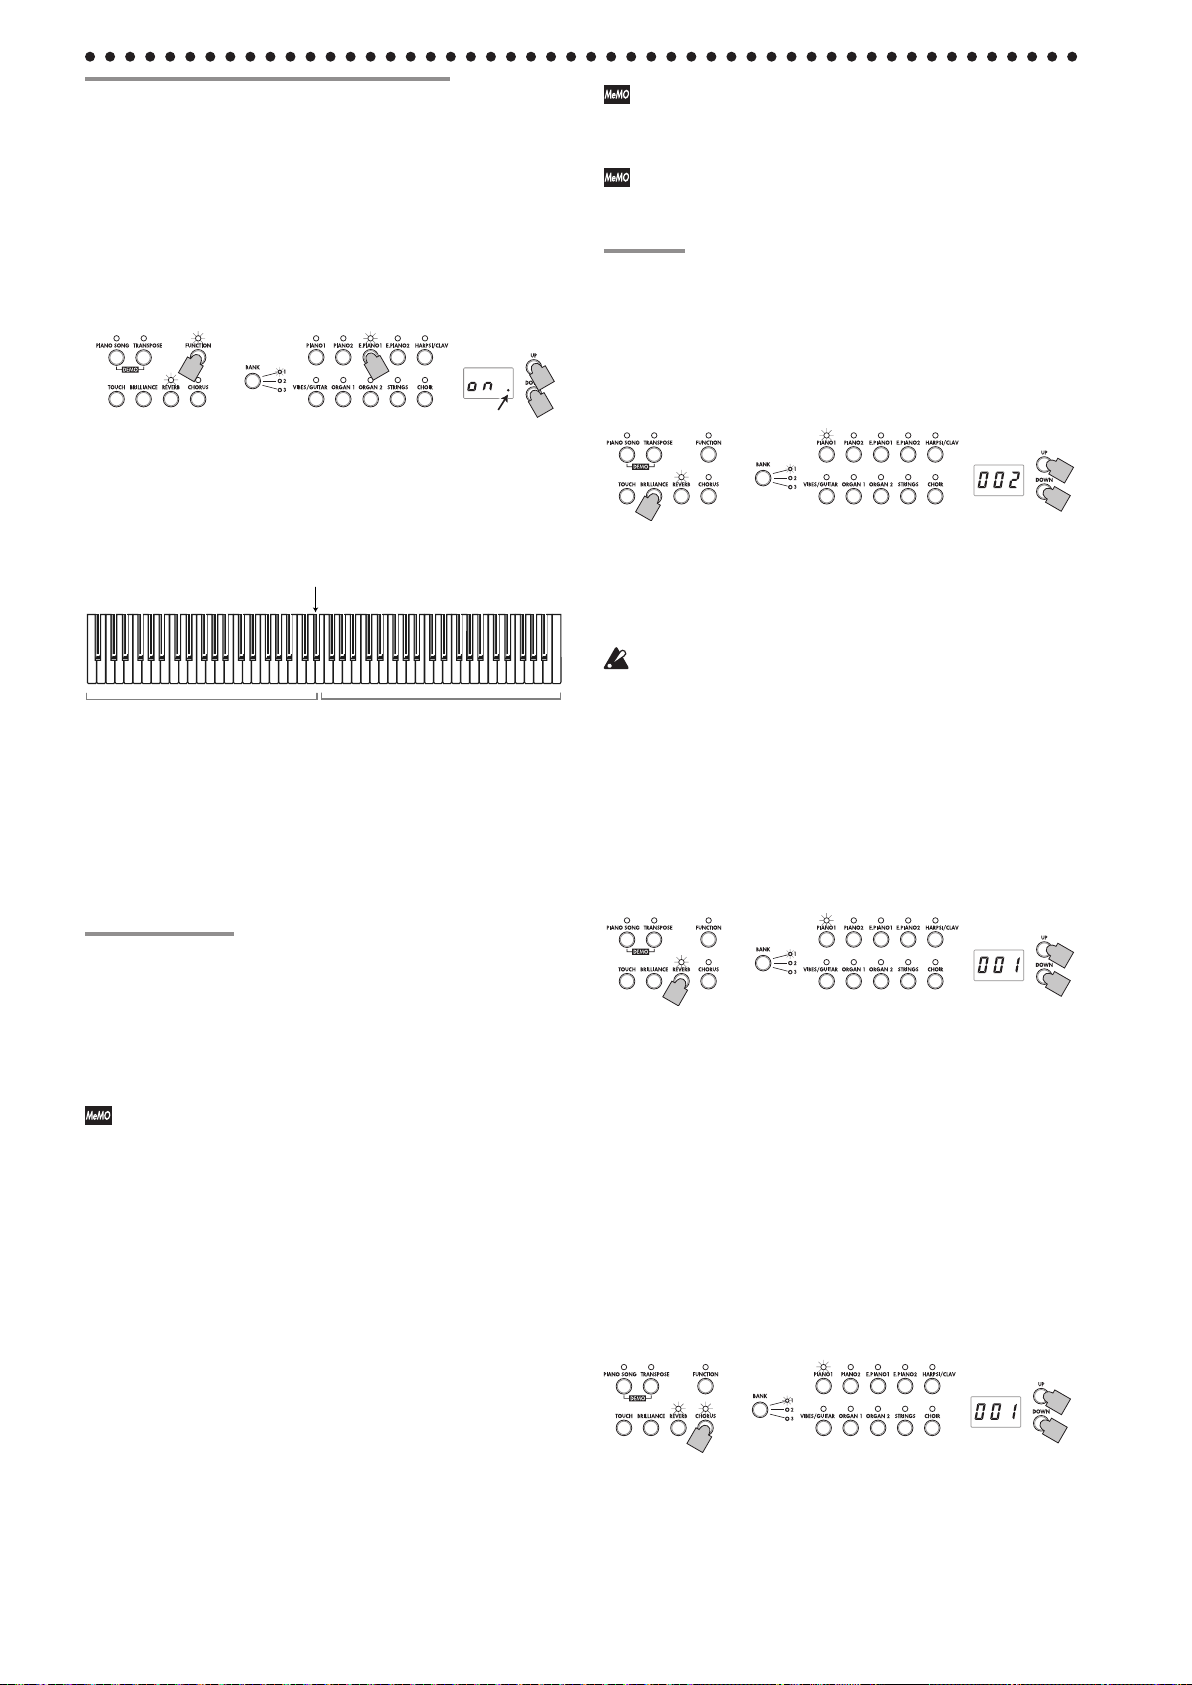
1. PressthePIANOSONGbuon.
The PIANO SONG and PIANO1 LEDs light up, and the
number for the piano song (001) appears in the display.
1,3
2. Aerabout3seconds,thePIANO1LEDblinks,and
playbackofthepianosongbegins.
When playback of the rst piano song is nished, play-
back continues sequentially with second, third, etc.
When playback of the twentieth piano song is nished,
playback begins again with the rst piano song.
Listeningtoaspecicpianosong
The number for the song that you want to hear can be
selected by pressing the UP or DOWN buon beside the
display. If a dierent number is selected by pressing the
buons, even while a song is being played, playback of
the corresponding song will begin aer a few seconds.
3. Tostopplaybackofapianosong,pressthePIANO
SONGbuonagain.
Pianosonglist
No.
display
Songtitle Composer
1 001 Etude Op.10-12 F.Chopin
2 002 Claire de lune C.Debussy
3 003 Fantaisie-Impromptu Op.66 F.Chopin
4 004 Waltz No.6 Db-major Op.64-1 F.Chopin
5 005
“Prelude 1” The Well-Tempered
Clavier, Book 1 J.S.Bach
6 006 “Turkish March” Sonata K.331 W.A.Mozart
7 007 Arabesque No.1 C.Debussy
8 008 Für Elise L.v.Beethoven
9 009 Liebesträume Nr.3 F.Liszt
10 010 La Campanella F.Liszt
11 011 Nocturne Op.9-2 F.Chopin
12 012 Spring Song Op.62-6 F.Mendelssohn
13 013 Reets dans I'eau C.Debussy
14 014 Gymnopédie No.1 E.Satie
15 015 Etude Op.10-3 F.Chopin
16 016 Old Feather Blues KORG original
17 017 La lle aux cheveux de lin C.Debussy
18 018 The Entertainer S.Joplin
19 019 Sunowers KORG original
20 020 Amazing Grace Hymn
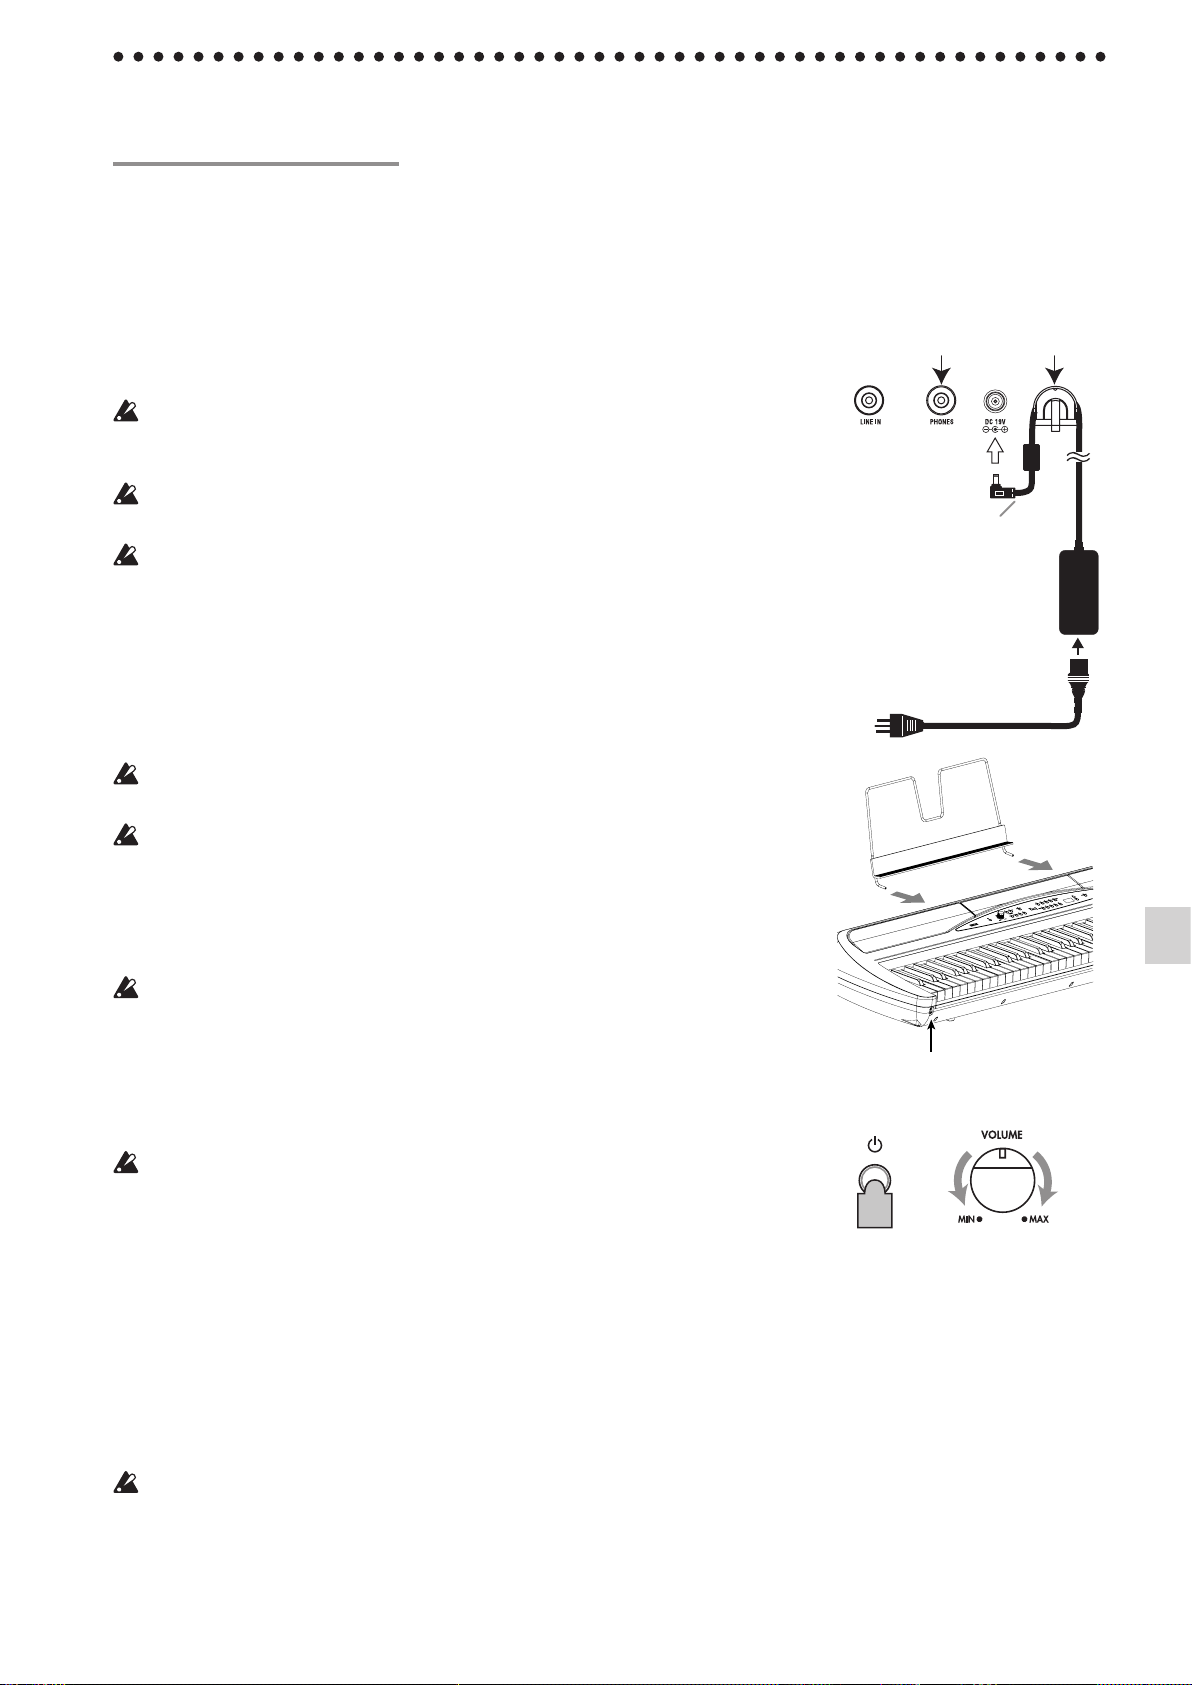
Using the LINE IN/LINE OUT jacks
Use the LINE IN jack to listen to the sound from another
musical instrument or sound system through the speakers
of the SP-280. Connect this jack to the output jack of the
other musical instrument or sound system.
Use an audio cable with a stereo mini plug inserted into
the SP-280 and a plug on the other end appropriate for the
connected device.
Use the LINE OUT jacks, if you want to connect your SP-
280 to a mixer, stereo hi-, or a couple of active monitors.
When using a stereo hi-, connect the LINE OUTs to the
AUX or LINE inputs. For mono amplication, connect only
the L/MONO jack.
You must only connect devices with the power turned o.
Careless operation may damage the SP-280 or the device
where it’s connected, or malfunctions may be caused.
Connection cables are sold separately. You will need to
obtain the appropriate commercially-available cables
for your equipment.
Listening to demo performances
The SP-280 contains a total of 30 demo performances (10
demo songs using 10 high-quality sounds and 20 familiar
piano songs using the piano sounds).
During playback of a sound demo song, you can play
using the keyboard; however, the sound cannot be
changed by using the sound buons.
During playback of a sound demo song, the settings
for eects (reverb and chorus) cannot be changed.
Listening to a demo song
1. SimultaneouslypressthePIANOSONGbuonand
theTRANSPOSEbuon.
The PIANO SONG LED blinks, and the LEDs for the
sound buons blink sequentially.
In addition, the number for the sound demo song (d01)
appears in the display.
1,3 1
2. Aerabout3seconds,thePIANO1LEDblinks,and
playbackofthedemosongcorrespondingtothatbut-
tonbegins.
When playback of the PIANO1 demo song is fin-
ished, playback continues sequentially with PIANO2,
E.PIANO1, etc. When playback of the CHOIR demo
song is nished, playback begins again with the PIA-
NO1 demo song.
Listeningtoaspecicsounddemosong
When the LEDs for the sound buons are blinking se-
quentially, press the sound button for the demo song
that you want to hear. If a different sound button is
pressed, even while a song is being played, playback of
the corresponding demo song begins after a few sec-
onds.
In addition, a song can be selected by pressing the UP
or DOWN buon beside the display.
3. Tostopplaybackofademosong,pressthePIANO
SONGbuonagain.

7
Playing two sounds at the same time
(Layer mode)
You can play two sounds at the same time on the key-
board. This is called the Layer mode.
Simultaneously press the two sound buttons for the
sounds to be played at the same time. The LEDs for the
two pressed sound buons will light up.
The lemost or uppermost selected sound buon is layer 1,
and the other (rightmost or lowermost) one is layer 2 (see
the diagram at the below).
For example, if E.PIANO1 and ORGAN1 are selected,
E.PIANO1 is layer 1 and ORGAN1 is layer 2.
In order to use sounds in different banks, first select the
banks in the Single mode for the sound buttons to be
pressed.
For example, to play by layering the grand piano and
jazz organ 2 sounds, select bank 1 (classic piano) for the
PIANO1 buon and bank 2 (jazz organ 2) for the ORGAN1
buon, and then press both buons simultaneously.
When selecting Layer mode, the total number of voices
that can play at the same time is reduced, depending
on the total number of oscillators used by the selected
sounds. (refer to “About maximum polyphony” on
page 15.)
Sounds in dierent banks for the same sound buon
(grand piano and jazz piano for the PIANO1 button)
cannot be selected.
Returning to the Single mode
To return to Single mode, just press a single sound se-
lection buon.
Layer mode settings
In Layer mode, the volume balance between sounds
can be adjusted, the octave for each sound can be shi-
ed, and the damper pedal can be enabled or disabled
for each sound. (refer to “Function mode” on page 10.)
Layer 2
Layer 1
Playing a single sound (Single mode)
You can select a sound from the thirty sounds supplied
with the instrument (10 sounds x 3 banks).
Soundbuon Bank Soundname #
PIANO1 1 Classic Piano 3
2 Grand Piano 3
3 Jazz Piano 2
PIANO2 1 Live Piano 2
2 Honky-Tonk 2
3 Elec.Grand 1
E.PIANO1 1 Stage E.piano 1
2 Bright E.Piano 2
3 Tremolo EP 3
E.PIANO2 1 Dig.E.Piano1 2
2 60's E.Piano 1
3 Dig.E.Piano2 2
HARPSI/CLAV 1 Harpsichord 2
2 Clav 1
3 Synth Clav 2
VIBES/GUITAR 1 Vibraphone 1
2 Marimba 1
3 Acoustic Guitar 2
ORGAN1 1 Jazz Organ1 2
2 Jazz Organ2 2
3 Jazz Organ3 2
ORGAN2 1 Pipe Organ1 2
2 Pipe Organ2 2
3 Positive Organ 2
STRINGS 1 Strings 2
2 Cinema Strings 2
3 Analog Strings 2
CHOIR 1 Aah Choir 2
2 Ooh Voices 2
3 Classical Choir 3
(#) These columns show the number of oscillators per voice
that are used by each sound. (refer to “About maximum
polyphony” on page 15.)
1. Pressthesoundbuonforthesoundthatyouwant
toplay.
The LED for that buon will light up.
2. PresstheBANKbuttontoselectoneofthethree
sounds.
Each press of the BANK button switches the bank in
the order 1, 2, 3, 1, ..., and the corresponding LED to the
right of the BANK buon will light up.
For example, to select the electric grand piano sound,
press the PIANO2 buon, aer which its LED lights up.
Then, press the BANK button twice to select bank 3
(electric grand piano); the LED below and to the right
of the BANK buon will light up.
In addition, the bank selected for a sound button re-
mains the same, even if a different sound button is
pressed.
2
1
Each time the SP-280 is turned on, the sound in bank 1
is selected for all sound buons.
Playing the SP-280

8
In Layer mode, you can select the sound(s) where you
want to apply the pedal. (refer to “Specifying layer
pedals” on page 12)
In Partner mode (see page 11), the damper eect can be
applied independently by both players.
Effects
Brilliance
This eect changes the brightness of the tone.
TheseingcanbechangedbyholdingdowntheBRIL-
LIANCEbuttonandpressingtheUPorDOWNbutton
besidethedisplay.
The setting appears in the display with 3 producing a
brighter sound and 1 producing a less bright sound.
The same seing is applied to all sounds and remains ap-
plied until the SP-280 is turned o. When the instrument is
turned on, the default seing 2 is selected.
Brilliance cannot be turned o.
Reverb
This eect adds ambience and depth to the sound, produc-
ing the sense of performing in a concert hall. As a factory
default, the on/o seing for this eect as well as this ef-
fect’s seing are saved with each sound.
EachpressoftheREVERBbuonturnsreverbon(LED
lightsup)oro(LEDturnso).
Tochangethissetting,holddowntheREVERBbutton
andpresstheUPorDOWNbuonbesidethedisplay.
The seing appears in the display with 3 producing a deep
reverb eect and 1 producing a light reverb eect.
If a dierent sound is selected or if the SP-280 is turned o,
the on/o seing for this eect as well as this eect’s set-
ting return to their factory defaults (default seings).
Chorus
Chorus adds modulation to the sound, producing an ex-
pansively rich sound. As a factory default, the on/o set-
ting for this eect as well as this eect’s seing are saved
with each sound.
EachpressoftheCHORUSbuonturnsreverbon(LED
lightsup)oro(LEDturnso).
Tochangethisseing,holddowntheCHORUSbuon
andpresstheUPorDOWNbuonbesidethedisplay.
The seing appears in the display with 3 producing a deep
chorus eect and 1 producing a light chorus eect.
If a dierent sound is selected or if the SP-280 is turned o,
the on/o seing for this eect as well as this eect’s set-
ting return to their factory defaults (default seings).
Performing with another person
(Partner mode)
Two people can play in the same range with the keyboard di-
vided in half between them. This is called the Partner mode.
1. PresstheFUNCTIONbuon.
The FUNCTION and PIANO1 LEDs will light up.
2. PresstheE.PIANO1buon.
The LED for the E.PIANO1 sound buon lights up, and
oFF appears in the display.
3. PresstheUPbuonbesidethedisplaytoselecton.
Partner mode is turned on, and the PIANO1 sound is
used for both the le and right sides of the keyboard.
The right side of the keyboard, from E4 to C8, produces
sounds in a range two octaves lower (E2–C6).
The le side of the keyboard, from A0 to Eb4, produces
sounds in a range two octaves higher (A2–Eb6).
4. ToexitPartnermode,presstheDOWNbuonbeside
thedisplaytoselectoFF.
5. PresstheFUNCTIONbuon.
The FUNCTION LED turns o.
In Partner mode, the sound for the le and right sides can
be changed, and the volume can be adjusted. For details,
refer to “Partner mode seings” on page 11.
Using pedals
Using the damper pedal
Pressing this pedal will sustain the sound, producing a
richly resonant decay. You can also use halfpedalling, with
a gradual resonance eect depending on the depth of the
pedal pressure (“half-pedaling”).
In Layer mode, you can select the sound(s) to apply the
pedal to. (refer to “Specifying layer pedals” on page 12)
Useoptionalpedalunit(soldseparately)toachievethree
pedaleects.
Soft pedal (left)
Pressing this pedal will make the tone soer. You can con-
trol the soness of the tone by how far down you press the
on pedal (“half-pedaling”).
Sostenuto pedal (center)
Pressing this pedal will apply the damper eect only to the
notes that are already being held down on the keyboard,
and will sustain only those notes. The damper eect will
not be applied to any additional notes that you play while
holding down the Sostenuto pedal.
Damper pedal (right)
Pressing this pedal will sustain the sound, producing a
richly resonant decay. You can also add the damper reso-
nance to the classic piano and the grand piano tone (bank
1 and 2 of Piano1). You can also use halfpedalling, with a
gradual resonance effect depending on the depth of the
pedal pressure (“half-pedaling”).
2
1,5 3
4
Partner mode
Pitches A2 to E6 for the player
on the left side
Pitches E2 to C6 for the player
on the right side
E
4
A0 E4 C8

9
Selecting a bell for the accent
1. HolddowntheMETRONOMEbuonuntiltheMet-
ronomeseingsmodeisentered.
2. PresstheE.PIANO1buon,andtheaccentsoundset-
tingwillappearinthedisplay.
3. SelecttheseingwiththeUPorDOWNbuonbe-
sidethedisplay.
The seing range consists of oFF (no accent sound), on1
(emphasized sound for the accent beat) and on2 (bell
sound for the accent beat); the default seing is oFF.
4. PresstheMETRONOMEbuttontoexittheMetro-
nomeseingsmode.
Specifying the tempo (Metronome settings mode)
1. HolddowntheMETRONOMEbuonuntiltheMet-
ronomeseingsmodeisentered.
2. PresstheE.PIANO2buon,andthetempowillap-
pearinthedisplay.
3. SpecifytheseingwiththeUPorDOWNbuonbe-
sidethedisplay.
The seing range is q = 40–240; the default seing is 120.
To return to the default setting, simultaneously press
the UP and DOWN buons.
4. PresstheMETRONOMEbuttontoexittheMetro-
nomeseingsmode.
Selecting the Metronome Sound
1. HolddowntheMETRONOMEbuonuntiltheMet-
ronomeseingsmodeisentered.
2. PresstheHARPSI/CLAVbuon,andthemetronome
soundseingwillappearinthedisplay.
3. SpecifytheseingwiththeUPorDOWNbuonbe-
sidethedisplay.
The setting range consists of 1 (acoustic) and 2 (elec-
tronic sound); the default seing is 1.
4. PresstheMETRONOMEbuttontoexittheMetro-
nomeseingsmode.
2
1,4
3
3
2
1,4
3
3
2
1,4
3
3
The metronome
The SP-280 is equipped with a metronome, which can be
changed to a bell sound convenient for practicing.
Turning on/off the metronome
Press the METRONOME buon. The
LED lights up, and the metronome
starts.
To stop the metronome, press the METRONOME button
again. The LED turns o.
Specifying the tempo
When the tempo appears in the dis-
play (default seing of 120), regardless
of whether the metronome is turned
on or off, the tempo can be specified with the UP and
DOWN buons beside the display.
The seing range is
q
= 40
–
240.
To return to the default seing, simultaneously press the
UP and DOWN buons.
Selecting the time signature
1. HolddowntheMETRONOMEbuonuntiltheMet-
ronomeseingsmodeisentered.
The METRONOME LED blinks, and the LED for the
PIANO1 sound buon lights up.
In addition, the time signature appears in the display.
When the Metronome settings mode is entered, the
time signature seing normally appears.
2. Toselectthetimesignatureafterchangingother
settingsintheMetronomesettingsmode,pressthe
PIANO1buon.
3. SelecttheseingwiththeUPorDOWNbuonbe-
sidethedisplay.
The setting range consists of 02 (2/4), 03 (3/4), 04 (4/4)
and 06 (6/4); the default seing is 04.
To return to the default setting, simultaneously press
the UP and DOWN buons.
4. PresstheMETRONOMEbuttontoexittheMetro-
nomeseingsmode.
Adjusting the metronome volume
1. HolddowntheMETRONOMEbuonuntiltheMet-
ronomeseingsmodeisentered.
2. PressthePIANO2button,andthevolumewillap-
pearinthedisplay.
3. SpecifytheseingwiththeUPorDOWNbuonbe-
sidethedisplay.
The seing range is 1–13; the default seing is 10.
To return to the default setting, simultaneously press
the UP and DOWN buons.
4. PresstheMETRONOMEbuttontoexittheMetro-
nomeseingsmode.
2
1,4
3
3
2
1,4
3
3

10
key Eect
F#6–B6 6–1 semitones below
C7 Standard pitch
C#7–F7 1–5 semitones higher
Function mode
The temperament as well as other pitch settings can be
specied from the Function mode.
SeingprocedureforfunctionsintheFunctionmode.
1. PresstheFUNCTIONbuon.
The FUNCTION and PIANO1 LEDs light up.
2. Pressthesoundbuoncorrespondingtothedesired
function.
The current seing appears in the display.
3. Specifythedesiredseing.
4. Afterspecifying the desired settings, press the
FUNCTIONbuontoreturntothemodeforplaying.
The FUNCTION LED turns o.
3
3
1,4
2
When the SP-280 is turned off, all functions, except
the auto power o function, return to their default set-
tings.
The seings are applied to all sounds.
Fine tuning
In order to adapt the SP-280 pitch to that of another instru-
ment, you can adjust the pitch in steps of 0.5 Hz over a
range of A4 = 427.5–452.5 Hz
.
27.5–52.5 appears in the display.
The standard pitch is A = 440 Hz, and the default seing is
40.0.
1. AfterenteringtheFunctionmode,theLEDforthe
PIANO1soundbuonlightsup.
When the Function mode is entered, the pitch seing
normally appears.
2. Tospecifythepitchaerchangingotherseingsin
theFunctionmode,pressthePIANO1buon.
3. SpecifytheseingwiththeUPorDOWNbuonbe-
sidethedisplay.
Simultaneously press the UP and DOWN buttons to
return to 440 Hz.
3
3
1,4 2
Touch settings
The keyboard sensitivity, or touch, can be programmed.
To change the seing, hold down the TOUCH buon and
press the UP or DOWN buon beside the display.
Loud
Loudness
Quiet
Quiet Loud
Playing
strength
Light
Normal
Heavy
Display
Touchsensitivity
1 Light. Loud notes can be produced even by
playing lightly.
2 Normal. Normal piano touch.
3 Heavy. Loud notes can be produced only by
playing very hard.
When the instrument is turned on, the touch seing is
reset to Normal.
The seings are applied to all sounds.
Transpose
In some cases, a song may be wrien in a dicult key (e.g.,
many black keys), or you may wish to shift the pitch to
match another instrument or vocalist. In such cases, you
can transpose (shi the pitch) so that you can use an easier
fingering, or use the same familiar fingering to play at a
dierent pitch. This is called the Transpose function.
For example if you transpose upward by one semitone,
playing the notes shown at the lower le will produce the
pitches shown at the right.
When the instrument is turned on, the transposing is
reset.
While holding down the TRANSPOSE button, press the
keyboard key (F#6–F7) for the desired transposition.
If a keyboard key other than C7 is pressed, the TRANS-
POSE LED lights up to indicate that the keyboard is trans-
posed.
The pitch of the entire keyboard is transposed according
to the pitch of the pressed keyboard key in relation to C7.
To return to the original pitches, hold down the TRANS-
POSE buon and press the C7 key. The TRANSPOSE LED
turns o, and transposition is canceled.
C4 C7
F 6
F7
Other functions

11
Selecting a temperament
You can select from nine temperaments, including the
equal temperament, pure temperaments (major and mi-
nor), classical temperaments (Kirnberger and Werckmeis-
ter) as well as temperaments used with Middle Eastern
and Indian folk music.
Display
Temperament
00 Equaltemperament(defaultseing):
Spacing all semitones at equal pitch intervals,
this temperament is the most widely used.
01 Puretemperament[major]:Major chords in the
selected key are perfectly tuned.
02 Puretemperament[minor]:Minor chords in
the selected key are perfectly tuned.
03 Arabic:This scale includes the quarter-tone in-
tervals used in Arabic music.
04 Pythagorean:This ancient Greek scale is espe-
cially eective for playing melodies. It consists
of perfect hs; however, other intervals – the
major third in particular – is out of tune.
05 Werckmeister:The Werckmeister III scale was
created in the later Baroque period to allow
relatively free transposition.
06 Kirnberger:The Kirnberger III scale is used
mainly for tuning harpsichords.
07 Slendroscale:This is an Indonesian gamelan
scale with ve notes per octave.
08 Pelogscale:This is an Indonesian gamelan
scale with seven notes per octave.
1. EntertheFunctionmode,andthenpressthePIANO2
buon.
The LED for the PIANO2 sound buon lights up, and
the temperament seing (00) appears in the display.
2. SelecttheseingwiththeUPorDOWNbuonbe-
sidethedisplay.
2
2
1
Aboutstretchedtuning
In order to produce the most natural resonance, PIANO1
and PIANO2 sounds use a “stretched tuning” that makes
the notes of the lower range slightly aer than equal tem-
perament, and the upper range slightly sharper. This is
how an acoustic piano is normally tuned by professional
tuners.
Partner mode settings
1. Enter the Function mode, and then press the
E.PIANO1buon.
The LED for the E.PIANO1 sound buon lights up, and
the on/o seing appears in the display.
2. EachpressoftheUPorDOWNbuonbesidethedis-
playturnsthemodeon(on)oro(oFF).
2
2
1
When the Partner mode is turned on, the PIANO1 sound
is used for both the left and right sides of the keyboard,
and the PIANO1 LED lights up.
The right side of the keyboard, from E4 to C8, produces
sounds in a range two octaves lower (E2–C6). The le side
of the keyboard, from A0 to Eb4, produces sounds in a
range two octaves higher (A2–Eb6).
The division for the le and right sides of the keyboard
as well as the range (pitches) cannot be changed.
In the Partner mode, the transposition settings are
ignored. In addition, keyboard information (Note On
and Note O) is not sent with MIDI.
Selectingthesoundfortheleside
Exit the Function mode, and then press the sound but-
ton for the sound to be used with the left side of the
keyboard. The right side of the keyboard remains set to
the PIANO1 sound.
Selectingsoundsfortheleandrightsides
Exit the Function mode, and then simultaneously press
the two sound buons for the sounds to be used. The
LEDs for the two pressed sound buons light up.
Sound for left side of keyboard
Sound for right side of keyboard
The lemost or uppermost selected sound buon is for
the le side of the keyboard, and the other (rightmost
or lowermost) one is for the right side of the keyboard.
For example, if E.PIANO1 and ORGAN1 are selected,
E.PIANO1 is for the le side of the keyboard and OR-
GAN1 for the right side of the keyboard.
In order to use sounds in different banks, first select
the banks in the Single mode for the sound buons to
be pressed.
If the Partner mode is turned off and the Function
mode is exited with the le and right sides of the key-
board set to dierent sounds, the Layer mode will be
entered.
In the Partner mode, the tone performed will change
to Piano 1 when entering the performance of a piano
song. However, the tone of the keyboard on the right
that was selected in the Partner mode will be emied
when the keyboard on the right (E4–C8) is played.
Usingthesamesound(otherthanPIANO1)forboththe
leandrightsides
Exit the Function mode, and then simultaneously press
two sound buttons, making sure that the rightmost
one is for the sound to be used. Then, press the right-
most selected sound button again. For example, after
pressing the PIANO2 and ORGAN1 buons, press the
ORGAN1 buon again to use the ORGAN1 sound with
both the le and right sides of the keyboard.
Changingthevolumefortheleandrightsides
I
f the sounds for the left and right sides of the key-
board have been changed, the volume can be specied
for each sound. refer to “Specifying the volume balance
for layers” on page 12.

12
Specifying layer pedals
In the Layer mode, a damper seing can be specied for
each sound.
The seings are only for the layer 1 sound (o – –), only for
the layer 2 sound (– – o) and for both sounds (o – o).
The default seing is o – o.
1. EntertheFunctionmode,andthenpresstheVIBES/
GUITARbuon.
The LED for the VIBES/GUITAR sound button lights
up, and the damper seing (o – o) appears in the dis-
play.
2. SelectthedamperseingwiththeUPorDOWNbut-
tonbesidethedisplay.
2
2
1
If the sound is in the Single mode, – – – appears in the
display, and a seing cannot be specied.
Specifying the auto power off function
When 30 minutes have passed without a key pressed in
the keyboard or without an automatic performance played,
the instrument is automatically turned o. To disable this
function, turn o (oFF) this function. The default seing is
this function turned on. If this seing is changed, the new
seing is saved and remains selected, even if the SP-280 is
turned o.
1. EntertheFunctionmode,andthenpresstheOR-
GAN1buon.
The LED for the ORGAN1 sound buon lights up, and
the seing (on) appears in the display.
2. Selecttheon/oseingwiththeUPorDOWNbut-
tonbesidethedisplay.
2
2
1
Usingdampers
The included damper pedal can be used to apply a
damping eect for only the player on the right side of
the keyboard.
Optional pedal unit (sold separately) can be used as
separate damper pedals for the le and right sides of
the keyboard.
Damper: Used as a damper pedal for the player on the
right side of the keyboard.
Sostenuto: Not used.
So: Used as a damper pedal for the player on the le
side of the keyboard.
Specifying the volume balance for layers
The volume balance for sounds in the Layer mode (or the
Partner mode) can be adjusted. The seing range is 1 – 9...
9 – 9...9 – 1, with the number on the le for layer 1 (or the
le side of the keyboard) and the number on the right for
layer 2 (or the right side of the keyboard).
The default seing is 9 – 9.
1. Enter the Function mode, and then press the
E.PIANO2buon.
The LED for the E.PIANO2 sound buon lights up, and
the balance seing (9 – 9) appears in the display.
2. SpecifythevolumebalancesettingwiththeUPor
DOWNbuonbesidethedisplay.
To return to the default setting, simultaneously press
the UP and DOWN buons.
2
2
1
If the sound is in the Single mode, – – – appears in the
display, and a seing cannot be specied.
Specifying layer octaves
In the Layer mode, the octave for each sound can be speci-
ed. The seing range is ±1 octave for each sound, and –01,
00 and 01 appear in the display. The default seing is 00.
1. EntertheFunctionmode,andthenpresstheHARP-
SI/CLAVbuon.
The LED for the HARPSI/CLAV sound buon lights up,
and the layer (L1) whose octave is to be specified ap-
pears in the display.
2. SelectthelayerwiththeUPorDOWNbuonbeside
thedisplay.
L1 appears for layer 1, and L2 appears for layer 2.
3. PresstheBANKbuon.
The octave seing (00) appears in the display.
4. SelecttheoctaveseingwiththeUPorDOWNbut-
tonbesidethedisplay.
To return to the default setting, simultaneously press
the UP and DOWN buons.
To select the octave for the other layer, press the HARPSI/
CLAV buon to select the layer.
1
32,4
2,4
If the sound is in the Single mode, – – – appears in the
display, and a seing cannot be specied.

13
What is MIDI?
MIDI, is the abbreviation of Musical Instrument Digital
Interface. It is an international standard that was created
to connect and transfer data between electronic musical
instruments, computers and other devices.
What can you do with MIDI?
Thanks to MIDI, you can use the SP-280 to control other
instruments, use other instruments to control the SP-280,
and use a sequencer to create complex musical pieces.
When you use the SP-280 keyboard or pedal, or select a
sound, the notes, pedal activation and change in sound are
transmitted to another instrument, or are recorded by a
sequencer.
Connections
Commercially available MIDI cables are used to transfer
MIDI data. Connect these cables from the MIDI connectors
of the SP-280 to the MIDI connectors of the external MIDI
device that you want to exchange data with. There are two
types of MIDI connector.
MIDIINconnector
This connector receives MIDI messages.
The MIDI IN connector lets you play the SP-280’s sounds
from an external MIDI device (e.g., MIDI keyboard or se-
quencer). Use a MIDI cable to connect the SP-280’s MIDI IN
connector to your external MIDI device’s MIDI OUT con-
nector.
MIDIOUTconnector
This connector transmits MIDI messages.
The MIDI OUT connector lets you control an external
MIDI device using the MIDI messages transmitted from
the SP-280. Use a MIDI cable to connect the SP-280’s MIDI
OUT connector to your external MIDI device’s MIDI IN
connector.
MIDI function mode
When the SP-280 is turned on, the MIDI parameters are set
to transmission channel 1, all reception channels (1–16),
Local On and Omni O.
These settings can be changed from the MIDI function
mode.
Setting procedure for parameters in the MIDI
function mode
1. HolddowntheFUNCTIONbuon.
The PIANO 1 LED lights up, and the MIDI channel set-
ting (C01) appears in the display. The FUNCTION but-
ton is blinking. The FUNCTION LED will blink.
2. Pressthesoundbuoncorrespondingtothedesired
parameter.
The current seing appears in the display.
3. Specifythedesiredseing.
4. Afterspecifying the desired settings, press the
FUNCTIONbuontoreturntothemodeforplaying.
The FUNCTION LED turns o.
3
3
1,4
2
When the SP-280 is turned o, all parameters return to
their default seings.
Changing the MIDI channels
Data can be transmied and received on MIDI channels 1
through 16 (C01–C16).
When the SP-280 is turned on, transmission channel 1 (C01)
is automatically selected.
• AerenteringtheMIDIfunctionmode,theLEDfor
thePIANO1soundbuonlightsup.
When the MIDI function mode is entered, the MIDI
channel seing normally appears.
To specify the MIDI channel setting after changing
other settings in the MIDI function mode, press the
PIANO1 buon.
In the Layer or Partner modes, selecting the transmission
channel specifies the channel for layer 1 or the left side
of the keyboard. The transmission channel for layer 2 or
the right side of the keyboard will automatically be set to
the following channel. For example, if MIDI channel 7 is
selected for the sound of layer 1 or the le side of the key-
board, MIDI channel 8 will automatically be specied for
the sound of layer 2 or the right side of the keyboard. If
MIDI channel 16 is selected for the sound of layer 1 or the
le side of the keyboard, channel 1 will be specied for the
sound of layer 2 or the right side of the keyboard.
Local On/Off
With the Local On seing, playing the SP-280’s keyboard
produces the sounds of the performance as well as trans-
mits MIDI data. With the Local Off setting, playing the
SP-280’s keyboard does not produce the sounds of the
performance; MIDI data is only transmied. Normally this
parameter is set to Local On (default seing: on).
The Local Off setting should be selected when using the
SP-280 as a master keyboard, for example, to play sounds
from a connected MIDI device (a keyboard, sound module,
etc.). The SP-280 will not produce sound, but the perfor-
mance will be played by the connected MIDI device.
Select the Local Off setting (oFF) when using the SP-280
as a sound module, for example, when the SP-280 is con-
nected to a sequencer with its Echo Back seing (function
that sends back data that the sequencer received) selected
in order to prevent echoing of returned data.
• EntertheMIDIfunctionmode,andthenpressthe
PIANO2buon.
The LED for the PIANO2 sound buon lights up, and
the Local On/O seing (on) appears in the display.
MIDI

14
Enabling/disabling control change transmission/
reception ltering
Messages, such as operation of the SP-280’s damper pedal,
can be transmied to a connected external MIDI device to
control it, and these messages can be received from the ex-
ternal MIDI device to control the SP-280.
To transmit/receive control change messages, disable this
function (oFF: default seing). To not transmit/receive the
messages, enable this function (on).
• EntertheMIDIfunctionmode,andthenpressthe
E.PIANO2buon.
The LED for the E.PIANO2 sound buon lights up, and
the seing (oFF) appears in the display.
Using the SP-280 as a multi-timbral sound module
The SP-280 can operate as a 16-part multi-timbral sound
module when an external MIDI device is used to control
its internal sound generator.
1. ConnectaMIDIcabletotheSP-280’sMIDIINcon-
nectorandtotheMIDIOUTconnectorofasequencer
orotherMIDIdevice.
2. TransmitMIDIdatafromtheconnectedsequenceror
otherMIDIdevice.
For details on transmitting data from the connected
sequencer or other MIDI device, refer to its user’s man-
ual.
3. WhentheSP-280receivestheprogramchangemes-
sagealongwiththeperformancedata,itwillplay
withthesoundcorrespondingtothatprogramnum-
ber.
If the SP-280 is not to be used as a multi-timbral sound
module, disable this function (oFF).
• EntertheMIDIfunctionmode,andthenpressthe
HARPSI/CLAVbuon.
The LED for the HARPSI/CLAV sound buon lights up,
and the seing (on: default seing) appears in the dis-
play.
Enabling/disabling program change transmis-
sion/reception ltering
The programs on a connected MIDI device can be changed
by sending a MIDI change number from the SP-280. In
addition, the programs on the SP-280 can be changed by
receiving a MIDI change number from a connected MIDI
device.
For program change numbers and their corresponding
sounds, refer to “Table of sounds and corresponding pro-
gram change numbers” below.
To transmit/receive program change messages, disable this
function (oFF: default seing). To not transmit/receive the
messages, enable this function (on).
• EntertheMIDIfunctionmode,andthenpressthe
E.PIANO1buon.
The LED for the E.PIANO1 sound buon lights up, and
the seing (oFF) appears in the display.
Transmiingprogramchanges
When a sound is selected using the sound buttons and
BANK buon on the SP-280, the corresponding MIDI pro-
gram change number is transmied.
Receivingprogramchanges
When the SP-280 receives a MIDI program change number,
the sound is changed to the corresponding one.
If an incompatible program change number is re-
ceived, the SP-280 sound is not changed.
Tableofsoundsandcorrespondingprogramchange
numbers
CC0: Bank Select (MSB) for all sounds is set to 121.
SoundBuon Bank
CC32 PC
Sound
PIANO1 1 1 0 Classic Piano
2 0 0 Grand Piano
3 0 1 Jazz Piano
PIANO2 1 2 0 Live Piano
2 0 3 Honky-Tonk
3 0 2 Elec.Grand
E.PIANO1 1 0 4 Club E.piano
2 1 4 Vintage E.Piano
3 3 4 Tremoro EP
E.PIANO2 1 0 5 Dig.E.Piano1
2 2 4 60's E.Piano
3 1 5 Dig.E.Piano2
HARPSI/CLAV 1 0 6 Harpsichord
2 0 7 Clav
3 1 7 Synth Clav
VIBES/
GUITAR
1 0 11 Vibraphone
2 0 12 Marimba
3 0 24 Acoustic Guitar
ORGAN1 1 0 16 Jazz Organ1
2 1 16 Jazz Organ2
3 0 17 Jazz Organ3
ORGAN2 1 0 19 Pipe Organ1
2 1 19 Pipe Organ2
3 2 19 Positive Organ
STRINGS 1 0 48 Strings
2 0 50 Cinema Strings
3 1 50 Analog Strings
CHOIR 1 0 52 Aah Choir
2 1 52 Ooh Voices
3 2 52 Classical Choir

15
Specications
Keyboard NH Keyboard: 88 note (A0–C8)
Touchselection Light, Normal, Heavy
Pitch Transpose, Fine tuning
Temperament Nine kinds
Soundgeneration Stereo PCM System
Polyphony 120 notes (max)
Sounds 30 sounds (10 x 3 banks)
Eects Brilliance, Reverb, Chorus (3 levels each)
Demo 30 (Sound demo song x 10, Piano Song x 20)
Metronome
Tempo, Time signature, Accent, sound and Volume
controls
Pedal
Damper pedal (half-pedaling supported) or pedal unit
(sold separately)
Connections
LINE OUT (L/MONO, R), LINE IN, MIDI (IN, OUT)
Headphones×2, PEDAL, Pedal unit
Controls
Power, VOLUME, PIANO SONG, TRANSPOSE,
FUNCTION, TOUCH, BRILLIANCE, REVERB,
CHORUS, BANK, Sound × 10, UP, DOWN,
METRONOME
Amplication 22 W × 2
Sperkers Oval (8 cm x 12 cm) x 2
Powersupply DC 19 V, AC adapter (included)
Powerconsumption 15 W
Dimensions(W×D×H)
1361 × 406 × 785 mm / 53.88 × 15.98 × 30.91 inches
(including Stand, excluding music stand)
Weight 19 kg / 41.89 lbs.
(including Stand, excluding music stand)
Includedaccessories
AC adapter ( ), Music stand, Stand, Damper Pedal
Optionssoldseparately Pedal unit
* Specications and appearance are subject to change with-
out notice for improvement.
Appendix
Troubleshooting
If during use any of the following problems should occur,
carefully examine the instrument to see if you can nd out
what the problem is, and try resolving it by following the
suggestions below. If the instrument will still not function
properly refer to your dealer.
The instrument will not turn on
• Check that the AC adapter is correctly connected to the
piano and the outlet.
No sound
• Make sure that the volume is not set on MIN. If it is,
bring it up to an adequate level.
• Make sure that the MIDI Local function is not set on
OFF. If it is, set it to ON (or turn the instrument o and
then on again).
• Make sure there is not a jack plugged into one of the
Headphones jacks. This would turn the internal speak-
ers o. if so, unplug the jack.
Notes are interrupted
• You have exceeded the maximum polyphony. see
“About maximum polyphony.”
The pitch or tone of the piano sounds wrong in some
key regions
• The SP-280’s piano sounds replicate the sound of an
actual piano as faithfully as possible. This means that
in some regions of the keyboard, you may feel that
the overtones seem stronger, or that the tone or pitch
seems wrong. This is not a malfunction.
The connected MIDI device does not respond to trans-
mitted MIDI data
• Make sure that all MIDI cables are correctly connected.
Make sure that the SP-280 is receiving MIDI data on the
same channel as the MIDI device.
About maximum polyphony
If the number of notes being played simultaneously ex-
ceeds the maximum polyphony, some notes will be lost
since the SP-280 is equipped with a mechanism that stops
the rst note being played to give priority to notes played
with keys pressed later. Some SP-280 sounds, although
they may be a single sound, are generated by two or more
oscillators (one note of a sound-generating circuit). Sounds
using just one oscillator, such as those in banks 1 and 2 of
VIBES/GUITAR, have a maximum polyphony of 120 notes.
Sounds using two oscillators, such as those in banks 1 and
2 of PIANO2 and in banks 1 and 3 of E.PIANO2, have a
maximum polyphony of 60 notes.
120 ÷ Number of sound oscillators = Maximum polyphony
Keep the maximum polyphony in mind and carefully
choose sounds when using Layer mode to play two sounds
simultaneously or when using the damper pedal.

16
Warning
●
The stand must be installed by at least two people.
Installation precautions
Be sure to observe the following precautions in order to
safely and correctly perform the installation.
• Make sure that the correct parts are in the correct ori-
entation and position, and perform the installation in
the order of the steps provided.
Other precautions
Observe the following precautions aer the stand has been
installed.
• Loosenedscrews
Since the screws may become loose as time passes af-
ter installation, we recommend periodically checking
for loose screws. In addition, if you feel that the stand
shakes excessively, it may be due to screws becoming
loose. In that case, re-tighten them.
• Whentransportingtheinstrument
Transporting the instrument with the stand installed
may result in unforeseen damage. Remove the stand
from the SP-280, and then transport them separately.
Aer they have been transported, re-install the stand
as described in “Installing the stand”.
• Removal
Remove the stand by reversing the installation proce-
dure. After removal, store the screws and other parts
so they will not be lost.
Installation procedure
Make sure that all of the following parts are available.
In addition, check if enough of the bolts on the front legs
extend out (14 mm or more), and then install the legs aer
adjusting the bolt lengths.
If the bolts are not long enough (less than 14 mm), turn
the adjusters until they reach an appropriate length.
Front leg × 2
Rear leg × 2
Knob bolt A × 2
14 mm or more OK
NG
Less than 14 mm
Knob bolt B
Knob bolt B
Brace
Brace
Adjusters
Installing the stand
In order to prevent damage to the keyboard or knobs of
the SP-280, prepare some magazines, fabric or moderately
sti cushions (see below).
1. TurnovertheSP-280.
In order to avoid placing the SP-280 directly on the
oor, place magazines or fabric at each end as shown
below, and then place the instrument upside-down on
top of them.
When turning over the SP-280, be careful that it does
not become unbalanced and dropped.
When magazines are used
2. Installthefrontlegs(oneeachontheleandright).
Screw the front legs (without braces attached) clock-
wise (direction of arrow) into the screw holes on the
keyboard side of the stand base.
Make sure that the adjusters are not loose.
3. Installtherearlegs(oneeachontheleandright).
Screw the rear legs (with braces attached) clockwise
(direction of arrow) into the screw holes on the back
side of the stand base.
Keyboard side
Rear leg
Front leg
Stand base
Adjusters
4. LoosenknobboltsBforthebracesattachedtothe
rearlegs.
5. Aeradjustingthebracessothatthescrewholeon
theirendscontacttheinstallationpositionsonthe
SP-280,securethebraceendswithknobboltsA.

17
6. TightenknobboltsBforthebracesattachedtothe
rearlegs.
Knob bolt B
of brace
Knob bolt A
7. Checkthesurroundingarea,andthenturnoverthe
SP-280withouthiinganything.
Adjusting front leg clearances to oor
Follow the procedure below to nely adjust the clearances
between the front legs and the oor within 3 mm.
1. Turneithertheleftorrightfrontlegcounterclock-
wise(directionofarrow1)alileatatimetoadjust
theclearancebetweenthefrontlegandtheoor.
2. Holdtheadjustedlegsoitdoesnotturn,andthen
turntheadjusteratthetopofthelegclockwise(di-
rectionofarrow2)untilitisrmlysecured.
1
2
Adjusters
Adjusters
Check after installation
• Are any parts le over?
If any parts are le over, carefully review the assembly
procedure to see where those parts should have been
used.
• Make sure that all screws are tight.
Installing optional pedal unit (sold sepa-
rately)
If you purchased pedal unit, continue by installing the
pedal unit.
Make sure that the power of the unit is turned o when
connecting the pedal unit to it.
Connectthepedalcordtotheconnectorontheundersideof
theunitandfastenitwiththecordholder.
Be sure to connect the pedal cord with the connector in the
correct orientation.
Hold the locking tab while inserting or removing the ped-
al cord.
Cord holder
Keyboard
side
Rear
panel
side
Locking tab
Rear panel side

18
Précautions
Emplacement
L’utilisation de cet instrument dans les endroits sui-
vants peut en entraîner le mauvais fonctionnement.
• En plein soleil
• Endroits très chauds ou très humides
• Endroits sales ou fort poussiéreux
• Endroits soumis à de fortes vibrations
• A proximité de champs magnétiques
Alimentation
Branchez l’adaptateur secteur mentionné à une prise
secteur de tension appropriée. Evitez de brancher
l’adaptateur à une prise de courant dont la tension
ne correspond pas à celle pour laquelle l’appareil est
conçu.
Interférences avec d’autres appa-
reils électriques
Les postes de radio et de télévision situés à proximité
peuvent par conséquent souffrir d’interférences à la
réception. Veuillez dès lors faire fonctionner cet ap-
pareil à une distance raisonnable de postes de radio
et de télévision.
Maniement
Pour éviter de les endommager, manipulez les com-
mandes et les boutons de cet instrument avec soin.
Entretien
Lorsque l’instrument se salit, nettoyez-le avec un
chion propre et sec. Ne vous servez pas d’agents de
neoyage liquides tels que du benzène ou du diluant,
voire des produits inammables.
Conservez ce manuel
Après avoir lu ce manuel, veuillez le conserver soi-
gneusement pour toute référence ultérieure.
Evitez toute intrusion d’objets ou
de liquide
Ne placez jamais de récipient contenant du liquide
près de l’instrument. Si le liquide se renverse ou
coule, il risque de provoquer des dommages, un
court-circuit ou une électrocution.
Veillez à ne pas laisser tomber des objets métalliques
dans le boîtier (trombones, par ex.). Si cela se produit,
débranchez l’alimentation de la prise de courant et
contactez votre revendeur korg le plus proche ou la
surface où vous avez acheté l’instrument.
* Tous les noms de produits et de sociétés sont des
marques commerciales ou déposées de leur déten-
teur respectif.
REMARQUE IMPORTANTE POUR LES CLIENTS
Ce produit a été fabriqué suivant des spécications sévères et
des besoins en tension applicables dans le pays où ce produit
doit être utilisé. Si vous avez acheté ce produit via l’internet,
par vente par correspondance ou/et vente par téléphone, vous
devez vérier que ce produit est bien utilisable dans le pays
où vous résidez.
ATTENTION: L’utilisation de ce produit dans un pays autre
que celui pour lequel il a été conçu peut être dangereuse et
annulera la garantie du fabricant ou du distributeur. Conser-
vez bien votre récépissé qui est la preuve de votre achat, faute
de quoi votre produit ne risque de ne plus être couvert par la
garantie du fabricant ou du distributeur.
Note concernant les dispositions (Seulement EU)
Quand un symbole avec une poubelle barrée d’une
croix apparait sur le produit, le mode d’emploi, les piles
ou le pack de piles, cela signie que ce produit, manuel
ou piles doit être déposé chez un représentant compé-
tent, et non pas dans une poubelle ou toute autre dé-
cheerie conventionnelle. Disposer de cee manière, de
prévenir les dommages pour la santé humaine et les dom-
mages potentiels pour l’environnement. La bonne méthode
d’élimination dépendra des lois et règlements applicables
dans votre localité, s’il vous plaît, contactez votre organisme
administratif pour plus de détails. Si la pile contient des mé-
taux lourds au-delà du seuil réglementé, un symbole chimique
est aché en dessous du symbole de la poubelle barrée d’une
croix sur la pile ou le pack de piles.

19
Introduction
Principales caractéristiques
Trente timbres de qualité superbe
Le SP-280 ore 30 sons (ou “timbres”) pleins d’expression et de
qualité époustouante, dont un son stéréo de piano à queue de
concert. Le mode Layer permet de jouer simultanément deux
timbres et le mode Partner permet à deux personnes de jouer sur
une moitié du clavier en utilisant la même plage de notes.
Effets
Le SP-280 comporte 3 eets numériques. Ces eets permeent de
régler la brillance du son (Brilliance), de simuler l’environnement
acoustique d’une salle de concert (Reverb) et de rendre le son plus
ample (Chorus).
Pédale d’effets
La pédale Damper fournie avec l’instrument permet de produire
le même eet de pédale forte (Damper) que sur un piano acous-
tique. L’utilisation de la pédale forte permet d’ajouter un eet de
résonance au son de piano classique et de piano à queue (banque
1 et banque 2 de Piano1). La pédale Damper ore en outre une
fonction mi-pédale qui permet d’appliquer une résonance gra-
duelle selon la pression exercée sur la pédale.
Outre l’eet de pédale Damper, le pédalier (disponible en option)
permet d’utiliser des eets de pédale douce et de pédale de soutien.
Métronome
Le métronome intégré vous permet de spécifier la mesure, le
tempo et le volume, et vous permet aussi d’employer le son d’une
cloche comme accent.
Fonction de réglage du toucher
La réponse dynamique du clavier est une des caractéristiques les
plus importantes d’un piano, et le SP-280 vous permet de choisir
parmi trois types diérents de réponse dynamique.
Tempéraments
Afin de garantir un jeu authentique dans un vaste éventail de
styles musicaux, le SP-280 vous permet de choisir parmi neuf tem-
péraments, comprenant la gamme tempérée, les tempéraments
purs (majeur et mineur), les tempéraments classiques (Kirnberger
et Werckmeister) ainsi que des tempéraments utilisés dans la
musique traditionnelle d’Inde et du Moyen-Orient. Quand vous
choisissez un son de piano acoustique, l’accord étendu utilisé sur
les pianos est automatiquement sélectionné.
Réglage de la hauteur
La fonction Transpose permet de modier la hauteur du timbre,
tandis que la fonction Pitch Control permet d’eectuer un accor-
dage n.
Deux prises pour casque
Les deux prises pour casque (une sur la face avant et une sur la
face arrière du SP-280) permeent à deux personnes l’écoute si-
multanée.
Prises LINE IN/LINE OUT
Quand vous reliez un dispositif audio ou un autre instrument
de musique électronique à la prise LINE IN, le son de l’appareil
connecté est reproduit sur les enceintes du SP-280. En outre, vous
pouvez connecter des retours actifs ou un système d’enregistre-
ment via les prises LINE OUT.
Caractéristiques MIDI
Le SP-280 supporte le protocole MIDI, c’est à dire un protocole
standard qui permet d’échanger des données musicales entre
instruments musicaux et ordinateurs. Le protocole MIDI permet à
deux dispositifs (ou plus) de piloter ou d’être pilotés l’un l’autre ;
le SP-280 peut ainsi fonctionner comme un générateur sonore à 16
parties multitimbres.
Table des matières
Introduction ------------------------------------ 19
Principales caractéristiques -------------------- 19
Parties et leurs fonctions ----------------- 20
Préparatifs et écoute des
morceaux de démonstration ------ 21
Avant de commencer à jouer ------------------- 21
Écoute des morceaux de démonstration ---- 22
Utilisation du SP-280 pour la lecture -- 23
Jouer un timbre (mode Single) -----------------23
Jouer deux timbres à la fois (mode Layer) -- 23
Jouer à deux (mode Partner) ------------------- 24
Utilisation de pédales ---------------------------- 24
Effets ------------------------------------------------- 24
Le métronome -------------------------------------- 25
Fonctionnalités supplémentaires ------- 26
Réglage du toucher ------------------------------- 26
Fonction Transpose ------------------------------- 26
Mode de fonctions --------------------------------26
MIDI ----------------------------------------------- 29
Le MIDI, qu’est-ce que c’est ? ----------------- 29
Que peut-on faire avec le MIDI? --------------29
Connexions ----------------------------------------- 29
Mode MIDI ------------------------------------------ 29
Appendice -------------------------------------- 31
Problèmes et solutions--------------------------- 31
Spécications -------------------------------------- 31
Monter le stand ------------------------------- 32
Précautions à observer pour le montage ---32
Précautions supplémentaires ------------------ 32
Procédure de montage -------------------------- 32
Équilibrage des pieds avant --------------------33
À vérier après le montage ---------------------33
Installer le pédalier (disponible en option) --33
Tableau d’implémentation MIDI---------- 99

20
12. Boutonsdetimbres:Ces boutons permettent de choisir
parmi les 30 timbres disponibles (10 × 3 banques). Vous pou-
vez enfoncer deux boutons pour jouer simultanément deux
timbres (en mode Layer, aussi appelé “mode de superposi-
tion”).
13. Écran:Affiche les réglages, comme par exemple ceux du
mode de fonctions et du métronome.
14. BoutonsUP/DOWN:Ces boutons permettent de régler les
valeurs des divers paramètres.
15. BoutonettémoinMETRONOME:Ce bouton sert à activer/
arrêter le métronome. Quand vous utilisez le métronome, le
témoin s'allume. En outre, vous pouvez maintenir ce bouton
enfoncé pour activer le mode de réglage du métronome et ré-
gler divers paramètres.
16. Orificesdemontagedustand:Ces orifices permettent de
monter l’instrument sur le stand fourni.
17. PrisesMIDI(IN,OUT):Bornes pour connecter des disposi-
tifs tels que séquenceurs, claviers, etc..
OUT: Sortie des données (à connecter à la borne MIDI IN
d’un autre dispositif MIDI).
IN: Entrée de données (à connecter la borne MIDI OUT
d’un autre dispositif MIDI).
18. PrisePEDAL:Cee prise sert à brancher la pédale Damper
fournie.
19. PrisesLINEOUT(L/MONO,R):Sorties Audio. Un système
d’amplication externe peut être branché à ces bornes. (Avec
un système hi-, utilisez les bornes AUX ou LINE IN). Pour
amplier votre SP-280 en mono, branchez-vous à la borne in-
dividuelle L/MONO. Pour réglez le volume de sortie, utilisez
le commande VOLUME.
20. PriseLINEIN:Cee prise minack stéréo permet de bran-
cher une source audio. Reliez cette prise à la sortie audio
(sortie AUX) d’une chaîne hifi ou d’un autre instrument de
musique électronique.
Réglez le volume du signal d’entrée sur le dispositif connecté.
21. Prisepourcasque(PHONES):Branchez un casque d’écoute
doté d’une che minack stéréo à cee prise. La prise pour
casque sur le panneau avant du SP-280 produit le même si-
gnal.
Quand vous branchez un casque à cee prise, les enceintes
de l’instrument ne produisent aucun son.
22. PriseDC19V: Branchez ici l’adaptateur secteur fourni.
1
212 14
313
54 6
87 10 11
915
Panneau avant
Panneau arrière
20
19 22
21
16
17 18
1. Prisepourcasque( )[panneauavantduSP-280]:Branchez
un casque d’écoute doté d’une fiche minijack stéréo à cette
prise. La prise pour casque sur le panneau arrière du SP-280
produit le même signal. Quand vous branchez un casque à
cee prise, les enceintes de l’instrument ne produisent aucun
son.
2. Interrupteurd’alimentation:Cet interrupteur permet de
mere le SP-280 sous tension et hors tension.
3. CommandeVOLUME:Règle le volume des haut-parleurs, et
des bornes Output et Phones.
4. BoutonettémoinPIANOSONG:Ce bouton permet d’acti-
ver le mode de morceau de piano. Quand ce mode est actif,
le témoin s’allume. Vous pouvez enfoncer simultanément ce
bouton et le bouton TRANSPOSE pour activer le mode des
morceaux de démonstration de timbres.
5. BoutonettémoinTRANSPOSE:Ce bouton permet de régler
la transposition. Quand vous utilisez la fonction de trans-
position, ce témoin s’allume. Vous pouvez enfoncer simulta-
nément ce bouton et le bouton PIANO SONG pour activer le
mode des morceaux de démonstration de timbres.
6. BoutonettémoinFUNCTION:Ce bouton permet d’activer
le mode de fonctions (Function) et de régler la hauteur, le
tempérament et d’autres paramètres. Maintenez ce bouton
enfoncé pour activer le mode MIDI et régler les paramètres
MIDI. La diode s’allume quand le mode de fonctions du SP-
280 est actif et clignote quand il est en mode MIDI.
7. BoutonTOUCH:Sélectionne la courbe de dynamique du
toucher du clavier.
8. Bouton BRILLIANCE:Ce bouton permet de régler la
brillance du son.
9. BoutonettémoinREVERB:Ce bouton sert à activer/couper
l’eet de réverbération, utilisé pour recréer divers environne-
ments acoustiques. Quand l’eet est activé, le témoin s’allume.
10. BoutonettémoinCHORUS:Ce bouton sert à activer/couper
l’eet de chorus, utilisé pour rendre le son plus ample. Quand
l’eet est activé, le témoin s’allume.
11. BoutonettémoinBANK:Ce bouton permet de choisir la
banque de timbres voulue. Le témoin de la banque active s’al-
lume.
Parties et leurs fonctions
Other manuals for SP-280
1
Table of contents
Languages:
Other Korg Musical Instrument manuals

Korg
Korg PA 500 User manual

Korg
Korg G1 User manual

Korg
Korg Triton Studio Product information sheet

Korg
Korg EASYSTART EM-1 Product information sheet

Korg
Korg NAUTILUS Series User manual

Korg
Korg Kronos X User manual

Korg
Korg PA1X User manual

Korg
Korg XE20 User manual

Korg
Korg SV-2 User manual

Korg
Korg SP 250 User manual

Korg
Korg LP-380 User manual

Korg
Korg Concert NC-500 Series User manual

Korg
Korg EC350 User manual

Korg
Korg PA4X User manual

Korg
Korg Krome EX User manual

Korg
Korg Stage Vintage SV-1 User manual

Korg
Korg KRONOS 61 User manual

Korg
Korg TR Product information sheet

Korg
Korg SP-500 User manual

Korg
Korg N264 User manual