Features
1. If the set humidity is higher than the ambient humidity, the dehumidifier will enter the "wet
control state" and will not run.
2. When entered dehumidification mode, the fan is turned on for 5 seconds to start the compressor;
when the dehumidifier stops working, it will first turn off the compressor, then turn off the fan after
30 seconds;
3. After the compressor is turned off, it takes 3 minutes to restart. When the compressor is running
for 72 hours, the system will automatically resume after 30 minutes of forced stop.
4. When running at a lower temperature, the machine will automatically detect the system
temperature. When reached the defrosting temperature, it will automatically stop and defrosting. The
“snow pattern” will light up and the “defrosting pattern” will shine. After the defrosting, the
dehumidifier starts automatically.
5. Humidity control operating range: 10%~90%.
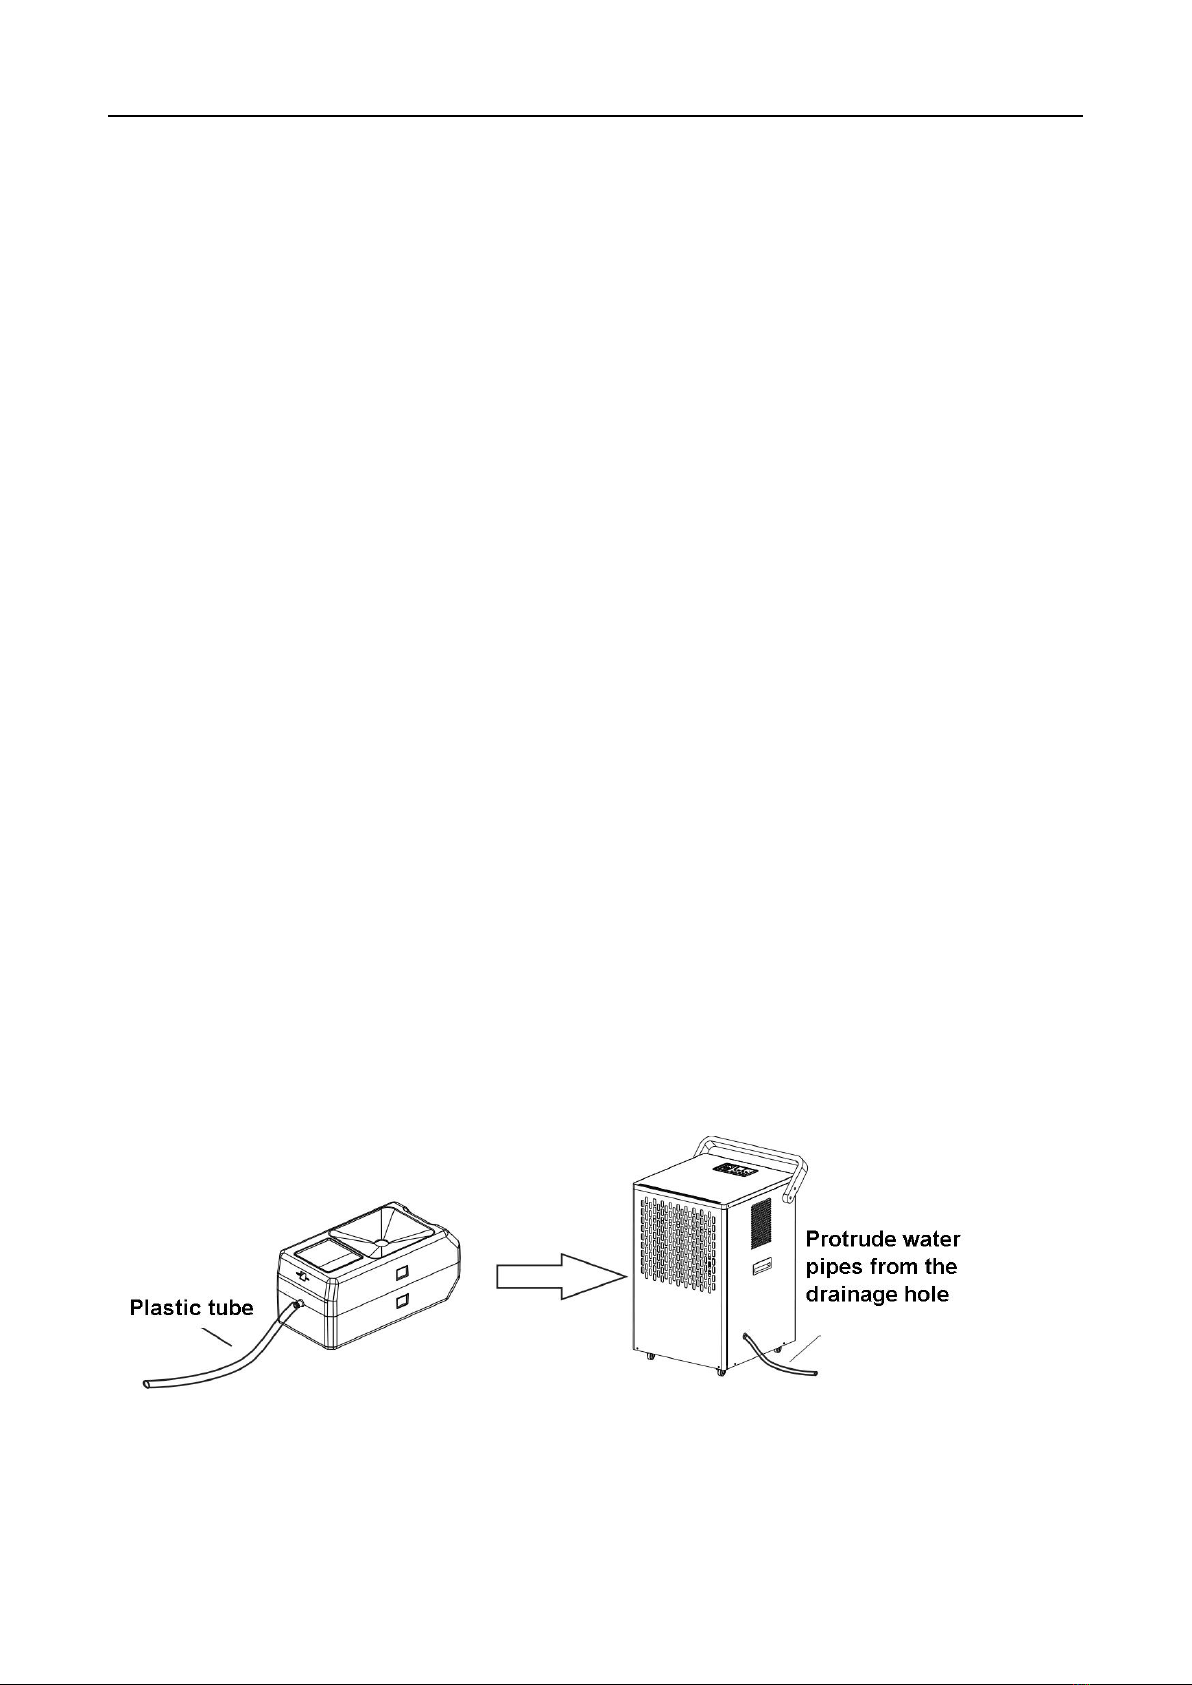
6. If the dehumidifier is not used for a long time, remove the power cord or power off.
7. The function of the memory system, the function can function before the power is tured off in 72
hours after the power is lost. (Note: When you leave the humidifier, please turn off the source)
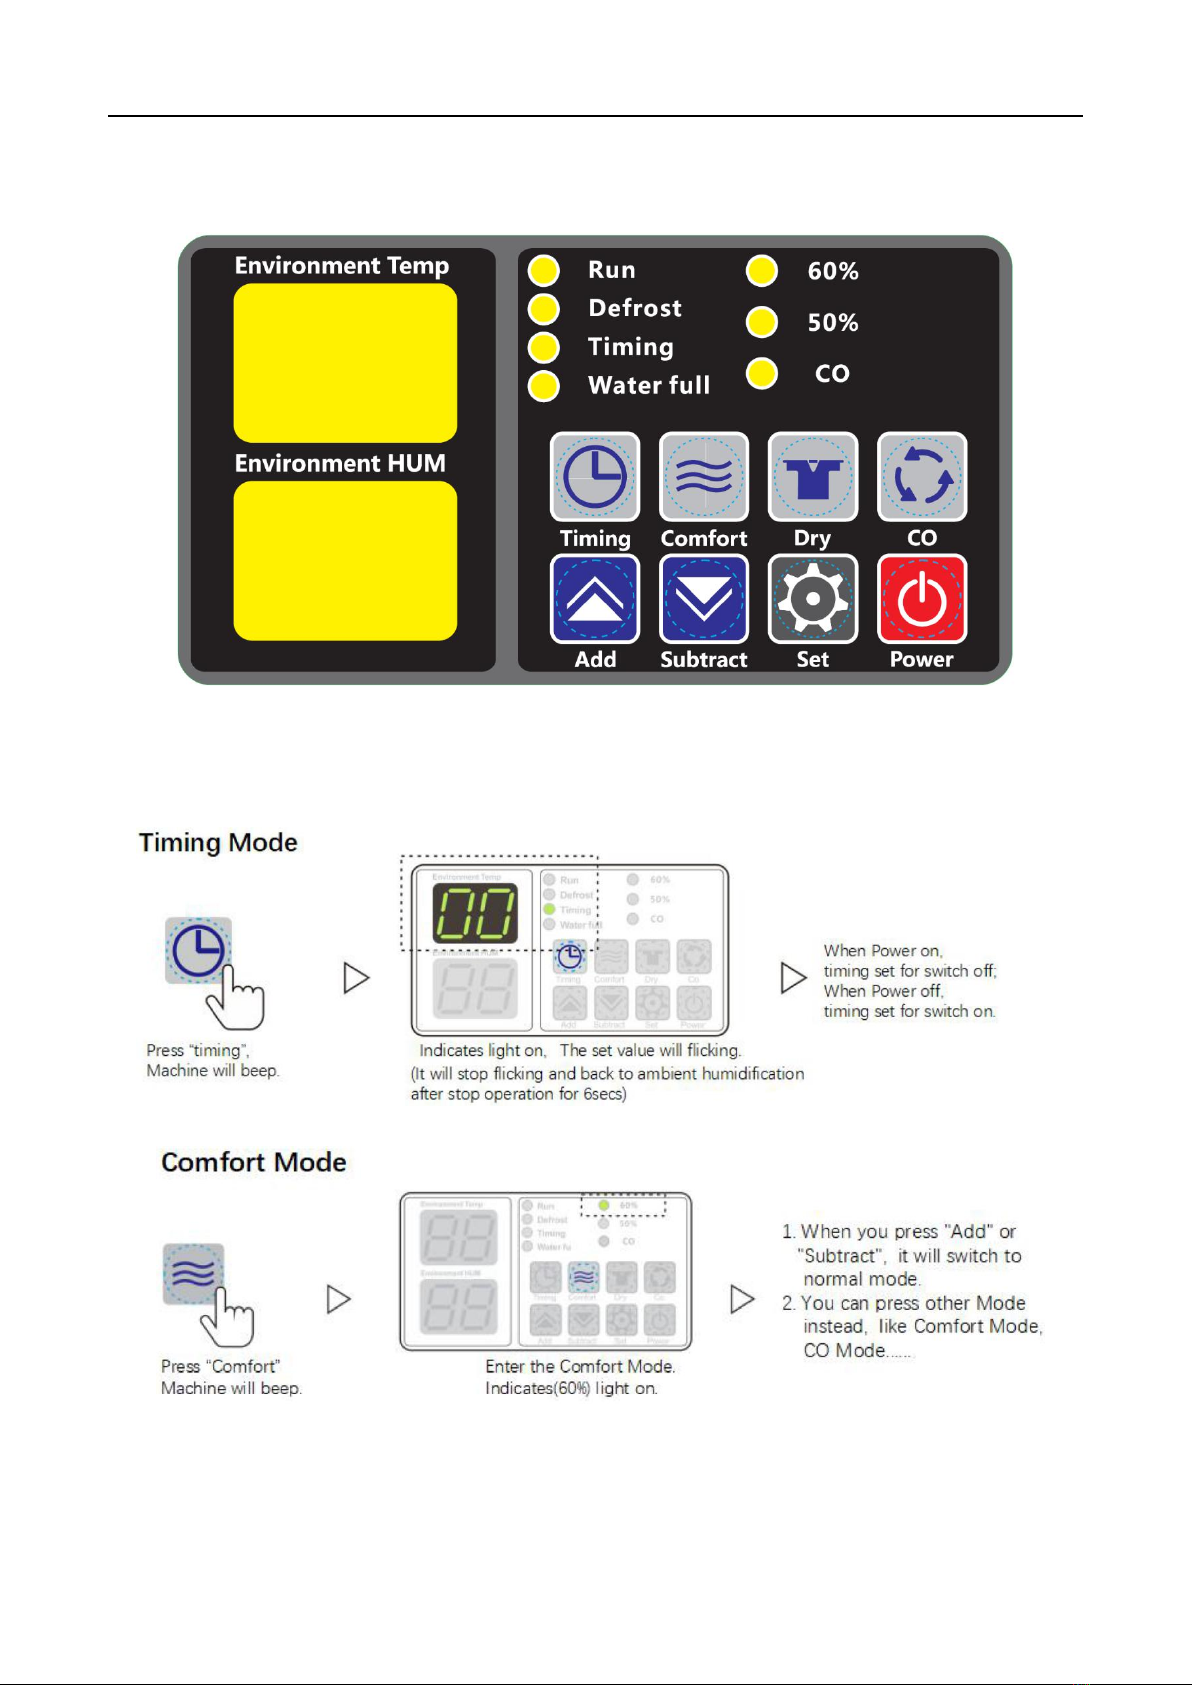
3. Operating Instructions
When the substrate is powered on for the first time, the substrate enters the standby state, press the power
button and set the required humidity 3% less than the current humidity to enter the running state, If the setting
humidity is higher than ambient humidity, the dehumidifier will not work.
3.1 Dehumidifying Running
1. When the compressor has passed the protection for 3 minutes and the indoor humidity ≥set humidity +3%
RH, the compressor will work again.
2. When the indoor humidity <set humidity -2% RH, the compressor is turned off.
3. Set humidity -3% RH <indoor humidity <set humidity +3% RH to keep the original compressor working.
4. The compressor stops the fan if it has not been operated for 3 minutes after the humidity has dropped.