4
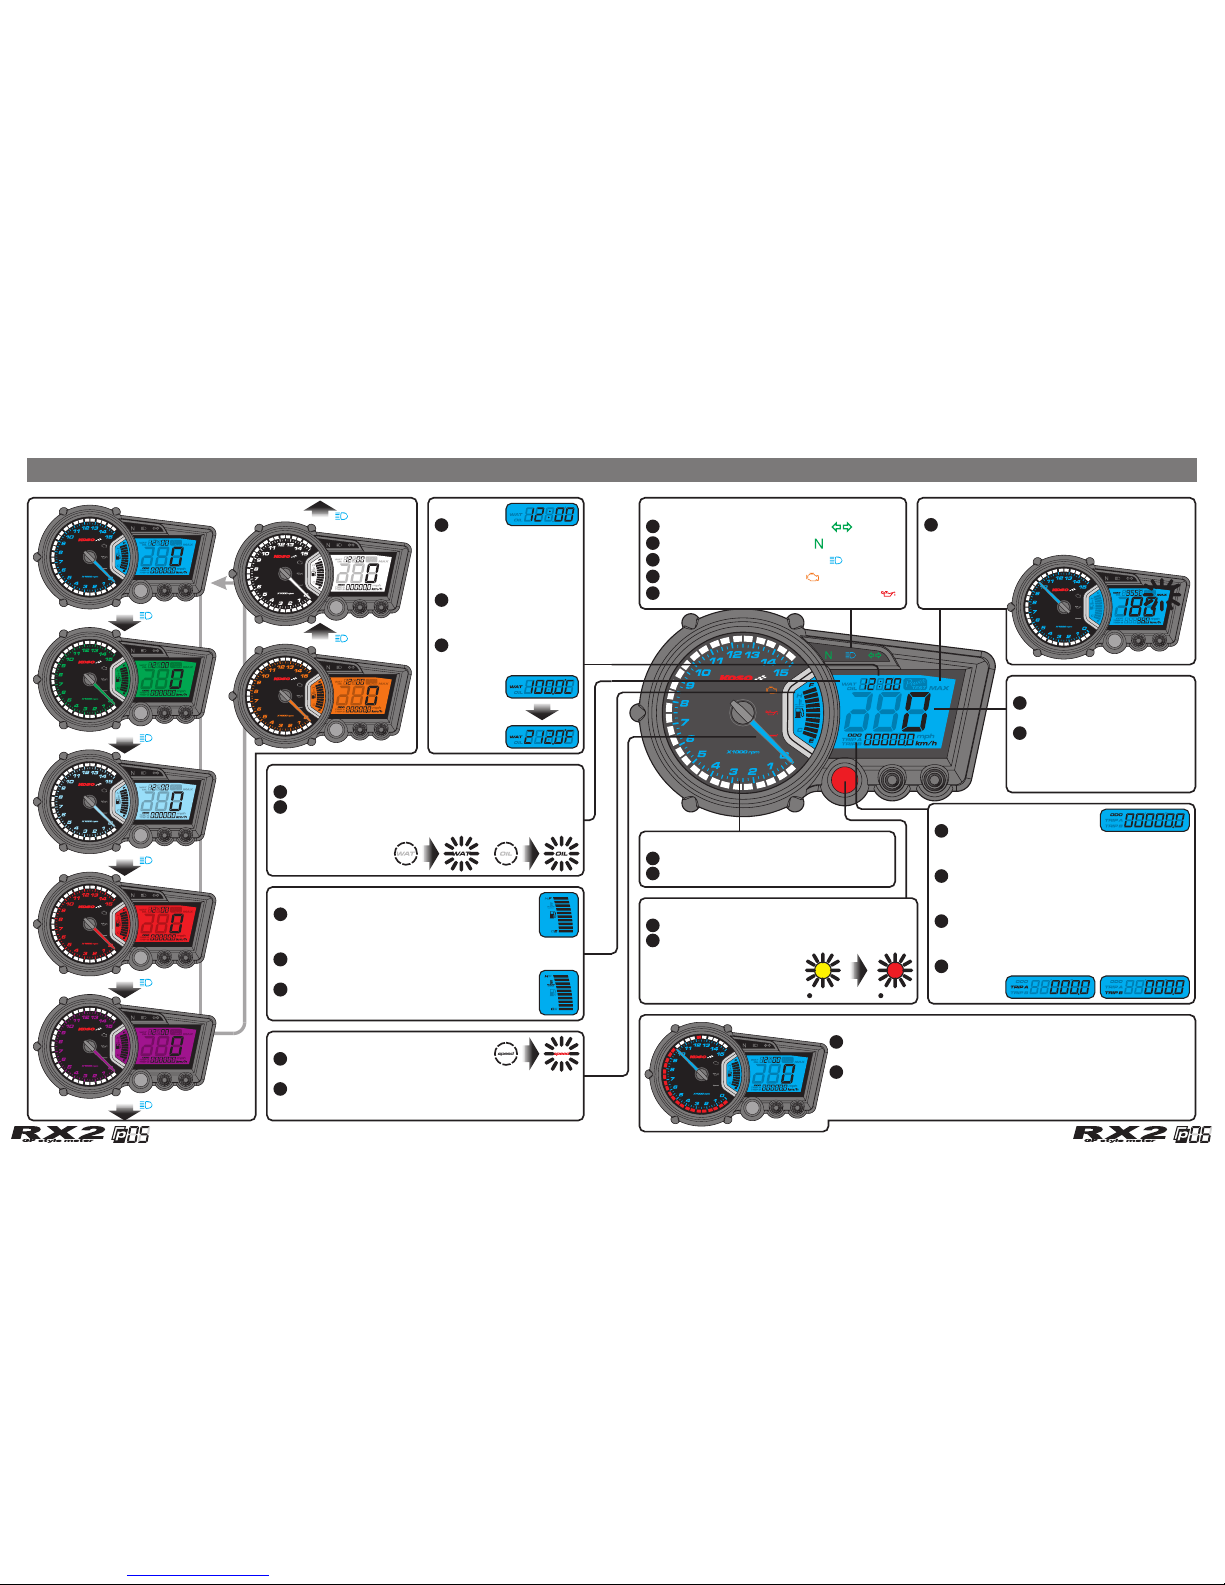
Display internal
Trip meter A/B
Odometer
Top speed record
<0.5 second
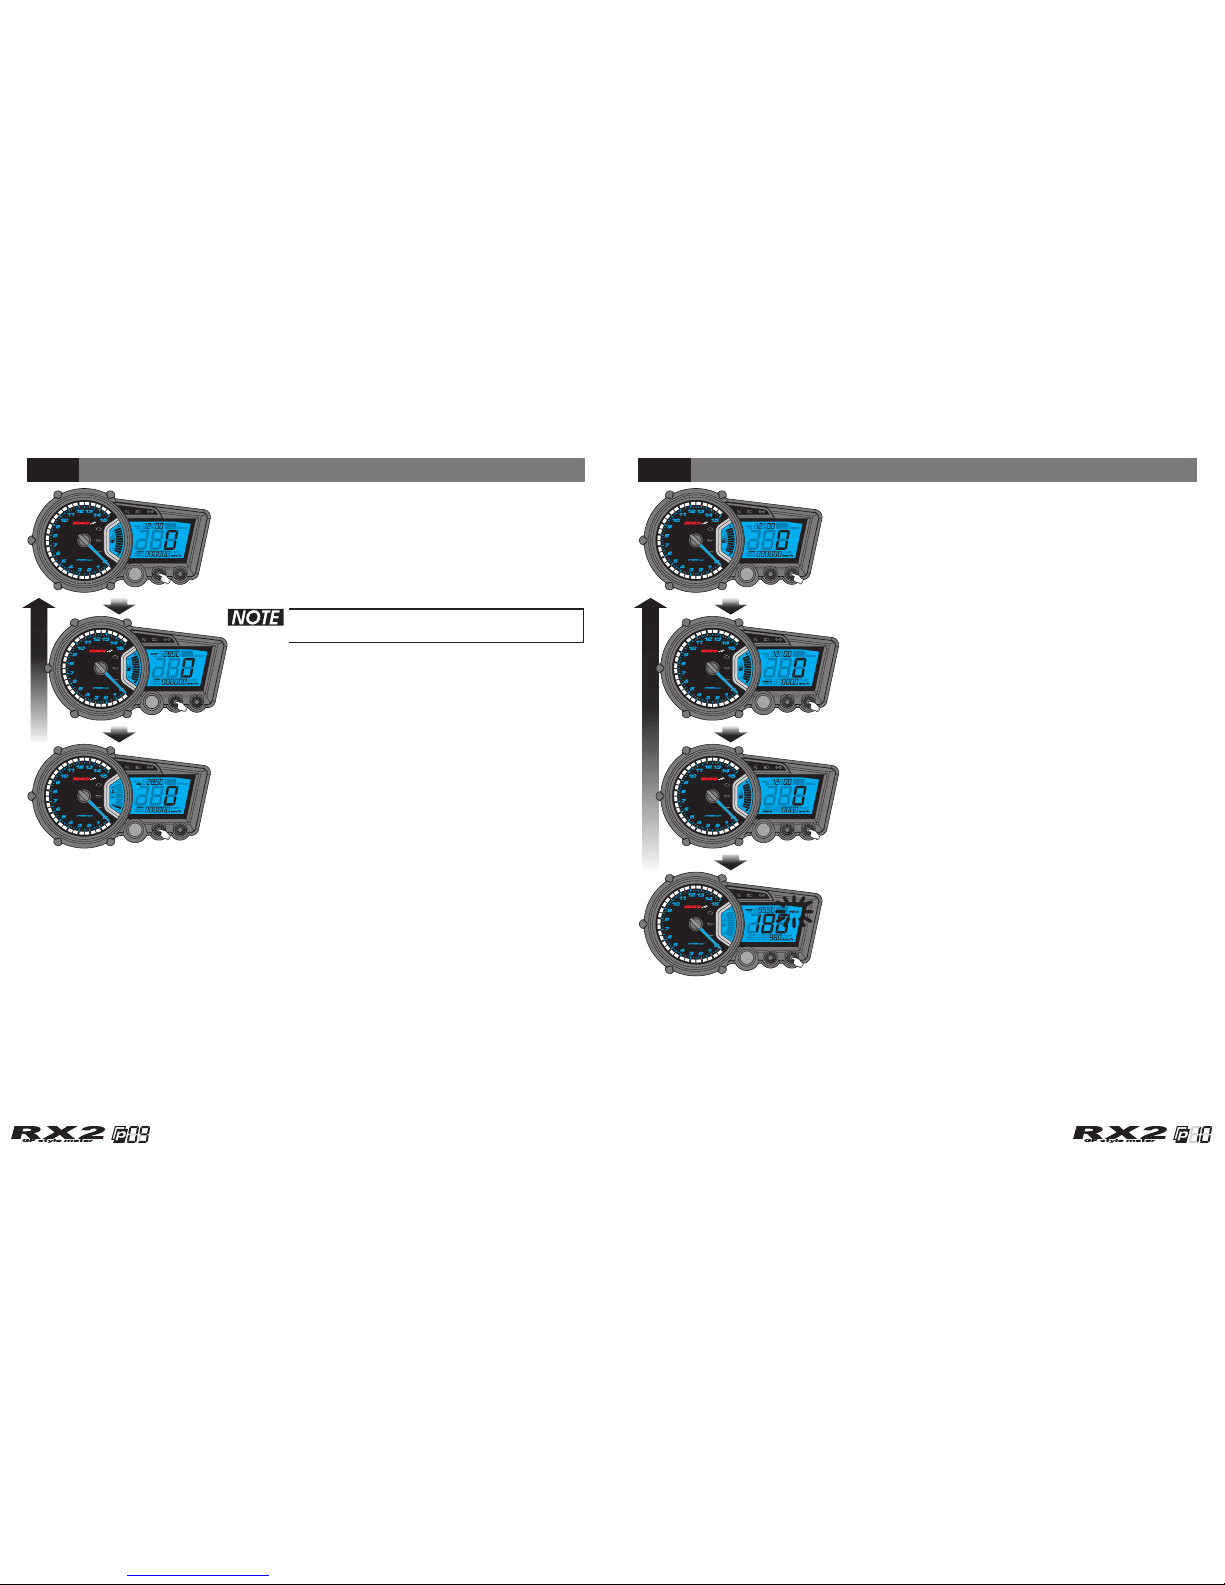
Function, setting instruction
o
-10~+60 C
Effective voltage
Indicator light color
DC12V
Effective temperature range
Meter standard
Meter size
Meter weight
JIS D 0203S2
151.8 X 81.5X 52.5 mm
Around 305 g
Setting range: 30~360 km/h (20~220 MPH)
Target speed timer
Top speed timer
Target distance timer Setting range: 50~1,000 M (1/32~20/32 mile)
Setting unit: 50 M (1/32 mile)
uel warningInsufficient f
24 H
Clock
Neutral-green, High beam-blue,
The record including,
Design and specification are subject to change without notice!
Display range: 0~15,000 RPM
Tachometer
MAX RPM record
Stroke / piston setting
<0.5 second
oo
Display range: 0~120 C (32~248 F)
Display internal
2 Stroke: 1, 2, 3, 4 pistons
4 Stroke: 1, 2, 3, 4, 5, 6, 8, 10, 12 pistons
Top temperature record oo
Display range: 0~120 C (32~248 F)
Display range: 0~360 km/h (0~223 MPH)
Display range: 0~360 km/h (0~223 MPH)
Speedometer
Display unit: km/h & MPH for alternative
Display range: 0~99999.9 km (mile),
Display range: 0~999.9 km (mile),
Setting range: 30~180 km/h (20~110 MPH)
Speeding warning light
Setting unit: 5 km/h (MPH)
Setting unit: 1 mm Sensitive point: 1~60
Tire circumference Setting range: 300~2,500 mm
Display range: 0~15,000 RPM
Display unit: 100 RPM
Setting range: 5,000~15,000 RPM
Setting unit: 100 RPM
Thermometer oo
Display unit: C & F for alternative
Display range: 10 levels
Display unit: Each level represents 10 %
Fuel meter
Setting unit: 10 %
Setting range: 10~50 %
Setting unit: 5 km/h (MPH)
1.Speed: 0~360 km/h (0~223 MPH)
2.Distance: 0~999 M (0~3,280 feet)
3.RPM: 0~15,000 RPM
4.Timer: 0~9'59"99 second.
Repeater-green, EOBD-amber, Oil-red,
Speeding-red, RPM shift light yellow / red.
reset automatically after 99999.9 km (mile).
reset automatically after 999.9 km (mile)
Shift light
Digital thermometer
oo
Display unit: 0.1 C ( F)
(Water & oil temperature)
oo
Display range: 20~120 C (68~248 F), 10 levels
Level thermometer
oo
Display unit: Each level represents 10 C (50 F)
(Water temperature)
Display internal
oo
Setting range: 60~120 C (140~248 F)
<0.5 second
Over heat warning
(Water & oil temperature) oo
Setting unit: 1 C ( F)
Setting range: 100 Ù, 510 Ù, no display
CDI & FI CDI & FI