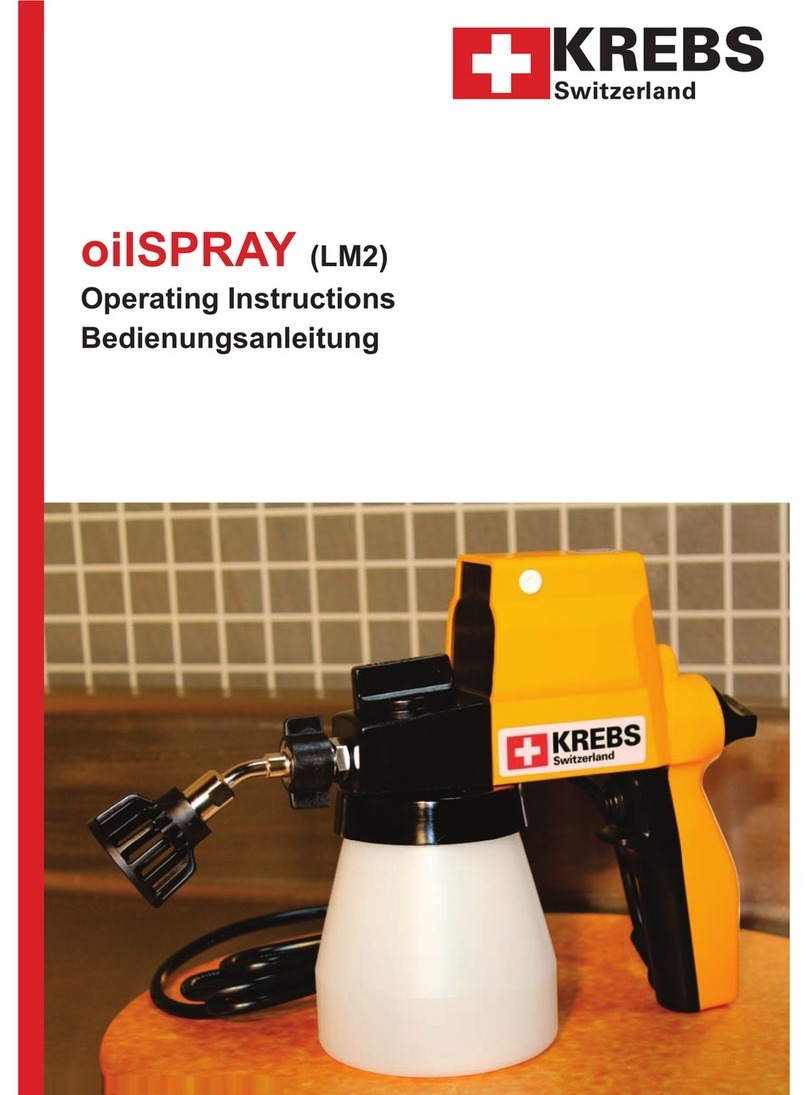
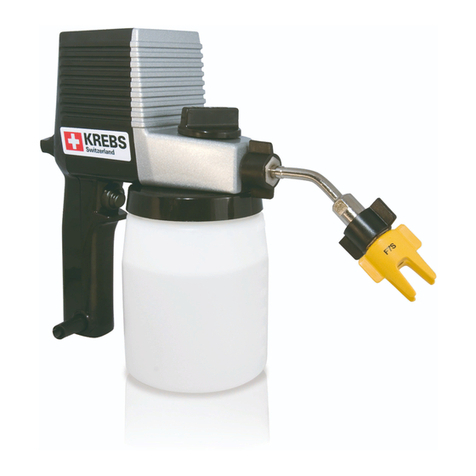
KREBS Tex-2 User manual

Bedienungsanleitung
Operating Instructions
Instructions d’emploi
Instrucciones de manejo
KREBS Tex-2
使用说明书

Gefahrloses Arbeiten mit dem Gerät ist nur möglich, wenn Sie die
Bedienungsanleitung und die Sicherheitshinweise vollständig lesen
und die darin enthaltenen Anweisungen strikt befolgen.
Lassen Sie sich vor dem ersten Gebrauch praktisch einweisen.
Das Gerät darf nicht feucht sein und auch nicht in feuchter
Umgebung betrieben werden.
Vor jedem Gebrauch Gerät, Kabel und Stecker kontrollieren.
Beschädigte Teile nur vom Fachmann reparieren lassen.
Beim Arbeiten in geschlossenen Räumen ist für ausreichende
Belüftung zu sorgen.
Das Einatmen des Sprühnebels kann gesundheitsschädlich sein.
Immer einen Atemschutz tragen.
Explosionsgefahr!
Im Arbeitsbereich darf sich keine offene Flamme befinden.
Rauchen verboten!
Leicht brennbare oder explosive Flüssigkeiten (z.B. Benzin oder
Spiritus) nicht spritzen.
• In Räumen, in denen explosive Gase entstehen können, darf das Gerät nicht benutzt
werden.
• Lacke und Lösungsmittel (Verdünnung) müssen einen Flammpunkt von über 21°C
aufweisen.
• Sprühstrahl nie auf Personen oder Tiere richten. Das Spritzgut tritt unter hohem Druck
aus der Düse. Verletzungs- und lnfektionsgefahr!
• Stecker nur bei ausgeschaltetem Gerät einstecken. Nach Gebrauch den Netzstecker zie-
hen.
• Vor allen Arbeiten am Gerät den Stecker aus der Steckdose ziehen. Gerät nicht am Kabel
tragen.
• Kabel immer nach hinten vom Gerät wegführen.
• Gerät und Zubehör so aufbewahren, daß es für Kinder nicht zugänglich ist.
• Nur Original-Zubehör verwenden.
• Keinerlei Stoffe versprühen, von denen die Gefährlichkeit nicht bekannt ist.
Zu Ihrer Sicherheit!
2

Anleitung für die Fleckenreinigung
Vorbereitung
• Geräte nicht ohne Flüssigkeit in Gang setzen.
• Flüssigkeit in den Behälter am Gerät einfüllen und Gerät durch Drücken des
Schalters in Gang setzen.
• Achten Sie darauf, daß die Regulierschraube von hinten gesehen nach links, gegen die
Uhrzeigerrichtung, gedreht ist. So erhalten Sie den größten Druck. Drehen Sie nur nach
rechts, wenn Sie wünschen, daß weniger Flüssigkeit kommt oder weniger Strahldruck.
• Durch Drehen des Hebels an der Verstelldüse können Sie stufenlos jede beliebige
Strahlart einstellen. Beim extrem harten, scharfen Strahl zeigt der Düsenhebel nach
oben, beim nebelartigen, sehr weichen Strahl zeigt der Düsenhebel nach unten.
Fleckenreinigen:
Beim KREBS-Fleckenreinigungssystem wird der Schmutz durch das
Material hindurchgespült oder geschossen. Deshalb muß die Rückseite
des zu reinigenden Gewebes frei sein oder aus einer saugkräftigen
Unterlage bestehen.
WICHTIG!
Machen Sie bei jedem neuen Gewebe einen Reinigungsversuch an einer Stelle,
an der Sie keinen sichtbaren Schaden anrichten können.
Düsenhebel nach oben So sieht das Gewebe nach dem
Herausspülen mit spitzem Strahl Herausspülen mit spitzem Strahl aus
Düsenhebel nach unten So sieht das Gewebe nach
Ausnebeln mit weichem Strahl richtigem Ausnebeln aus
3

Arbeiten Sie zügig. Stellen Sie rasch vom scharfen auf den weichen Strahl um. Je rascher
Sie arbeiten und je weniger Flüssigkeit Sie einsetzen, desto geringer ist die Randbildungs-
gefahr.
Bei heiklen Geweben sofort nach dem Ausnebeln trocknen. Sind noch Schmutzreste nach
dem Trocknen sichtbar, wiederholt man den ganzen Reinigungsvorgang. Lieber zweimal
rasch mit wenig Flüssigkeit reinigen als einmal langsam und mit viel Flüssigkeit.
Arbeitsanleitung Tex-2 Gerät
Wichtig!
Diese Arbeitsanleitung soll Sie unverbindlich informieren. Die unterschiedliche Beschaffen-
heit der verschiedenen Gewebe und Gewirke erfordert in Einzelfällen, daß man versuchs-
weise einen Test an einem Reststück bzw. an einer verdeckten Stelle eines Kleidungsstü-
ckes vornimmt.
Richtiger Einsatz der VARIA-Düse
Die Strahlqualität und -stärke am Hebel der VARIA-Düse wählen. Der Druckstrahl sollte der
Verschiebefestigkeit der zu reinigenden Gewebe und Gewirke angepaßt werden. Bringen
Sie das Gerät dem Material nie so nahe, daß es zu Gewebebeschädigungen oder
-verschiebungen kommt. Führen Sie das Gerät ruhig und gezielt, so daß das Gewebe nicht
unnötig befeuchtet wird. Bei größeren Verschmutzungen sollte das Gerät so geführt wer-
den, daß der Druckstrahl kreisförmig die Substanz von außen nach innen spült. Zur Vermei-
dung der Randbildung verstellt man die VARIA-Düse nach der Fleckenbehandlung auf den
weichen, nebelartigen Strahl. Mit Hilfe dieses Flüssigkeitsnebels schaffen Sie kreisförmig
und gleichmäßig einen Übergang vom feuchten zum trockenen Teil des Gewebes hin. Das
Feuchtigkeitsbild sollte sich konturenfrei, also ohne sichtbaren Übergang, darstellen.
Arbeiten Sie schnell, so vermeiden Sie, daß sich eine Randbildung im Material festsetzt.
Die feuchte Unterlage ist nach der abgeschlossenen Behandlung zu entfernen. Bei Arbeiten
auf dem Bügel- oder Absaugtisch sollte das feuchte Gewebestück von der durchnäßten
Stelle auf den trockenen Teil der Arbeitsfläche verlegt werden. So vermeiden Sie, daß die
durch die Feuchtigkeit aufgelöste Schmutzsubstanz wieder nach oben in das Material ge-
tragen wird.
Sollten Sie aus irgendeinem Grund die VARIA-Düse auseinander nehmen müssen, z.B. wenn
der Düsenkopf verstopft ist, dann nehmen Sie diese Gebrauchsanweisung zu Hilfe. Die
Abbildung zeigt Ihnen den Zusammenbau der einzelnen Teile. Wenden Sie nie Gewalt an!
Demontage der VARIA-Düse
1. Lösen des Gewindestiftes 21
2. Abziehen der Düsenhülse 22
3. Den Montageschlüssel 31 auf die Längskerben am Düsenkopf 24 schieben.
Einen Gabelschlüssel auf den 6-Kant am Gewindestück 28 stecken und den Düsenkopf
vom Gewindestück abdrehen.
4. Düsenkopf und Drall 29 reinigen.
4

Montage der VARIA-Düse
1. Gewindestück 28 ganz nach vorne drehen, gegen den SeegerHalbmondring 27.
2. Achten Sie nun darauf, daß die Teflondichtung 25 und die Messingscheibe 26 in der
richtigen Reihenfolge auf dem Drall oder im Düsenkopf stecken.
3. Düsenkopf auf das Gewindestück schrauben und mit den beiden Schlüsseln gegenein
ander festziehen.
4. Mit dem Montageschlüssel den Düsenkopf zurückdrehen (nach rechts) bis die VARIA-
Düse nebelt.
5. Düsenhülse in der Stellung auf den Düsenkopf stecken, in der Sie am besten damit
arbeiten können.
6. Gewindestift anziehen.
Tipps
• Gewebe und Gewirke, die durch ihre Beschaffenheit und Ausrüstung besonders stark zur
Randbildung neigen, müssen vor der eigentlichen Behandlung hauchartig mit dem
Nebelstrahl benetzt werden.
• Bei sehr empfindlichen Geweben, auch beim Entfernen von entstandenen Rändern (fal-
sches Ausnebeln oder Trocknen), arbeitet man nur mit dem weichen Nebelstrahl, indem
man für das eigentliche Herausspülen den Nebelstrahl dem Gewebe so nahe bringt, wie
es ohne Beschädigung (Maschenverschiebung) möglich ist. Sofort anschließend wieder
mehr Abstand und mit kreisender Bewegung einen gleichmäßigen Übergang vom
trockenen zum nassen Gewebe schaffen. Diesen Prozeß ein- oder zweimal wiederholen.
Es darf nie zuviel Flüssigkeit im Gewebe sein. Sehr rasch arbeiten. Abtrocknen und, wenn
nötig, nochmals bearbeiten.
• Bei den folgenden, weniger häufigen Fleckenarten muß man, trotz der größeren Rand-
bildungsgefahr, vorher einige Tropfen Detachiermittel auf den Fleck geben. Nachher das
Detachiermittel und den gelösten Schmutz herausspritzen.
Dieser Ratschlag gilt für die folgenden Fleckenarten:
Spezialöle auf Molybdensulfidbasis, Talge, Wachs, Kugelschreibertinte, Schminke,
Stempelfarbe und bedingt auch bei Obstflecken.
5
Pos. Order-No.
20 15-507-010
21 10-006-011
22 15-501-033
23 15-501-034
24 12-006-002
25 10-006-007
26 10-006-008
27 09-504-024
28 10-006-009
29 15-507-001
30 15-408-005
31 10-006-010

• Tangential gereinigt wird, wenn ein »Durchspritzen« nicht möglich ist. Es wird immer mit
weichem, nebelartigem Strahl gereinigt.
Alle Arten von Garnkörpern und besonders Kreuzspulen werden auf diese Art erfolgreich
gereinigt, selbst wenn sich die Verschmutzung auf der Aus- oder Einbuchtung befindet.
Handelt es sich um Teppiche, Strukturgewebe, Mohair, Velour oder allgemein gerauhte
Ware, arbeitet man auf einem runden Kissen, oder man legt das zu reinigende Stück
über den Arm. Der Schmutz wird auf diese Art »tangential« aus dem Material gespült.
• Sedimentflecken, die einseitig des Gewebes einen Belag bilden, sollten von der
Rückseite her ausgespritzt werden.
• Die Entfernung von Kettverschmutzungen und Nadelstreifen bei Uni-Stoffen ist leicht,
wirtschaftlich und deshalb empfehlenswert.
• Flecken von technischen Spezialölen oder -fetten oder solche, welche sich nach länge-
rer Zeit im Gewebe verkapselt haben, sollten zuerst hauchartig eingenebelt werden,
damit der Schmutz etwas aufweicht. Nicht durchnässen, sondern hauchartig besprü-
hen.
• Krusten sollen, soweit möglich, zuerst mit einem Messerrücken abgeschabt werden.
Der Spritzstrahl soll möglichst im rechten Winkel auf das Gewebe aufschlagen, da so
die Gefahr einer Maschenverschiebung vermindert wird.
• Feuchtigkeitsabstossende, dichte Gewebe sollen planliegend, möglichst gespannt,
gespritzt werden, da freihängend die Flüssigkeit zu schnell nach unten ausweichen
kann.
• Produktionsmaschinen (Ringläufer, Schützenkästen, Webriete, Nadelbetten, Nähma-
schinen, Maschinen und Motoren allgemein) werden im KREBS-Verfahren gereingt und
sauber gehalten.
• Mottenschutz- und lmprägniermittel können ebenfalls versprüht werden. Diese Mittel
sind allerdings meist sehr korrosiv, weshalb das Gerät sofort nach Gebrauch gereinigt
werden muß. Bitte für jedes Mittel einen besonderen Behälter verwenden.
Geräusch-/Vibrationsinformation
Meßwerte ermittelt entsprechend EN 50 144.
Der A-bewertete Schalldruckpegel des Gerätes beträgt typischerweise 81dB(A). Der Ge-
räuschpegel beim Arbeiten kann 85 dB(A) überschreiten.
Gehörschutz tragen!
Die Hand-Arm-Vibration ist typischerweise niedriger als 5,5 m/s2.
Konformitätserklärung
Wir erklären in alleiniger Verantwortung, daß dieses Produkt mit den folgenden Normen
oder normativen Dokumenten übereinstimmt. EN 50 144, EN 55 014, EN 60 555, HD 400
gemäß den Bestimmungen der Richtlinien 73/23/EWG, 89/336/EWG (ab 1/96), 89/392/
EWG.
THEO KREBS AG
T.Christiansen H. Kohlert
6

Betriebsstörungen
Fehler Ursache und Lösung
Spritzstrahl ist unregelmäßig Düse verstopft.
(Düse reinigen oder einsenden)
Laufton unregelmäßig a) Regulierschraube ist nicht richtig eingestellt
(Siehe Vorbereitung)
b) Zu wenig Flüssigkeit im Behälter
Gerät saugt nicht an a) Saugrohr lose
b) Regulierschraube zu weit nach rechts gedreht.
(Siehe Vorbereitung)
Gerät hat kein normales a) Kolben sitzt im Zylinder fest. Sie haben mit dem Gerät
Laufgeräusch, sondern etwas Ungeeignetes gespritzt. Sind Zylinder und
brummt nur leise Kolben zu stark beschädigt worden, so muß die Pum-
pe komplett ersetzt werden.
b) Düsenkopf ist ganz verstopft (reinigen oder
einsenden).
c) Pumpe ausgeschliffen (ersetzen)
Es bleiben Ränder im Stoff Falsche Strahlstärke, falsche Anwendung, falsches
Trocknen
Maschenverschiebung Zu scharfer Strahl, zu wenig Abstand zum Gewebe, fal-
scher Spritzwinkel (Siehe Tipps)
VARIA-Düse undicht Düsenkopf und Gewindestück gegeneinander anziehen.
Düse verstopft Düsenkopf und Drall laut Anleitung reinigen.
Produktehaftung
Jede Haftung für Schäden, die direkt oder indirekt durch die Verwendung und das
Sprayen mit Produkten entstanden sind, wird abgelehnt.
6 Monate Garantie
Die Garantie erstreckt sich auf kostenfreie Behebung aller Störungen, die sich infolge
mangelhafter Ausführung oder Materialfehler zeigen sollten. Die Garantie erstreckt sich
jedoch nicht auf durch Verschmutzung und/oder falsche Wartung verursachte Schäden.
THEO KREBS AG
7

For your safety!
This machine can only be operated safely when the operating
and the safety instructions have been completely read and
strictly adhered to. It is recommended to receive practical
instruction before using the machine for the first time.
Do not use the tool if damp or if the surroundings are damp.
Always check the tool, power cord and plug before use. In the event of
damage, repair work should only be carried out by a specialist.
Ensure that there is adequate ventilation when working in
confined spaces.
Inhaling the aerosol can be a health hazard.
Always wear respiratory protection.
Danger of Explosion.
There must be no naked flames in the working area.
Do not smoke.
Do not spray inflammable or explosive liquids (e.g. petrol or spirit).
• The device must not be used in locations where explosive gases may occur.
• Paints and solvents (thinner) must have a flash point above 21°C.
• Never direct the spray jet towards people or animals. The spray material comes out of
the nozzle at high pressure. Danger of injury and infection!
• Only connect the power plug when the tool is OFF. Disconnect the power plug after
use.
• Always disconnect the power plug before performing any work on the tool. Do not
carry the tool by the power cord.
• Always keep the extension cable well away from the workplace.
• Keep the tool and accessories out of the reach of children.
• Only use original accessories.
8

Nozzle handle upwards Appearance of fabric after
Flushing with sharp jet. flushing with sharp jet.
Nozzle handle downwards Appareance after mist treatment
Mist treatment with soft jet. with soft jet.
Instructions for removing stains
Preparation
• Do not operate the spray gun without fluid.
• Fill liquid into cup on spray gun and start up gun by pressing switch.
• Make sure that seen from the rear the adjusting screw is turned counterclockwise. This
yields the highest pressure. Turn screw to the right if you desire less fluid or less jet
pressure.
• By turning lever on variable nozzle you can adjust infinitely any given type of jet. F or an
extremely hard, sharp jet the lever points upwards; for a misty, very soft jet it points
downwards.
Removal of stains
With the KREBS stain removal system the dirt is flushed or “shot” through the material.
The back of the fabric to be cleaned must therefore be free, or it must consist of an
absorbant support.
IMPORTANT!
With every new fabric make a cleaning test in an area where no visible damage can be
done.
Perform work quickly. Change over promptly from sharp to soft jet. The quicker the work
is done and the less fluid used, the less is also the danger of forming rings.
9

With sensitive fabrics dry immediately after mist treatment by shaking cleaned fabric up and
down. If dirt residues are still visible after drying, repeat entire cleaning procedure. It is better
to clean twice quickly with little fluid than to clean once slowly with a lot of fluid.
Operating instructions for Tex-2 device
IMPORTANT
These Operating and Maintenance Instructions are for your information but are not binding.
The differing characteristics of the various types of woven and knitted materials may make it
necessary, in individual cases, to carry out a test on a remnant or on a hidden part of an
article of clothing.
Correct use of the VARIA Nozzle
Select type and force of jet using the lever on the VARIA Nozzle. The pressure of the jet
should be set to match the resistance to displacement of the soiled woven and knitted
fabrics. The stain remover should never be brought so close to the material, that the fabric is
damaged or displaced.
The stain remover has to be directed smoothly and with accuracy, to avoid unnecessary
wetting of the fabric. For large soiled areas it must be guided in a circular motion, so that the
pressure jet rinses the substance from the outside to the inside.
After the stain has been treated the VARIA Nozzle is set to produce a soft, fine mist spray .
This is to avoid the formation of ring marks. Using this mist spray a circular and uniform
transition from the damp to the dry part of the fabric is produced. The damp patch should
appear without contours - that is, without a visible transition. Rapid working will avoid ring
marks becomig fixed in the material.
After completing treatment the damp back -up layer is to be removed. If the work is being
carried out on a ironing board or exhaust table the damp fabric is to be removed from the
wet patch and transferred to the dry part of the working surface. This avoids the transfer of
dissolved staining substances back into the treated material.
If you have to dismantle the VARIA Nozzle for any reason, e.g. if the nozzle head is clogged,
then refer to the operation instructions. Below is an exploded view of the individual part. Do
not use excessive force.
Dismantling the VARIA Nozzle
1. Remove the setscrew 21
2. Pull off the nozzle sleeve 22
3. Push the fitting spanner 31 onto the splined nozzle head 24. Hold the threaded holder
28 by means of a spanner and unscrew the nozzle head.
4. Clean nozzle head and swirl head 29.
10

Assembling the VARIA Nozzle
1. Rotate the threaded holder 28 as far as possible against the circlip 27.
2. Ensure that the teflon washer 25 and the brass washer 26 are placed in the correct order
on the swirl head or in the nozzle head.
3. Screw the nozzle head onto the threaded holder and tighten by rotating both spanners
against each other.
4. Using the fitting spanner rotate the nozzle head back (to the right) until the VARIA Nozzle
is in the fine spray position.
5. Push the nozzle sleeve onto the nozzle head to the position which is most convenient for
working.
6. Tighten setscrew.
Tips
• Woven and knitted fabrics, which due to their nature and finish are particularly susceptible
to formation of ring marks, must be treated by application of a trace of fluid from the fine
mist spray, before the actual treatment begins.
• For very sensitive fabrics and also for removal of ring marks (caused by incorrect finish
with fine mist spray or drying), treatment is carried out only with the soft, fine mist spray.
For the actual rinsing out process the fine mist spray is brought as close to the fabric as
possible, without causing any damage (thread displacement). Immediately afterwards a
uniform transition from the dry to the wet fabric is produced by making circular movements
at a greater distance from the fabric. Repeat this process once or twice. Never allow too
much fluid to penetrate the fabric. Always work very quickly. Dry and if necessary, repeat
process.
• With the following types of stain, which occur less frequently, it is necessary, in spite of
the increased danger of forming ring marks, to wet the stain before treatment with a few
drops of stain removing agent using, for instance, an oil can. Then the stain removing
agent together with dissolved staining substance can be removed by spraying with sol-
vent from the Tex-2. This treatment can be recommended for the following types of spot:
Special oils based on molybdenum sulphide, tallow, wax, ballpoint pen ink, make-up,
stamp pad ink and also in some cases stains of fruit juices.
11
Pos. Order-No.
20 15-507-010
21 10-006-011
22 15-501-033
23 15-501-034
24 12-006-002
25 10-006-007
26 10-006-008
27 09-504-024
28 10-006-009
29 15-507-001
30 15-408-005
31 10-006-010

• If spraying through the material is not possible, then cleaning is carried out by spraying
tangentially across the surface. In this case always work with a soft, fine mist spray.
All types of yarn packages and especially con bobbins can be successfully cleaned this
way, even if the soiled area is in the bulge or dent. Should it be necessary to clean
carpets, structured fabrics, mohair, velour or any napped fabric, the soiled material can
be laid over a round cushion or over the arm of the operator. In this way the stain is rinsed
”tangentially” out of the material.
• Sedimentary spots, which have formed a crust on one side of the fabric, should be
cleaned from the reverse side.
• The removal of continuous and needle-shaped stains from plain fabrics is easy, economical
and, therefore, to be recommended.
• Stains caused by specialized technical oils or greases or those, which have worked into
the fabric over a lengthy period, should first of all be treated by applying a trace of fluid
using the fine mist spray, in order to somewhat soften the staining substance. Do not
make thoroughly wet: spray only a very thin layer.
• Where possible, crusts should, first of all, be scraped off with the dull edge of a knife
blade. The spray jet should if possible be kept at a right-angle to the material, in order to
reduce danger of thread displacement.
• Spraying of dense fabrics, treated with moisture-repellant, should be carried out when
they are lying flat, and stretched, if possible. If they are freely suspended, fluid can escape
downwards too quickly.
• Production machines (ring travellers, shuttle-boxes, loom reeds, needle beds, sewing
machines, and machines and motors in general) can be treated and kept clean using the
KREBS process.
• Both repellant and impregnating agent can also be sprayed. However, these fluids are
nearly always very corrosive, and for this reason the stain remover must be cleaned
immediately after use. Please use a separarte container for each type of fluid.
Noise/vibration information
Measured values determined according to EN 50 144.
Typically the A-weighted sound pressure level of the tool is 81 dB(A)
The noise level when working can exceed 85 dB(A).
Wear ear protection!
The typical hand-arm vibration is below 5,5 m/s2.
Declaration of conformity
We declare under our sole responsibility that this product is in conformity with the
following standards or standardized documents: EN 50 144, EN 55 014, EN 60 555,
HD 400 in accordance with the regulations 73/23/EEC, 89/336/EEC (from 1 st Jan.
1996), 89/392/EEC.
THEO KREBS LTD
12 T.Christiansen H. Kohlert

Fault finding
Fault Cause and remedy
Spraying jet is irregular Nozzle clogged
(Clean nozzle or send to manufacturer)
Irregular operating sound a) Incorrect setting of setting screw
(See Preparation)
b) Insufficient fluid in container
No suction a) Suction tube loose
b) Setting screw turned too far in clockwise direction.
(See Preparation)
Unit does not run with normal a) Piston seized in cylinder. You have sprayed an
operating sound but only unsuitable medium. Should cylinder piston be too
hums quietly. badly damaged, the complete pump assembly must
be replaced.
b) Nozzle head is completely clogged.
(Clean or send to manufacturer)
c) Pump weared out (replace)
Ring marks remain in material Wrong jet setting, incorrect operation, drying not carried
out properly.
Threads are displaced Jet is too concentrated, distance between fabric is not
enough, angle of spraying is incorrect. (See Tips)
VARIA Nozzle leaks Tighten nozzle head and threaded holder against each
other.
Nozzle clogged Clean nozzle head and swirl head as instructed.
Product liability
No liability is accepted for damage caused directly or indirectly by the use and spraying
of products.
6 Months Guarantee
The guarantee covers the remedying of all faults, without cost to the customer, arising from
faulty manufacture of materials. This guarantee excludes damage caused by ingress of dirt,
insufficient and/or incorrect maintenance.
THEO KREBS LTD
13

Pour votre sécurité!
Travailler sans danger avec cet appareil n’est possible qu’à condition de lire
intégralement la notice d’instructions et de suivre les instructions qui figurent
dedans. Avant la première mise en service de l’appareil, se faire montrer
l’emploi pratique de la machine par quelqu’un le maîtrisant déjà.
L’appareil ne doit pas être humide ni ne doit fonctionner dans un environnement
humide.
Avant toute utilisation, vérifer l’état de l’appareil, du cordon de raccordement et
de la fiche mâle. Ne confier la réparation des pièces détériorées qu’à un
spécialiste.
Si le travail a lieu dans des locaux fermés, veiller à une ventilation suffisante.
L’inhalation du brouillard de pulvérisation peut nuire à la santé.
Toujours porter une protection respiratoire.
Risque d’explosion!
Aucune flamme nue ne doit se trouver dans la zone de travail.
Interdiction de fumer.
Ne pas pulvériser de liquide très inflammables ou explosifs (par ex. de l’essence
ou de l’alcool à brûler).
• Interdiction d’utiliser l’appareil dans les locaux où des gaz explosifs peuvent se dégager.
• Les peintures et solvants (dilution) doivent avoir un point d’éclair supérieur à 21°C.
• Ne jamais diriger le jet sur des personnes ou des animaux. Le produit jaillit de la buse
sous haute pression. Risque de blessure et d’infection.
• Ne mettre la fiche mâle dans la prise qu’avec appareil éteint. Retirer la fiche mâle de la
prise une fois le travail terminé.
• Toujours retirer la fiche mâle de la prise avant d’effectuer tout travail sur l’appareil. Ne
jamais porter l’appareil par son câble.
• Toujours veiller à ce que le câble prolongateur se trouve derrière l’appareil.
• Ranger l’appareil et ses accessoires hors de portée des enfants.
• N’utiliser que des accessoires KREBS d’origine.
14

Instructions pour l’enlèvement des taches
Préparation
• Ne jamais mettre l’appareil en marche lorsqu’il ne contient pas de liquide.
• Remplir le réservoir de l’appareil avec le liquide et mettre en marche en appuyant sur la
commande.
• Bien veiller à ce que le bouton de régulation, vu de derrière, soit bien placé tout à fait à
gauche lors de l’opération (tourner dans le sens inverse des aiguilles d’une montre).
• En actionnant le levier qui se trouve sur la buse, on peut régler en continu le jet produit.
Lorsque le levier est placé vers le haut, on a un jet puissant et fin, lorsque le levier est
placé vers le bas, on a un jet très doux (nébulisation).
Enlèvement des taches
Avec le détacheur KREBS, la tache est chassée à travers le tissu. C’est pourquoi, le dos du
tissu traité doit être libre ou bien posé sur un matériau absorbant.
REMARQUE IMPORTANTE
Pour tout nouveau tissu, effectuer d’abord un essai à un endroit qui n’est pas visible.
Levier de buse vers le haut, enlèvement Aspect du tissu après détachage
d’une tache au moyen d’un jet fin et puissant au moyen d’un jet puissant
Levier de buse vers le bas, nébulisation Aspect du tissu après nébulisation
au moyen d’un jet doux
15

Toujours travailler très rapidement. Passer vite du jet puissant à la nébulisation. Plus vous
travaillerez vite, moins vous utiliserez de liquide et moins vous aurez de risque de formation
d’une auréole. Sur les tissus fragiles, sécher aussitôt après avoir nébulisé.
S’il reste encore une tache après le premier nettoyage, répéter l’opération. Il est préférable
d’opérer le détachage en deux opérations, en utilisant chaque fois une faible quantité de
liquide et non pas une seule opération en employant beaucoup de liquide.
Instructions d’utilisation
IMPORTANT
Ce mode d’emploi vous informe sans engagement de notre part. La variété de tissus et des
tricots impose dans certains cas d’effectuer des essais sur une chute ou sur un endroit non
visible du vêtement.
Emploi de la buse VARIA
Sélectionner la forme et la puissance du jet à l’aide de la manette de la buse. Le jet doit être
ajusté en fonction de la résistance à l’éraillement du tissu ou du tricot. Ne jamais approcher
l’appareil trop près du tissu, pour ne pas l’endommager ou l’érailler.
Utiliser l’appareil calmement, en visant bien, de manière à ce que le tissu ne soit pas mouillé
inutilement. Pour les salissures de grandes dimensions, partir de l’extérieur et progresser
vers l’intérieur de la tache.
Pour éviter la formation d’auréoles, régler la buse, après le premier passage, sur le jet en
brouillard. Avec ce jet, en passant en cercles et régulièrement, créer une zone de transition
entre le tissu mouillé et le tissu sec. La partie mouillée ne doit pas avoir des contours nets,
et doit se fondre régulièrement dans le reste du tissu.
Travailler rapidement pour éviter que’une auréole définitive se puisse former dans le tissu.
Enlever le support humide dès que l’opération soit terminée. Si on travaille sur une table à
repasser ou sur une table aspirante, la pièce de tissu doit être enlevée de l’endroit mouillé
de la table et replacée sur un endroit sec. On evite ainsi que la salissure entraînée par le
liquide ne revienne dans le tissu.
Si, pour une raison ou une autre, il est nécessaire de démonter la buse, par exemple si la
tête se bouche, suivre les instructions de cette brochure en se reportant au schéma, qui
présente les différentes pièces. Ne jamais forcer.
Démontage de la buse VARIA
1. Dévisser la tige filetée 21
2. Retirer la douille de buse 22
3. Placer la clé de démontage 60 sur les rainures longitudinales de la tête de buse 24.
Placer une clé à fourche sur la partie à 6 pans de l’écrou 28 et séparer la tête de buse et
l’écrou en desserrant.
4. Nettoyer tête de buse et atomiseur 29.
16

Demontage de la buse VAR,A
1. Serrer l’écrou 28 complètement sur le devat, contre la rondelle en forme de croissant 27.
2. Vérifiez que le joint en Teflon 25 et la rondelle en laiton 26 sont placés dans le bon ordre
sur l’atomiseur ou dans la tête de buse.
3. Visser la tête de buse sur l’écrou et bien serrer l’un contre l’autre à l’aide des deux clés.
4. Dèsserrer la tête de buse à l’aide de la clé de démontage (en tournant vers la droite)
jusqu’à ce que le liquide sorte de la buse sous forme de jet en brouillard.
5. Placer la douille de buse sur la tête de buse dans la position qui vous convient le mieux.
6. Serrer la tige filetée.
Conseils
• Les tissus et tricots qui, du fait de leur nature et de leurs traitements, ont une forte tendance
à la formation d’auréole. Il est recommandé de les mouiller légèrement avec le jet en
brouillard avant le traitement proprement dit.
• Sur les tissus très sensibles ou pour éliminer des auréoles (mauvaise projection du jet en
brouillard ou mauvais séchage) travailler uniquement avec le jet en brouillard. Pour
entraîner les salissures, rapprocher ce jet doux du tissu autant que possible sans
l’endommager (éraillement). Reprendre immédiatement de la distance et, en décrivant
des cercles, réaliser une tansition régulière entre le tissu mouillé et le tissu sec. Répéter
les opérations une ou deux fois. Le tissu ne doit jamais être excessivement mouillé.
Travailler très rapidement. Sécher et recommencer si nécessaire.
• Pour les types de taches suivants, plus rares, il convient de placer préalablement quelques
gouttes d’agent détachant sur la tache, malgré le risque accru d’auréoles. Utiliser par
exemple une petite burette. Ensuite, éliminer l’agent détachant et la salissure dissoute.
Ce conseil s’applique pour les taches suivantes:
Huiles spéciales à base de sulfure de molybdène, suif, cire, encre de stylo à bille,
maquillage, encre à tampons, ainsi que certaines taches de fruits.
• On peut réaliser un nettoyage tangentiel lorsqu’il n’est pas possible de pulvériser à travers
le tissu. Dans ce cas, toujours travailler avec le jet en brouillard.
Il est ainsi possible de nettoyer avec succès tous les types de bobines de fil, y compris
les bobines croisées, même si la saleté se trouve sur le relief ou dans les creux. Lorsqu’il
s’agit de tapis, de tissus à structure, de mohair, de velours ou d’une manière générale de
textiles grattés, travailler sur un coussin rond, ou placer la pièce sur le bras. La saleté est
ainsi giclée du matériau »tangentiellement». 17
Pos. Order-No.
20 15-507-010
21 10-006-011
22 15-501-033
23 15-501-034
24 12-006-002
25 10-006-007
26 10-006-008
27 09-504-024
28 10-006-009
29 15-507-001
30 15-408-005
31 10-006-010

• Les taches sédimentaires formant un dépôt sur un seul côté du tissu doivent être éliminées
en travaillant au verso.
• Il est extrêmement facile et économique, donc recommandé, d’éliminer les salissures de
chaîne et les traces d’aiguilles sur les tissus unis.
• Les taches d’huiles et de graisses techniques spéciales, ainsi que celles qui se sont
imprégnées à la longue dans le tissu doivent tout d’abord être assouplies avec le jet en
brouillard. Ne jamais tremper le tissu, mais l’humidifier légèrement.
• Dans la mesure du possible, éliminer préalablement les croûtes à l’aide du dos d’un
couteau. Le jet doit frapper le tissu autant que possible perpendiculairement, afin de
réduire le risque d’éraillement.
• Les tissus denses et hydrofuges doivent être traités à plat, autant que possible tendus,
car sinon le liquide serait évacué trop rapidement par le bas.
• Les machines de production (curseurs, boîte à navettes, peignes, planches à aiguilles,
machines à coudre, machines et moteurs d’une manière générale) peuvent être nettoyées
à l’aide du procédé KREBS.
• Les produits anti-mites et d’imprégnation peuvent également être pulvérisés. Cependant,
ces produits sont généralement très corrosifs. Pour cette raison l’appareil doit être nettoyé
immédiatement après l’emploi. Utiliser un réservoir séparé pour chaque produit à
pulvériser.
Bruits et vibrations
Valeurs de mesures obtenues conformément à la norme européenne
50 144. La mesure réelle (A) du niveau sonore de l’outil est 81 dB(A).
Le niveau sonore en fonctionnement peut dépasser 85 dB(A).
Munissez-vous de casques anti-bruit!
La vibration de l’avant-bras est en-dessous de 5,5 m/s2.
Déclaration de conformité
Nous déclarons sous notre propre responsabilité que ce produit est en conformité avec
les normes ou documents normalisés suivant: EN 50 144, EN 55 014, EN 60 555, HD 400
conforme aux règlementations 73/23/CEE, 89/336/CEE (à partir du 1er janvier 1996), 89/
3921CEE.
THEO KREBS SA
18 T.Christiansen H. Kohlert

Incidents de fonctionnement
Défauts Cause et solution
Jet irrégulier Buse bouchée
(nettoyer la buse ou nous la retourner)
Bruit de fonctionnement a) Mauvais réglage de la vis de réglage
irrégulier (voir la préparation)
b) Liquide insuffisant dans le récipient
Pas d’aspiration a) Tube d’aspiration bouché ou mal serré
b) Vis de réglage trop serrée à droite
(voir la préparation)
L’appareil ne fait pas son bruit a) Piston bloqué dans le cylindre.
normal et ne bourdonne que Travail avec un liquide nonconvenable.
faiblement Si le cylindre et le piston sont trop endommagés,
la pompe doit être changée entièrement
b) Tête de buse entièrement bouchée
(nettoyer ou nous la retourner)
c) pompe usée (à remplacer)
Auréole sur le tissu Erreur dans le réglage de la puissance du jet,
mauvais utilisation, séchage mauvais
Eraillement du tissu Jet trop violent, distance de travail trop courte,
mauvais angle de projection (voir les conseils)
Fuite de la buse Resserrer la tête de buse et l’écrou
Buse bouchée Nettoyer la tête de buse et le corps de buse suivant les
instructions
Responsabilité du fabricant
Toute responsabilité est déclinée pour tous dégâts résultant directement ou indirectement
de l’utilisation et la pulvérisation de produits.
Garantie de six mois
Cette garantie couvre Ia réparation gratuite de toutes les pannes qui seraient causées par
un vice de fabrication ou de matériau. La garantie ne couvre cependant pas les dommages
causés par des salissures.
THEO KREBS SA
19

為能安全操作本工具槍,在使用前請仔細閱讀此操作指引,並嚴格遵守,建議
在首次使用前接受實際操作培訓。
嚴禁在工具槍受潮或周圍環境潮濕情況下使用。
工具槍在使用前,請檢查電線和插頭,如發現有破損,請交由專業人士維修。
要注意確保工作場所的空氣流通,人體吸入煙霧會對健康造成危害,工作時請
佩帶呼吸保護裝置。
爆炸的危險
工作環境嚴禁吸煙
嚴禁噴射易燃易爆液體(如:汽油、酒精等)
安全警告!
● 嚴禁在有可能出現易燃易爆氣體的區域內使用本工具槍。
● 塗料和溶濟(稀釋劑)的氣化點必須在 21°C以上。
● 嚴禁將工具槍對準自己、他人或動物,從噴嘴噴射出來的高壓流體會引起損傷
和感染。
● 只有在工具槍處於關閉“OFF"狀態下才能接通電源,每次使用後都必須斷開電
源。
● 工作外使用工具槍,請務必斷開電源,切勿用電源線垂吊工具槍。
● 非工作需要,請將電源線遠離工作場所。
● 請將工具槍及其配件放在小孩不能觸及的地方。
● 請使用原裝配件。
20
Table of contents
Languages:
Other KREBS Paint Sprayer manuals