Kroger BP3NP1-3EKRO User manual

Important Product and Safety Information
Follow Instructions for Use. This document provides important
product operation and safety information regarding this Blood
Pressure Monitor. Please read this document thoroughly before
using the device and keep for future reference.
This blood pressure monitor is an automatic digital blood pressure mea-
suring device for use by adults on the wrist at home or in the doctor’s
office. It enables a very fast and reliable measurement of the systolic and
diastolic blood pressure, as well as the pulse rate, by way of the oscillo-
metric method. This device detects the appearance of irregular heartbeats
during measurement and provides a warning signal when the irregular
heartbeat is detected.
This blood pressure monitor IS intended to be used:
•For self-measurement/monitoring of blood pressure and pulse in
adults; whereas the person being measured may be the user/operator
of the device.
•Within a home healthcare environment.
•With a cuff located upon the user’s wrist; ½inch from the hand.
This blood pressure monitor IS NOT intended for use with:
• Pregnancy
• Preeclampsia
•Children under 12
•Neonatal patients
WARNING – Potentially hazardous situation that if not
avoided may result in serious injury or death.
•Self-measuring means monitoring, not diagnosis or treatment. Unusual
values must always be discussed with your doctor. Under no circum-
stances should you independently alter the dosages of any drugs pre-
scribed by your physician.
1

•Consult your physician before using this device if any of the following
or similar conditions are present: arrhythmias such as atrial or ventricular
premature beats or atrial fibrillation, arterial sclerosis, poor perfusion
,
diabetes, age, pregnancy, preeclampsia, renal diseases. Motion during
measurement, including trembling or shivering may affect the mea-
surement.
•Though not for use with children under 12, ensure that any children
around this device are supervised; some parts are small enough to be
swallowed.
DO NOT:
Use this device if you think it is damaged or anything appears unusual
(e.g. sporadic operation, open packaging upon purchase).
Use the displayed pulse for checking the frequency of heart pacemakers
as this device is not suitable for this action.
Open/modify this device; inaccuracy and/or harmful injury may result.
Conduct many frequent measurements as this may result in harmful
injury due to blood flow interference.
Place the Cuff over a wound as this may cause further injury.
Place and pressurize the Cuff over/near any present intravascular
access or therapy, or arteriovenous shunt, as this may cause blood
flow interference and result in harmful injury.
Place and pressurize the Cuff over a limb near the side of a mastectomy
as this may cause harmful injury.
Use the Blood Pressure Monitor on a limb simultaneously with other
medical equipment on the same limb due to possible interference with
such medical equipment.
Maintain pressure in the Cuff applied to the limb for a prolonged
amount of time. Ensure that circulation in the limb is not impaired by
checking circulation if prolonged/repeated exposure to pressure
occurs.
2

Service the device when being used or when power is supplied. When
the device is not in use and power is removed, batteries may be
replaced by the user. No other parts/components are accessible.
CAUTION – Potentially hazardous situation that if not
avoided may result in minor/moderate injury, property dam-
age, and/or damage to the device
•This device contains sensitive electronics components. Avoid strong
electrical or electromagnetic fields in the direct vicinity of the device
(e.g., mobile telephones, microwave ovens). These can lead to temporary
impairment of the measuring accuracy. Move the device to another
loca
tion if interference is determined.
•When not using the Blood Pressure Monitor for extended lengths of
time, remove the batteries to avoid potential battery leakage and damage
to the monitor.
•When replacing the batteries, ensure all the batteries are replaced
simultaneously to avoid battery damage and potential damage to the
monitor. Microlife USA does not recommend using rechargeable batteries.
•To avoid inaccurate measurements and to lessen any discomfort from
Cuff pressure, ensure the Cuff is placed correctly on the limb and fits
correctly when snug (not tight), as indicated by markings with the Cuff.
•
Consult your physician in cases of frequent irregular heartbeat detections.
•This Risk Indicator feature is provided in order to help you understand
your potential blood pressure risk. However, this feature is neither a
diagnosis nor a substitute for a medical examination. It is important to
consult with your physician to determine your risk.
DO NOT:
Drop this device or expose it to strong vibrations; sensitive compo-
nents may be affected resulting in inaccuracies and/or operational
issues.
3

Use the Blood Pressure Monitor outside of its specified operation
temperature
and humidity rating, or if stored outside of its specified
storage temperature and humidity rating. Avoid storage in direct sunlight.
Use this device in a moving vehicle; inaccurate measurements may result.
Use third party accessories. Only use Microlife authorized accessories,
such as cuffs or AC adapters, as those not approved for use with the
device may provide inaccurate measurements, injury, and/or damage
the device.
STANDARDS
This medical device is compliant with:
•Medical device and non-invasive blood pressure monitor standards
IEC 60601-1, IEC 60601-1-2, IEC 60601-1-11, and AAMI/ANSI/IEC
80601-2-30, and
•Electromagnetic standards IEC 60601-1-2, along with FCC Part 15, and
•
Clinical Testing per standard ANSI/AAMI/ISO 81060-2:2013 was conducted
on blood pressure device using the same measurement technology.
Please note: According to international standards, your monitor should be
checked for accuracy every 2 years.
TYPE
IP20: Protected against solid foreign particles with a diameter of
more than 12.5 mm, no protection against water.
Keep Dry.
Type BF Applied Part
Expected Life
Monitor 5 Years
Cuff 2 Years
Batteries and electronic instruments must be disposed of in accordance
with the locally applicable regulations, not with domestic waste.
4

FCC
This device complies with part 15 of the FCC Rules. Operation is subject
to the following two conditions: (1) This device may not cause harmful
interference, and (2) this device must accept any interference received,
including interference that may cause undesired operation. Changes or
modifications to the product are not approved by Microlife USA and could
void the user's authority to operate the equipment under FCC jurisdiction.
This equipment has been verified to comply with the limits for a Class B
digital device, pursuant to part 15 of the FCC Rules. These limits are
designed to provide reasonable protection against harmful interference in
a residential installation. This equipment generates uses and can radiate
radio frequency energy and, if not used in accordance with the instruc-
tions, may cause harmful interference to radio communications. However,
there is no guarantee that interference will not occur in a particular
installation. If this equipment does cause harmful interference to radio or
television reception, which can be determined by turning the equipment
on and off, the user is encouraged to try to correct the interference by
increasing the distance between the product and the affected device; or if
applicable, reorientation the receiving antenna, or moving the product’s
power plug to another receptacle.
5

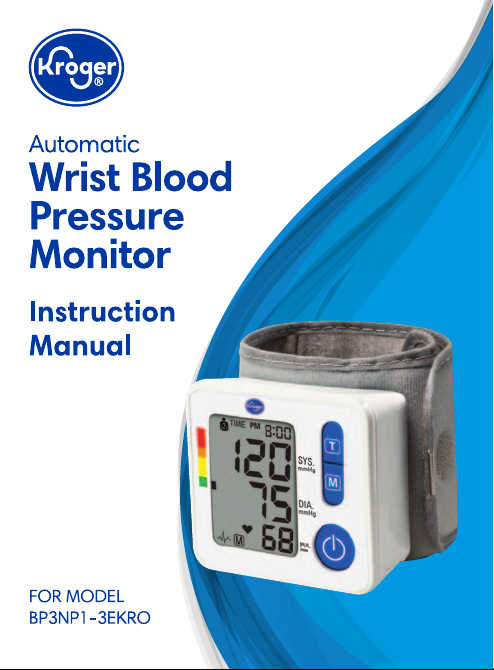
Wrist Blood Pressure Monitor
Instruction Manual
Table of contents
1. Introduction
1.1. Your Automatic Wrist Blood Pressure Monitor
1.2. Inflation Mode Technology
2. How is blood pressure measured?
2.1. What is blood pressure, and why does it fluctuate?
2.2. Measurement Guidelines
2.3. What can I do to change my blood pressure?
3. Components of your blood pressure monitor
4. How do I get started?
4.1. Inserting the batteries
4.2. Setting the date and time
5. How do I take a measurement?
5.1. Preparing to take a measurement
5.2. Common errors
5.3. Using the cuff
5.4. Selecting the user
5.5. Taking a measurement
5.6. Stopping a measurement
5.7. Irregular heartbeat detection
5.8. Hypertension risk indicator
5.9. Memory: Reviewing readings
5.10. Setting the medication reminder
6

6. Battery change indicator
7. Error messages/troubleshooting
8. Care and maintenance
9. Limited warranty
10. Technical specifications
11. How to contact us
7

1. Introduction
1.1. Your Automatic Wrist Blood Pressure Monitor
Thank you for purchasing a fully automatic wrist blood pressure monitor.
Your monitor is designed to provide fast and reliable digital readings of
your pulse, and systolic / diastolic blood pressure using the oscillometric
method on your wrist. It offers clinically proven accuracy and has been
designed to be user friendly.
Before using your blood pressure monitor, please read this instruction
manual carefully to ensure correct use. If you have additional questions
regarding blood pressure measurements please contact your doctor.
1.2. Inflation Mode Technology
Please note that this device employs our “Inflation Mode Technology.”
This means your blood pressure is measured while the wrist cuff is inflat-
ing, rather than first inflating to a peak pressure and then measuring dur-
ing a slow deflation process. This unique technology provides a faster,
more comfortable blood pressure reading for you.
If you have any questions about your blood pressure reading or monitor,
please call us at 1-800-568-4147.
2. How is blood pressure measured?
2.1. What is blood pressure, and why does it fluctuate?
Your level of blood pressure is determined in the circulatory center of the
brain and adjusts to a variety of situations through feedback from the ner-
vous system. To adjust blood pressure, the strength and frequency of the
heart (pulse), as well as the width of circulatory blood vessels is altered.
Blood vessel width is affected by way of fine muscles in the blood vessel
walls. Your level of arterial blood pressure changes periodically during
heart activity. During the "blood ejection" (Systole), the value is highest
(systolic blood pressure value). At the end of the heart’s "rest period"
8

(Diastole), pressure is lowest (diastolic blood pressure value). Your blood
pressure values must lie within certain normal ranges in order to prevent
particular diseases.
2.2. Measurement Guidelines
Blood pressure is very high if your systolic blood pressure is over 140
mmHg and/or your diastolic pressure is above 90 mmHg, while at rest.
In this case, please consult your doctor immediately. Long-term values at
this level endanger your health due to continual damage to the blood ves-
sels in your body.
Should the systolic blood pressure values lie between 130 mmHg and 139
mmHg and/or the diastolic blood pressure values lie between 80 mmHg
and 89 mmHg, consult your doctor. Regular self-checks will be necessary.
If you have blood pressure values that are too low (i.e., systolic values under
105 mmHg and/or diastolic values under 60 mmHg), consult your physician.
Even with normal blood pressure values, a regular self-check with your
blood pressure monitor is recommended. You can detect possible changes
in your values early and react appropriately.
If you are undergoing medical treatment to control your blood pressure,
keep a record of values along with time of day and date.
Show these values to your physician. Never use the results of your
measurements
to independently alter the medication prescribed by
your physician.
9
Table of contents
Languages:
Other Kroger Blood Pressure Monitor manuals


Popular Blood Pressure Monitor manuals by other brands


Soehnle
Soehnle SYSTO MONITOR 100 Instructions for use

Nasco Healthcare
Nasco Healthcare Simulaids Life/form LF01095U USER HELP GUIDE

Microlife
Microlife WatchBP office instruction manual

HoMedics
HoMedics MiBody 360 instruction manual

ForaCare
ForaCare FORA P30 Plus owner's manual

JOYTECH
JOYTECH DBP-6296B owner's manual