Setting up your StarPlus Standard includes installing both the optional backup
batteries and connecting the phone and installing the wall mount attachment.
1. Installing optional backup batteries
The StarPlus Standard utilizes 4 AA alkaline (not included) optional backup bat-
teries. Make sure that the telephone cord and AC Adapter are both unplugged
before installing or replacing the optional backup batteries.
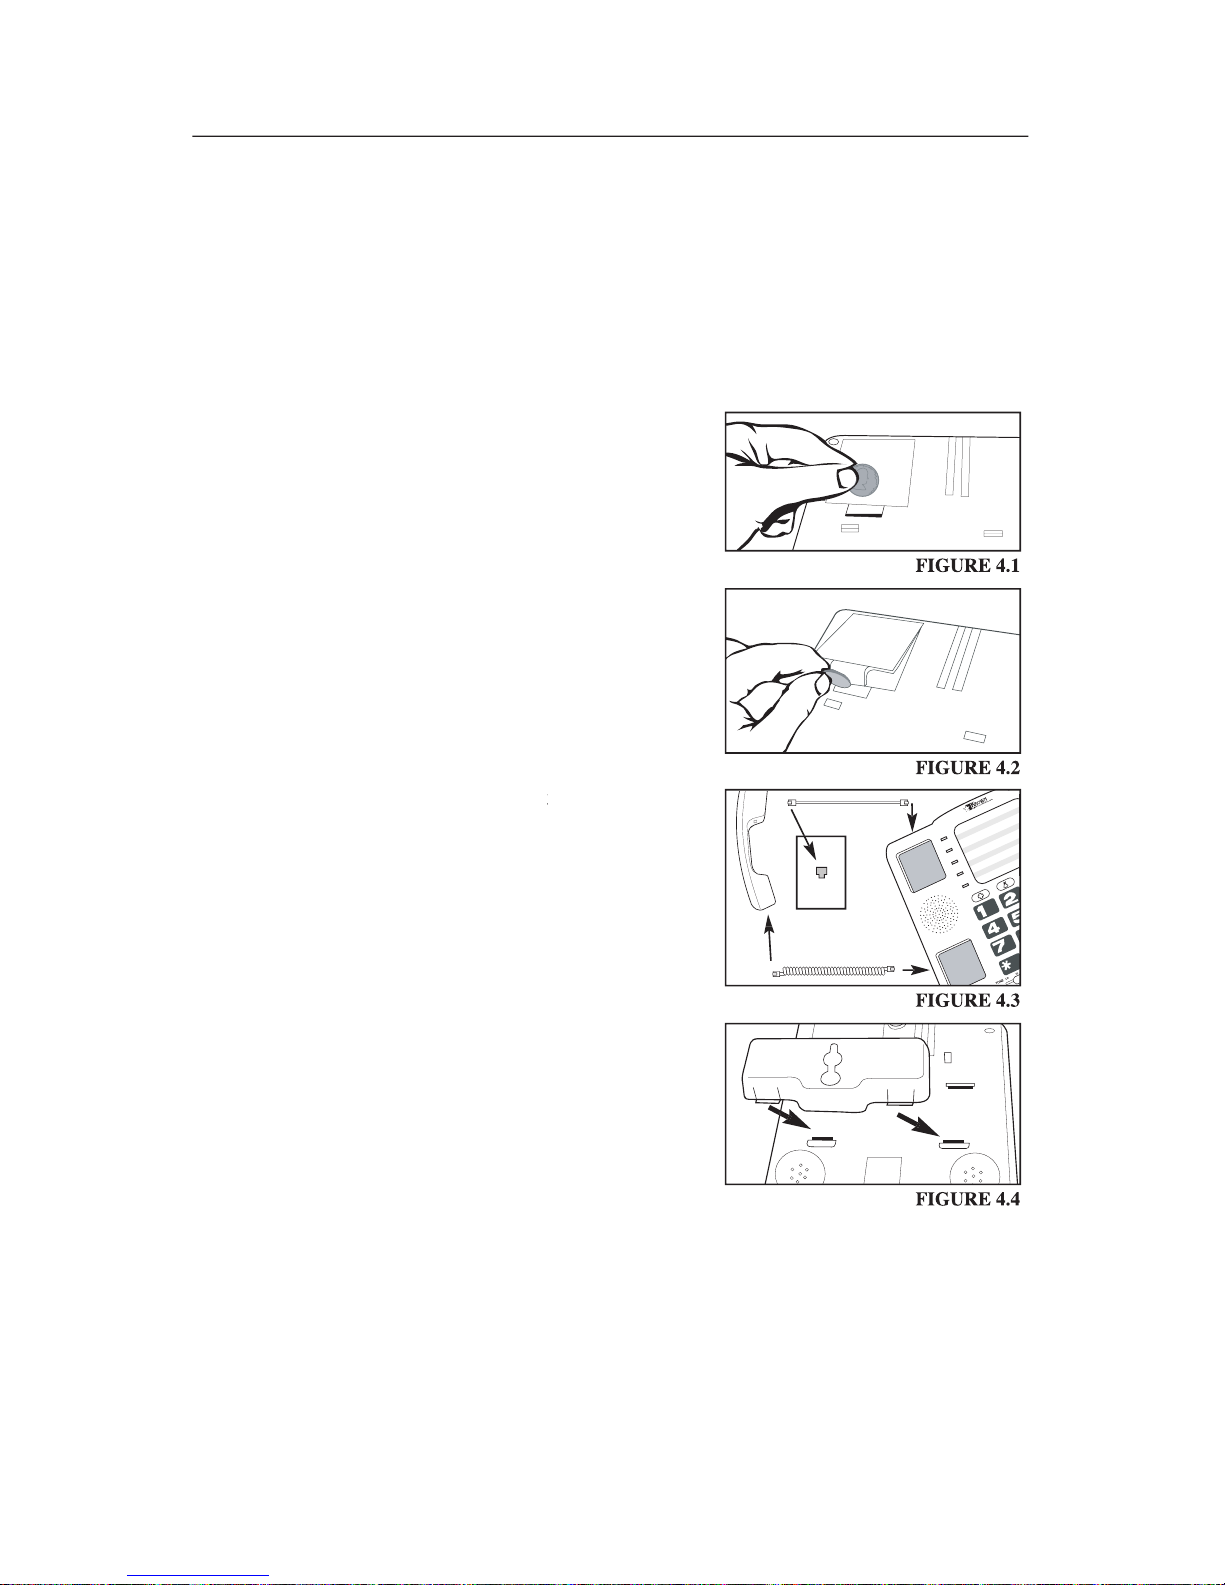
1. Insert a coin into the latch and press toward
the topside to release the battery cover on the
underneath side of the unit as shown in
2. Remove the battery cover
Place 4 AA alkaline batteries into the compartment
following the directional markings.
4. Replace the battery cover and press down
In the event of a power outage the StarPlus Standard
will continue to function but will
plifi cation. The optional backup batteries are designed
to maintain the numbers stored in the directory not to
maintain the amplifi cation of the phone during power
outages. Krown Manufacturing suggests that the op-
tional backup batteries be replaced after each power
outage. Krown also suggests the StarPlus Standard’s
AC Adapter be plugged into a surge protector and not
directly into a wall outlet, this will help to protect your
telephone from electrical surges during severe weather.
2. Installing the StarPlus Standard
1. Install the telephone cord to the wall outlet
and to the telephone as shown in Figure 4.3
Install the handset cord into the telephone and handset as shown in Figure 4.3
3. Set the dial mode selector to P (pulse) if you have pulse dialing or a rotary
line. If you have tone dialing, do not change the dial mode selector, the
manufacture default setting is set to tone dialing.
4. Plug the AC adapter into the telephone inserting the end of the adapter cord
into the power jack located on the back of the telephone. Plug the AC
adapter into a standard 120VAC wall outlet.
5. Pick up the handset or press SPEAKER button and listen for a dial tone.
Your StarPlus Standard is now ready to use.