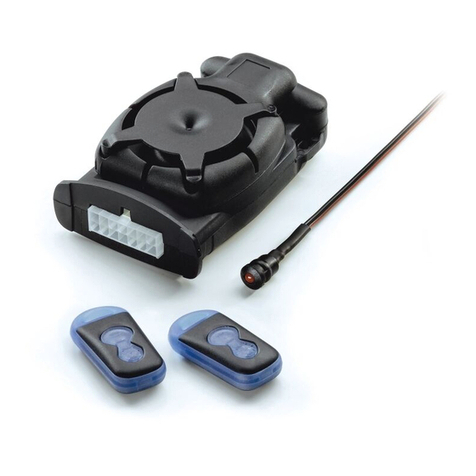
KTM 950 ADVENTURE User manual

Information
Hard Equipment
Bedienungsanleitung Alarmanlage
Modelle 950 Adventure, 950 Adventure S
User manual alarm system
950 Adventure, 950 Adventure S models
Manuale d'Uso Allarme Antifurto
Modelli 950 Adventure, 950 Adventure S
Notice d’utilisation. Alarme
Modèles 950 Adventure, 950 Adventure S
KTM Teilenummer / KTM Partnumber
600.12.035.000
Art.Nr. 3.211.03
4. 2003

DEUTSCH
Funktionen der KTM Alarmanlage
Alarmauslösung bei Stoß, Erschütterung, Neigung und unerlaubter Zünd-
schlossbetätigung
–2-achsiger digitaler Neigungssensor mit Erschütterungssensor
– Selbstschärfend 5 Minuten nach Ausschalten der Zündung oder
manuelles Schärfen per Fernbedienung
–Empfindlichkeit über die Fernbedienung in vier Stufen einstellbar
–Sabotageschutz der Alarmanlage durch integrierte Akku-Notstromver-
sorgung
– Zündkreisüberwachung und elektronische Wegfahrsperre, „Safety-Ride-
Logic“ verhindert das Aktivieren der Wegfahrsperre während der Fahrt
–Wahlweise akustische und optische oder nur optische Alarmgebung.
– Integrierte Piezo-Sirene mit 110dB
–Warnblinkfunktion
–Alarm-Reset, die Anlage schaltet sich nach einer Alarmgebung wieder
scharf
– „Pre-Alarm“ und „Alarm-Memory“
– Motorrad-Suchfunktion und Panikalarm mit akustischem und optischem
Signal
– Piezo-Sensorik ermöglicht beliebige Einbaulage der Steuereinheit
Lieferumfang
–Alarmkonsole mit integrierter Wegfahrsperre, Sirene, Alarmsensorik und
Notstromversorgung
–Eine Funk-Fernbedienung
–Montagekabelsatz
–Installations- und Bedienungsanleitung
–Klebepad zur Befestigung der Alarmkonsole
Technische Daten
Fernbedienung
Betriebsspannung: 12V Battery (Typ A23)
Reichweite: > 30 m
Sendefrequenz: 433,92 MHz
Steuereinheit
Betriebsspannung: DC 12V (10,8...15,6 V)
Stromverbrauch: ca. 2mA (alarmbereit)
Betriebstemperatur: -15o C ... +55o C
Spezielle Funktionen der KTM Alarmanlage
Pre-Alarm
–Bei einmaliger Erschütterung wird ein kurzer Sirenenwarnton ausgelöst.
–Nach einer zweiten Auslösung innerhalb von 10 Sekunden erfolgt ein
lauter 20-Sekunden-Alarm. Nach Ablauf des Alarms schaltet sich die
Anlage wieder scharf.
–Bei Auslösung durch Neigungssensor, oder Manipulation der Zündelek-
trik wird kein Voralarm, sondern sofort ein 20-Sekunden-Alarm aus
gelöst.
Alarm-Memory
–Jede Alarmauslösung wird gespeichert und beim Ausschalten der Alarm
bereitschaft optisch und akustisch signalisiert.
Panikalarm
–Auslösung der Sirene und der Blinker für ca. 60 Sekunden.
Warnblinken
–Bei eingeschalteter Zündung kann über die Fernbedienung die
Warnblinkfunktion aktiviert werden. Der Einbau eines zusätzlichen Warn-
blinkrelais ist daher nicht erforderlich.
Sleep-Funktion
–Abschalten der Alarm- und Wegfahrsperrenfunktion bzw. der Selbst-
schärfung der Anlage für Servicezwecke (z.B. Werkstattbesuch).
Blink-LED
–Die LED blinkt, solange die Alarmanlage scharfgestellt ist.
2

Gewünschte Funktion Erforderliche Bedienungsschritte Quittiersignal
Alarmbereitschaft einschalten • Zündung ausschalten 1 x optisch und akustisch
Alarmgebung über Sirene, Blinker • nach 5 Minuten schaltet sich die Anlage LED blinkt (Frequenz ca. 2Hz)
und Funk-Alarmruf (Zubehör) selbstständig scharf, oder
• Taste 1 einmal drücken
Stillen Alarm einschalten • Zündung ausschalten 1 x optisch und akustisch
Alarmgebung nur über den • Taste 1 zweimal nacheinander drücken und
Funk-Alarmruf (Zubehör) Hinweis: durch mehrmaliges Drücken der 1 x optisch
Taste 1 wird jeweils zwischen „lautem“ und
„stillem“ Alarm gewechselt LED blinkt /Frequenz ca. 2Hz)
Alarmbereitschaft ausschalten • Taste 2 einmal drücken, oder wenn kein Alarm ausgelöst wurde:
• Taste 2 länger als zwei Sekunden lang 2 x optisch und akustisch
drücken, um das akustische Signal zu wenn Alarm ausgelöst wurde:
unterdrücken 4 x optisch und akustisch
LED blinkt nicht mehr
Warnblinken einschalten • Zündung einschalten Warnblinken
• Taste 1 und 2 gleichzeitig drücken
Warnblinken ausschalten • Taste 1 einmal drücken
Panikalarm einschalten • Zündung ausschalten optisch und akustisch
• Taste 1 und 2 gleichzeitig drücken für ca. 60 Sekunden
Panikalarm ausschalten • Taste 1 einmal drücken
Sleep-Funktion einschalten • Zündung einschalten 1x optisch und akustisch
• Taste 2 mindestens zwei Sekunden lang
gedrückt halten
Sleep-Funktion ausschalten • Zündung einschalten 2 x optisch und akustisch
• Taste 2 mindestens zwei Sekunden lang
gedrückt halten
DEUTSCH
Fernbedienung
Die Bedienung der Alarmanlage erfolgt ausschließlich über die mitgelieferte
Fernbedienung. Wenn die Leuchtstärke der LED-Anzeige nachlässt oder die
Reichweite des Funksignals geringer wird, ist die Batterie zu ersetzen (Typ
A23). Setzen Sie die Fernbedienung nicht extremer Hitze oder Nässe aus.
Hinweise zur Installation
Es wird empfohlen, den Einbau der KTM Alarmanlage von einer KTM
Motorradwerkstatt durchführen zu lassen. 3
Bedienung der Alarmanlage

DEUTSCH
Bedeutung der Anschlusskabel
1. rot +12V Spannungsversorgung
2. schwarz Masseanschluss (-)
3. blau Abtastung der Betriebsspannung für den Zündkreis
4. grün Unterbrecherrelais der Wegfahrsperre (max. 15A)
5. weiß Unterbrecherrelais der Wegfahrsperre (max. 15A)
6. gelb (2mal) Blinkgeber
7. braun (dünn) Empfangs-Antenne
8. gelbe Steckerschleife Aktivierung der Notstromversorgung
9. schwarz, geschirmte LED Anschluss
Leitung
10. schwarz/rot Anschluss für Funk-Alarmruf
Inbetriebnahme des Alarmsystems:
Nach dem Anschließen der Betriebsspannung (verbinden der Anlage mit
dem Kabelbaum) schaltet sich die Alarmanlage in den geschärften Zustand.
Den Alarm mit Taste 2 der Fernbedienung abstellen, und am Motorrad das
Zündschloss einmal ein- und wieder ausschalten. Schließen Sie nun die
gelbe Steckschleife. Ihre KTM Alarmanlage ist jetzt betriebsbereit.
Inbetriebnahme der Notstromversorgung
Durch das Zusammenstecken der gelben Steckschleife (8) wird die interne
Akku-Notstromversorgung aktiviert. Der Akku wird nur bei eingeschalteter
Zündung automatisch geladen und übernimmt bei abgeklemmter Batterie
oder Sabotage an der Motorradelektrik die Versorgung der Alarmanlage.
HINWEIS:
Um den Akku vollständig zu laden werden ca. 8 Stunden benötigt (bei ein-
geschalteter Zündung!).
Wird die Motorradbatterie (z.B. im Winter) für längere Zeit abgeklemmt,
sollte die Alarmanlage stillgelegt werden, um eine Tiefentladung des Not-
stromakkus zu verhindern.
Einstellen der Sensor-Empfindlichkeit
Passen Sie mit Hilfe der Fernbedienung die Empfindlichkeit der Sensorik an
das Gewicht Ihres Motorrades und Ihre persönlichen Bedürfnisse an. Um
eine gleich bleibende Empfindlichkeit der Alarmanlage über das gesamte
Motorrad zu erreichen, muss das Gehäuse der Alarmanlage guten mechani-
schen Kontakt zum Motorradrahmen haben. Kleben Sie die Alarmanlagen-
steuereinheit also an Rahmenteile. Falls dies nicht möglich ist (runde Rah-
menteile), so kleben Sie die Anlage neben den Rahmen und stellen den
Kontakt zum Rahmen mit einem oder mehreren Kabelbindern her. Das ein-
fache Aufkleben der Alarmanlage auf Verkleidungsteile erhöht die Gefahr
von Fehlalarmen, da diese zum Mitschwingen neigen. Außerdem ist die
Empfindlichkeit an verschiedenen Stellen des Motorrades dann sehr unter-
schiedlich.
4
Bedienungsschritt Quittersignal
1. Zündung einschalten -
2. Taste 1 gedrückt halten - 3 x optisch und akustisch
mindestens zwei Sekunden lang
3. Taste 1 drücken - 1 x optisch und akustisch,
die Empfindlichkeit wird erhöht wenn die höchste Empfindlichkeitsstufe bereits erreicht ist: 1 x optisch
Taste 2 drücken - 1 x optisch und akustisch,
die Empfindlichkeit wird gesenkt wenn die niedrigste Empfindlichkeitsstufe bereits erreicht ist: 1 x optisch
4. Wenn die Einstellung beendet ist - 2 x optisch und akustisch
etwa 5 Sekunden warten, die gewählte kurze Pause
Einstellung wird gespeichert mehrmals optisch. Die Anzahl der Signale entspricht der eingestellten
Empfindlichkeit

DEUTSCH
Stillegen der KTM Alarmanlage
Wird die Alarmanlage länger als einige Stunden von der Fahrzeugbatterie
getrennt, sollte die Anlage nach folgendem Muster stillgelegt werden, um
eine schädliche Tiefentladung des eingebauten Notstromakkus zu vermei-
den:
1. Anlage unscharf schalten.
2. Die gelbe Steckschleife öffnen und Steuereinheit am ATX Stecker trennen.
3. An der Fernbedienung die Taste (2) 3 Sekunden drücken, dabei muss die
Fernbedienung auf der Steuereinheit liegen.
Es erfolgt eine akustische Quittung beim Tastendruck und danach keine
weiteren Signale.
Die KTM Alarmanlage ist jetzt stillgelegt.
Zum Reaktivieren der Alarmanlage verbinden Sie die Steuereinheit wieder
mit dem ATX Stecker und schließen die gelbe Steckschleife.
Nachbestellen einer Ersatzfernbedienung
Im Falle einer verlorenen oder beschädigten Fernbedienung können Sie bei
KTM Ersatzfernbedienungen bestellen. Das Anfertigen einer Ersatzfernbe-
dienung ist nur nach schriftlicher Bestellung unter Beilage einer Kopie des
Kaufnachweises und Angabe der Seriennummer des Alarmsystems möglich.
Notieren Sie daher zu Ihrer Sicherheit die Codenummer ihrer KTM Alarman-
lage! Die richtige Nummer finden Sie auf dem Aufkleber auf der Fernbedie-
nungsrückseite.
Meine Codenummer: S/N A______________________________
5
Problem Ursache Abhilfe
Anlage zeigt keinerlei Reaktion • keine Betriebsspannung an der Alarmanlage • Korrekten Anschluss und Kontakt des roten
und schwarzen Kabels prüfen
• Motorradbatterie ist leer oder hat durch • Batterie aufladen
Kälte zu geringe Spannung
Anlage reagiert nicht auf • Batterie der Fernbedienung leer • Batterie wechseln (Typ A23)
Fernbedienung (LED leuchtet nicht/nur schwach)
• Reichweite der Fernbedienung überschritten • Näher an das Motorrad herangehen
(ca. 30m)
• Sleep-Mode ist eingeschaltet • Sleep-Mode ausschalten
Sehr geringe Reichweite der • Batterie der Fernbedienung leer • Batterie wechseln (Typ A23)
Fernbedienung (LED leuchtet nur schwach)
• Empfangsantenne abgerissen • Anlage zur Reparatur einsenden
• Empfangsantenne in geschlossenem Metall- • Antenne anders verlegen, auf mehr
gehäuse verlegt Abstand zu Metallteilen achten
Sirene klingt merkwürdig oder ist • Die interne Sirene ist beschädigt • Anlage zur Reparatur einsenden
(auch nicht abgedeckt) sehr leise • Wasser in Schallaustrittsöffnung • Anlage so einbauen, dass Wasser aus der
Schallaustrittsöffnung ablaufen kann
Notstromversorgung funktioniert • Gelbe Steckschleife offen • Gelbe Steckschleife schließen
nicht • Akku entladen • Akku aufladen (ca. 8h bei eingeschalteter
Zündung
Zu kurze Alarmdauer, • Akku nicht ausreichend geladen • Akku aufladen(ca. 8h bei eingeschalteter
ungewöhnlicher Sirenenton Zündung
Selbstschärfung trotz eingeschalteter • Blaues Kabel enthält keine 12V bei ein- • Spannung am blauen Kabel bei eingesch-
Zündung geschalteter Zündung alteter Zündung messen , ggf. anderen
Anschlußpunkt wählen.
Auslösung der WfS • Kabelbruch • Kabel unter Zugbelastung auf Durchgang
bei laufendem Motor prüfen, ggf. Kabel auswechseln
• Wackelkontakte • Sicheren Kontakt aller elektrischen
Anschlüsse überprüfen
Gelegentliche Fehlalarme • Sensibilität zu hoch • Niedrigere Empfindlichkeitsstufe wählen
• Motor „knackt“ beim Abkühlen • Anderen Einbauort wählen
• Wackelkontakt in der Kontaktschleife • Verbindung der Kontaktschleife überprüfen
Anlage reagiert zu unempfindlich • Sensibilität zu gering • Höhere Empfindlichkeitsstufe wählen
• Ungünstige Einbauposition • Andere Einbauposition wählen
Fehlerbehebung

ENGLISH
KTM alarm system functions
The alarm is activated upon impact, vibrations, tilting and ignition lock tam-
pering
–2-axle digital tilt sensor with vibration sensor
– Self-arming 5 minutes after the ignition is switched off or manual arming
by remote control
–Sensitivity is adjustable in four stages via remote control
–Integrated accumulator battery for emergency power to protect the alarm
system from tampering
– Ignition monitoring and "Safety Ride Logic“ electronic immobilizer
prevents the immobilizer from being activated while driving
–Your choice of acoustic and optical or only optical alarm
– Integrated piezoelectric 110dB siren
–Hazard warning function
–Alarm reset, the system resets itself after the alarm is activated
– "Pre-Alarm“ and "Alarm Memory“
– Motorcycle search function and panic alarm with acoustic and optical
signal
– Piezoelectric sensor technology makes it possible to mount the control
unit in any position
Scope of supply
–Alarm console with integrated immobilizer, siren, alarm sensor techno
logy and emergency power supply
–Radio remote control
–Wiring harness
–Installation and operating instructions
–Adhesive pad to mount the alarm console
Technical data
Remote control
Operating voltage: 12V battery (type A23)
Range: > 30 m
Transmitter frequency: 433,92 MHz
Control unit
Operating voltage: DC 12V (10,8...15,6 V)
Power consumption: approx. 2mA (armed)
Operating temperature: -15° C ... +55° C
Special functions of the KTM alarm system
Pre-alarm
–Abrief siren warning is triggered after one vibration.
–Asecond vibration within 10 seconds will trigger a loud 20-second
alarm. The alarm system will re-arm itself after the alarm sounds.
–A20-second alarm instead of a pre-alarm will sound if the alarm is
triggered by the tilt sensor or due to tampering with the electric ignition
system.
Alarm memory
–Each activation of the alarm is stored and an optical and acoustic signal
given when the alarm alert is switched off.
Panic alarm
–The siren and flasher lights are activated for approx. 60 seconds.
Hazard warning signal
–The hazard warning function can be activated with the remote control
when the ignition is switched on. Therefore it will not be necessary to
install an additional emergency flasher relay.
Sleep function
–To switch off the alarm and immobilizer function or the system's
self-arming function for service purposes (e.g. maintenance at a workshop).
Blink LED
–The LED will blink as long as the alarm system is armed.
6

Desired function Procedure Acknowledgement signal
Arming the alarm • Switch off the ignition 1 x optical and acoustic
Alarm signal via the siren, flasher • The system will arm itself after 5 minutes or LED will blink (frequency approx. 2Hz)
lights and radio alarm signal (accessory) Press button 1 once
• Press button 1 once
Switching on the silent alarm • Switch off the ignition 1 x optical and acoustic
The alarm is only given via the • Press button 1 twice in succession and
radio alarm signal (accessory) Note: by repeatedly pressing button 1 you 1 x optical
will alternate between the "loud“ and
"silent“ alarm mode LED will blink (frequency approx. 2Hz)
Disarming the alarm • Press button 2 once or if no alarm is triggered:
• Press button 2 longer than two seconds 2 x optical and acoustic
to suppress the acoustic signal if an alarm was triggered:
4 x optical and acoustic
LED will no longer blink
Switching on the hazard warning light • Switch on the ignition Warning hazard lights will blink
• Simultaneously press buttons 1 and 2
Switching off the hazard warning light • Press button 1 once
Switching on the panic alarm • Switch off the ignition optical and acoustic
• Simultaneously press buttons 1 and 2 for approx. 60 seconds
Switching off the panic alarm • Press button 1 once
Switching on the sleep function • Switch on the ignition 1x optical and acoustic
• Press button 2 and hold for at least
two seconds
Switching off the sleep function • Switch on the ignition 2 x optical and acoustic
• Press button 2 and hold for at least
two seconds
ENGLISH
Remote control
The alarm system can only be operated by means of the remote control
included in the scope of supply. The battery (type A23) needs to be repla-
ced if the light output of the LED display becomes weak or the reach of the
radio signal becomes smaller. Do not expose the remote control to extreme
heat or moisture.
Note on installation
It is recommended to have the KTM alarm system installed by a KTM
motorcycle workshop.
7
Operation of the alarm system

ENGLISH
Description of connecting cables
1. red +12V voltage supply
2. black ground connection (-)
3. blue scanning the operating voltage for the ignition
circuit
4. green contact breaker relay for the immobilizer (max.
15A)
5. white contract breaker relay for the immobilizer (max.
15A)
6. yellow (two) flasher unit
7. brown (thin) reception antenna
8. yellow connector loop activation of the emergency power supply
9. black shielded wire LED connection
10. black/red connection for the radio alarm signal
Initial start-up of the alarm system:
The alarm system will arm itself after being connected to the operating vol-
tage (to the wiring harness). Switch off the alarm by pressing button 2 on
the remote control and switch the ignition on the motorcycle on once and
off again. Now close the yellow connector loop. Your KTM alarm system is
ready for operation.
Initial start-up of the emergency power supply
The internal accumulator emergency power supply is activated by connec-
ting the yellow connector loop (8). The accumulator is automatically char-
ged when the ignition is on and will supply power to the alarm system if the
battery is disconnected or the motorcycle's electric system is tampered with.
NOTE:
It will take approx. 8 hours to completely charge the accumulator battery
(with the ignition switched on!).
If the motorcycle battery is disconnected for longer periods of time (e.g.
during the winter), the alarm system should be immobilized to prevent the
emergency power battery from running down.
Adjusting the sensitivity of the sensor
Use the remote control to adapt the sensitivity of the sensory system to the
weight of your motorcycle and your personal requirements. To achieve a
constant sensitivity of the alarm system for the entire motorcycle, the alarm
system housing should have a good mechanical contact to the motorcycle
frame; glue the alarm system control unit to the frame components. If this is
not possible (round frame components) glue the system next to the frame
and establish the contact to the frame by means of one or more cable clips.
Simply gluing the alarm system to the trim molding will increase the risk of
false alarms since the molding tends to resonate. In addition, it will cause
the sensitivity to vary at different points on the motorcycle.
8
Operating step Acknowledgement signal
1. Switch on the ignition -
2. Press button I and hold 3 x optical and acoustic
for at least two seconds
3. Press button I - 1 x optical and acoustic,
sensitivity is increased when you reach the highest sensitivity level: 1 x optical
Press button II - 1 x optical and acoustic,
sensitivity is reduced when you reach the lowest sensitivity level: 1 x optical
4. After completing the adjustment - 2 x optical and acoustic
wait approx. 5 seconds, the brief pause
adjustment will be stored several optical signals. The number of signals will correspond to the
sensitivity setting.

ENGLISH
Immobilizing the KTM alarm system
If the alarm system is disconnected from the battery for more than several
hours, the system should be immobilized as described below to prevent an
exhaustive discharge of the built-in emergency power accumulator battery:
1. Disarm the system.
2. Open the yellow connector loop and disconnect the control unit at
the ATX connector.
3. Press button (2) on the remote control for 3 seconds; the remote
control should be placed on the control unit.
An acoustic acknowledgement will sound when the button is pressed;
no other signals will follow.
The KTM alarm system is now immobilized.
To reactivate the alarm system, connect the control unit with the ATX
connector and close the yellow connector loop.
Reordering a new remote control
If your remote control is lost or damaged, you can order a replacement from
KTM. A new remote control will only be provided upon receiving your writ-
ten order, enclosing a copy of the proof of purchase and the serial number
of the alarm system. Write down the code number of your KTM alarm
system and keep in with your records. The number is printed on the label
on the back of the remote control.
My code number: S/N A______________________________
9
Problem Cause Remedy
The alarm system does not react • No operating voltage to the alarm system • Check for correct connection and contact of
the red and black cables
• The motorcycle battery is empty or • Charge the battery
has too little voltage due to the cold
The alarm system does not react to • Battery in the remote control is empty • Replace the battery (type A23)
the remote control (LED does not light up / lights up weakly)
• Out of the remote control range (over • Move closer to the motorcycle
approx. 30m)
• Sleep mode is switched on • Switch off the sleep mode
The remote control does not • Battery in the remote control is empty • Replace the battery (type A23)
have enough range (LED lights up weakly)
• Reception antenna is torn off • Send the system in for repair
• Reception antenna is positioned in a closed • Position the antenna differently, increasing
metal housing the distance to metal parts
The siren sounds unusual or • The internal siren is damaged • Send the system in for repair
is too faint (even uncovered) • Water in the sound projector • Install the system to allow water to drain
from the sound projector
The emergency power supply does • Open the yellow connector loop • Close the yellow connector loop
not function • Load the accumulator battery • Load the accumulator battery (approx.
8 hours with the ignition switched on)
The length of the alarm is too short, • Accumulator battery is not fully charged • Charge the accumulator battery (approx.
unusual siren sound when using 8 hours with the ignition switched on)
emergency power
Self-arming while the ignition is • The blue cable is not receiving 12V when • Measure the voltage on the blue cable with
switched on the ignition is switched on the ignition on; select another terminal
if necessary
The immobilizer is activated • Cable rupture • Check the cable with a tensile load for
while the engine is switched on continuity, replace the cable if necessary
• Loose contact • Check all electric connections for a good
contact
Occasional false alarms • Sensitivity level is too high • Select a lower sensitivity level
• The engine "crackles“ when cooling • Select a different installation position
• Loose contacts in the contact loop • Check the contact loop connectors
The system is too insensitive • Sensitivity level is too low • Select a higher sensitivity level
• Unfavorable installation position • Select a different installation position
Troubleshooting

ITALIANO
Funzioni dell'allarme antifurto KTM
L'allarme scatta in caso di urto, scosse, inclinazione ed azionamento non
autorizzato dell'interruttore d'accensione.
–Sensore d'inclinazione digitale a 2 assi con sensore di scuotimento
– Inserimento automatico 5 minuti dopo lo spegnimento dell'accensione
oppure azionamento manuale per telecomando
–Sensibilità regolabile a quattro livelli da telecomando
–Protezione antisabotaggio dell'allarme antifurto attraverso alimentazione
elettrica d'emergenza da accumulatore
– Controllo circuito d'accensione e blocco motore elettronico, "Safety-
Ride-Logic" che impedisce l'attivazione del blocco motore durante la
guida
–Ascelta allarme acustico ed ottico oppure solo ottico
– Sirena piezoelettrica con 110 dB
–Funzione di lampeggio d'emergenza
–Reset dell'allarme, dopo un allarme l'impianto si reinserisce
automaticamente
– Pre-allarme e memoria d'allarme
– Funzione di localizzazione motocicletta ed allarme panico con segnale
acustico ed ottico
– Sensori piezoelettrici permettono qualsiasi posizione di montaggio dell'u
nità di comando
Volume della fornitura
–Impianto d'allarme con blocco motore integrato, sirena, sensori d'allarme
e alimentazione elettrica d'emergenza
–Un radiotelecomando
–Kit cavi di installazione
–Istruzioni di montaggio ed uso
–Nastro biadesivo per il fissaggio dell'impianto d'allarme
Dati tecnici
Telecomando
Tensione d'esercizio: batteria da 12V (tipo A23)
Raggio d'azione: > 30 m
Frequenza di trasmissione: 433,92 MHz
Unità di comando
Tensione d'esercizio: DC 12V (10,8...15,6 V)
Consumo di corrente: ca. 2mA (in stato d'allarme)
Temperatura d'esercizio: -15o C ... +55o C
Funzioni speciali dell'allarme antifurto KTM
Pre-allarme
–In caso di una singola scossa scatta un breve segnale di sirena.
–Al secondo scatto di un allarme entro 10 secondi avviene un allarme ad
alto volume di 20 secondi. Al termine dell'allarme acustico l'impianto si
reinserisce automaticamente.
–In caso di scatto dell'allarme attraverso il sensore di inclinazione oppure
per una manipolazione del circuito di accensione non viene innescato un
pre-allarme, ma subito un allarme di 20 secondi.
Memoria d'allarme
–Ogni scatto di un allarme viene memorizzato ed alla disattivazione dello
stato d'allarme segnalato in modo ottico ed acustico.
Allarme panico
–Scatto della sirena e degli indicatori di direzione per ca. 60 secondi.
Lampeggio d'emergenza
–Ad accensione inserita è possibile attivare con il telecomando la funzione
del lampeggio d'emergenza. Il montaggio di un addizionale relè per
lampeggio d'emergenza quindi non è necessario.
Funzione sleep-mode
–Disattivazione della funzione d'allarme e di blocco motore ossia
dell'inserimento automatico dell'impianto per motivi di manutenzione
(p.es. lavori in officina).
Led lampeggiante
–Il led lampeggia quando l'impianto è in stato d'allarme.
10

Funzione desiderata Passi operativi necessari Segnale di conferma
inserimento stato d'allarme, allarme • disinserire l'accensione 1 x ottico ed acustico
attraverso sirena, indicatori e radioallarme • dopo 5 minuti l'impianto s'inserisce il led lampeggia (frequenza ca. 2Hz)
(accessorio) automaticamente, oppure
• premere una volta il tasto 1
inserimento allarme silenzioso, • disinserire l'accensione 1 x ottico ed acustico
scatta solo il radioallarme (accessorio) • premere due volte di seguito il tasto 1 e
Avvertenza: premendo più volte il tasto 1 si 1 x ottico
cambia rispettivamente tra allarme
"acustico" ed allarme "silenzioso" il led lampeggia (frequenza ca. 2Hz)
disattivazione stato d'allarme • premere una volta il tasto 2, oppure se non è scattato un allarme:
• premere il tasto 2 per più di due secondi per 2 x ottico ed acustico
sopprimere il segnale acustico se è scattato un allarme:
4 x ottico ed acustico
il led non lampeggia più
attivazione lampeggio d'emergenza • inserire l'accensione lampeggio d'emergenza
• premere contemporaneamente i tasti 1 e 2
disattivazione lampeggio d'emergenza • premere una volta il tasto 1
attivazione allarme panico • disinserire l'accensione ottico ed acustico
• premere contemporaneamente i tasti 1 e 2 per ca. 60 secondi
disattivazione allarme panico • premere una volta il tasto 1
attivazione sleep-mode • inserire l'accensione 1x ottico ed acustico
• tener premuto il tasto 2 almeno per due
secondi
disattivazione sleep-mode • inserire l'accensione 2 x ottico ed acustico
• tener premuto il tasto 2 almeno per due
secondi
ITALIANO
Telecomando
Il comando dell'impianto d'allarme avviene esclusivamente attraverso il tele-
comando in dotazione. Quando diminuisce la luminosità del led o il raggio
d'azione del segnale radio, la batteria (tipo A23) va sostituita. Non esporre il
telecomando ad estremo calore o umidità.
Avvertenze per l'installazione
Si raccomanda di far eseguire l'installazione dell'allarme antifurto KTM in
un'officina specializzata KTM.
11
Uso dell'allarme antifurto

ITALIANO
Significato dei cavi di collegamento
1. rosso tensione di alimentazione +12V
2. nero collegamento a massa (-)
3. blu esplorazione della tensione di esercizio per il circuito
di accensione
4. verde relè di interruzione del blocco motore (max. 15A)
5. bianco relè di interruzione del blocco motore (max. 15A)
6. giallo (2x) intermittenza indicatori di direzione
7. marrone (sottile) antenna di ricezione
8. cappio giallo attivazione dell'alimentazione elettrica d'emergenza
9. nero schermato collegamento led
10. nero/rosso collegamento per radioallarme
Messa in servizio del sistema d'allarme:
Dopo il collegamento della tensione di esercizio (collegamento dell'impianto
al cablaggio) l'impianto d'allarme attiva lo stato di allarme. Disattivare lo
stato d'allarme con il tasto 2 del telecomando e accendere e spegnere una
volta l'accensione della motocicletta. Chiudere il cappio di cavi gialli.
L'allarme antifurto KTM ora è pronto per il servizio.
Messa in servizio dell'alimentazione elettrica d'emergenza
Chiudendo il cappio di cavi gialli (8) si attiva l'alimentazione elettrica d'e-
mergenza da accumulatore. L'accumulatore viene caricato automaticamente
solo ad accensione inserita e provvede all'alimentazione elettrica dell'impi-
anto d'allarme in caso di batteria staccata o di sabotaggio all'impianto
elettrico della motocicletta.
AVVERTENZA:
La ricarica completa dell'accumulatore dura ca. 8 ore (ad accensione inse-
rita!).
Se la batteria della motocicletta viene staccata per un lungo periodo di
tempo (p.es. d'inverno), è consigliabile disattivare l'allarme antifurto per evi-
tare la scarica completa dell'accumulatore.
Regolazione della sensibilità dei sensori
Mediante il telecomando adattare la sensibilità dei sensori al peso della pro-
pria motocicletta ed alle esigenze personali. Per avere una sensibilità
costante dell'allarme antifurto su tutta la motocicletta, la scatola dell'impi-
anto deve avere un buon contatto meccanico con il telaio della moto.
Incollate quindi l'unità di comando su parti del telaio. Nel caso ciò non fosse
possibile (parti rotonde del telaio), incollare l'impianto a fianco del telaio e
stabilire il contatto con il telaio con uno o più fascette serratavi. Il semplice
incollaggio dell'allarme antifurto su rivestimenti aumenta il rischio di falsi
allarmi perché questi pezzi tendono a co-vibrare. Inoltre la sensibilità varie-
rebbe notevolmente in diversi punti della motocicletta.
12
Passo operativo Segnale di conferma
1. Inserire l'accensione -
2. Tener premuto il tasto I - 3 x ottico ed acustico
almeno per due secondi
3. Premere il tasto I - 1 x ottico ed acustico,
la sensibilità aumenta quando è già raggiunto il massimo livello di sensibilità: 1 x ottico
Premere il tasto II - 1 x ottico ed acustico,
la sensibilità diminuisce quando è già raggiunto il minimo livello di sensibilità: 1 x ottico
4. A regolazione terminata - 2 x ottico ed acustico
attendere ca. 5 secondi, la breve pausa
regolazione scelta viene salvata più volte ottico. Il numero dei segnali corrisponde alla sensibilità regolata.

ITALIANO
Disattivazione dell'allarme antifurto KTM
Quando l'allarme antifurto viene staccato dalla batteria del veicolo per più
di alcune ore, l'impianto dovrebbe essere disattivato come descritto di
seguito onde evitare una dannosa scarica completa dell'accumulatore inte-
grato per l'alimentazione elettrica d'emergenza:
1. Disattivare lo stato d'allarme.
2. Aprire il cappio di cavi gialli e staccare l'unità di comando dal connettore
ATX.
3. Sul telecomando premere il tasto (2) per 3 secondi, per fare questo il
telecomando deve essere appoggiato sull'unità di comando.
Alla pressione del tasto viene emessa una conferma acustica alla quale
non seguono altri segnali.
L'allarme antifurto KTM ora è disattivato.
Per riattivare l'allarme antifurto collegare l'unità di comando di nuovo con il
connettore ATX e richiudere il cappio di cavi gialli.
Riordine di un telecomando
In caso di perdita o danneggiamento del telecomando è possibile riordinare
un telecomando alla KTM. La preparazione di un telecomando di sostitu-
zione è possibile solo su ordine scritto con allegata una copia della prova
d'acquisto e con l'indicazione del numero di serie dell'impianto d'allarme.
Per sicurezza annotarsi sempre il codice del proprio allarme antifurto KTM! Il
codice giusto si trova sull'adesivo sul retro del telecomando.
Il mio codice di serie: S/N A______________________________
13
Disturbo Causa Rimedio
l'impianto non ha nessuna reazione • non c'è tensione d'esercizio all'impianto • verificare il corretto collegamento e contatto
d'allarme dei cavi rosso e nero
• la batteria della moto è scarica oppure ha • ricaricare la batteria
una tensione troppo bassa a causa del freddo
l'impianto non reagisce al • la batteria del telecomando è scarica • sostituire la batteria (tipo A23)
telecomando (il led non s'illumina/s'illumina solo debolmente)
• è stato superato il raggio d'azione del • avvicinarsi di più alla motocicletta
telecomando (oltre ca. 30m)
• è attivato lo sleep-mode • disattivare lo sleep-mode
raggio d'azione del • la batteria del telecomando è scarica • sostituire la batteria (tipo A23)
telecomando molto corto (il led s'illumina solo debolmente)
• l'antenna di ricezione è strappata • inviare l'impianto per la riparazione
• l'antenna di ricezione è posata in una • posare l'antenna diversamente facendo
scatola di metallo chiusa attenzione ad una sufficiente distanza da parti
metalliche
la sirena suona strana o • la sirena interna è danneggiata • inviare l'impianto per la riparazione
molto bassa (anche non coperta) • c'è acqua nell'apertura di uscita del • installare l'impianto in modo tale che l'acqua
suono possa defluire dall'apertura d'uscita del suono
l'alimentazione elettrica • il cappio di cavi gialli è aperto • chiudere il cappio di cavi gialli
d'emergenza non funziona • l'accumulatore è scarico • ricaricare l'accumulatore
(dura ca. 8 ore ad accensione inserita)
durata d'allarme troppo breve, • l'accumulatore non è sufficientemente carico • ricaricare l'accumulatore
suono della sirena strano in (dura ca. 8 ore ad accensione inserita)
caso di alimentazione d'emergenza
autoinserimento nonostante • il cavo blu non riceve 12V con • ad accensione inserita misurare la tensione
sia inserita l'accensione l'accensione inserita al cavo blu, eventualmente cambiare il punto
di collegamento
attivazione del blocco • rottura del cavo • sotto carico di trazione controllare la
motore a motore acceso continuità del cavo, eventualmente sostituirlo
• contatti difettosi • verificare la stabilità di tutti i contatti elettrici
occasionali falsi allarmi • sensibilità troppo alta • regolare un livello di sensibilità più basso
• il motore emette rumori al raffreddamento • scegliere un altro posto per l'installazione
• contatti difettosi nel circuito di contatto • verificare i contatti nel circuito di contatto
l'impianto reagisce con poca • sensibilità troppo bassa • regolare un livello di sensibilità più alto
sensibilità • posizione di montaggio sfavorevole • scegliere un'altra posizione di montaggio
Eliminazione disturbi

FRANCAIS
Fonctions de l’alarme KTM
Déclenchement de l’alarme en cas de choc, de secousse, d’inclinaison ou
d’actionnement mal intentionné du contacteur d’allumage.
–Capteur d’inclinaison numérique à deux axes et capteur de secousse
–Armement automatique 5 mn après que l’on a coupé l’allumage ou
armement manuel par télécommande
–Sensibilité réglable en quatre degrés par la télécommande
–Autoprotection de l’alarme par pile intégrée en cas de coupure de
courant
–La surveillance du circuit d’allumage et l’anti-démarrage électronique
« Safety-Ride-Logic »empêche que l’anti-démarrage s’active alors qu’on
roule
–Au choix alarme acoustique et optique ou simplement optique
–Sirène piezo de 110 dB intégrée
–Activation des clignotants
–Réarmement après un déclenchement
–Pré-alarme et « Alarm-Memory »
–Fonction de recherche de la moto et fonction panique avec signal
acoustique et optique
–Le capteur piezo permet toute position de montage du boîtier de com
mande
Kit de montage
–Boîtier d’alarme avec anti-démarrage, sirène, capteur et alimentation
d’autoprotection intégrés
–Télécommande
–Faisceau
–Notice d’installation et d’utilisation
–Patch de fixation du boîtier
Caractéristiques techniques
Télécommande
Alimentation : pile 12 V (type A23)
Rayon d’action : supérieur à 30 m
Fréquence d’émission : 433,92 MHz
Boîtier de commande
Tension : continu 12 V (10,8 ... 15,6 V)
Consommation : env. 2 mA (en veille)
Fonctionne entre -150° C et + 550° C
Fonctions spéciales de l’alarme KTM
Pré-alarme
–En cas de secousse unique, la sirène émet un court avertissement.
–Au cas où la sollicitation se reproduit dans les 10 secondes suivantes,
l’alarme déclenche la sirène pendant 20 secondes. Puis elle s’arme à
nouveau.
–Si la sollicitation se fait par inclinaison de la machine ou intervention sur
le circuit d’allumage, il n’y a pas de pré-alarme mais déclenchement
immédiat pour 20 secondes.
Alarm-Memory
–Chaque déclenchement est enregistré et signalé de manière sonore et
optique quand on coupe l’alarme.
Fonction panique
– Déclenchement de la sirène et des clignotants pendant environ 60
secondes.
Feux de détresse
– Lorsque l’allumage est mis on peut activer les feux de détresse au moyen
de la télécommande. Il n’est donc pas nécessaire de monter un relais
supplémentaire.
Fonction sommeil
– Il est possible de neutraliser l’alarme et l’anti-démarrage, de même que
l’armement automatique, pour faire l’entretien de la moto (par exemple
à l’atelier).
Led
–La led clignote tant que l’alarme est branchée.
14

Fonction souhaitée Démarche Signal obtenu
Armer l’alarme • Couper l’allumage 1 x optique et sonore
Alarme par sirène, clignotants et par radio • Au bout de 5 mn l’alarme s’arme toute seule la led clignote (fréquence env. 2 Hz)
(au titre des accessoires) ou bien
• Appuyer une fois sur la touche 1
Armer l’alarme, mais qui restera silencieuse • Couper l’allumage 1 x optique et sonore
et ne déclenchera que l’appel radio • Appuyer deux fois sur la touche 1 et
(accessoire) Nota bene : chaque fois qu’on appuie sur la 1 x optique
touche 1 on passe d’alarme sonore à alarme
silencieuse la led clignote (fréquence env. 2 Hz)
Couper l’alarme • Appuyer une fois sur la touche 2 ou bien Si l’alarme ne s’est pas déclenchée :
• Appuyer au moins deux secondes sur la 2 x optique et sonore
dtouche deux afin de neutraliser l’indication Si l’alarme s’est déclenchée :
sonore 4 x optique et sonore
La led ne clignote plus
Brancher l’alarme pour qu’elle se fasse par • Brancher l’allumage Clignotants
les clignotants • Appuyer en même temps sur les touches 1 et 2
Couper l’alarme par les clignotants • Appuyer une fois sur la touche 1
Armer l’alarme panique • Couper l’allumage optique et sonore pendant
• Appuyer en même temps sur les touches 1 et 2 environ 60 secondes
Couper l’alarme panique • Appuyer une fois sur la touche 1
Activer la fonction sommeil • Brancher l’allumage 1x optique et sonore
• Appuyer au moins deux secondes sur la
touche 2
Désactiver la fonction sommeil • Brancher l’allumage 2 x optique et sonore
• Appuyer au moins deux secondes sur la
touche 2
FRANCAIS
Télécommande
La commande de l’alarme s’effectue uniquement au moyen de la télécom-
mande livrée dans le kit. Quand la luminosité de la led diminue ou que la
portée de la télécommande diminue, il faut changer la pile (type A23). Ne
pas exposer la télécommande à une chaleur élevée ou à l’humidité.
Conseils d’installation
Il est conseillé de confier l’installation de l’alarme KTM à un atelier KTM.
15
Utilisation de l'alarme

FRANCAIS
Repérage des fils
1. rouge Alimentation 12 V (+)
2. noir Masse (-)
3. bleu Indication de la tension pour le circuit d’allumage
4. vert Relais de l’interrupteur de l’anti-démarrage (max. 15 A)
5. blanc Relais de l’interrupteur de l’anti-démarrage (max. 15 A)
6. jaune (deux fois) Centrale clignotante
7. marron (fin) Antenne réceptrice
8. boucle jaune Activation de l’alimentation de secours
9. noir, antiparasité Branchement de la led
10. noir/rouge Branchement pour appel radio
Mise en service de l’alarme
Après branchement (raccordement au faisceau électrique) l’alarme s’arme
d’elle-même. La couper avec la touche 2 de la télécommande et actionner
une fois le contacteur d’allumage de la moto (mettre et couper l’allumage).
Fermer alors la boucle jaune. L’alarme KTM est prête.
Mise en service de l’alimentation de secours
En branchant la boucle jaune (8) on active l’alimentation intégrée par pile.
La pile se charge automatiquement quand l’allumage est branché et se sub-
stitue à l’alimentation générale si l’on débranche la batterie ou sabote le fai-
sceau.
NOTA BENE:
Pour charger entièrement la pile il faut que l’allumage reste mis environ 8
heures.
Si l’on débranche la batterie pour une longue période, par ex. en hiver, il
faut désactiver l’alarme afin d’éviter une décharge profonde de la pile.
Réglage de la sensibilité du capteur
Au moyen de la télécommande on peut régler la sensibilité en fonction du
poids de la moto et des nécessités personnelles. Pour que l’alarme réagisse
de manière égale quelle que soit la partie de la moto à laquelle il est porté
atteinte, il faut que le boîtier de l’alarme ait un bon contact avec le cadre. Il
est donc conseillé de coller le boîtier directement sur le cadre. Si cela est
impossible (tubes ronds), le coller directement près du cadre et établir le lien
avec un ou plusieurs colliers. Si l’on colle le boîtier sur le carénage, on aug-
mente la possibilité de déclenchements intempestifs car un carénage a ten-
dance à répercuter les vibrations. De plus les atteintes aux différentes parties
de la moto sont alors irrégulièrement transmises au boîtier.
16
Démarche Signal obtenu
1. Brancher l’allumage -
2. Appuyer sur la touche 1 pendant au 3 x optique et sonore
moins deux secondes
3. Appuyer sur la touche 1, 1 x optique et sonore,
la sensibilité augmente Quand la plus haute sensibilité est atteinte: 1 x optique
Appuyer sur la touche 2, 1 x optique et sonore,
la sensibilité diminue Quand le minimum de sensibilité est atteint: 1 x optique
4. Quand le réglage est terminé, 2 x optique et sonore
attendre environ 5 secondes pour que le courte pause,
réglage soit enregistré plusieurs fois optique. Le nombre de fois correspond à la sensibilité
enregistrée

FRANCAIS
Désactivation de l’alarme KTM
Si l’on débranche l’alarme de la batterie pour plus de quelques heures il faut
la mettre hors service selon la procédure suivante afin d’éviter une décharge
profonde de la pile, ce qui est préjudiciable à celle-ci :
1. Couper l’alarme.
2. Ouvrir la boucle jaune et débrancher le boîtier de commande à la cosse
ATX.
3. Appuyer 3 secondes sur la touche (2) de la télécommande. La
télécommande doit être alors posée sur le boîtier de commande. On
entend un signal sonore quand on appuie sur la touche puis il ne se
passe plus rien.
L’alarme est désactivée.
Pour réactiver l’alarme, rebrancher la cosse ATX et refermer la boucle
jaune.
Commande d’une télécommande de remplacement
Si l’on vient à perdre la télécommande ou si elle est endommagée, on peut
commander une télécommande de remplacement auprès de KTM. La fabri-
cation d’une télécommande de remplacement ne peut se faire que sur com-
mande écrite accompagnée de la copie de la facture et du numéro de série
de l’alarme. C’est pourquoi, par sécurité, il convient de noter ce numéro. Il
se trouve sur l’autocollant au dos de la télécommande.
Numéro de série de l’alarme : S/N A___________________________
17
Problème Cause Remède
L’alarme ne montre aucune réaction • L’alimentation ne se fait pas • Vérifier les branchements et le contact aux
fils rouge et noir
• La batterie de la moto est vide ou ne donne • Charger la batterie
pas suffisamment en raison du froid
L’alarme ne réagit pas à la • La pile de la télécommande est vide • Changer la pile (type A23)
télécommande (la led s’allume faiblement ou pas du tout)
• Au-delà de la portée de la télécommande • Se rapprocher de la moto
(env. 30 m)
• Alarme en sommeil • Sortir de la fonction sommeil
Très faible portée de la • Pile de la télécommande usée • Changer la pile (type A23)
télécommande (la led s’allume faiblement)
• Antenne arrachée • Envoyer l’alarme en réparation
• Antenne enfermée dans une partie • Positionner l’antenne différemment,
métallique pas trop près des parties métalliques
La sirène a un drôle de bruit ou est • La sirène intégrée est abîmée • Envoyer l’alarme en réparation
faible (sans être recouverte) • Eau dans la sortie du son • Monter l’installation de manière telle
que l’eau puisse ressortir
L’alimentation de secours ne • Boucle jaune ouverte • Fermer la boucle jaune
fonctionne pas • Pile déchargée • Charger la pile (environ 8 h quand
l’allumage est mis)
Alarme trop courte, bruit inhabituel • Pile insuffisamment chargée • Charger la pile(environ 8 h quand
en alimentation de secours l’allumage est mis)
S’arme automatiquement bien • Le fil bleu ne reçoit pas 12 V quand • Mesurer la tension au fil bleu quand
que l’allumage soit mis l’allumage est mis l’allumage est mis. Eventuellement raccorder
différemment
L’anti-démarrage se déclenche quand • Fil coupé • Vérifier que le courant passe dans les fils
le moteur tourne même quand on tire dessus. Changer les fils
si nécessaire
• Faux contacts • Vérifier tous les raccordements
Déclenchement intempestif de • Sensibilité trop grande • Diminuer la sensibilité
temps à autre • Le moteur émet des craquements en • Monter l’alarme à un autre emplacement
refroidissant
• Faux contact dans l’alimentation • Vérifier les raccords
L’alarme ne réagit pas assez • Sensibilité trop faible • Augmenter la sensibilité
• Position de montage peu favorable • Choisir une autre position de montage
Recherche de panne
This manual suits for next models
2
Table of contents
Languages:
Other KTM Security System manuals