manuals.online logo
Brands
  1. Home
  2. •
  3. Brands
  4. •
  5. Kuma Stoves
  6. •
  7. Stove
  8. •
  9. Kuma Stoves K-SEQ Sequoia User manual

Kuma Stoves K-SEQ Sequoia User manual

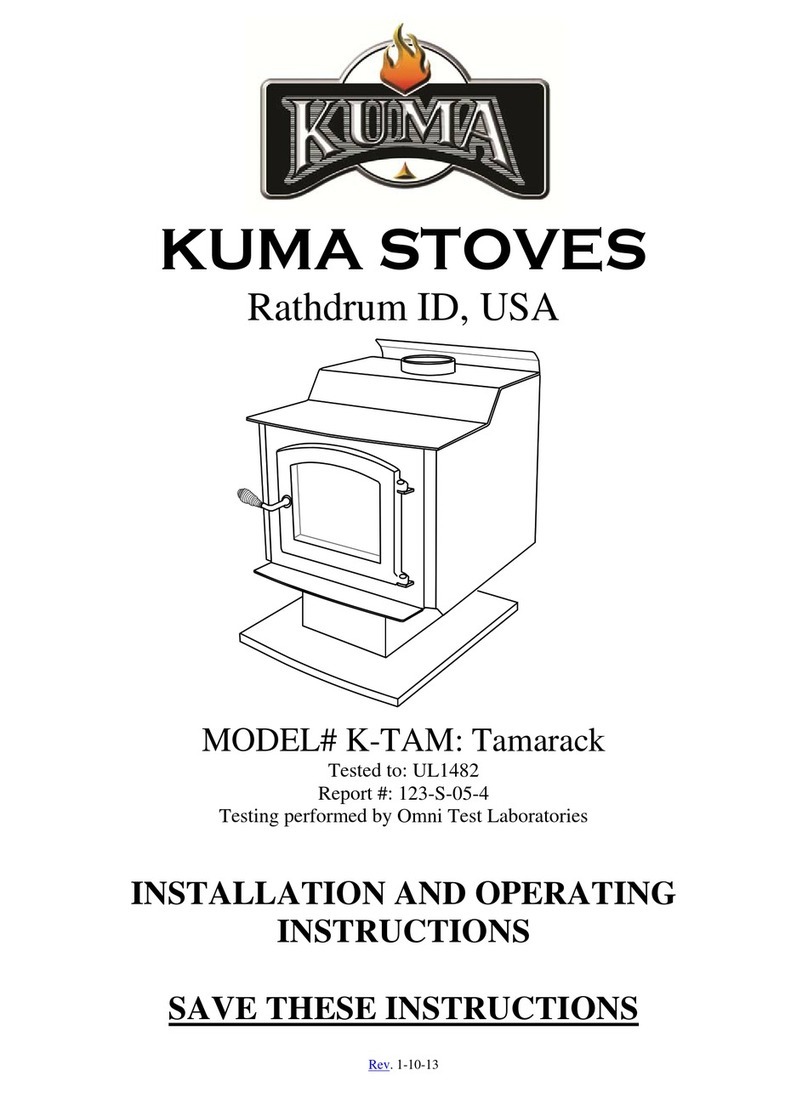
KUMA STOVES
Rathdrum ID, USA
MODEL# K-SEQ: Sequoia
Tested to: UL1482
Report #: 123-S-04-2
Testing performed by Omni Test Laboratories
INSTALLATION AND OPERATING
INSTRUCTIONS
SAVE THESE INSTRUCTIONS
Rev. 4-18-12
2
Welcome to the Kuma family.
Kuma is a modified version of the Greek word Kauma that means
“a great heat”.
We would like to take the time to say thank you for
purchasing a Kuma stove. If this is your first Kuma stove, you
have joined a long list of family members, some since 1981. We
are a family business that still desires to maintain a good
relationship with each and every one of our customers. Our
mission is to provide you with a quality product that will last a
lifetime. If you ever have a problem with your stove, we will do
what is needed to get it resolved and keep you warm.
You may have noticed a portion of the Bible enclosed in your
owner’s packet. It is a small gift for you. Our faith in Jesus Christ
is very important to us and we have that faith because there is hope
in heaven. That hope comes from the message of truth that is found
in this gospel of John.
Thank you for allowing us the opportunity to warm your
house. May God bless you and we anticipate that you will enjoy
the use of your new Kuma wood stove.
Sincerely,
The Freeman Family
3
Under Specific test conditions, this heater has been shown to meet
the U.S. Environmental Protection Agency and Washington State
emission limits for residential wood stoves.
Please read the safety precautions and the entire installation and
operation instructions carefully. Failure to properly install and
maintain your wood stove can result in an unsafe condition.
Contents
Section 1…..………………...………….Safety Precautions
Section 2……….……………………..Catalyst Information
Section 3.1……….. Free Standing Installation Instructions
Section 3.2…………………. Insert Installation Instructions
Section 4……………Wood Burning Operation Instructions
Section 5……………………………………....Maintenance
Section 6…………….Installation Clearances and Diagrams
Section 7………………………………..…Troubleshooting
Section 8…………………………...Replacement Parts List
Section 9……………………………………….…Warranty
Section 10……………………………...…EPA Information
4
5
Section 1– Safety Precautions
6
Install and use in accordance with the manufacturers installation and operation instructions
contained in this manual only.
1. If this stove is not properly installed, a house fire can occur. For your protection, follow the
installation instructions provided. We recommend contacting local building or fire officials
regarding restrictions and installation inspection requirements in your area. We also recommend
that your Kuma model Sequoia stove be installed by a properly trained and licensed
installer, preferably a NFI (National Fireplace Institute) expert.
2. DO NOT CONNECT THIS UNIT TO A CHIMNEY FLUE SERVICING ANOTHER
APPLIANCE.
3. Do not use gasoline, gasoline-type lantern fuel, kerosene, charcoal lighter fluid, or similar liquids
to start or “freshen up” a fire in this heater. Keep all such liquids well away from the heater while
it is in use.
4. Do not burn garbage.
5. DO NOT OVERFIRE. If any part of the stove or chimney glows, the stove is in an overfire
condition. If this happens, shut the air control off immediately.
6. WARNING: DO NOT INSTALL IN A SLEEPING ROOM
7. CAUTION: The structural integrity of the floor, wall and ceiling/roof must be maintained.
8. DO NOT USE SINGLE WALL PIPE FOR ANY CHIMNEY APPLICATION, EXTERIOR
OR THROUGH THE WALL OR CEILING. Single wall pipe may only be used as a
connection between the stove and an approved masonry or stainless steel chimney.
9. When installing into an existing masonry or metal chimney, examine the chimney system
carefully. If you have any questions, seek professional advice. We recommend having existing
chimneys cleaned and inspected by a qualified professional prior to the installation of your new
Stove.
10. NOTE ALL MINIMUM CLEARANCE REQUIREMENTS TO COMBUSTIBLES.
Installation must comply with minumum clearances as listed in this manual. (see section 6)
11. Do not operate this stove with the door in the open position.
12. This stove must be connected to a minimum 8” diameter, U.L.listed type 103HT factory built
chimney, or a code approved masonry chimney. If the masonry chimney does not meet code, a
U.L. 1777 approved liner must be installed. Insert installations should always use a chimney
liner.
13. When connecting single wall or double wall connector pipe to the stove and chimney, use 3
screws per pipe joint including 3 screws securing the pipe to the stove. Depending on the type of
double wall pipe you are using, it may also be necessary to fasten it at the chimney. Simpson
Duravent’s DVL double wall uses a snap lock connector and does not need screws.
14. When connecting this stove to a masonry chimney, make sure you observe all applicable
clearances including walls, ceilings and other combustible material. A masonry chimney must be
minimum 8” diameter and constructed with a liner according to NFPA code 211. If you have any
questions about the condition or the code compliance of your masonry chimney, please speak
with a qualified professional.
15. WHEN PENETRATING A COMBUSTIBLE WALL TO CONNECT TO AN OUTSIDE
MASONRY CHIMNEY YOU MUST BE CERTAIN THAT THE WALL PASS THROUGH
IS A SAFE AND LISTED METHOD. Please refer to NFPA code 211 for details about listed
wall pass through methods. To obtain a copy of the NFPA code 211, you may visit their website
7
at www.nfpa.org or call them toll free at 1(800)344-3555. Your local building dept. may also
have information regarding NFPA code 211.
EXCERPT FROM NFPA 211
8
Section 2– Catalyst Information
1. Tamper Warning- This wood stove contains a catalytic combustor which needs periodic
inspection and replacement for proper operation. It is against the law to operate this wood
stove in a manner inconsistent with the operating instructions in this manual, or if the catalytic
element is deactivated or removed.
2. Catalyst type- The combustor supplied with this wood stove is an Applied Ceramics
FireCat® combustor. Please refer to section 5 for catalyst maintenance. Refer to section 7
for catalyst troubleshooting. Refer to section 9 for catalyst warranty information.
3. Catalyst Monitoring- It is important to periodically monitor the operation of the catalytic
combustor to ensure that it is functioning properly, and to determine when it needs to be
replaced. You may also purchase a catalytic probe thermometer which can be used to more
accurately observe and maintain proper catalyst activity. The probe stem must be 3/16”
diameter and between 4” and 5 ½” in length. (Condar brand model: 3-12-1)
Optional Probe installation: To install the probe, remove the metal button on the top plate of
the stove near the flue. Insert the probe through the top plate and into the firebox.
Reading the Probe: Follow the instructions in section 4 to build and maintain a fire. During
normal operation (see section 4) the probe should read between 600 degrees or “active” and
less than 1400 degrees or “too hot” If, during normal operation, the probe reads less than 600
degrees, the stove should be refueled following the instruction in section 4. If the probe is
approaching 1400 degrees, you need to decrease the primary air control so that you do not
over-fire the catalyst. A non-functioning combustor will result in a loss of heating efficiency,
and an increase in creosote and emissions. Combustors should be visually inspected at least
three times during the heating season to determine if physical degradation has occurred.
Actual removal of the combustor is not recommended unless more detailed inspection is
warranted because of decreased performance. See Section 5
9
Section 3.1–Residential Free Standing Installation
INSTALL AND USE IN ACCORDANCE WITH THE MANUFACTURER’S INSTALLATION
AND OPERATING INSTRUCTIONS ONLY. WHILE MOST ANYONE WITH BASIC
CARPENTRY SKILLS CAN SUCCESSFULLY AND SAFELY INSTALL THEIR KUMA WOOD
STOVE, IT IS HIGHLY RECOMMENDED THAT IT IS INSTALLED BY A QUALIFIED
PROFESSIONAL WHO IS PROPERLY TRAINED AND LICENSED–PREFERABLY AN NFI
CERTIFIED (NATIONAL FIREPLACE INSTITUE) EXPERT.
CAUTION: The Structural integrity of the home floor, walls, and ceiling/roof must be maintained. Use
additional bracing if required. Never cut a load bearing wall or engineered truss, use elbows if necessary to
offset the pipe.
CAUTION: NEVER INSTALL A STOVE IN A SLEEPING ROOM. DO NOT INSTALL THIS UNIT
IN A MOBILE OR MANUFACTURED HOME
Free Standing Installation:
Step 1: Determining the stove location:
When choosing a stove location there are a few things that should be considered.
1. Try to choose a location that is centrally located in the house.
2. Try to choose a location that will be easy to access from your wood storage area.
3. Survey the roof area above and around the location of the chimney exit. Be sure there are no
dormers, roof valleys or any other roof irregularities that could cause difficulty when trying to set
and seal the roof flashing.
4. If possible, survey the attic area above and around the location of the chimney. Be sure there are
no major obstructions such as plumbing, heating ducts, electrical wires, phone cables, etc. Also
check the crawl space below and around the stove location for the same obstructions.
STEP 2: Installing the chimney.
Use only 8” Class A solid fuel chimney that has been U.L. safety tested for wood stoves (type 103 HT)
IMPORTANT: These instructions are a very basic guideline for the steps to install your chimney.
For complete instructions, refer to the installation manual that came with your chimney. Chimney
installation instructions are usually located in the box with the chimney cap or chimney support
components. DO NOT mix different brands of chimney components. If you have any questions about
the installation of your chimney, please contact the dealer where you purchased your stove.
CAUTION: Inspect all chimney components for damage. Do not use any damaged chimney
components.
Installing the chimney
CAUTION: Inspect all chimney components for damage. Do not use any damaged chimney
components.
1. Familiarize yourself with the clearances of the stove for the configuration in which you have
chosen to install, i.e. corner installation or straight wall installation (see section 6). Notice the
clearances listed for the chimney, this will help you determine the location of the hole in the
ceiling. Note: On metal roofs in snow regions, consideration must be given to snow loads above
10
the chimney that can slide in to chimney and severely damage it. Please consider snow breaks or
snow dividers to prevent damage.
2. Once you’ve determined the stove location based on the applicable clearances and connector type
(see section 6), be sure to check attic and roof for any obstructions. Install the chimney system
according to the step by step illustrated instructions that came with your chimney.
3. Special care needs to be exercised when passing the chimney through an attic space. An attic
insulation shield must be used in all chimney installations to ensure that no insulation can contact
the chimney pipe. If there is little or no attic space, or if you have a vaulted ceiling, use a tall
square cathedral ceiling support box to pass all the way through to the roof line to provide the
shielding.
4. Stability: If necessary, install a roof brace kit on the chimney to stabilize the chimney against
wind, etc. Generally, roof bracing is required if the chimney extends more than five feet above the
chimney exit point.
5. See illustrations in section 6, page 22, for all components required for factory-built chimneys, as
well as parts required to connect to an approved masonry chimney.
6. Chimney Height. Page 22 shows the minimum chimney height in relation to the roof. With low
pitch roofs or little attic space, the chimney can be too short. For proper draft and best
performance, a minimum overall height of connector pipe plus chimney combined should be at
least 12 feet tall, measured from the stove top to the chimney cap. If necessary, add chimney.
STEP 3: Installing the hearth
1. The hearth must be a minimum 3/8” thick non-combustible material and must extend beyond the
base of the stove 8” to the sides and back and 18” to the front (section 6). This will require a
hearth that is at least 46” wide and 54” deep. In Canada the hearth must be at least 54” deep. For
Canadian clearances refer to the listing tag on the back of the stove.
STEP 4: Setting the stove and connecting to the chimney
1. Attach the legs before setting the stove on the hearth. Once the legs are attached, set it gently on
the hearth using cardboard to protect the hearth.
2. Position the stove on the hearth according to the clearances shown on the diagrams in section 6.
Be sure that the stove is at least minimum clearance from all combustible walls and materials. If
possible it is advisable to set the stove 1-2 inches further away from the combustibles than
required.
3. Using double wall or single wall stove pipe, connect the stove to the chimney. We recommend
using double wall pipe regardless of pipe clearance; however, single wall pipe is approved for use.
If necessary, use elbows to offset the pipe so that the stove can remain at the correct clearance and
still connect to the chimney. Secure each pipe joint with three screws, using the screws provided
with the pipe. Be sure to follow the clearance diagrams in section 6 pertaining to the correct pipe,
single or double wall. Single wall pipe has a minimum clearance of 18” and double wall a
minimum clearance of 8”
If your stove installation required a permit and requires inspection by the local building dept. please do not
forget to call for inspection. It is important that your permit and inspection be finalized, as some insurance
companies will require the stove to be inspected. It is also a great idea to give your insurance a call and let
them know that you have installed a wood stove.
Outside Air -
1. Kuma stoves does not particularly require that outside air be directly connected to this
stove, However, some state or local building codes may mandate outside air. If your state or
local building code requires an outside air supply use part# KA-OUTSIDEAIR. If you are unable
to supply a direct connection to the stove or if you need additional ventilation due to room air
starvation, we suggest the following:
11
a. Provide a passive air supply to the home. The air vent should be a minimum of 4” in
diameter.
b. The air supply must be provided to the same room that the stove is installed in.
c. The air supply should utilize a barometric damper so that air is only supplied to the room
if the house pressure becomes negative.
Visit www.woodheat.org for more information on the use of outside air.
PLEASE REFER TO SECTION 4-Wood Burning Operation Instructions before lighting your first fire.
Section 3.2–Residential Insert Installation
You must have 18” of hearth extending beyond the face of the stove. Since many fireplace hearths are 18”
from the face of the opening, you may need to add a hearth extension to achieve proper clearance. Please
refer to Section 6 for complete clearance diagram.
With the addition of a fireplace insert surround kit (part #KA-SEQSURR) your Sequoia unit may be
installed and used in masonry fireplaces only (lined, masonry chimneys constructed in accordance with
NFPA 211 guidelines). NOT APPROVED FOR USE IN FACTORY–BUILT OR ZERO
CLEARANCE FIREPLACES.
If your masonry chimney is damaged, deteriorated, or unlined, a stainless steel liner (8” diameter)
with thermal wrap will need to be installed and connected directly to the Sequoia insert flue opening. If
you are unsure of the condition of your chimney, have it cleaned and inspected by your dealer or a chimney
professional. Use and install liner kits that are approved to UL 1777 only.
Tools and materials Required
1. 7/16” wrench
2. Flat blade screwdriver
3. KA-SEQSURR Fireplace surround kit.
4. Bricks or a metal roller to level stove in fireplace (you may use the leveling bolts provided in
the fireplace surround kit for most applications.)
5. Unfaced fiberglass insulation
6. Small rug or utility blanket
Prior to installation:
1. Check for cracks, loose or damaged mortar joints, blockages, or extraordinary deterioration.
2. The chimney must have at least a 2” clearance to combustible inside and outside the house.
3. The chimney must have a 5/8” thick fireclay liner. If you have an older, unlined masonry
chimney, then you must install an approved chimney liner system including a thermal wrap that
will bring your existing chimney up to the requirements of U.L. 1777. Contact your dealer or a
licensed chimney professional if you have any questions.
4. Check for any gap existing between the masonry fireplace construction and the fascia masonry. If
there is a gap, seal with a high temperature masonry mortar.
5. If outside air is required by local building code then it should be connected to the back of the
fireplace prior to installation.
a. The outside air vent can not exceed in length, the vertical height of the exhaust flue
b. The outside air vent must be installed where it will remain free of snow, ice, or debris.
c. The outside air vent must not terminate close to exhaust vents.
12
Guidelines for installation: (Refer to Section 6 for insert diagrams)
1. Make sure the damper is secured in the full open position or removed prior to installation.
2. Install approved (U.L. 1777) fireplace liner
3. Protect the hearth by covering it with a small rug or utility blanket.
4. If using the ½” leveling bolts provided in the surround kit, screw these in completely
before installing the stove.
5. Set the insert on the hearth using a dolly. Make sure the dolly is rated to carry at least 515
lbs, and has a strap to secure the stove to the dolly.
6. Insert the unit ½ way into the fireplace then use a roller or unscrew the leveling bolts to
level the stove.
7. Carefully slide the insert all the way to the back wall of the fireplace. Make sure you do
not bend the leveling bolts while sliding the stove. You can cut and place sheet metal in
the bottom of the fireplace to help the insert slide in easily.
8. Connect the Chimney liner.
9. Install the Fireplace surround according to the supplied instructions.
13
Section 4– Wood burning operation instructions
CAUTION:
When building the first couple of fires, be careful to build the fire small and increase the heat slowly over a
4-5 hour period. The paint on the stove “cures” with heat and needs to be done slowly. As the paint
“cures” it gives off a smell and even sometimes a visible “smoky” haze into the room. Make sure the area
is well ventilated during the curing operation. The smell will disappear after a few hours of operation.
A word about draft.
The principle of draft is that warm air rises. Your chimney provides draft which sucks the smoke up the
chimney. The stove does not “push” out the smoke. Your stove has been designed and approved for use
under normal conditions. Unacceptable smoking usually indicates poor draft in your chimney system.
CAUTION: HOT WHILE IN OPERATION. KEEP CHILDREN, CLOTHING AND FURNITURE
AWAY. CONTACT MAY CAUSE SKIN BURNS.
Achieving and Maintaining Catalyst Light-Off
Your KUMA stove is equipped with a by-pass plate that slides forward to allow the draft to escape
up the chimney when the rod is pulled all the way out (towards yourself). This by-passes the combustor for
the purpose of (1) starting a fire, and (2) refueling. This section describes the position of the by-pass for 3
different burning situations.
CAUTION: The by-pass control handle may be hot. Use of fireplace gloves is recommended.
1. START-UP:The by-pass rod should be pulled all the way out (towards yourself) during start-up. It
should remain open long enough to achieve a medium to high burn rate (about 15-20 minutes). It may also
be necessary to “crack” the door to allow extra air during start-up. (never leave the stove unattended with
the door open). Usually a normal fire start-up, to produce a good coal bed, will produce sufficient
temperatures to begin catalytic combustion.
2. NORMAL OPERATION: After the start-up temperature is reached, the by-pass should be pushed in
(away from yourself). This will route the flow of smoke and gases through the combustor. The combustor
will begin operating. The by-pass is to remain closed during normal operation.
3. REFUELING: The by-pass should be pulled out (towards yourself) during the refueling of the stove.
When refueling or rekindling a cool fire or a fire that has burned down to the charcoal phase, operate the
stove again at a medium to high burn rate (about 15-20 minutes) until a sufficient start-up temperature is
reached.
How to start a fire
1. Pull by-pass control out to open. CAUTION: Handle may be hot.
2. Start with tinder and small kindling. When starting a fire, stack the wood in a ‘criss-cross’
arrangement to allow the fuel plenty of air. Place small chunks of wood on the kindling and
larger chunks of wood on the smaller chunks until desired fire is reached.
3. Open the air control by sliding it out to the right. Crack the door open 1/2” to help establish the
fire. The door will need to remain cracked open approximately 25-30 minutes. (Do not leave the
stove unattended with the door open) Close after start up is achieved.
14
4. Leave by-pass and air control fully open until a medium to high burn rate is achieved (about
15-20 minutes). After start-up push the by-pass control in. Adjust the air control to achieve the
desired heat output.
5. The slide type air control can be opened to allow more air to the fire, thus increasing the fire
size, rate of burn, and heat produced. Likewise, sliding the air control closed or decreasing the air
to the fire decreases the fire size, rate of burn, and heat produced
6. Never leave your stove unattended with the door open. When the stove door is open it will be
necessary to open the by-pass to prevent smoke spillage.
About your stoves burn rate and the Catalytic Combustor.
Properly operated, the catalytic combustor in your new Kuma Stove will provide years of trouble
free use. Over firing of the catalytic combustor is a common cause of failure.
Try to avoid direct flame contact with the catalytic combustor.Each chimney will provide a
different level of draft. For your first few fires, watch the flames as the lick up near the baffle
assembly. If your chimney provides enough draft to pull the flames into the combustor, lower the
amount of air by pusing the air control in towards the stove. If flames are still pulled into the
combustor, a damper may be installed in the pipe to help further regulate draft.
Additional instructions and information.
1. Build your fires directly on the firebrick. Using a grate will allow too much air to the coal bed and
will result in incomplete combustion of the wood. Using a grate can also leave charred pieces of
wood after the fire has gone out.
2. Use only the best grade of dry wood available. Wood should be seasoned for 1 full year prior to
being used. Split wood will season much faster and better that wood left in the rounds. Burning
green or wet wood greatly increases the chance of creosote build up and produces significantly
less heat. The number 1 cause for creosote build up is moisture in the wood. Store your wood
in a dry location. Any wood stored near the stove needs to maintain proper clearance from the
stove.
3. Small hot fires produce less creosote than long, low smoldering fires. When you start your stove
or are re-kindling (reloading) your wood stove with a full or sizeable load of wood, open the draft
fully and burn the stove at full burn for 20-30 minutes to heat up the chimney and secondary burn
system.
Optional blower operation instructions
To install the blower, follow the instructions packaged with the blower. Plug the blower into the nearest
115V grounded circuit. Turn the variable speed knob to ‘click’ onto high speed. As the knob is turned
clock-wise, the blower speed decreases to your desired speed. The blower speed should match the desired
burn rate on your stove: i.e. low-burn rate...low blower speed; high-burn rate… high blower speed and so
forth.
15
Section 5– Maintenance
Use the table below as a general maintenance schedule for your stove. See below the table for detailed
information on performing the maintenance.
Ash disposal Every 2-3 weeks
Chimney inspection and cleaning Every 2-3 months
Gasket replacement Every year or as needed
Glass cleaning and replacement As needed
Brick replacement Replace broken bricks as needed
Clean and inspect stove Every year
Replace catalytic combustor Every 7-10 years or as needed
Ash disposal – Every 2-3 weeks
1. Empty the ashes when the fire is out. Never try to empty the ashes when the stove has an active or
full fire.
2. Using a small shovel, scoop the ashes out of the firebox into a metal container. Remove the ash
container from the house. DO NOT PLACE THE ASHES NEAR THE HOUSE OR IN THE
GARAGE.
Chimney inspection and cleaning – Every 2-3 months
1. Refer to the chimney manufacturers installation instructions for additional information on cleaning
the chimney. We recommend having the chimney cleaned by a licensed professional chimney
sweep.
2. When wood is burned, it releases tar and other organic vapors. When these vapors combine with
moisture, creosote is formed and enters the chimney. When the stove is burning on a low setting,
the exhaust can be moving slow and the chimney can be relatively cool. This combination of slow
exhaust and a cool chimney causes creosote to stick to the walls of the chimney. When creosote
accumulates, it causes the draft to slow and the problem of creosote accumulation will compound.
If the creosote is not removed on a regular basis, a chimney fire can occur which can damage the
chimney and/or stove. Therefore, the importance of regular chimney maintenance cannot be
emphasized enough.
Gasket Replacement – Every year or as needed
1. Gaskets need to be checked at least once a year. The gaskets on your stove are designed to keep
unwanted air out of the firebox. Neglecting these gaskets can cause a decrease in burn times,
more wood consumption and possible over heating of the stove. When checking the gaskets, look
for wear areas that show fraying or cutting. Check the gasket for softness by pressing them with
your finger and give a slight tug on one area to see if the glue is still holding. Gaskets that are cut
or fraying can cause small air leaks in that spot. Gaskets that are hard will not conform to the
stove and may leak air. Gaskets that are not held in with glue could come out at an inconvenient
time. The gaskets that need to be checked are: Door gasket and glass gasket. Refer to section 8
for part numbers for the correct gasket for your stove and check with your dealer for parts
availability.
Glass cleaning and replacement – as needed
1. Never clean the glass when it is hot.
2. Clean the glass with an approved stove glass cleaner, never use an abbrasive material like
sandpaper or steel wool
3. When closing the door be sure that no pieces of wood are protruding from the door opening that
could touch the glass. Excessive stress like closing the door on a piece of wood will break the
glass. If the glass ever breaks in your stove, don’t panic, simply shut the air off and let the fire
burn out. Do not continue to operate a stove with broken glass. Do not leave the stove unattended
with broken glass.
16
4. To replace the glass it may be helpful to remove the door from the stove and place on a clean soft
work area. Remove the retaining ring screws and retaining ring, remove the glass and dispose of
properly, CAUTION: BROKEN GLASS WILL BE SHARP. Clean the door thoroughly where the new
piece of glass will install. Set the new piece of glass into the door and replace the retaining ring and
screws. Be careful to tighten the screws evenly, uneven pressure can break the glass. Tighten the
screws just enough to hold the glass firmly, overtightening can cause uneven pressure and can break the
glass.
Brick replacement – As needed
1. Bricks should be inspected and replaced if necessary at least once a year. Cracked bricks are fine as
long as they remain in place.
Clean and inspect stove – Every year
1. Your stove should be fully cleaned and inspected once a year. This is a great time to inspect the bricks,
gaskets, catalyst and the rest of the stove for signs of abnormal wear. Start by shoveling all the ashes
out of the stove. Use a shop vac to clean the hard to reach places.
2. Your catalytic combustors performance should be closely inspected at least 3 times during the heating
season. To check the performance of your catalytic follow these steps:
a. With a flashlight, visually inspect the catalyst for physical deterioration. If catalysts are
crumbling or falling apart they must be replaced. Removal of catalyst for inspection is not
recommended unless stove performance has noticeably decreased.
b. Light the stove in accordance with the instructions in section 4
c. With the bypass rod pulled out (towards yourself), go outside and observe the emissions
leaving the chimney.
d. Push in the bypass rod and again observe the emissions leaving the chimney.
e. Significantly more smoke should be seen when the bypass rod is pulled out. Significantly
less smoke should be seen when the bypass rod is pushed in. Be careful not to confuse smoke
with steam from wet wood.
Replace catalyst – Every 7-10 years or as needed
1. If you have determined that the catalyst needs to be replaced contact you nearest dealer for parts and
service. Use the parts list in section 8 for ordering a replacement catalyst.
2. Replacement Steps:
a. Remove stove pipe or pull out insert to gain access to the stove flue. (If removing insert is not
practical you can access baffle fasteners through the stove door. Instructions for this follow in
parenthesis in step b.)
b. Remove bypass rod by removing the pin that drops into the hex shaft. To remove drop in pin
you will first remove the cotter pin at the bottom side of drop in pin. Pull the drop in pin up
and out. Pull the damper rod all the way out of the stove. (Instructions for doing this job
through door: Pull damper rod out until it hits stop. You will not be able to see fasteners and
will have to do this job by feel. Reach through the stove door, up the rear of the baffle and
then towards the front of stove until you find hex shaft that is bolted to damper plate. Feel
along hex shaft until you find pins. Remove the small retaining pin at the bottom of drop in
pin then pull up on the drop in pin. Remove damper rod from stove.
c. Set a bottle jack underneath the center of the baffle and jack it up applying a small amount of
pressure to the baffle. Lubricate and remove the 4 main baffle bolts using a 9/16” socket with
a 6” extension. Slowly lower the jack balancing the baffle as it comes down. The baffle is
fairly heavy; use proper lifting techniques.
d. Carefully remove the baffle from the stove.
e. Lift off the baffle clips and remove the catalytic hold down clamp noting the location of the
gaskets. Slide the catalytics out.
f. Install the new cataytic combustors in the same location. (approximately 1” from the face of
the baffle). Cut and use the gasket provided to achieve a snug fit.
g. Replace the catalytic hold down clamp, re-gasket the top and sides of the clamp to achieve a
snug fit. Re-install the baffle clips.
h. Re-install the entire baffle system in the same manner that it was removed using the bottle
jack.
3. If the steel baffle is warped or degraded, the entire baffle system with the catalytics and gasketing
pre-installed may be ordered. Contact you dealer.
17
Catalyst replacement diagram
Baffle clip
Hold down
clamp
Catalytic
Bypass plate
Baffle
Bypass rod
18
Section 6– Clearances and diagrams
Figure #1 Double Wall Pipe
Use this diagram for the following installations:
1. Residential installation with the stove in a corner using double wall pipe. For single wall pipe,
refer to figure 2.
Hearth
ALL CLEARANCES SHOWN IN INCHES
ALL CLEARANCES ARE MINIMUMS
HEARTH CLEARANCES SHOWN IN
19
19
10
10
8 8
8
18
19
Figure #2 Single Wall Pipe
Use this diagram for the following installation:
1. Residential installation with the stove in a corner using single wall pipe. For double wall pipe,
refer to figure 1.
Hearth
ALL CLEARANCES SHOWN IN INCHES
ALL CLEARANCES ARE MINIMUMS
HEARTH CLEARANCES SHOWN IN
24
24
15
15
8 8
8
18
20
Figure #3 Double Wall Pipe
Use this diagram for the following installations:
1. Residential installation with the stove on a sraight wall using double wall pipe. For single wall
pipe, refer to figure 4.
ALL CLEARANCES SHOWN IN INCHES
ALL CLEARANCES ARE MINUMUMS
HEARTH CLEARANCES SHOWN IN
Hearth
16
13
10
27
8 8
8
18

This manual suits for next models

1

Other Kuma Stoves Stove manuals

Kuma Stoves SHASTA User manual

Kuma Stoves

Kuma Stoves SHASTA User manual

Kuma Stoves K-250 Cambridge LE User manual

Kuma Stoves

Kuma Stoves K-250 Cambridge LE User manual

Kuma Stoves ARCTIC AR-10 User manual

Kuma Stoves

Kuma Stoves ARCTIC AR-10 User manual

Kuma Stoves ARCTIC AR-7 User manual

Kuma Stoves

Kuma Stoves ARCTIC AR-7 User manual

Kuma Stoves OC-7 User manual

Kuma Stoves

Kuma Stoves OC-7 User manual

Kuma Stoves K-TAM User manual

Kuma Stoves

Kuma Stoves K-TAM User manual

Kuma Stoves Wood Classic User manual

Kuma Stoves

Kuma Stoves Wood Classic User manual

Kuma Stoves OC-10 User manual

Kuma Stoves

Kuma Stoves OC-10 User manual

Kuma Stoves K-ASH Ashwood User manual

Kuma Stoves

Kuma Stoves K-ASH Ashwood User manual

Popular Stove manuals by other brands

Konigshutte Pavo 28/836 instruction manual

Konigshutte

Konigshutte Pavo 28/836 instruction manual

Dovre F400 Installation & operating instructions

Dovre

Dovre F400 Installation & operating instructions

Orion OHP-26AS instruction manual

Orion

Orion OHP-26AS instruction manual

MSR WHISPERLITE instruction manual

MSR

MSR WHISPERLITE instruction manual

MCZ Flat Use and installation  manual

MCZ

MCZ Flat Use and installation manual

Smeg C7GMXI8-2 manual

Smeg

Smeg C7GMXI8-2 manual

Teba therm T-25 Installation and manual

Teba therm

Teba therm T-25 Installation and manual

Palazzetti TERMOPALEX 78 FAST PRODUCT TECHNICAL DETAILS

Palazzetti

Palazzetti TERMOPALEX 78 FAST PRODUCT TECHNICAL DETAILS

Tulikivi KIPITTI operating manual

Tulikivi

Tulikivi KIPITTI operating manual

Palazzetti EcoFire IDRO Installation

Palazzetti

Palazzetti EcoFire IDRO Installation

Primus 321483 User manual and product specifications

Primus

Primus 321483 User manual and product specifications

Dimplex WLL20-AU instruction manual

Dimplex

Dimplex WLL20-AU instruction manual

Regency GR57H and Installation and operation instruction

Regency

Regency GR57H and Installation and operation instruction

Aarrow Hamlet Operating & installation manual

Aarrow

Aarrow Hamlet Operating & installation manual

Vermont Castings Dutchwest 2465 Homeowner's installation and operating manual

Vermont Castings

Vermont Castings Dutchwest 2465 Homeowner's installation and operating manual

Solas ONE6 FS Installation & operation manual

Solas

Solas ONE6 FS Installation & operation manual

Drolet SIBERIAN 1200 owner's manual

Drolet

Drolet SIBERIAN 1200 owner's manual

Kalor Denia 14 installer and user manual

Kalor

Kalor Denia 14 installer and user manual

manuals.online logo
manuals.online logoBrands
  • About & Mission
  • Contact us
  • Privacy Policy
  • Terms and Conditions

Copyright 2025 Manuals.Online. All Rights Reserved.