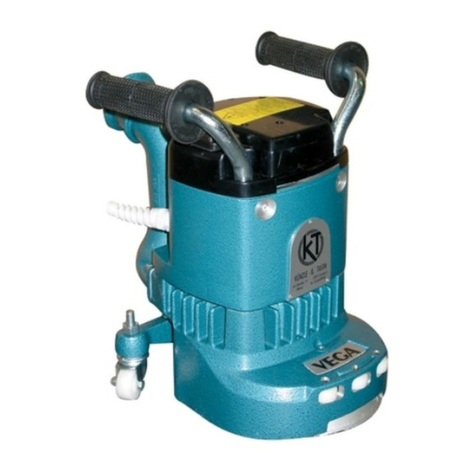
Kunzle & Tasin Gemini 100 Operating instructions

1
STEERING SANDER
FOR WOODEN FLOORS
USER &
MAINTENANCE MANUAL

2
GEMINI 100 User Manual_April 2013 Edition
Foreword
This manual contains important information on the safe use and operation of
this machine.
Failure to read this manual before operating, adjusting or servicing this
machine could cause injury or damage to persons or objects.
Anybody operating the machine should understand how to use and operate it
before starting it up.
Keep this manual for future reference.
This manual is an ENGLISH translation of the original version in Italian.
For a new manual contact:
Kunzle & Tasin S.r.l.
REGISTERED HEADQUARTERS
Via Circonvallazione est, 2/6
27023 Cassolnovo (PV) - Italy
OPERATIONAL HEADQUARTERS
Via Cajkovskij, 14
20092 Cinisello Balsamo (MI) - Italy
Tel. +39 02 66040930
Fax +39 02 66013445
www.kunzletasin.com

3
GEMINI 100 User Manual_April 2013 Edition
Contents
Key for machine symbols 4
Operator safety instructions 4
Storage 5
Transporting and handling the machine 5
Transport with one person 5
Transporting with the trolley case 5
Introduction 6
Information on safe use 6
Correct use 5
Machine data plate 6
Commencing operation 6
Instructions for electrical connection 6
Cables, extensions and plugs 7
Instructions on removing sawdust generated during use 7
Recommendations on prevention measures for users 8
Personal safety measures 8
Compliance with safety measures and warnings 8
Instructions on correct machine use 9
Machine control instructions 10
Machine specifications 11
Machine warnings 12
Prohibited use 12
Starting the machine 12
Machine adjustment procedures 14
Abrasive assembly procedures 14
Adjusting the working surface on the floor 14
Routine maintenance to be performed 14
Sawdust chamber (for the user) 14
Disc (for the user) 15
Spherical wheel (for the user) 15
Dust bag (for the user) 16
Graphite brushes (for the user) 16
Lubrication (only for Technical Support Service) 17
Spare parts 17
Rear spherical wheel: OC30 17
Choice and maintenance (for the user) 17
Emergency situations (for the user) 18
Faults 18
Causes 18
Solutions 18
Declaration of Conformity 19
Disposal 20
Diagrams 21
Notes 22

4
GEMINI 100 User Manual_April 2013 Edition
Key for machine symbols
READ THE INSTRUCTIONS CONTAINED IN THIS
USER AND MAINTENANCE MANUAL BEFORE
USING THE MACHINE
HEARING PROTECTION DURING USE IS
RECOMMENDED
PROTECTION OF THE AIRWAYS DURING USE IS
RECOMMENDED
HAZARD DUE TO ELECTRICITY
HAZARD DUE TO MOVING PARTS
Operator safety instructions
HAZARD
means
Failure to comply with HAZARD notices on the machine or in this
manual may result in death or serious injury to the operator or other
people. Read and comply with all HAZARD notices on the machine
or in this manual.
WARNING means Failure to comply with WARNING notices on the machine or in this
manual may result in injury to the operator or other people. Read
and comply with all WARNING notices on the machine or in this
manual.
CAUTION means Failure to comply with CAUTION notices on the machine or in this
manual may result in injury to the operator or other people. Read
and comply with all CAUTION notices on the machine or in this
manual.
HAZARD:
Failure to read the GEMINI 100 machine manual before operating, adjusting or performing
maintenance operations on the machine could cause injury or damage to persons or objects. Anyone
operating the machine should understand how to use and operate it before starting it up.

5
GEMINI 100 User Manual_April 2013 Edition
Storage
If the machine is removed from the original packaging and is not used for some time ensure the wheel and discs do
not come into contact with the floor. In this case use two supports at least 20mm in height to rest the machine on,
ensuring contact is with the base frame.
WARNING
This equipment is for dry use only and must not be used or kept outside in wet conditions. Store the machine
in a dry building, otherwise the machine could be damaged.
Storage temperature from -20°C to 50°C.
Transporting and handling the machine
Transport with one person
1. Ensure the power supply cable is disconnected
from the mains and the machine.
2. Always move the sanding machine using the two
handles with the bag support turned upwards.
Protect the sanding discs with abrasive discs.
When transporting the sanding machine on a
vehicle always ensure it is well-secured and
cannot move. Always lift and move the machine
with care, as it is very heavy.
Transporting with the carry case
A convenient trolley case is available to enable the machine to be transported by one person.
1. Position the machine in the special housings in the case
with the accessories dismantled (bag and sanding discs).
2. Shut the case lid using the appropriate levers.
3. Grasp the external case handle and lift it till the case is
resting on the wheels.
4. Take the case to the work area.

6
GEMINI 100 User Manual_April 2013 Edition
Introduction
Information on safe use
Read this manual carefully before using the GEMINI 100 steering sander for wooden floors for the first time.
The instruction manual contains important information on safety and preventing improper use of the machine and
will resolve any doubts or questions, making it possible to operate the machine safely and with ease.
Removing safety features could cause death or physical injury.
Familiarise yourself with the machine before using it for the first time.
If a situation arises which has not been described in this manual contact your retailer or Kunzle & Tasin s.r.l.
Correct use
The GEMINI 100 steering sander for wooden floors is suitable for dry sanding. Any other use without the consent of
the manufacturer is prohibited.
Do not use on wet floors.
See also Prohibited Use on page 12.
Keep hands and clothing away from moving mechanical parts.
The work area is protected with the base frame.
Machine data plate
The following information can be found on the machine data plate:
1. Machine model
2. Safety symbols
3. Motor power
4. Frequency
5. Supply voltage
6. Name of manufacturer
7. Country of manufacture
8. Year of manufacture or see
serial number
9. Serial number:
The serial number is formed as follows:
- the first two numbers refer to the year of manufacture (13 = 2013)
- the second group of three numbers indicates the date the machine was
manufactured (029 = 29th January)
- the last two numbers indicate the progressive number of machines
produced on that day of manufacture (16 = sixteenth machine)
Commencing operation
Instructions for electrical connection
CAUTION This machine only operates with the voltage and frequency shown on the machine data
plate. Before connecting the cable to the power supply ensure the correct voltage and
frequency are available.
WARNING Do not expose the machine to rain. This machine is intended for dry use only.
Keep the machine in a dry building and do not use it in damp or wet places.

7
GEMINI 100 User Manual_April 2013 Edition
Commencing operation
Instructions for electrical connection
WARNING If the machine is not connected correctly to the electricity network death due to
electrocution may occur. To prevent electric shocks always use a three wire electrical
system connected to earth. For maximum protection against electric shocks use a
circuit protected with a differential cut-out switch.
WARNING Tampering with the earthing plug in any way may result in death from electrocution. Do
not cut, remove or break the earthing plug. If the socket does not match the plug
consult a qualified electrician.
WARNING Do not use the machine if the switch malfunctions.
HAZARD If the machine is used with a damaged plug or power supply cable death may occur
from electrocution. If cables or plugs are worn or damaged in any way, have them
replaced by the manufacturer or the K&T technical support service or similarly qualified
person, in order to prevent risks to safety.
Cables, extensions and plugs
Only use approved cables. The maximum recommended cable length is 7m; for greater lengths use cables with a
larger cross-section.
CAUTION Using the machine with unsuitable cable cross-sections and/or excessively long cables
may cause injury or damage to people or objects.
WARNING The machine must never be moved using its cable and the cable must never be pulled
when disconnecting from the socket.
WARNING Keep the cable away from sources of heat, oil and sharp edges.
WARNING
MACHINE WITH 230V∼50Hz SINGLE PHASE MOTOR
For machines with a 230-240V~50Hz single phase motor (Europe), a HO5VV-2x1.5 mm2HAR-approved
power supply cable must be used along with an approved SHUKO 2P+T16A 200÷250V plug.
For non-European versions contact an authorised K&T distributor.
Instructions on removing sawdust generated during use
HAZARD
Sawdust can ignite spontaneously and cause
injury or damage. It must be disposed of
appropriately. Always empty the sawdust into
metal containers which are located outside the
building.
HAZARD
Sawdust can ignite spontaneously and cause
injury or damage. Empty the contents of the dust
bag when it is 1/3 full. Empty the dust bag at the
end of each machine use. Never leave the dust
bag unattended when it contains sawdust. Do not
empty the contents of the dust bag above a fire.

8
GEMINI 100 User Manual_April 2013 Edition
Recommendations on prevention measures for users
Personal safety measures
WARNING Sawdust can spread through the air and be inhaled when using the sander. Always
wear a dust mask when using the sanding equipment.
WARNING The eyes and/or body may suffer injury if personal safety clothing is not used. Always
wear safety goggles, protective clothing and a dust mask during sanding operations.
WARNING Lengthy exposure to noise levels during sanding operations may damage the hearing.
Always use ear protectors during sanding operations.
CAUTION Never become distracted during sanding operations, check what is happening
continually. Use common sense. Do not use the machine when tired.
Compliance with safety measures and warnings
HAZARD Using the machine when not fully assembled may cause injury or damage to people or
objects. Do not use the machine when it is not fully assembled. Keep all fittings tightly
closed. Maintain machine settings in accordance with the specifications.
HAZARD Using the sander without the safety guards and covers in position may cause injury or
damage. Always ensure that all safety guards and covers are in position and secured
well.
HAZARD The wood flooring sander may create an explosive environment. Cigarettes, cigars,
pipes, lighters, pilot flames, or any other source of fire may create an explosion if lit
during sanding operations. No sources of fire must be kept near the work area.
HAZARD Poorly ventilated work areas may create an explosive environment when some
combustible materials are present in the atmosphere, such as solvents, thinners,
alcohol, fuel, some paints, wood dust or other combustible materials. Floor sanding
machines may cause various materials and fumes to ignite. Read the manufacturer's
instructions for each chemical product used and establish its combustibility. Always
keep the work area well-ventilated.
HAZARD Striking nails when sanding may generate an explosion or fire. Always ensure all nails
are sunk before sanding surfaces.
HAZARD Serious damage may occur if the power supply circuit trips repeatedly or is undersized.
Have the fuses, safety circuit and power supply line checked by an authorised
electrician.
HAZARD Performing maintenance and/or repairing the machine when it is not fully disconnected
from the power supply may cause death due to electrocution. Disconnect the power
supply before carrying out any maintenance and/or repair work.
HAZARD The use of this machine on a circuit which is not earthed may cause death due to
electrocution. Never disconnect or disable the earthing conductor. Consult an
electrician if the earth conductor is missing or it is suspected that the circuit is not
suitably earthed.

9
GEMINI 100 User Manual_April 2013 Edition
Recommendations on prevention measures for users
Compliance with safety measures and warnings
HAZARD The use of this machine with a damaged power supply cable may cause electric shock.
Check the power supply cable regularly for damage such as splitting or wear and tear.
Do not use the machine if the power supply cable is damaged. Do not use the electric
cable to move the machine.
HAZARD Injury or damage may occur if the sander runs over the power supply cable and it
becomes damaged. Keep the cable away from the lower part of the machine to avoid
contact with the abrasive. Always keep the power supply cable raised above the
machine.
HAZARD The moving parts on this machine may cause serious injury and or damage. Keep
hands, feet and loose clothing away from all moving parts of the sander.
HAZARD Performing maintenance or replacing the dust bag may cause injury to the operator or
people nearby if the machine is connected to the power supply.
WARNING Failure to comply with instructions on this machine and in this manual may cause
serious injury and/or damage. Read and comply with all safety instructions. Ensure that
all plates, labels, warnings and instructions are secured to the machine. New plates
can be obtained from an authorised K&T dealer.
CAUTION Injury or damage may occur if maintenance operations or repairs are carried out by
unauthorised personnel.
CAUTION The machine may become damaged if it is not kept in a dry building. Keep the machine
in a dry building.
Instructions on correct machine use
Read this manual carefully and become familiar with the machine.
The equipment is suitable for industrial use e.g. in hotels, schools, hospitals, offices, factories and shops.
The following information highlights particularly hazardous situations for the operator and/or machine.
Understand when these conditions may be present.
Removing safety features could cause death or physical injury.
Take all steps necessary to instruct personnel who may use the machine.
Report any damage on the machine or incorrect operation immediately.
1. Keep hands and clothes away from rotating parts.
2. Keep hands on the handle when the motor is operating.
3. Do not leave the machine unattended when the motor is operating.
4. Always use the machine with the dust bag in the correct position.
5. Do not detach the dust bag with the motor operating.
6. Always disconnect the power supply cable from the machine before performing maintenance.
7. Transport the machine with care.
8. Always use the machine in well-ventilated areas.
9. Always dispose of the sawdust appropriately.
10. Use the type and amount of abrasive specified in the instruction manual.
11. Always keep the work area well-lit.
12. The use of accessories other than those recommended in this manual may cause injury.
13. Only use the steering sander indoors.

10
GEMINI 100 User Manual_April 2013 Edition
Machine control instructions
The Gemini 100 is defined as a steering sander due to its innovative control characteristics (patent pending). The
point of pressure is related to the chosen direction whereby the pressure exerted on one side moves the machine
in the same direction.
Therefore the machine moves left and right on the basis of the force and pressure applied to the handle.
Until now all small single disc sanders
have required point pressure i.e. a load
perpendicular to the centre of the
machine, whereas the Gemini 100
steering sander has two counter
rotating discs. The thrust of the left disc
(towards the inside i.e. towards the
right) is counterbalanced by the thrust
in the opposite direction exerted by the
right disc (which pushes towards the
left).
The correct operator position for
optimum control is behind the machine
and not at the side (as many tend to
do), with the hands on the two handles.
Once the machine has been started it
can be noted that it remains quite
stationary even though the discs in
contact with the floor are turning.
To move the machine to the right exert a light downward pressure on the right handle.
To move the machine to the left exert a light downward pressure on the left handle.
The picture above makes it easier to understand machine operation.
WARNING It is prohibited to place
objects on the base
frame to load the tool or
load the front part of the
base frame with the
weight of the arms or
body.

11
GEMINI 100 User Manual_April 2013 Edition
Machine specifications
Abrasive disc size:2x Ø 100 mm
Disc size 2x Ø 100 mm
Disc speed 4500 revs/min
Motor speed 14000 revs/min
Motor:
(A40) Europe
(A42) USA
230V ∼50 Hz 1.15 Kw
110V ∼60 Hz 1.5 Kw
Disc tilt control by adjusting
the height
of the rear wheel support
OMNICASTER
Bearings:
lifetime lubricated ball bearings
Noise level (IEC 60704 -1
(continuous weighted sound pressure level A, measured at a
distance of 0.4 m from the handle and a height of 1.5 m from the
ground)
weighted in A LPA
85 dB(A) max
Vibration (ISO 5349)
(weighted value of the mean square deviation of the acceleration)
≤
1.5 m/s2
Net weight
9 kg
Gross weight
Complete trolley case (P/N 6899950001 – 6899950003)
Cardboard packages (P/N 6899950002)
16.5 kg
10 kg
Machine dimensions
Height at handle (A)
Height at suction tube (B)
Width at handle (C)
Base frame width (D)
length (B)
320 mm
425 mm
255 mm
221 mm
430 mm
Packaging dimensions (A x B x
C)
Complete trolley case
(P/N 6899950001 – 6899950003)
Cardboard packages
(P/N 6899950002)
810 x 420 x 390 mm
450 x 430 x 320 mm
Standard equipment
50x discs SIA abrasives 2812 (Ø 100 mm - grit 60)
50x discs SIA abrasives 2812 (Ø 100 mm - grit 100)
10x discs SCM (Ø 100 mm, coarse)
1x additional spherical wheel, OC30 with black sphere
2 spare discs in velcro-backed steel
Fabric dust collection bag
Electric cable with plug (length 7m)
Accessory bag with operation keys
User and maintenance manual

GE
Ma
Pro
h
W
C
C
St
a
T
o
2
3
MINI 100
U
chine war
n
h
ibited use
WARNING
This equip
m
anyone wit
h
the equipm
e
W
ARNING
C
AUTION
C
AUTION
a
rting the
m
o
start the m
a
2
. Bring the
machine i
s
the sucti
o
pictures)
a
3
. Place the
cord over
4. Fit the
WARNING
Only use di
s
U
ser Man
u
n
ings
m
ent is not
t
h
out the rel
e
e
nt and are
s
T
h
U
d
a
h
a
n
o
W
w
t
h
m
achine
a
chine proce
1.
machine
t
s
removed f
r
o
n tube loc
k
a
nd turn it 1
8
dust bag o
n
the flange.
abrasive in
a
s
cs with a di
u
al
_April 201
t
o be used
b
e
vant experi
e
s
upervised
b
h
is equipme
n
sing the m
a
a
mage. The
a
ve a maxi
m
o
t sit astride
W
ork surface
s
w
hile the tool
h
e cutting lin
e
ed as follow
s
Become fa
m
that all ope
r
t
o the plac
e
r
om the orig
i
k
ing piston
8
0°.
n
the suctio
n
a
ccordance
w
ameter of 1
0
3 Edition
b
y anyone (
e
nce and kn
o
b
y a respons
i
n
t is not suit
a
a
chine to m
machine m
u
m
um incline
o
the machin
e
s
may be s
e
is in conta
c
e
carefully.
s
:
m
iliar with th
e
r
ators have r
e
e
of work.
nal packagi
n
(ref. no. 3
n
pipe by tyi
n
w
ith the AB
R
0
0 mm.
12
(
children inc
l
o
wledge, un
ible person
t
a
ble for coll
e
m
ove objects
u
st only be
u
o
f 2%. Do n
o
e
when it is
o
e
riously da
m
c
t with the s
u
e machine
a
e
ad this ma
n
If the
n
g pull
in the
n
g the
R
ASIVE AS
S
l
uded) with
p
less they h
a
t
o ensure th
e
e
cting hazar
d
or moving
u
sed to sand
o
t use the m
o
perating.
m
aged if the
u
rface. To a
v
a
nd read all
i
n
ual.
S
EMBLY PR
O
p
hysical or
m
ve received
e
ir safety.
d
ous dust.
on an incli
n
dry wooden
achine to s
a
machine is
v
oid damagi
i
nstructions
a
O
CEDURE
S
m
ental disa
b
instructions
ne may ca
u
n
floors whic
h
a
nd steps or
left turning
o
ng the surf
a
and safety
n
S
(pg. 14).
b
ilities, or
on using
u
se injury o
h
are level o
furniture. D
o
o
n one poin
a
ce approac
h
n
otices. Ens
u
r
r
o
t
h
u
re

13
GEMINI 100 User Manual_April 2013 Edition
Starting the machine
5. Locate the power supply. The socket must be compatible with the plug.
6. Connect the plug to the socket.
7. Raise the discs so that the
machine is only resting on the
floor with the rear wheel and
keep the switch pressed (as
shown by the arrow)
8. Keep the machine moving while
the discs are lowered and in
contact with the work surface.
9. To stop the machine raise the
discs so that the machine is only
resting on the floor with the rear
wheel and release the switch (as
shown by the arrow).
WARNING
The switch must be kept pressed to operate the machine.
The machine gradually stops when the switch is released or the power supply is interrupted (due to
unplugging the cable from the supply or a power cut).
WARNING
The discs do not stop immediately!
Take care not to touch it with any part of the body during this phase.

14
GEMINI 100 User Manual_April 2013 Edition
Machine adjustment procedures
Abrasive assembly procedures
1. Ensure the electric cable is disconnected to the power.
2. Turn the machine over, resting the handles on the floor.
3. Remove the worn abrasive paper discs from the velcro-
backed discs.
4. Ensure the surface of the velcro-backed discs is clean and
position new 100 mm diameter abrasive discs.
5. Attach the abrasive disc securing it well to the velcro.
Adjusting the working surface on the floor
The discs operate best when slightly tilted with respect to
the floor.
Tilt is determined by the position of the wheel support
which is fitted at the rear of the conveyor.
To change the inclination of the discs
loosen the Allen nut and let the support
slide on the sanded surface, then tighten
the nut once the required height has been
reached.
Routine maintenance to be performed
To keep the machine in good working condition the following items must be checked and serviced regularly:
Sawdust chamber (for the user)
Hoover the sawdust from the chamber regularly to prevent
the hazardous accumulation of dust.

15
GEMINI 100 User Manual_April 2013 Edition
Routine maintenance to be performed
Discs
Check the disc surface regularly. Remove any dirt.
Spherical wheel (for the user)
Even though the spherical OMNICASTER wheel is self-cleaning
with regard to sawdust, remove dirt from the body of the machine
and the wheels regularly.
Dirt may cause uneven sanding.
Dust bag (for the user)
Remove the bag and shake it well to
remove sawdust.
Turn the bag inside out and wash it in
the machine in cold water to prevent
blockage of the pores and a decrease in
dust collection ability.

16
GEMINI 100 User Manual_April 2013 Edition
Routine maintenance to be performed
Dust bag (for the user)
As an alternative to a fabric bag a remote control
industrial vacuum cleaner with tube with maximum length
of 10 metres may be used.
Graphite brushes (for the user)
The motor has two graphite brushes that must be checked every six months or after 400 hours of
operation. The check the brushes carry out the following procedure:
1. Remove the screws on the side motor covers with a screwdriver.
2. Remove the cover.
3. Remove the wire terminal screw.
4. Remove the brush complete with spring.
5. Check the brushes. If one of the brushes is shorter by 7 mm replace both brushes.
WARNING
When fitting new brushes ensure they are installed correctly before replacing the cover.

17
GEMINI 100 User Manual_April 2013 Edition
Routine maintenance to be performed
Lubrication (for the user)
The machine does not require lubrication. All moving parts, including the motor, have watertight ball bearings
lubricated for approximately 10,000 hours of operation.
Spare parts
Always use K&T spare parts.
Failure to use K&T spare parts, or repairs/adjustments carried out by unauthorised personnel, will invalidate the
guarantee and any resulting liability.
The machine must only be repaired by qualified personnel. This electric equipment is compliant with the
relevant safety legislation.
Repairs must be carried out by qualified personnel using K&T spare parts, otherwise the user may suffer serious
injury.
Rear spherical wheel: OC30
Choice and maintenance (for the user)
Before starting to use the Gemini 100 steering sander it is important to
choose the spherical OC30 wheel from the OMNICASTER line to use.
The sander is provided with 2 OC30 wheels (ø35mm) with 2 different
spheres, one black and one white.
The black sphere is classed as hard due to its intrinsic characteristics as
it is made with phenolic resin.
This material is very stiff and therefore highly resistant to abrasion, and
not affected by external contamination from liquids, dust, gels etc.
The sphere is silent and its slide and capacity properties are excellent.
It is recommended for sanding hard or very hard woods.
The white sphere is classed as medium. It is made of plastic
polyurethane material with hardness of 90° Shore A ~. This material has
high elasticity properties.
The polyurethane sphere does not damage flooring, is silent, cushions
knocks and vibrations,
and the slide and capacity properties are good.
It is recommended for sanding softer woods.
.
Good wheel maintenance is important for perfect operation,
and is characterised by two phases - maintenance of the central body and maintenance of the sphere.
To clean the central body compressed air is required to remove all the sawdust from internal parts,
whereas a distinction has to be made between the two spheres for their maintenance.
The black sphere can be cleaned with a degreasing agent or alcohol.
The white sphere need only be cleaned with a damp cloth.
Check the following on both after cleaning:
- the sphere has kept its round shape
- the surface is not warped
- there are no grooves
The occurrence of these phenomena could compromise the sliding action of the wheel making the tool unusable.

18
GEMINI 100 User Manual_April 2013 Edition
Emergency situations (for the user)
FAULTS CAUSES SOLUTIONS
Insufficient cutting Unsuitable or worn abrasive
Replace the abrasive
Insufficient motor speed Insufficient tension due to:
Excessive cable length or unsuitable
cross section
Use cables of suitable length and
cross section
Unstable connections
Arrange suitable connections
Faulty capacitor
Contact an authorised K&T dealer
Faulty motor
Contact an authorised K&T dealer
Scratched work surface Faulty abrasive
Replace the abrasive
Disc surface dirty, faulty or worn
Clean/replace the discs
Incorrect wheel adjustment
Correct the wheel position
Insufficient dust collection Dust bag more than 1/3 full
Empty the bag.
Dust bag dirty or with blocked pores
Shake out the dirt and wash the bag.
Vacuum ducts and/or obstructed
pipes
Clean air ducts
Motor does not start Faulty switch
Contact an authorised K&T dealer
Insufficient voltage for unstable
connections
Contact an authorised K&T dealer
Faulty motor
Contact an authorised K&T dealer
No power supply voltage
Check power supply and connections
Scorching on work
surface Worn abrasive Replace the abrasive
Excessive pressure on the discs
Decrease sanding pressure
Abrasive too fine Use abrasive with larger grain

19
GEMINI 100 User Manual_April 2013 Edition
DECLARATION OF CONFORMITY
2006/95 EC, 2006/42 EC
2004/108 EC, 2002/95 EC
2002/96 EC
KUNZLE & TASIN S.r.l.
Manufacturer and entity authorised to compile and maintain the technical file
Registered headquarters
Via Circonvallazione Est. 2/6
27023 Cassolnovo (PV) - Italy
Business Management and Production Site
Via Cajkovskij, 14
20092 – Cinisello Balsamo (MI) - Italy
declare that under our sole responsibility the product:
STEERING SANDER
GEMINI 100
to which this declaration refers, is compliant with the following Directives:
2006/95 EC (Low Voltage Directive), 2006/42 EC (Machine Directive), 2004/108 EC (EMV),
2002/95 EC (RoHS), 2002/96 EC (WEEE Directive).
The product is compliant with the following harmonised standards:
•Machine safety - basic concepts, general design principles
•Basic terminology, EN ISO 12100 methodology, Part 1
•Machine safety - basic concepts, general design principles
•Technical principles and EN ISO 12100 specifications, Part 2
•Machine safety - electrical machine equipment
•Part 1: General rules EN 60204-1
•Safety of domestic equipment and similar - General rules
•EN 60 335-1
•Special standards for equipment to treat and clean flooring for industrial and general use - EN 60 335-2-
67
•Electromagnetic compatibility (EMC)
•Limits and methods in measuring the characteristics of radio interference in motorised or thermal domestic
appliances and similar, electric tools and similar electric devices - EN 55014-1
•Part 3: Limits: Section 2: Limits for the emission of harmonic currents (equipment with input current ≤16 A
per phase) - EN 61000-3-2
•Part 3: Limits: Section 11: Limit of voltage fluctuations and flicker in low voltage power supply systems for
equipment with rated current ≥16 A - EN 61000-3-11
CASSOLNOVO (PV) – 06/04/2012
__________________________________________________________________
(place and date of issue)Michela Caresana - CHIEF EXECUTIVE OFFICER

G
E
Di
s
E
MINI 100
s
posal
S
m
a
p
d
o
di
s
e
n
a
s
a
c
o
p
r
u
n
è
D
i
p
r
In
p
o
w
a
m
w
a
s
h
a
t
s
m
E
n
S
y
e
n
di
e
s
e
U
m
G
e
z
u
fr
a
E
n
A
u
R
ü
E
v
e
u
v
o
d
e
a
g
s
è
è
q
s
u
d
è
p
r
e
x
User Ma
n
m
altimento
d
p
pare sul pro
d
o
mestici. Gli
u
raccolta indi
c
e
parati dalle
a
a
turali e gara
n
a
lute. Per ult
e
o
mune di resi
d
r
odotto. Per
i
n
’etichetta s
u
stata fissata
i
sposal of W
r
oduct on or i
t
stead, it is y
o
o
int for the re
c
a
ste equipme
anner that pr
o
a
ste equipme
h
op where yo
u
t
tach the lab
e
m
all label to
t
n
tsorgung v
o
y
mbol auf de
m
n
tsorgt werde
n
e
Entsorgun
g
e
parate Sam
m
m
welt bei un
d
e
sundheit de
s
u
m Recyceln
a
a
gen Sie dort,
n
tsorgungsri
u
ßerdem, da
ü
ckseite der
v
aquation d
e
u
ropèenne.
L
o
us dèbarass
e
e
l’èvaquation
g
rèè pour le r
e
è
parès de vo
s
q
uipements s
o
u
r les lieux de
è
chets mèna
g
r
oduit pour
s
x
terne est fo
u
n
ual_April
d
i apparecch
i
d
otto o sulla
u
tenti devono
c
ato per il ri
c
a
pparecchiat
u
n
tiscono che
t
e
riori informa
z
d
enza, il ser
v
i
ndicare che
u
l retro del g
r
un’altra l’eti
c
aste Equipm
t
s packaging
i
o
ur responsibi
l
c
ycling of wa
s
nt at the time
o
tects human
nt for recyclin
u
purchased t
h
e
l to the bac
k
t
he back of t
h
o
n Ausschu
m
Produkt od
e
n
darf. Es obl
g
oder Wied
e
m
lung und da
d
gewährleist
e
s
Menschen u
a
bgeben kön
n
wo Sie das
G
chtlinien ge
eine externe
Kalotte ang
e
e
s èquipme
n
L
a prèsence d
e
r de ce pro
d
de vos èqui
p
e
cyclage des
s
èquipement
s
o
nt recycles
d
collecte des
è
g
ers ou le m
a
s
ignaler qu’i
l
u
rnie, fixes l
a
2013 Edi
t
i
ature da rot
t
confezione i
n
provvedere a
c
iclaggio delle
re da rottam
a
t
ali apparecc
h
z
ioni sui punt
v
izio di smalti
m
questo pro
d
r
uppo manic
o
c
hetta sul ret
ent by User
s
i
ndicates that
ity to dispos
e
s
te electrical
a
of disposal
w
health and th
e
g, please co
n
h
e product. T
o
k
-side of the
h
e power su
p
sselektroger
ä
e
r dessen Ve
r
iegt daher Ih
r
e
rverwertung
s
Recycling I
e
t, dass sie
a
nd der Umwe
n
en, setzen S
G
erät erworbe
lten, wurde
Versorgung
e
bracht.
n
ts usagès
p
e ce symbol
e
d
uit de la mê
m
p
ements usag
èquipements
s
usagès per
m
d
ans le respe
c
è
quipements
u
a
gasin où vo
u
l
doit être è
v
a
petite ètiqu
e
20
t
ion
t
amare da p
a
n
dica che il
p
llo smaltimen
t
apparecchia
t
a
re in fase d
h
iature venga
n
t
i di raccolta
m
ento dei rifi
u
d
otto comp
o
o, inoltre es
s
ro della sco
c
s
in Private
H
this product
m
e
of your wast
a
nd electronic
w
ill help to co
n
e
environmen
n
tact your loc
a
o
indicate th
a
handle gro
u
p
ply.
r
äten durch
r
packung gibt
r
er Verantwor
t
von Elektrog
hrer zur Ent
s
a
uf eine Art u
lt darstellt. F
ü
S
ie sich sie mi
n haben. Um
auf der R
ü
im Lieferum
f
p
ar les utili
s
e
sur le produ
m
efacon que
v
ès et à cet e
f
èlettriques e
t
m
ettent de p
r
c
t de la santè
usagès, veuill
u
s avez ach
e
v
acuè selon
e
tte à l’arrièr
e
a
rte di privat
i
p
rodotto non
d
t
o delle appa
r
t
ure elettrich
e
i smaltiment
o
n
o rottamate
n
delle appare
c
u
ti locale o il
o
rta requisiti
s
endo p
r
ese
n
c
ca della ma
c
H
ouseholds i
n
m
ust on be d
i
e equipment
b
equipment.
T
serve natural
t. For more i
n
a
l city office,
y
a
t this produ
c
u
p. If an exte
Benutzer in
an, dass da
s
t
ung, das zu
m
eräten aller
A
s
orgung besti
m
nd Weise re
c
r weitere Info
r
t den örtliche
n
darauf hinz
u
ü
ckseite der
f
ang enthalt
e
s
ateurs dan
s
it on sur son
v
os dèchets
c
f
fet, vous ête
s
t
èlettronique
s
èserver les r
e
humaine et
d
ez contracter
e
tè le produit
.
une procèd
u
e
de celle-ci.
nell’Unione
d
eve essere
s
r
ecchiature d
a
e
ed elettroni
c
favoriscono
n
el rispetto d
e
c
chiature da
r
n
egozio pres
s
speciali di
n
te una fonte
c
china.
n
the Europ
e
sposed of wi
t
b
y handing it
T
he separate
c
resources an
formation ab
o
y
our househol
d
c
t has speci
a
r
nal power s
privaten H
a
s
Produkt nic
h
m
Verschrotte
n
A
rt entsprech
m
mten Elektr
o
c
ycelt werden
,
r
mationen da
r
n
Behörden,
W
weisen, das
s
Griffgruppe
e
n ist, wurde
s
les foyers
amballage in
d
c
ourant. Au c
o
s
tenu de les
s
usagès. Le
e
ssources na
t
d
e l’environne
votre mairie,
.
Fixes la gr
a
u
re particuli
è
Europea. Q
u
smaltito assi
e
a
rottamare p
o
c
he. La racc
o
la conservaz
e
ll’ambiente
e
r
ottamare, co
s
o il quale è
s
smaltimento
e
di alimenta
z
e
an Union. T
h
t
h your other
over to a de
s
c
ollection an
d
n
d ensure tha
t
o
ut where you
d
waste disp
o
a
l disposal r
e
s
upply is incl
a
ushalten in
h
t zusammen
n
bestimmte
G
h
enden Stelle
o
geräte träg
t
, die keine G
r
über, wo Sie
W
ertstoffhöfe
n
s
für dieses
P
e
ein Aufkle
ein anderes
A
s
privès au
d
ique que vo
u
o
ntraire, vous
remettre à u
n
tri, l’èvaquati
o
t
urelleset de
s
e
ment. Pour p
votre service
r
ande ètique
t
è
re. Lorsqu’
u
u
esto simbolo
e
me ad altri
r
o
rtandole al l
u
o
lta e il ricicla
ione delle ris
o
e
della tutela
d
ntattare il pr
o
s
tato acquist
a
, è stata fis
s
z
ione estern
a
h
is symbol o
n
household w
a
s
ignated colle
c
d
recycling of
y
it is recycled
can drop off
y
o
sal service o
r
e
quirements,
uded, attach
der EU. Di
e
mit dem Res
t
G
erät an eine
abzugeben.
t
zum Schutz
efährdung fü
r
alte Elektrog
e
n
im Kontakt
o
P
rodukt spez
ber angebr
a
A
ufkleber an
sein de l’U
n
u
s ne pouvez
êtes raspons
n
point de coll
o
n et le recyc
s
’assurer que
lus d’informa
t
de traitement
t
te à l’arrièr
e
u
ne aliment
a
che
r
ifiuti
u
ogo
ggio
o
rse
d
ella
o
prio
a
to il
s
ata
a
, ne
n
the
a
ste.
c
tion
y
our
in a
y
our
r
the
has
the
e
ses
t
müll
r für
Die
der
r
die
e
räte
o
der
ielle
a
cht.
der
n
ion
pas
able
ecte
lage
ces
t
ions
des
e
du
a
tion
Table of contents
Other Kunzle & Tasin Sander manuals

Kunzle & Tasin
Kunzle & Tasin Bona Belt lite Instructions for use

Kunzle & Tasin
Kunzle & Tasin STORNELLO 7699950001 Operator's manual

Kunzle & Tasin
Kunzle & Tasin Arlequin Manual

Kunzle & Tasin
Kunzle & Tasin Bona Belt Series User manual

Kunzle & Tasin
Kunzle & Tasin Bona Edge UX Operating instructions

Kunzle & Tasin
Kunzle & Tasin Bona Belt UX Operating instructions

Kunzle & Tasin
Kunzle & Tasin Bona Belt UX User manual

Kunzle & Tasin
Kunzle & Tasin Bona Dual Edge User manual

Kunzle & Tasin
Kunzle & Tasin Bona Belt lite User manual

Kunzle & Tasin
Kunzle & Tasin Bona Belt UX Operating instructions