manuals.online logo
Brands
  1. Home
  2. •
  3. Brands
  4. •
  5. Kuppersbusch
  6. •
  7. Hob
  8. •
  9. Kuppersbusch EKE 805.3 Quick setup guide

Kuppersbusch EKE 805.3 Quick setup guide

BEDIENUNGSANWEISUNG
mit Montageanweisungen
Instructions for use and installation instructions
Instructions d’utilisation et avis de montage
Gebruiksaanwijzing en montagehandleiding
Istruzioni di uso e di montaggio
Instrucciones de uso y de montaje
Instruções de uso e de montagem
Ðtv³wuÒ xvÒvÒ ÊËw Ò´ÎËxÑÐÌгvÒvÒ
EKE 805.3 / 606.3
241070 L21
EKE 805.3/606.3 13
Conditions of guarantee
The conditions o guarantee applicable or this product are subject to those
published by the representative in the relevant country. Details regarding same
may be obtained rom the dealer rom whom the appliance was purchased.
For claims under guarantee the sales receipt must be produced.
For your information
Please read the instructions in this booklet care ully as it contains important
in ormation concerning the sa ety, the installation, the use and the mainte-
nance o your appliance.
The appliance should only be used or cooking in the household.
Keep the operation instructions in a sa e place.
Notes on disposal
Disposing of the packaging
The transport packaging consists o the ollowing materials: Corrugated card-
board, cardboard, styro oam (CFC- ree), Polyethylen- oil.
Do not put these materials in the household rubbish, but ask your local au-
thority to give you the adress o the most convenient collection point.
What to do if you happen to have an old appliance
Old appliances contain many materials which can be recycled. For this reason
you should not simply put your old appliance on the rubbish tip, but ask your
local authority how it might be recycled.
Contents
Your appliance at a glance . . . . . . . . . . . . . . . . . . . . . . . 14
Safety instructions . . . . . . . . . . . . . . . . . . . . . . . . . . . . 15
or connection and unction
or the cooking area
Before first use . . . . . . . . . . . . . . . . . . . . . . . . . . . . . . . 15
Use of the cooking zones . . . . . . . . . . . . . . . . . . . . . . . . 16
Switch on the cooking area
The pan recognition unction
The cooking setting
The automatic boost unction
Cooking zone heating indicator
Some instructions on cookware
Dual-circuit cooking zones and rying zones
The emergency switch
Child proo lock (sensor-lock)
Minute minder
Switch o unction
Warming zone
Time limit unction (holiday unction)
Other unctions
What to do if there is a fault . . . . . . . . . . . . . . . . . . . . . . 20
Cleaning and care . . . . . . . . . . . . . . . . . . . . . . . . . . . . . 20
Installation . . . . . . . . . . . . . . . . . . . . . . . . . . . . . . . . . . 22
Please note
Notes or itting
Installation o glass-ceramic cooking areas
Electrical connection
14 EKE 805.3/606.3
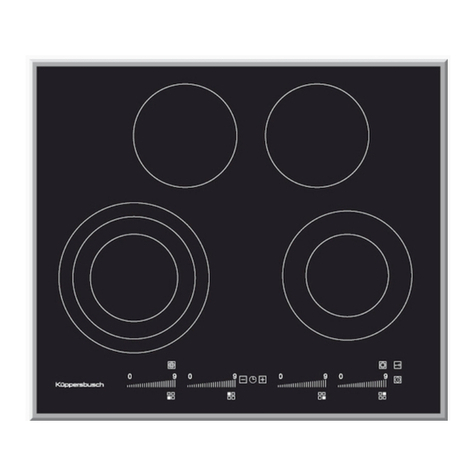
Your appliance at a glance
1 Cooking zone with automatic switch o
( unction (via minute minder)
2 Cooking zone thermal indicator
3 Dual-circuitcooking zone
4 Display or minute minder
5 O -sensor / emergency switch
6 Child proo lock (sensor-lock)
7Sensor-stand-by switch
8 Minute minder
9 Sensor buttons or cooking settings
10 Sensor buttons or warming zone
11 Indicator or warming zone
12 Warming zone
13 Frying zone
EKE 805.3/606.3 15
Safety instructions
or connection and unction
■ KÜPPERSBUSCH built-in cooking zones may be combined only with KÜP-
PERSBUSCH built-in ovens with cooling an. The use o any other make o
oven shall exempt Küppersbusch rom all liability. Failure to observe this re-
quirement will invalidate all granted certi icates and labels o approval.
■ The mains connection, maintenance and repair jobs should only be carried
out by an authorised technician in accordance with the applicable sa ety
standards. Work which has been improperly carried out can endanger your
sa ety.
■ The sur aces o heating- and cooking zones become hot during operation.
There ore: Always keep children away.
■ The appliance must be earthed!
or the cooking area
■ Overheated ats and oils may spontaneously ignite. You should there ore
cook ood involving the use o ats and oils, e. g. chipped potatoes, only
under supervision. Never extinguish ats or oils with water! Place a lid on
the pan, switch o the cooking zone and take the pan o the hot cooking
zone.
■ I cracks, ractures, or any other de ects appear in your glass-ceramic cook-
ing area, do not use your appliance. Unplug or otherwise disconnect your
appliance rom the mains supply and call our service centre.
■ I the cooking area cannot be switched o due to a de ect in the sensor
control immediately disconnect your appliance and call the service centre.
■ Immediately switch o the cooking zone a ter using with the respective mi-
nus key and not just by pot recognition.
■ Be care ul when working with additional appliances! The connection leads
must not come into contact with the hot cooking zones.
■ The glass ceramic cooking area should not be used as a storage area.
■ Do not place combustible or in lammable objects upon the cooking top
which might be dangerous in case o unintentional switching on.
■ Do not place any in lammable or combustible items on the hob since there
is a risk o burns or damage i the hob is switched on unintentionally.
■ Never use the cooking zones without cookware. Never use the appliance to
heat rooms!
■ Never put aluminium oil or plastic on top o the cooking zones. Substances
that melt, or example plastic, oils and especially sugar and ood with a
high sugar content are to be kept away rom the hot cooking zone. In order
to avoid damaging, sugar, while still hot, should immediately be scraped o
the cooking area with a scraper.
■ Avoid repeated burning o stains and boiling over.
■ Chalk deposits may damage the cooking area.
■ I you have pets in your lat, who might reach the cooking top, activate the
child-proo unit.
Before first use
■ Remove packaging and moving parts.
■ Be ore irst use the cooking area should be cleaned with a damp cloth and
a little washing-up liquid.
■ The cooking area is insensitive to temperature shocks (cold and hot) and
also extremely robust.
■ Avoid dropping sharp objects onto the cooking area. Pointed objects alling
onto your cooking area might break it.
■ Please read through the cleaning and care instructions. Be especially care ul
to keep the sensor keys clean since soiling could be mistaken or inger
contact by the appliance. Never put anything (pans, tea towels etc.) onto
the sensor keys! I ood boils over onto the sensor keys, we advice you to
activate the emergency switch.
■ You might hear a humming sound rom the heating when switching on the
appliance. This is due to technical reasons and has no in luence on quality
and unctioning o your appliance.
■ Hot pans should not cover the the sensor keys, otherwise the appliance
switches itsel o automatically.
■ I the electronic components heat up, a cooling an switches itsel on. This
cooling an may continue to be in operation even a ter switching o the
cooking area.
16 EKE 805.3/606.3
Use of the cooking zones
Read the safety instructions!
Switch on the cooking area
Press the sensor-button or approx.
2 seconds. The LED-display above
the sensor lights up and the appli-
ance is in operation (stand-by
mode).
The stand-by mode automatically switches itsel o ,
– i you do not press another sensor key during the ollowing 20 seconds
(a ter 10 seconds an acustic signal indicates that the appliance switches
itsel o a ter another 10 seconds) or
– i the appliance is not used 10 minutes a ter starting operation.
The pan recognition unction
The appliance is equipped with a pan recognition unction.
I a suitable pan is put onto the
cooking zone, "U" is indicated by
the display.
I no pan or an unsuitable pan is put
onto the cooking zone, an under-
lined "U" is indicated.
A ter 10 minutes the cooking zone automatically switches itsel o .
Should a "U" happen to appear in the display although there is no pan on the
cooking zone, this does not mean that a ault has occured. Nor does it mean
that the cooking zone will switch on automatically. The electronics adjust au-
tomatically, which means that this e ect will not occur the next time the ap-
pliance is put into operation.
Switching off the pan recognition function
Press the plus- and minus-sensor at
the same time before making the
cooking setting.
A circle will appear in the display
next to the selected cooking setting.
There is a de ect in the pan recog-
nition unction, i this circle lights
up.
You can nevertheless continue to
use the cooking zone.
The cooking setting
You have 9 cooking settings availa-
ble.
Select the required cooking setting
with the plus- or minus-sensor.
It will be indicated in the display.
The "0"-position will not be indicat-
ed.
When pressing the plus-sensor the
cooking zone starts at cooking set-
ting 5, without boost.
When pressing the minus sensor
the cooking zone starts at cooking
setting 9.
This automatically starts the auto-
matic boost.
Switching o the cooking zone:
press the plus- and minus-sensor at
the same time.
and
Cooking setting suitable or
1-3 Heating, Warming,
Creeing, De rosting
4-5 Steaming, Poaching,
Boiling
6-8 Roasting, Deep- rying
9Heating large quantities
or
and
EKE 805.3/606.3 17
The automatic boost unction
All cooking zones are equipped with an automatic boost unction. Maximum
power is used or the boost. The time period o the boost depends on the
selected cooking setting. A ter the elapsed time the cooking zone automatically
switches back to the selected cooking setting.
When selecting the respective cook-
ing setting by pressing the minus-
sensor, the boost unction switches
on automatically.
During automatic operation a "A"
lights up in the display alternately
with the selected cooking setting.
When selecting the required cook-
ing setting by pressing the plus-
sensor, it is necessary to press the
plus-sensor again a ter reaching
cooking setting 9 i the automatic
boost unction is to be activated.
Select the required cooking setting.
"A" lights up in the display alter-
nately with the selected cooking
setting.
Cooking zone heating indicator (1) (Example)
Lights up, as long as the cooking zones are still hot – even a ter switching o .
Be careful! The indicator can ail (de ective lamp). In this case there is no
warning o hot temperature. Change lamp immediately.
Some instructions on cookware
Only use pans with even and flat bottoms.
Uneven pan bottoms prolong the boost times and increase the power require-
ment. Rough pan bottoms scratch the glass-ceramic area when shi ted about.
When using ireproo glass or porcelain cookware, please ollow the manu ac-
turers instructions.
Choose a pan with a diameter at least as large as the cooking zone.
You will thereby save energy and cooking time. You will also avoid overheating
o the cooking area.
Wherever possible, place a lid on the pan.
You will save a lot o energy by cooking in a closed pan. Liquids and oods
will only boil over i the temperature is too high. For the cooking zones, you
can precisely set the temperature required. With a little practice, you will read-
ily make the correct choice o cooking settings so that nothing boils over even
when a lid is in place.
Dual-circuit cooking zones and rying zones
Usually the cooking zone with the smaller diameter is being heated.
Switch on the outer cooking zone circuit or bigger sauce pans or rying pans.
Press the cooking zone symbol next
to the plus/minus sensor. A control
indicator above the cooking zone
symbol indicates operation o the
dual-circuit cooking zone.
Pressing the cooking zone symbol
once again deactivates the dual cir-
cuit cooking zone or rying zone.
press again
18 EKE 805.3/606.3
The emergency switch
All unctions can be switched o by pressing any o the two sensors to the
ar right and the ar le t.
Even i you cannot reach an o sensor, the appliance can be switched o .
Child proo lock (sensor-lock)
Operating the sensor lock detains unauthorised persons rom using the appli-
ance. In order to activate this lock the cooking area has to be in operation.
Press the sensor lock. It is alos
possible to press it during opera-
tion.
In this case you can only chosse a
lower cooking setting or switch o .
The lock is indicated by 3 lashing control indicators.
Be careful: Switching o the cooking area does not deactivate the lock!
Deactivating the lock:
Press the sensors under the lashing control indicators at once.
Or
You can deactivate the lock as ollows:
Press the sensors under the two le t lasing control indicators at once. A ter
not more than 3 seconds press the sensor under the lashing control indicator
on the right.
Minute minder
The minute minder is equipped with a sleep-/and a switch-o unction or a
maximum interval o 99 minutes.
You can activate the minute mind-
er by pressing the plus or the mi-
nus-sensor.
You can then select the required
period o time with the plus-sensor
(starting at 0) and the minus-sen-
sor (starting at 99).
An audible signal sounds or about
30 seconds when the time has
elapsed.
"00" is displayed.
The audible tone goes o when
pressing the plus- and the minus-
sensor at the same time.
Switch o unction
An audible signal sounds or ap-
prox. 30 seconds when the time
has elapsed.
"00" is displayed.
Press the plus- and the minus-
sensor at the same time in order to
switch o the audible tone.
or
Press at once
after max. 3 sec.At once,
30 sec.
and
and
By pressing the clock-sensor next to the cooking zone sensor o
the le t cooking zone at the back the cooking zone automatically
switches into minute minder unction – the cooking zone is switched
o automatically when the set time is elapsed.
30 sec.
and
EKE 805.3/606.3 19
Warming zone (only EKE 805.3)
Switching the warming zone into stand-by mode
Press the sensor key. The LED-Display underneath the sensor lights up. I no
sensor is pressed in the ollowing 4 seconds, the stand-by mode switches o
automatically.
Switching on the warming zone
Press the on-sensor. The LED-Display underneath the sensor lights up.
The ormer display goes o .
I the warming zone is still hot the heating indicator – lashes even a ter
switching o the appliance.
Be careful! The lighting can ail (lamp is de ective). In this case there is no
warning o high temperatures. Change lamp immediately.
Switching off the warming zone
Press the o -sensor. Die LED-Display underneath the sensor goes o . The
warming zone is switched o automatically.
In order to switch on the warming zone once more you have to switch it into
stand-by mode irst.
Time limit unction (holiday unction)
The appliance is equipped with an automatic time limit unction. This unction
makes sure that the appliance is not in operation or a long time. The time
period o the time limit depends on the selected cooking setting, eg.:
The higher the selected cooking setting, the aster the appliance is switched
o .
I more than one cooking zone is activated the maximum operation time de-
pends on the cooking zone with the highest cooking setting.
Other unctions
■ I pressing two or more sensor keys – at the same time e. g. when a pan
is mistakenly put onto the sensor key no unction is activated. An audible
signal sounds a ter 10 seconds. The appliance switches o automatically
a ter 20 seconds.
Exceptions:
– Deactivation o the sensor-lock
– Deactivation o the pan recognition unction
– Switching o the cooking zones
– Switching o the audible signal
■ I you continue to press a sensor button even a ter having set the highest
cooking setting, an audible signal sounds a ter 10 seconds. A ter 20 sec-
onds the appliance switches o automatically.
■ In case o a break down o the mains supply the appliance does not auto-
matically switch on again.
■ In case o the electronic components overheating, – e. g. when a hot pan
was mistakenly put onto the sensor keys – the appliance switches o au-
tomatically.
In this case the control indicator above the le t or the right emergency
switch lashes until the appliance has cooled down. A terwards the cooking
area can be operated again.
Symbol for the warming zone Cooking setting Switching o time a ter
91 hour
82 hours
7
63 hours
54 hours
4
35 hours
2
110 hours
...
20 EKE 805.3/606.3
What to do if there is a fault
Unplug the appliance befor repair!
Check care ully to make sure that the ault is not due to misoperation. You
can recti y many aults yoursel .
Important note:
Repairs should only be carried out by an authorised technician!
Even during the guarantee period repairs will not be ree o charge i due to
incorrect operation or to non-adherence to our instructions given under "What
to do i there is a ault".
You should always give the data on the rating plate to your service centre in
case you have enquiries or want to order spare parts. The rating plate is lo-
cated underneath the cooking area.
Cleaning and care
[Never clean the glass ceramic hob with a steam cleaner or similar ap-
pliance!
■ Never use sharp or abrasive agents!
It is su icient to clean with a damp
cloth and a little washing-up liquid
a ter usage. Wipe dry.
■ Incrustation due to boilied over oods
are best preso tened with a wet
cloth. Then remove them with a glass
scraper. Sugar and melted plastic
should be removed while the cooking
area is still hot.
■ Clean the glass-ceramic cooking area a ter every use. Always keep the sen-
sor keys clean, since soiling could be detected as inger contact by the
aplliance. Immediately remove soiling. Never put anything (pans, tea-towels
etc.) on the sensor keys! I ood boils over onto the sensor buttons, we ad-
vise you to activate the emergency switch.
■ Care or your glass-ceramic cooking area once a week. Regular care builds
up a protective layer and also eases day to day cleaning. Please ollow the
instructions o the cleaner or cleanser manu acturer concerned.
Even heavy soiling can be cleaned with a cleanser and enough water. Wipe
dry with a cloth.
Fault Cause Remedy
Thermal indicator o
cooking zone has
ailed.
Lamp is de ective. Call service centre. Risk o
burning, since no warning o
high temperatures.
Not possible to
switch o cooking
area.
Failure o electronic
component.
Switch o cooker use in use-
box,
Call service centre.
Cooking area does
not heat.
Fuse is de ective. Check or replace cooker use in
use box.
Child proo lock
activated.
Deactivate child proo lock.
Cooking area is
de ective.
Call service centre.
Inner circuit o the
dual-circuit zone is
de ective.
Do not operate the unctioning
outer circle.
Immediately call service centre.
EKE 805.3/606.3 21
* Figure only for cooking zones without an oven built-under the cook-
ing zone.
It must not be possible to remove the panel without using tools!
panel *
worktop
Deflector
plate
furniture
front
EKE 805.3
EKE 606.3
EKE 805.3
panel
EKE 606.3
worktop
Deflector
plate
furniture
front
22 EKE 805.3/606.3
Installation
Please note
KÜPPERSBUSCH built-in cooking zones may be combined only with KÜPPERS-
BUSCH built-in ovens with cooling an. The use o any other make o oven
shall exempt Küppersbusch rom all liability. Failure to observe this requi-
rement will invalidate all granted certificates and labels of approval.
Notes or itting
■ The worktop must have a width o 40 mm. It is absolutely essential that the
worktop is aligned horizontally and that a clean cut is made into it!
■ The ront, rear and lateral clearances around the hob unit must be main-
tained in accordance with the dimensional drawing.
A corner moulding o solid wood may be itted to the worktop at the back
o the cooking area provided that the minimum clearances are maintained.
For practical reasons the lateral clearance between the appliance and an
adjacent tall cupboard unit must measure at least 300 mm.
■ Make sure that there is su icient clearance underneath the cut-out. Any ur-
niture battens must be cut away to leave an area which is at least the same
size as the cut-out itsel .
■ Make a point o ensuring that the plastic laminate or wood veneer on your
urniture surround has been applied by means o a heat-resistant adhesive
(100 °C).
■ Any cooker hoods or wall cupboards must have a vertical clearance o at
least 650 mm rom the cooking area.
It will be expedient to seal built-in sinks and other built-in appliances in the
worktop in the same way (protection against ingress o water).
Prior to installation and a ter removal or repair, examine the gasket or pos-
sible damage. The gasket must provide per ect contact on all our sides. Re-
place it i necessary.
In the case o ceramic-tiled worktops it is necessary to provide an additional
seal with the aid o a permanently elastic sealing compound. Such sealing
compound can be purchased as Küppersbusch spare part No. 53 55 69.
– Clean the sur aces to be sealed in accordance with the manu acturer's
instructions on the cartridge. Apply the compound in a continuous strip,
pressing it irmly against the gap to be sealed.
– Cut away any surplus sealing compound with a sharp kni e and clean the
sealed joint with water.
Installation o glass-ceramic cooking areas
First install the air deflector plate in the front of the work top cut- out
as shown.
An air gap o 5 mm is required between the worktop and the urniture ront,
so that the hob can receive su icient air. I the gap is less than 5 mm, the
top edge o the urniture ront must be modi ied accordingly.
Using clips makes it easier and quicker or you to install these units. You can
carry out the complete installation work rom above.
■ Always li t the cooking area by holding it at the sides. Do not li t it by the
ront bar.
■ Be extremely care ul when installing!
Do not place or drop any sharp or pointed tools (screwdrivers etc.) on the
glass sur ace!
■ The glass-ceramic cooking area must have a level and lush bearing. Any
distortion may lead to racture o the glass panel.
– First o all make a clean cut into the worktop.
– Make sure that the gasket is properly seated. I the worktop sur ace is un-
even (tiles etc.), remove the gasket strip and seal with a heat resistant
sealing compound.
– Then insert the clips into the worktop cut-out as shown in the igures on
the previous page, observing the clearances indicated. It is not necessary
to adjust the height due to the horizontal stop motion device.
– Install the cooking area on the le t as shown (1), align it (2) and asten it (3).
I the worktop cut-out should be a little too
large, it is possible to increase the prelim-
inary spring tension o the clips by screw-
ing them down.
You only require the enclosed tension el-
ements S i you are itting the cooking
area into worktops made o granite, mar-
ble or similar materials.
Electrical connection
■ The built-in cooking area must be connected to the mains supply by
a qualified electrician who is authorized to carry out such work.
■ Both legal wiring regulations and the requirements o your local electricity
supply board must be ully complied with.
■ Sa eguard the appliance by means o line-protecting switches, uses or con-
tactors with at least 3 mm contact opening width.
■ When connecting and repairing the appliance disconnect it rom the elec-
tricity supply with one o these devices.
■ It must not be possible to touch nonconducting parts when the appliance is
installed.
■ The earthed conductor lead must be su iciently long so that, in the event
o ailure o the strain relie , it is not subjected to strain until a ter the live
wires o the connection cable.
■ Any super luous cable must be removed rom the installation area beneath
the appliance.
Electrical connection Permanent connection by means o an oven connec-
tion socket.
Connection diagram is depicted on the underside o the appliance, suita-
ble or the various types o mains.
Connection data Permanent connection 400 V 3 N
~
50 Hz
(AC 230 V in UK)
Voltage o heating element: 230 V
400 V 3 N ~ sa ety curren 16 A
400 V 2 N ~ sa ety curren 20 A
230 V 1 N ~ sa ety curren 25 A
230 V 3 ~ sa ety curren 16 A
Connection cable Use H 05 RR-F or H 07 RN-F.
The cable must be no shorter than 2 m.
Granite
Achtung!
Wichtiger Hinweis für Montage! Unbedingt beachten!
Das Luftleitblech (B) muß unbedingt vorne im Arbeitplattenausschnitt befestigt werden. Andernfalls kann
es während des Betriebes zu Schäden an der lektronik kommen!
Attention!
Important installation instruction!
It is essential to attach the air deflector plate (B) at the front of the worktop opening, as otherwise damage
might be caused to the electronics of the hob during operation!
Attention!
Instruction d installation importante!
La tôle de canalisation d'air (B) doit être obligatoirement fixée sur la face avant dans l'é videment du
plan de travail. Sinon les systèmes électroniques pourraient être endommagés pendant le fonctionne-
ment de la table de cuisson !
Opgelet!
Zeer voornaam! Voorzorg in acht te nemen
bij de montage van kookplaten K . De luchtgeleidingsplaat (B) moet in elk geval vooraa n in de uits paring
van het aanrechtblad worden gemonteerd. Anders kan de elektronica van het kookveld bij het werken
beschadigd raken!
Attentione!
Instruzione d‘ installazione importante!
La lamiera di conduzione (B) deve essere assolutamente fissato al bordo frontale nel ritaglio del piano
di lavoro. Altrimenti durante un funzionamento potrebbe danneggiarsi l'elettronica del piano di cottura!
¡Atención!
¡Instrucción importante para el montaje!
¡ s indispensable fijar la chapa-guía del aire (B) en la parte delantera del hueco del tablero de trabajo.
De lo contrario, durante la cocción podrían producirse dete rioros del sistema electrónico de la encimera!
Atenção!
Indicação importante para a montagem! Observar sem falta!
A chapa de condução do ar (B) tem que ser impreterivelmente fixada à frente no entalhe do balcão de
serviço. Caso contrário, podem ser provocados danos na electrónica durante o funcionamento!
Observera!
Viktig information för montage! Beakta ovillkorligen!
Baffelplåten (B) måste ovillkorligen fästas framtill i arbetsbänkens urtag. I annat fall kan skador uppstå på den
elektroniska utrustningen under driften!
½
Ò{~{{Ó~
Ð{{(B)~{zz{z{{#Ë!
!{z{!{ {
Aworktop
Bdeflector plate
Cfurniture front
Atable de travail
BTôle canalisant l´air
Cpanneau du meuble
Awerkblad
Bluchtgeleidingsplaat
Cmeubelpaneel
Apiano di lavoro
Blamiera di guida aria
Cfrontale del mobile
Atablero de trabajo
Bchapa guia del aire
Cfrontal del mueble
Aplano del trabalho
Bchapa de condução do ar
Cparte da frente do armário
AArbetsplatta
BCirculationsplat
CSnickerifront
Az{{
B{{
C
Wa.Nr.: 241087 L22

Other manuals for EKE 805.3

1

This manual suits for next models

1

Other Kuppersbusch Hob manuals

Kuppersbusch EKI9954.1F Operation manual

Kuppersbusch

Kuppersbusch EKI9954.1F Operation manual

Kuppersbusch EKE 6542.0F Quick setup guide

Kuppersbusch

Kuppersbusch EKE 6542.0F Quick setup guide

Kuppersbusch CK580 User manual

Kuppersbusch

Kuppersbusch CK580 User manual

Kuppersbusch EKIW 957.0 F Quick setup guide

Kuppersbusch

Kuppersbusch EKIW 957.0 F Quick setup guide

Kuppersbusch T1-88-05 Manual

Kuppersbusch

Kuppersbusch T1-88-05 Manual

Kuppersbusch IKT804 Operation manual

Kuppersbusch

Kuppersbusch IKT804 Operation manual

Kuppersbusch EKE 805.3 Quick setup guide

Kuppersbusch

Kuppersbusch EKE 805.3 Quick setup guide

Kuppersbusch K 3 Series Operation manual

Kuppersbusch

Kuppersbusch K 3 Series Operation manual

Kuppersbusch EKI846UL Quick start guide

Kuppersbusch

Kuppersbusch EKI846UL Quick start guide

Kuppersbusch EKE 854.2 Operation manual

Kuppersbusch

Kuppersbusch EKE 854.2 Operation manual

Kuppersbusch KI9820.0SF Operation manual

Kuppersbusch

Kuppersbusch KI9820.0SF Operation manual

Kuppersbusch KI6870.0SR Operation manual

Kuppersbusch

Kuppersbusch KI6870.0SR Operation manual

Kuppersbusch GKS 11742.0-35 F-UL User manual

Kuppersbusch

Kuppersbusch GKS 11742.0-35 F-UL User manual

Kuppersbusch EKE 807.2 Quick setup guide

Kuppersbusch

Kuppersbusch EKE 807.2 Quick setup guide

Kuppersbusch GKS 324.0-54 User manual

Kuppersbusch

Kuppersbusch GKS 324.0-54 User manual

Kuppersbusch K8 Operating and maintenance manual

Kuppersbusch

Kuppersbusch K8 Operating and maintenance manual

Kuppersbusch KI6120.0SR Operation manual

Kuppersbusch

Kuppersbusch KI6120.0SR Operation manual

Kuppersbusch EKE3721.1 Operation manual

Kuppersbusch

Kuppersbusch EKE3721.1 Operation manual

Kuppersbusch KI9560.0SR User manual

Kuppersbusch

Kuppersbusch KI9560.0SR User manual

Kuppersbusch EKE 61.0 Quick setup guide

Kuppersbusch

Kuppersbusch EKE 61.0 Quick setup guide

Kuppersbusch EKI3720.1 Operation manual

Kuppersbusch

Kuppersbusch EKI3720.1 Operation manual

Kuppersbusch GWS 4711.0 M Installation and operating instructions

Kuppersbusch

Kuppersbusch GWS 4711.0 M Installation and operating instructions

Kuppersbusch VKI3805.0 User manual

Kuppersbusch

Kuppersbusch VKI3805.0 User manual

Kuppersbusch EM 58 User manual

Kuppersbusch

Kuppersbusch EM 58 User manual

Popular Hob manuals by other brands

AEG Electrolux B 99852G user manual

AEG Electrolux

AEG Electrolux B 99852G user manual

Electrolux CC 3060 Operating and assembly instructions

Electrolux

Electrolux CC 3060 Operating and assembly instructions

Franke SMART Series installation manual

Franke

Franke SMART Series installation manual

SCHOLTES TRC 630 C operating instructions

SCHOLTES

SCHOLTES TRC 630 C operating instructions

Klarstein VIRTUOSA manual

Klarstein

Klarstein VIRTUOSA manual

Russell Hobbs RH60EH401B instruction manual

Russell Hobbs

Russell Hobbs RH60EH401B instruction manual

SCHOLTES tip 642 dd b operating instructions

SCHOLTES

SCHOLTES tip 642 dd b operating instructions

Whirlpool KitchenAid KHID4 77510 user manual

Whirlpool

Whirlpool KitchenAid KHID4 77510 user manual

Buffalo PRO Hokker Big Flame 215333 User instructions

Buffalo

Buffalo PRO Hokker Big Flame 215333 User instructions

Zanussi ZGG75524 user manual

Zanussi

Zanussi ZGG75524 user manual

Candy CDK6GR4PBB User instructions

Candy

Candy CDK6GR4PBB User instructions

Electrolux GPE363YK user manual

Electrolux

Electrolux GPE363YK user manual

Viva VIVA VVK26R8150 Instructions for use

Viva

Viva VIVA VVK26R8150 Instructions for use

Dacor EG366 use and care manual

Dacor

Dacor EG366 use and care manual

BORETTI BIK-66 operating instructions

BORETTI

BORETTI BIK-66 operating instructions

Siemens EJ 730 Series instruction manual

Siemens

Siemens EJ 730 Series instruction manual

CONSTRUCTA CA321250 instruction manual

CONSTRUCTA

CONSTRUCTA CA321250 instruction manual

Siemens EH Series instruction manual

Siemens

Siemens EH Series instruction manual

manuals.online logo
manuals.online logoBrands
  • About & Mission
  • Contact us
  • Privacy Policy
  • Terms and Conditions

Copyright 2025 Manuals.Online. All Rights Reserved.