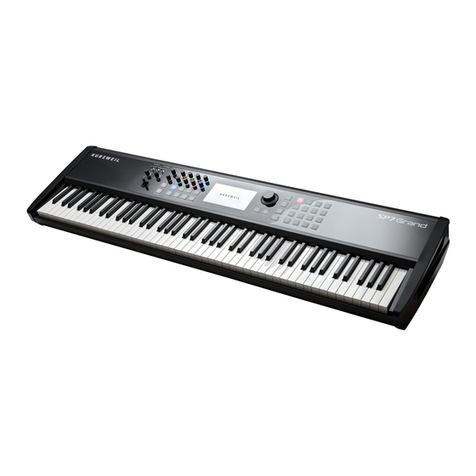
Kurzweil SP7 Grand User manual

English Manual
MUSICIAN'S
GUIDE


PowerSupply&Precautions
CAUTION
WARNING 1)To reduce the risk of fire or electric shock, do not expose this
apparatus to rain or moisture.
1) Discharge static electricity by touching a metal surface before
touching the instrument.
2) Protect the keyboard and switches when moving the instrument.
3) Ensure the volume is set to the minimum level before turning on
the instrument.
4) Do not open the inside of the instrument. This instrument contains
precision parts which should not be touched.
5) Turn off the power after use.
6) Unplug the instrument when unused for long periods of time.
7) Do not apply excess force to the buttons and switches.
2) Please connect the designated DC adaptor to an AC outlet of
the correct voltage.
3) This product should only be used with a standard voltage,
if not, please use an appropriate adaptor that is recommended
by the manufacturer.
4) When opening and closing the key cover, be careful not to pinch
hands or fingers.
Make sure your digital piano is rated for the AC voltage supplied in the area in which
the piano will be used. The voltage rating appears on the name plate on the adaptor.
To ensure proper and safe operation of the instrument, please read the manual care-
fully and keep it for future reference.
Prop 65 Warning: This product contains chemicals known to the state of California to cause cancer, or birth
defects or other reproductive harm. [As with most electronic equipment, the outer cables may contain
phthalate and the copper alloy power plug contains lead. Wash hands after handling.]

4
Chapter 1. Getting Started
1-1. SP7 Connections ................................................ 5
What’s Included
Power Connection
1-2. Main Features ..................................................... 6
1-3. Firmware update ................................................. 7
Engine Firmware Updates
LCD Firmware Updates
1-4. Quick Start .......................................................... 8
1-5. The Front Panel .................................................. 9
1-6. The Rear Panel ................................................. 12
1-7. SP7 Sounds ...................................................... 14
Selecting Sound presets
Split/Layer
1-8. Mode ................................................................ 15
1-9. Menu ................................................................ 15
Chapter 2. FAVORITE Mode
2-1. Screen Layout ................................................... 17
2-2. Select a Favorite ............................................... 17
2-3. Assign a Favorite ............................................... 17
Chapter 4. Audio Mode
4-1. General ............................................................. 42
4-2. Audio Input ....................................................... 43
4-3. Vocal Processor ................................................ 46
Chapter 5. Global Mode
5-1. Global 1 ............................................................. 48
5-2. Global 2 ............................................................. 49
5-3. Control .............................................................. 50
5-4. LED Color .......................................................... 55
5-5. Demo ................................................................ 56
5-6. Info ................................................................... 56
Supplementary Provisions
Supplementary Provisions - A
(Controller Destination) ............................................. 57
Supplementary Provisions - B
(MIDI Destination) ..................................................... 60
Supplementary Provisions - C
(Velocity Map) ........................................................... 61
3-7. ARP (Arpeggiator) .............................................. 35
3-8. Aux FX (Preset Master FX) ................................ 38
3-9. Saving User Sounds ......................................... 40
Chapter 3. Sound Mode
3-1. Sound Preset List .............................................. 18
3-2. Selecting Sound Presets ................................... 19
3-3. Editing Sound Presets ....................................... 19
3-4. Overview ........................................................... 20
3-5. Zone Edit ........................................................... 21
3-6. FX Bus (Zone Insert FX) ................................... 26
Table of
Contents

5
Chapter 1. Getting Started
1-1. SP7 Connection
What's Included
The SP7 carton packing contents are as follows.
Power Connection
The SP7's power is supplied by a DC power adaptor.
Before plugging the AC power cord into an AC receptacle, connect the DC power adaptor to the SP7 DC Power jack
on the rear panel.
※ The AC plug shape will vary depending on location
of use.
If any of the above are missing, please contact your Kurzweil dealer. Always use the original packing carton to
prevent damage during storage or transport.
SP7 stage piano
DC power supply, AC power cord
Sustain pedal (switch type)
Warranty card
USB cable
Balanced cables
Power on the SP7 by pressing the Power button on the right rear panel.
CAUTION : Be sure to use the supplied DC power adapter (15V, 2.5A) Using the wrong DC
power adapter may damage the product.
If the adapter is damaged or the adapter is lost, please contact your KURZWEIL dealer.
Chapter 1. Started

6
Features
Keyboard and Controllers
The SP7 has an 88-key fully-weighted hammer action keyboard that provides you with a piano-like feel. The
array of physical controllers includes:
Pedals
The SP7 has 3 jacks on the rear panel for connecting optional pedal controllers.
Two switch pedal jacks are typically used to control two-state (i.e., on / off) parameters such as sustain and
sostenuto. A Half Damper pedal (also known as a continuous switch pedal) can be used to allow for “half pedal-
ing” sustain techniques when playing piano programs.
A continuous pedal (CC pedal) jack is typically used to control continuous parameters such as volume and wah.
Note: The SP7 ships with one switch/sustain pedal. Half-damper and CC Pedals are sold separately.
Dual ATST synthesis platform
Includes 2GB of high quality realistic instrument samples extracted directly from the K2700
480 x 282 pixel, high resolution, 4.3″ color LCD touch screen with GUI interface
All controller knobs and buttons are equipped with programmable, full-color LEDs
256 voices of polyphony
512 factory Multis
301 factory Sounds
8 zone MIDI controller
String and pedal resonance modeling
Envelope/velocity controlled key-off samples
Half-damper pedaling support
Multi-effect system offering both insert and aux effects and features 21 effect algorithms
Dual XLR combo jack mic/line audio input with dedicated DSP audio effects
Built-in USB MIDI and audio interface
2 pairs of stereo 1/4" unbalanced outputs (Main, Monitor)
1/4″ headphone output
8 assignable knobs
8 assignable buttons
1 assignable X/Y joystick
2 transpose buttons
2 assignable switch pedal jacks
1 assignable CC pedal jack
Chapter 1. Started
1-2. Main Features

7
Chapter 1. Started
1-3. Firmware Updates
Be sure to check Kurzweil's website (www.kurzweil.com) for new updates. See the Info page in GLOBAL mode
to check the currently installed firmware versions.
The SP7 system consists of 2 separate firmware components: the Engine and the LCD. Each component is
updated individually. You will not necessarily always be updating both at the same time.
Preparing to Update
The entire process requires the SP7, a Windows computer, a USB cable (A to B type), an SD card reader and SD card
(SDHC type).
The engine firmware is updated via USB cable connection to the computer.
The LCD firmware is updated via SD card.
Download the current update kit from http://kurzweil.com -> DOWNLOADS -> select the SP7
-> select DOWNLOADS -> Download the latest update kit posted and save it to your computer and unzip it.
Installing the Engine Firmware
Turn off the SP7.
Connect the SP7 and computer with a USB cable (A to B type). The SP7 USB port is located on the rear panel.
While holding down the [DECREASE -] and [INCREASE +] buttons at the same time, turn on the SP7, wait for
about 1 to 2 seconds, then release the [DECREASE -] and [INCREASE +] buttons.
After confirming that the [DECREASE -] and [INCREASE +] button LEDs are lit, run the SP7Update.exe program
on the computer.
Check that [Kurzweil SP (Bootloader)] is displayed in the “Device” menu.
Press the [Start Program] button to start the update.
When the update is finished, a completion message will appear at the bottom of the screen.
Exit the program and reboot the SP7 to complete the installation.
To prevent conflicts with the existing firmware, perform a “Hard Reset” (Global mode / Info page).
If a problem occurs during firmware installation, try to repeat the installation process above again.
1.
2.
3.
4.
5.
6.
7.
8.
9.
10.
Installing the LCD Firmware
Insert the SD card into the SP7 SD card slot (located on the rear panel).
Press the [GLOBAL] button on the front panel to enter Global Mode.
Select the Info tab on the left side of the LCD screen.
Select the [LCD Firm Update] button under the current firmware version.
When the update page appears on screen, press the [UPDATE] button to start the update.
1.
2.
3.
4.
5.
Engine Firmware Updates
Important : Be sure the .exe and .dz files are located in the same directory path on your computer.
LCD Firmware Updates
Important : Be sure to copy the folder named [upgradeSP7] into the root directory path of the SD card. Do not
rename the files or folder.

8
Chapter 1. Started
After the update is complete, remove the SD card and reboot.
Note : If the [LCD Firmware Update] button is not activated in step 4 above, you can update by putting the
update.img file in the root path rather than the [upgradeSP7] folder of the SD card and rebooting to enter the
update screen.
The SP7 has a power saving feature (Global mode / Auto Power Off) that can automatically power off the SP7
after a period of inactivity. The Auto Power Off feature is enabled by default and can be set to 15 minutes, 30
minutes, 1 hour, 2 hours, 4 hours, or 8 hours. If no activity is detected during the set period of time, the SP7 will
automatically power off.
6.
Setting Up the SP7
If your SP7 keyboard has been out in the cold during shipping, give it time to warm up to room temperature before
powering it on, since condensation may have formed inside.
Place the SP7 on a keyboard stand or on a hard, flat, level surface.
Connect the DC power adaptor to the SP7 DC Power jack. (If you do not use the supplied power adapter, it may
cause malfunctions.)
Plug the power cable into the power outlet.
Plug the included Switch Pedal into the SW1 (SUSTAIN) jack on the SP7 rear panel.
If you have an additional switch pedal, plug it into the SW2 jack for Sostenuto control.
If you have a MIDI CC pedal (also known as a MIDI expression or volume pedal), plug it into the CC (VOLUME) jack
for volume control.
If you are using speakers, turn the master volume all the way down on your amplifier or mixer. Using standard
(1/4-inch) audio cables, first plug into the input jacks of your amplifier or mixer, then plug the other end of the cables
into the SP7 AUDIO OUT jacks. Connecting in this order minimizes the possibility of static discharge damage. For a
mono signal, only use the LEFT (MONO) jack, and leave the RIGHT jack unplugged.
If you are using headphones, connect stereo headphones to the ¼” headphone jack on the rear panel.
1.
2.
3.
4.
5.
6.
7.
8.
9.
Powering On the SP7
Press the POWER button on the right rear panel.
If you are using speakers, adjust the volume of your amp or mixer appropriately.
Slowly turn up the SP7 MAIN VOLUME knob and play some notes to check the volume level. (If you have a CC pedal
plugged into the CC jack, make sure it is set to the maximum volume position).
If using headphones, adjust the MONITOR knob to adjust the headphone volume appropriately.
If you are using a mixer and hear distortion, reduce the gain level on the mixer, or use the mixer’s Pad button if it has
one (a pad button typically decreases the audio input level by 20dB).
It is recommended to turn down the volume to minimum before powering down the SP7.
1.
2.
3.
4.
5.
6.
Auditioning SP7 Sounds
In SOUND Mode, select a Sound by tapping a preset name on screen, by using the [DECREASE -] and [INCREASE
+] buttons, turning the Alpha Wheel or by pressing Category buttons.
For details, see [1-7. SP7 Sounds] and [3-2. Select Sound Presets].
Listen to factory demo songs by pressing the GLOBAL button and then selecting Demo from the left on screen menu.
1.
2.
Automatic Power Saving
1-4. Quick Start

9
Chapter 1. Started
1-5. The Front Panel
HI-Z / Phantom Switch
Input Gain Knobs CATEGORY Buttons
VOLUME Knobs
Joystick Decrease / Increase Buttons
TRANSPOSE Buttons Arrow Keys / Select Button
CONTROL Section LCD Display ALPHA Wheel
MODE Buttons
The LCD display is the main user interface for the SP7. The status bar at the top of the screen displays informa-
tion about the currently selected Mode, Transpose value, Auto Power off status (if enabled) and Tempo. The title
bar just below the status bar shows the preset ID and name, Search button and Menu button.
Note : Depending on the selected function and page, the title bar will display different information.
LCD
The MAIN knob controls the volume level of the AUDIO OUT. The MONITOR knob controls the MONITOR and
HEADPHONE outs.
VOLUME Section
The TRANSPOSE buttons allow you to change the tuning of notes played in semitones (half steps). The current
transpose amount is shown in the LCD display (the default is “Transpose: 0st”). Press both TRANSPOSE buttons
simultaneously to reset the transposition to 0st.
TRANSPOSE Buttons

Chapter 1. Started
The SP7's knobs, buttons, joysticks and pedals typically control various performance parameters, zone volume,
synthesis and FX parameters. Controller assignments can be adjusted or set to user-assignable parameters in
Global Mode.
CONTROL Section
There are 8 knobs with colored LEDs located in the upper half of the control section.
By default, the knobs are preset to: EQ Lo, EQ Mid Lo, EQ Mid Hi, EQ Hi, Delay Time, Delay Level, Reverb Time
and Reverb Level. The function of each knob can be user customized on the Control page in Global Mode.
CONTROL Knobs
There are 8 buttons with colored LEDs on the lower half of the control section.
Each button defaults to turning on/off each Zone (1 to 8). The function of each button can be user customized
on the Control page in Global Mode.
CONTROL Buttons
The joystick is on the lower left corner of the front panel.
The joystick defaults to pitch bend for the X axis (left and right) and modulation for the Y axis (up and down).
The function of the joystick can be user customized on the Control page in Global Mode.
JOYSTICK
The CURSOR buttons are the five buttons immediately below the display. The ARROW buttons move the on
screen cursor (left/up/down/right) and the SELECT button invokes the selected item/field. Use the cursor
buttons to move to any position on the LCD screen, select a function with the SELECT button, then use the
ALPHA WHEEL or [DECREASE-]/[INCREASE +] buttons to change the parameter value of the currently selected
function.
Note: The ARROW and SELECT buttons do not have LEDs.
CURSOR Buttons (Arrow / Select buttons)
The large LED lit dial can be used to navigate through the list of Sounds as well as adjust various on screen
parameters. Turning the ALPHA WHEEL counterclockwise works the same as [DECREASE -] and turning it
clockwise works the same as [INCREASE +]. Turn the ALPHA WHEEL slowly to change the value by one incre-
ment, or turn it quickly to jump several increments.
ALPHA WHEEL

Chapter 1. Started
The [DECREASE -] and [INCREASE +] button allows you to change the value of the selected parameter in single
increments.
DECREASE/INCREASE Buttons
Press the MODE buttons to access the SP7’s various operating modes: FAVORITE, SOUND, AUDIO and
GLOBAL. See Modes on page 1-8 for a description of each Mode.
MODE Buttons
In SOUND mode, on the SoundList page, the CATEGORY buttons allow you to select and browse Sounds in 13
instrument categories. The CATEGORY buttons can also be used as a numeric keypad for direct parameter value
entry on various pages.
Note : The USER sound category houses Sounds that have been edited and saved by the user. If there are no
saved USER Sounds, you cannot yet select the USER category.
Unlike other categories that can only exist within a single category, USER sounds can also be assigned an instru-
ment specific category, such as PIANO or STRING etc., along with their USER designation. As such, they will
display in both the USER and selected instrument category.
CATEGORY Buttons
INPUT 1/2 GAIN Knobs
The INPUT GAIN knobs allow you to adjust the volume of the audio signal connected to the corresponding AUDIO
INPUT jacks on the rear panel.
Note: If you turn up the INPUT GAIN knobs with nothing connected to the rear panel AUDIO INPUT jacks,
unwanted noise may occur. As such, it is best practice to set the INPUT GAIN knobs to their minimum values
when no audio source is connected.
INPUT 1/2 HI-Z Switches
The input impedance of each input channel can be switched to high impedance for electric guitar or bass, etc.
AUDIO INTERFACE Section
INPUT 1/2 GAIN Knobs
As needed, Phantom power can be supplied to both input channels. Use only when microphones which require
phantom power are connected. Turn the switch off when phantom power is not needed.
Note : Phantom power cannot be turned on and off individually per channel. When enabled, both input channels
are supplied with phantom power.
PHANTOM Power Switch

Chapter 1. Started
1-6. The Rear Panel
Power Switch USB Port MAIN OUT HEADPHONE Jack
AUDIO INPEDALSDC Power Jack
MIDI Port SD Card Slot MONITOR OUT
Use the AUDIO IN jacks to mix external audio sources with the sounds of the SP7, apply effects to external audio
sources, or route external audio sources to a computer for recording or processing in a DAW. This is useful for
playing along with backing tracks from a portable music player, computer, or other electronic instrument.
Note : If you turn up the INPUT GAIN knobs with nothing connected to the rear panel AUDIO INPUT jacks,
unwanted noise may occur. As such, it is best practice to set the INPUT GAIN knobs to their minimum values
when no audio source is connected.
AUDIO INPUT Combo Jacks
Connect headphones to the 1/4-inch HEADPHONE jack located on the left rear panel. Headphone volume can
be adjusted through the front panel MONITOR knob. You will need a
1/8-inch-to-1/4-inch adapter in order to use headphones that have a smaller mini plug connector.
Note : The HEADPHONE and MONITOR OUT share the same audio bus and are both controlled by the MONITOR
volume knob.
HEADPHONE Jack
Connect an amplifier or mixer to the MONITOR OUT 1/4-inch jacks.
The volume is adjusted using the MONITOR volume knob on the front panel.
Note : The HEADPHONE and MONITOR OUT share the same audio bus and are both controlled by the MONITOR
volume knob.
MONITOR OUT - LEFT (MONO) and RIGHT jacks
Connect an amplifier or mixer to the MAIN OUT 1/4-inch jacks.
The volume is adjusted using the MAIN volume knob on the front panel. For a mono signal, only use the LEFT
(MONO) jack and leave the RIGHT jack unplugged.
MAIN OUT - LEFT (MONO) and RIGHT jacks

Chapter 1. Started
Use the SW1 (SUSTAIN) and SW2 jacks to connect switch pedals. SW1 (SUSTAIN) defaults to controlling
Sustain, and SW2 defaults to controlling Sostenuto. Pedal assignments can be customized using the parameters
on the “Control” page in GLOBAL Mode.
A Half Damper pedal (also known as a continuous switch pedal) can be used to allow for “half pedaling” sustain
techniques when playing piano programs.
Half-damper pedals are sold separately.
SW1 (SUSTAIN) and SW2 Jacks
Use the MIDI ports to communicate with other MIDI modules and controllers. The OUT port is the MIDI transmit-
ting port, and the IN port is the MIDI receiving port.
To use the SP7 as a MIDI controller triggering another sound module, use a MIDI cable to connect the SP7’s MIDI
OUT port to the MIDI IN port of the module that you want to control.
To trigger the SP7 from another MIDI controller, use a MIDI cable to connect the SP7’s MIDI IN port to the MIDI
OUT port of the controller that you will be using.
MIDI IN/OUT Ports
The SP7's power is supplied by a DC power adaptor. Before plugging the AC power cord into an AC receptacle,
connect the DC power adaptor to the SP7 DC Power jack, located on the rear panel.
CAUTION : Please use the supplied DC power adapter. (15V, 2.5A). Using the wrong DC power adapter may
cause damage to the product. If the adapter is damaged or the adapter is lost, please contact your Kurzweil
dealer.
DC Power Jack
Use the CC (VOLUME) jack to connect a MIDI CC pedal (also known as a MIDI expression or volume pedal). The
CC jack defaults to controlling MIDI Expression (cc#11). You can customize the CC Pedal assignment using the
parameters on the “Control” page in GLOBAL Mode.
CC Pedals are sold separately.
CC (VOLUME) Jack
The SD card slot is used to update the LCD's firmware. Below are the recommended specifications for the SD card.
Type : SDHC / Format type : FAT32 / Speed : 4C or more / Capacity : 16GB or more
SD Card Slot
When a computer or tablet is connected to the USB port, the following operations are possible:
Update the SP7 engine firmware and Sounds.
Use the SP7 as a master MIDI controller to play virtual instruments.
Use the the SP7 as a multitimbral slave for DAW/sequencer production.
Use the SP7 as an audio interface to send/receive audio between your computer.
USB Port

In SOUND Mode, you can select a Sound by directly scrolling and tapping through the preset list on the display,
or by using the ALPHA WHEEL and/or the [INCREASE +], [DECREASE -] buttons
The SP7 contains 512 high-quality multitimbral Sounds and 301 individual programs extracted from Kurzweil's
flagship K2700. Capacity for 128 user-edited Sounds is also provided.
Each Sound preset consists of 16 Zones and, depending on how each Zone is edited, a wide variety of perfor-
mance combinations can be realized.
Sound presets are divided into 13 categories based on instrument type. Sounds can be selected in a number of
ways, all detailed below:
Selecting Sound Presets
Each SP7 Sound consists of 16 independent zones as one performance “multi” preset. As such, splits and layers
are inherent in the design and whether a given zone is a split or layer is determined by the assigned key range
given to each zone.
To edit the zones directly, select a Sound and enter the “Edit” mode (accessible through the “Edit” button found
on the Menu page) and then adjust the parameters on the “Overview” or “Zone Edit” pages as needed.
For details, refer to [3-4. Overview] and [3-5. Zone Edit] page.
Creating Splits and Layers
The SP7 offers a total of 14 Sound categories, consisting of PIANO, E.PIANO, CLAV, ORGAN, STRING, PAD, ENSEM-
BLE, BRASS, WINDS, SYNTH, GUITAR/BASS, DRUMS/PERC, MISC, and USER.
In the SoundList page, you can scroll through and select from the list of categories displayed on the left side of the
screen, or you can press one of the physical CATEGORY buttons on the right side of the front panel. Via either
method, the first Sound in that category is automatically selected. Select a Sound from the current category by directly
scrolling through the Sound List or by using the ALPHA WHEEL and/or the [INCREASE +] or [DECREASE -] buttons.
Select a Sound by Category
Tap the USER SOUND tab at the bottom of the categories listed down the left side of the Sound List screen, or
by pressing the front panel USER category button.
Note : If there are no saved USER Sounds, you cannot yet select the USER category.
Select a User Sound
In SOUND mode, touch the “Search” button at the top of the screen to display a numeric keypad where you can
input ID numbers to search by. Input digits either by tapping the on screen numeric pad or by using the front
panel physical CATEGORY buttons (which also double as a numeric keypad and are each labeled with a number).
After inputting the desired number, tap the on screen Return button or press the front panel ENTER button to
perform the search. Scroll through the subsequent results list on screen and tap your desired selection.
Select a Sound by ID Number
Chapter 1. Started
1-7. SP7 Sounds

Chapter 1. Started
1-8. Modes
The SP7 has 4 operating modes and defaults to SOUND mode when the power is turned on.
Favorite mode is used to conveniently store and recall your 64 most used sounds. Favorites are organized into 4
groups, 16 Sounds per group.
FAVORITE Mode
Tap the “Edit” button to edit the currently selected Sound. When saving an edited factory preset, the new Sound
will get saved to a User ID slot and not saved on top of the original factory ID location.
Edit
Tapping the “ARP” button is a shortcut switch, enabling/disabling the system’s Arpeggiator engine.
Note : this will only engage arpeggiator activity if the current Sound has at least one arpeggiator assigned to one
of its multi zones.
ARP
Press “Tempo” to access the Tempo entry page. Set the system tempo by tapping the TAP button a few times
at the desired rate and/or use the +1/+5/-1/-5 buttons displayed on screen, ALPHA WHEEL, or DECREASE /
INCREASE buttons to set precise values.
Tempo
1-9. Menu
These functions appear when you touch the Menu button displayed at the top right of the screen.
The SP7 always powers up in SOUND mode by default and is the mode for selecting and editing Sounds. You can
edit the currently selected Sound by tapping the “Menu” button at the top of the screen, then selecting “Edit” in
the subsequent array of options . An edited Sound can be saved by pressing the Save button, also found in the
“Menu” page, or through the Save dialog presented when exiting the editor.
SOUND Mode
Audio mode is used to control the audio interface section of the SP7. Adjust the routing and mix levels of the
various inputs as well as apply effects chains to the live signals, including vocal-specific processing.
AUDIO Mode
Use Global mode to adjust common settings that are shared between all modes, such as controller assignments,
velocity sensitivity, auto power option, system Info display, perform a system reset, etc..
GLOBAL Mode

Chapter 2. Favorite Mode
Temporarily prevent accidental setting changes by engaging the “Lock” function. When activated, all on screen
and front panel controls are locked out. Tap the “padlock” icon in the display to restore normal operation.
Lock
The “Settings” button is an on screen shortcut to accessing Global Mode. It duplicates the same function as the
front panel GLOBAL mode button.
Settings
Panic deactivates all sounding notes and resets controller values by sending an “All Notes Off ” message and a
“Reset All Controllers” message on all 16 MIDI channels.
Panic
Chapter 2. Favorite Mode
Press the FAVORITE mode button to access Favorite mode. Store your most needed 64 multi presets for quick and
easy recall during performance.
Favorites are organized into 4 Groups, labeled A to D, with each group containing 16 Sound selections arranged in a
4x4 grid of tiles. Each tile displays the category/preset ID/ Sound name and color-coding corresponding to the
category to which they belong for easy identification.

2-1. Screen Layout
The status bar at the top of the FAVORITE mode screen displays the Transpose value, Auto Power off status (if
enabled) and system Tempo.
Below the top row, you will see the ID and name of the currently selected Sound and “Menu” button off to the right.
The Favorite Group selection buttons, A-D, are displayed down the left side of the screen. On the right side you will
see the Sound presets belonging to the currently selected Favorite Group.
2-2. Select a Favorite
Tap one of the 4 Group buttons on the left. The selected Group button is displayed as active in white, and its corre-
sponding 16 members are displayed in a 4x4 grid on the right.
To select a specific Favorite either tap the desired Favorite tile on the right or use the front panel physical CATEGORY
buttons to load the corresponding Sound.
2-3. Assign a Favorite
Select a Sound from the SoundList in SOUND Mode and then enter FAVORITE Mode.
Next, Select the desired Group (A-D).
Lastly, press and hold either:
a) one of the 16 tiles on the screen, or
b) one of the front panel physical CATEGORY buttons
Hold the button (approx. 2 sec) until you see that the Sound of the corresponding tile has changed to your new
selection.
Chapter 2. Favorite Mode

Chapter 3. Sound Mode
Sound mode is the most basic mode of the SP7, and can be entered by pressing the front panel SOUND mode
button. A list of Sound presets are displayed on the screen. The name of the currently selected Sound preset and its
ID appear in the title area at the top of the display.
3-1. Sound Preset List
The Sound Preset and Category list are displayed in a left and right column format. Category selections are displayed
on the left and Sound presets are displayed on the right.
Each category has a designated color. Since the color of the category to which each Sound belongs is also displayed, it
is easy to see at a glance which category a given Sound belongs to.
The Sounds built into the instrument are called Factory Presets, and as such they have a letter “F” in front of the Preset
ID to help identify them. Sounds created by the user are called USER presets and they have a letter “U” in front of the
Preset ID. These character markings help to distinguish whether a given Sound is a Factory Preset or User creation.
The SP7 Sound Categories consist of PIANO, E.PIANO, CLAV, ORGAN, STRING, PAD, ENSEMBLE, BRASS, WINDS,
SYNTH, GUITAR/BASS, DRUMS/PERC, MISC, and the USER category is displayed at the end of the list.

3-2. Selecting Sound Presets
In SOUND mode, you can select a Sound in the following ways. The name of the selected Sound appears in the title
area at the top of the display.
Note : Unlike other categories, the User Sound category is a category that displays only the Sounds created by the user.
Since each User Sound preset can be assigned a specific category when editing, the USER preset may also be
displayed when selecting a category such as PIANO or STRING that contains the User Sound.
3-3. Editing Sound Presets
Edit Sound presets to modify existing Sounds or create new ones. Modified Sound presets are saved as User Sounds.
You can edit the selected Sound preset by pressing the Menu button and pressing the Edit button.
Note : When factory Sound presets are edited, they are saved as User Sound presets.
In SOUND Mode, you can select a Sound by scrolling the Sound preset list on the display, using the ALPHA
WHEEL, or the [INCREASE +], [DECREASE -] buttons.
Browse All Sound
There are total of 14 categories, including 13 basic categories and 1 USER category.
The basic categories consists of PIANO, E.PIANO, CLAV, ORGAN, STRING, PAD, ENSEMBLE, BRASS, WINDS,
SYNTH, GUITAR/BASS, DRUMS/PERC, and MISC. The USER Sound category is
displayed at the end.
In the Sound List page, you can scroll and select the categories displayed on the left, or you can select each
category through the Category buttons on the right side of the front panel. When you select a category, the first
Sound in that category is automatically selected. You can select a Sound by scrolling through the Sound List or
using the ALPHA WHEEL or the [INCREASE +] or [DECREASE -] buttons.
Select a Sound by Category
You can access the User Sounds by touching the USER Sound at the bottom of the categories on the left side of
the Sound List, or by pressing the USER Category button on the right side of the front panel. User Sounds can be
edited through the EDIT function found under the Menu button selection at the top.
Select a previously saved User Sound
Touch the Search button at the top of the screen to display a screen where you can enter numbers. The Category
buttons on the right side of the front panel are marked with a number, and you can use this number to find the
ID of the Sound. After entering a number, click the Search button or press the Enter button in the category area
to search.
Select a Sound by ID number
Chapter 3. Sound Mode

3-4. Overview
The overview page shows the basic parameters for the 16 Zones of the Sound preset.
You can check and edit the status of each Zone (assigned core voice, key range, panning value, volume, etc.).
Buttons to toggle active/inactive state. They have the same function as Activate in the Zone Edit menu on the
left.
Zone
Shows the core voices assigned to the Zone. It has the same function as the Program in the Zone Edit menu on the
left. You can also use the ALPHA WHEEL or the [INCREASE +] and [DECREASE-] buttons to select a Core Voice.
Program
This parameter sets the lowest Key value of each Zone.
Key Lo
This parameter configures the highest Key value of each Zone.
Key Hi
The Pan parameter sets the panning (left/right stereo placement) of each Zone.
Pan
The Volume parameter sets the volume for each Zone in a range of 0-127 values.
Volume
Selects and display Zones in groups of 4
Zone group buttons at the bottom
Chapter 3. Sound Mode
Other manuals for SP7 Grand
3
Table of contents
Other Kurzweil Recording Equipment manuals

Kurzweil
Kurzweil K2600 - MUSICIANS GUIDE REV A PART NUMBER 910330 CHAP... User manual

Kurzweil
Kurzweil KME61 - REV A User manual

Kurzweil
Kurzweil K150 - ANNOTATED PROGRAM LIST User manual

Kurzweil
Kurzweil PC2 - MUSICIANS GUIDE REV A User manual

Kurzweil
Kurzweil SP7 Grand User manual

Kurzweil
Kurzweil MS-1A MICRO SEQUENCER - MUSICIAN S GUIDE User manual

Kurzweil
Kurzweil PC2 - MUSICIANS GUIDE REV A User manual

Kurzweil
Kurzweil PC2KBDV2 Owner's manual

Kurzweil
Kurzweil MS-1 MICRO SEQUENCER - MUSICIAN S GUIDE User manual

Kurzweil
Kurzweil KM88 User manual