KX-PRX120AZ KX-PRX120AZ User manual

Quick Guide
Premium Design Phone with Touchscreen
Model No. KX-PRX120AZ
Thank you for purchasing a Panasonic product.
Please read this document before using the unit and save it for future reference.
For detailed information about the features of your phone system, refer to the
Operating Instructions, which is available by tapping in the home screen or by
visiting the support page for this product at the address below.
http://www.panasonic.net/pcc/support/tel/sdect
To use this unit in your country, first change the unit’s region setting to match
your country (page 21).
Please access our online customer survey:
http://panasonic.net/pcc/tel/q
PRX120AZ_QG(en-en)_130909_ver.030.pdf 1 2013/09/09 22:58:09

Accessory information
Supplied accessories
No. Accessory item/Part number Quantity
AAC adaptor for base unit/PNLV226AL 1
BAC adaptor for charger/PNLV226ALK 1
CTelephone line cord (for Australia)*11
DTelephone line cord (for New Zealand) 1
ERechargeable battery*21
FHandset cover*31
GCharger 1
*1 The telephone line cord comes connected with the telephone plug.
*2 See page 2 for replacement battery information.
*3 The handset cover comes attached to the handset.
A B C D E F G
Additional/replacement accessories
Please contact your nearest Panasonic dealer for sales information.
Accessory item Model number
Rechargeable battery KX-PRA10EX
RLithium Ion (Li-Ion) type battery
Headset RP-TCM120*1
DECT repeater KX-A405AL
Key finder KX-TGA20AZ*2
*1 Contact Panasonic or the authorised sales department listed on the back cover for the
headset available in your area.
*2 You can register up to 4 optional key finders to your phone system. By registering a key
finder to the base unit and then attaching the key finder to an easily misplaced item, such as
your house or car keys, you can use your handset to find the item.
For more information, visit the following web site.
http://panasonic.net/pcc/products/telephone/p/tga20/
2
Introduction
PRX120AZ_QG(en-en)_130909_ver.030.pdf 2 2013/09/09 22:58:09

Expanding your phone system
Handset (optional): KX-PRXA10AZ
You can expand your phone system by
registering optional handsets (6 max.) to a
single base unit.
ROptional handsets may be a different
colour from that of the supplied handsets.
3
Introduction
PRX120AZ_QG(en-en)_130909_ver.030.pdf 3 2013/09/09 22:58:09

For your future reference
We recommend keeping a record of the following information to assist with any repair under
warranty.
Serial No. Date of purchase
(found on the rear of the base unit)
Name and address of dealer
Attach your purchase receipt here.
Trademarks
RGoogle and Android are trademarks of Google Inc.
RThe Bluetooth® word mark and logos are owned by the Bluetooth SIG, Inc. and any use of
such marks by Panasonic Corporation is under license.
RWi-Fi® is a registered mark of the Wi-Fi Alliance.
RmicroSDHC Logo is a trademark of SD-3C, LLC.
RAll other trademarks identified herein are the property of their respective owners.
Notice
RThe term “apps” is used in this document to refer to programs that are installed on the handset.
RThe handset supports microSD and microSDHC memory cards. In this document, the term
“microSD card” is used as a generic term for any of the supported cards.
RThe illustrations and screenshots shown in this document are for reference only and may differ
from the appearance of the actual product.
RThe suffix is omitted from model numbers listed in this document.
RInformation in this document is subject to change without notice.
4
Introduction
PRX120AZ_QG(en-en)_130909_ver.030.pdf 4 2013/09/09 22:58:09

For your safety
To prevent severe injury and loss of life/
property, read this section carefully before
using the product to ensure proper and safe
operation of your product.
WARNING
Power connection
RUse only the power source marked on the
product.
RDo not overload power outlets and
extension cords. This can result in the risk
of fire or electric shock.
RCompletely insert the AC adaptor/power
plug into the power outlet. Failure to do so
may cause electric shock and/or excessive
heat resulting in a fire.
RRegularly remove any dust, etc. from the
AC adaptor/power plug by pulling it from
the power outlet, then wiping with a dry
cloth. Accumulated dust may cause an
insulation defect from moisture, etc.
resulting in a fire.
RUnplug the product from power outlets if it
emits smoke, an abnormal smell, or makes
an unusual noise. These conditions can
cause fire or electric shock. Confirm that
smoke has stopped emitting and contact an
authorised service centre.
RUnplug from power outlets and never touch
the inside of the product if its casing has
been broken open.
RNever touch the plug with wet hands.
Danger of electric shock exists.
RThe AC adaptor should only be used
indoors.
Installation
RThis product is not water-resistant. To
prevent the risk of fire or electrical shock,
do not expose the product to rain or any
type of moisture.
RDo not place or use this product near
automatically controlled devices such as
automatic doors and fire alarms. Radio
waves emitted from this product may cause
such devices to malfunction resulting in an
accident.
RDo not allow the AC adaptor or telephone
line cord to be excessively pulled, bent or
placed under heavy objects.
RKeep all accessories, including the
microSD card, out of the reach of children
to prevent swallowing.
RIt is advised not to use the equipment at a
refuelling point. Users are reminded to
observe restrictions on the use of radio
equipment in fuel depots, chemical plants
or where blasting operations are in
progress.
Operating safeguards
RUnplug the product from power outlets
before cleaning. Do not use liquid or
aerosol cleaners.
RDo not disassemble the product.
RDo not spill liquids (detergents, cleansers,
etc.) onto the telephone line cord plug, or
allow it to become wet at all. This may
cause a fire. If the telephone line cord plug
becomes wet, immediately pull it from the
telephone wall socket, and do not use.
RDo not leave this product near heat sources
(such as radiators, cookers, etc.), in direct
sunlight, or in a car under blazing sun. It
should not be placed in rooms where the
temperature is less than 0 °C or greater
than 40 °C.
RTo prevent possible hearing damage, do
not listen at high volume levels for long
periods.
RDo not use this product at refuelling points.
Observe restrictions on the use of radio
equipment in fuel depots, chemical plants
or where blasting operations are in
progress.
RTo avoid damage or malfunction, do not
modify the microSD card or touch the
card’s gold-coloured contacts.
RWhile driving, follow the traffic regulations in
your area regarding the use of this product.
RRF signals may affect electronic systems in
motor vehicles (such as fuel injection
5
Important Information
PRX120AZ_QG(en-en)_130909_ver.030.pdf 5 2013/09/09 22:58:09

systems, air bag systems, etc.) that have
been improperly installed or are
inadequately shielded. For more
information, consult the manufacturer of
your vehicle or its equipment.
RTurn the product off when boarding an
aeroplane. Await instructions from flight
staff regarding the use of electronic devices
before turning the product on, and make
sure you turn on the product’s aeroplane
mode. Using this product in an aircraft may
be hazardous to the aircraft’s operation and
disrupt wireless communication, and may
also be illegal.
RThis product is capable of producing bright
flashing lights, which may cause seizures
or blackouts.
RThe earpiece of this device may retain
metallic items such as pins, care must be
taken to avoid serious injury.
RTo prevent serious damage to this product,
avoid strong impacts and rough handling.
RThe screen is made from glass. This glass
can break if the product is dropped on a
hard surface or receives a substantial
impact.
RDo not expose the skin to this product for a
long period of time. Using this product with
skin exposed to the heat generated by the
product or AC adaptor for a long period of
time can cause low-temperature burns.
RAlthough the product features GPS
functionality, it cannot be used as
navigation equipment for aircraft, vehicles
or people, or as a high-accuracy surveying
device. We do not take any responsibility
for any loss resulting from the use of the
GPS function for these purposes, or
resulting from inaccurate readings or
information caused by external factors such
as malfunction, operator error, or power
failure (including battery shortage).
Medical
RConsult the manufacturer of any personal
medical devices, such as pacemakers or
hearing aids, to determine if they are
adequately shielded from external RF
(radio frequency) energy.
DECT features operate between 1.88 GHz
and 1.90 GHz with a peak transmission
power of 250 mW.
Wi-Fi features operate between 2.4 GHz
and 2.4835 GHz with a peak transmission
power of 80 mW.
RWireless Technology Research (WTR)
recommends a minimum separation of
15.3 cm between a wireless device and an
implanted medical device such as
pacemaker or implanted cardioverter
defibrillator to avoid potential interference
with the medical device. If you have any
reason to suspect that your phone is
interfering with a pacemaker or other
medical devices, turn off the phone
immediately and contact the manufacture of
pacemaker or other medical devices.
RTurn off this product when in health care
facilities in accordance with any regulations
posted in the area. Hospitals or health care
facilities may be using equipment that could
be sensitive to external RF energy.
CAUTION
Installation and location
RNever install telephone wiring during an
electrical storm.
RNever install telephone line sockets in wet
locations unless the socket is specifically
designed for wet locations.
RNever touch uninsulated telephone wires or
terminals unless the telephone line has
been disconnected at the network interface.
RUse caution when installing or modifying
telephone lines.
RThe AC adaptor is used as the main
disconnect device. Ensure that the AC
outlet is installed near the product and is
easily accessible.
RThis product is unable to make calls when:
– the handset battery needs recharging or
has failed.
– there is a power failure.
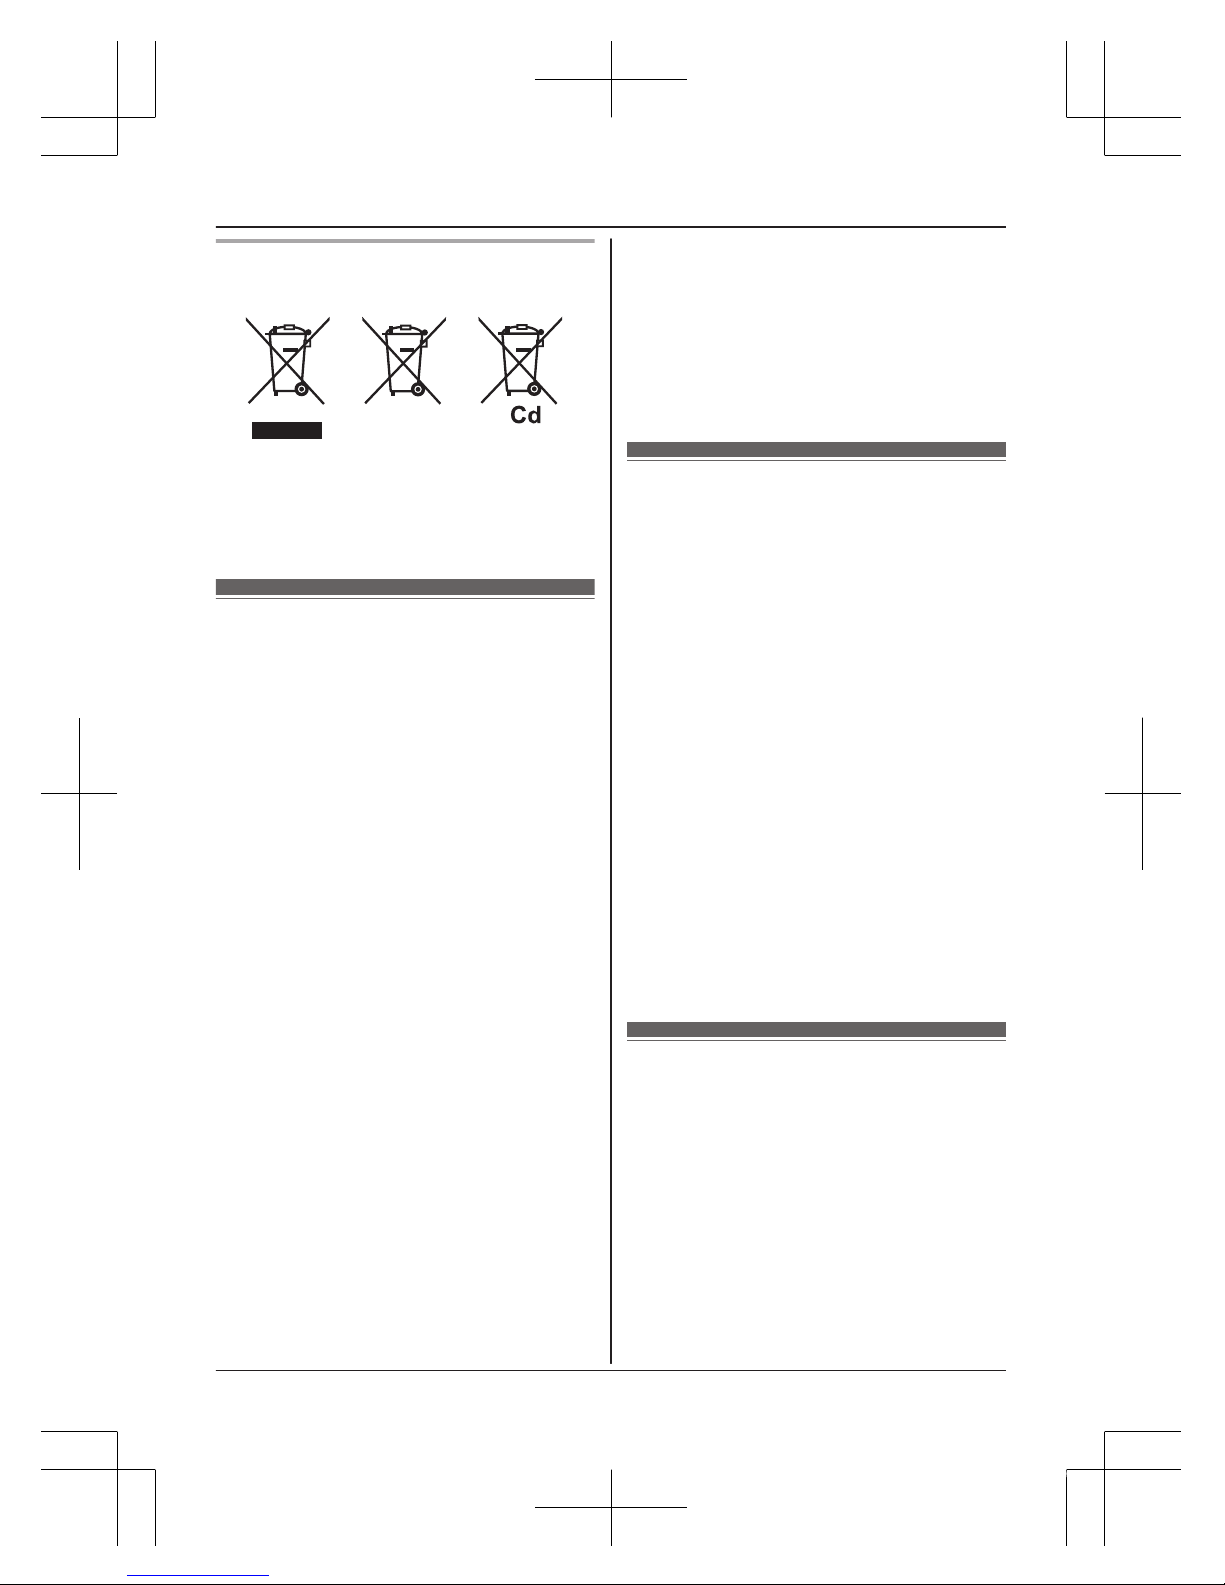
Battery
RUse only the specified battery.
RDo not open or mutilate the battery.
Released electrolyte from the battery is
6
Important Information
PRX120AZ_QG(en-en)_130909_ver.030.pdf 6 2013/09/09 22:58:09

corrosive and may cause burns or injury to
the eyes or skin. The electrolyte is toxic and
may be harmful if swallowed.
RExercise care when handling the battery.
Do not allow conductive materials such as
rings, bracelets, or keys to touch the
battery, otherwise a short circuit may cause
the battery and/or the conductive material
to overheat and cause burns.
RCharge the battery in accordance with the
instructions and limitations specified in this
manual.
ROnly use a compatible charger to charge
the battery. Do not tamper with the charger.
Failure to follow these instructions may
cause the battery to swell or explode.
RDo not subject the battery to mechanical
shock.
RKeep the battery out of the reach of
children.
RKeep the battery clean and dry.
RWipe the battery terminals with a clean dry
cloth if they become dirty.
RDo not continuously charge the battery for a
prolonged period of time.
RRemove the battery from the product if the
product will not be used for a prolonged
period of time.
General notices
RThis equipment will be inoperable when
mains power fails.
RWhen a failure occurs which results in the
internal parts becoming accessible,
disconnect the power supply cord
immediately and return this unit to an
authorised service centre.
RTo minimise the possibility of lightning
damage, when you know that a
thunderstorm is coming, we recommend
that you:
– Unplug the telephone line cord from the
phone socket.
– Unplug the AC adaptor from the AC
power outlet.
RNo calls, including “000” calls (for Australia)
and “111” calls (for New Zealand), can be
made from this device during a mains
power failure.
Important notice:
RUnder power failure conditions, this
telephone may not operate. Please ensure
that a separate telephone, not dependent
on local power, is available for emergency
use.
For New Zealand
RDisconnect the telecom connection before
disconnecting the power connection prior to
relocating the equipment, and reconnect
the power first.
RThis equipment shall not be set to make
automatic calls to the Telecom “111”
Emergency Service.
RThe unit’s answering system only responds
to Distinctive Alert cadence(s) DA1 and
DA3.
RNot all telephones will respond to incoming
ringing when connected to the extension
socket.
RThis equipment may not provide for the
effective hand-over of a call to another
device connected to the same line.
RThe grant of a Telepermit for any item of
terminal equipment indicates only that
Telecom has accepted that the item
complies with minimum conditions for
connection to its network. It indicates no
endorsement of the product by Telecom,
nor does it provide any sort of warranty.
Above all, it provides no assurance that any
item will work correctly in all respects with
another item of Telepermitted equipment of
a different make or model, nor does it imply
that any product is compatible with all of
Telecom’s network services.
Important safety
instructions
When using your product, basic safety
precautions should always be followed to
reduce the risk of fire, electric shock, and
injury to persons, including the following:
1. Do not use this product near water for
example, near a bathtub, washbowl,
kitchen sink, or laundry tub, in a wet
basement or near a swimming pool.
2. Avoid using a telephone (including a
cordless type) during an electrical storm.
7
Important Information
PRX120AZ_QG(en-en)_130909_ver.030.pdf 7 2013/09/09 22:58:10

There may be a remote risk of electric
shock from lightning.
3. Do not use the telephone to report a gas
leak in the vicinity of the leak.
4. Use only the power cord and batteries
indicated in this manual. Do not dispose of
batteries in a fire. They may explode.
Check with local codes for possible special
disposal instructions.
SAVE THESE INSTRUCTIONS
For best performance
Base unit location/avoiding noise
The base unit and other compatible Panasonic
units use radio waves to communicate with
each other.
RFor maximum coverage and noise-free
communications, place your base unit:
– at a convenient, high, and central
location with no obstructions between
the handset and base unit in an indoor
environment.
– away from electronic appliances such as
TVs, radios, personal computers,
wireless devices, or other phones.
– facing away from radio frequency
transmitters, such as external antennas
of mobile phone cell stations. (Avoid
putting the base unit on a bay window or
near a window.)
RCoverage and voice quality depends on the
local environmental conditions.
RIf the reception for a base unit location is
not satisfactory, move the base unit to
another location for better reception.
Environment
RKeep the product away from electrical noise
generating devices, such as fluorescent
lamps and motors.
RThe product should be kept free from
excessive smoke, dust, high temperature,
and vibration.
RDo not place heavy objects on top of the
product.
RWhen you leave the product unused for a
long period of time, unplug the product from
the power outlet.
RThe maximum calling distance may be
shortened when the product is used in the
following places: Near obstacles such as
hills, tunnels, underground, near metal
objects such as wire fences, etc.
ROperating the product near electrical
appliances may cause interference. Move
away from the electrical appliances.
Routine care
RWipe the outer surface of the product
with a soft moist cloth.
RDo not use benzine, thinner, or any
abrasive powder.
Other information
CAUTION: Risk of explosion if battery is
replaced by an incorrect type. Dispose of used
batteries according to the instructions.
Notice for downloading software or
upgrading the operating system
RProduct functions and operating procedures
may change and certain applications may
not function any longer if the product’s
operating system is upgraded.
RConfirm the safety and security of software
before downloading or installing it on this
product. Installing malware or viruses can
cause malfunction and the disclosure of
any private information stored in this
product, or may cause excessive sound
volume.
Notice for product disposal, transfer,
or return
RThis product can store your private/
confidential information. To protect your
privacy/confidentiality, we recommend that
you erase information such as phonebook
or caller list entries from the memory before
you dispose of, transfer, or return the
product.
8
Important Information
PRX120AZ_QG(en-en)_130909_ver.030.pdf 8 2013/09/09 22:58:10

Information on Disposal in other
Countries outside the European Union
These symbols are only valid in the European
Union. If you wish to discard these items,
please contact your local authorities or dealer
and ask for the correct method of disposal.
End-user licence
This is a legal agreement between you and
Panasonic System Networks Co., Ltd.
(“Panasonic”) with respect to the software
installed in and/or delivered by the Panasonic
Premium Design Phone with Touchscreen.
Carefully read all the terms of this agreement
prior to using this product. Using this product
indicates your acceptance of these terms.
Copyright:
The software is protected by copyright laws
and international treaty provisions, and all
other applicable laws. You acknowledge that
you are receiving only a limited licence to use
the software and related documentation, and
that you shall obtain no title, ownership nor
any other rights in or to the software and its
related documentation, all of which title and
rights shall remain with Panasonic or its
licensor.
Licence:
1. You may use the software installed in and/
or delivered by this product.
2. You may transfer your rights under this
licence agreement on a permanent basis,
provided that you transfer this agreement,
all copies of the software, all related
documentation and your Panasonic
Premium Design Phone with Touchscreen,
and the recipient thereof agrees to the
terms of this agreement.
Restrictions:
You may not reverse engineer, decompile or
disassemble the software, except as expressly
permitted by applicable law. You may not use,
copy, modify, alter, rent, lease or transfer the
software, its related documentation, or any
copies thereof, in whole or in part, except as
expressly provided in this agreement. You
may not export the software in contravention
of any applicable U.S. or foreign export laws
and regulations.
Open source software
notice
Parts of this product use open source software
supplied based on the relevant conditions of
the Free Software Foundation’s GPL and/or
LGPL and other conditions. Please read all
licence information and copyright notices
related to the open source software used by
this product. This information is available at
the following web page:
www.panasonic.net/pcc/support/tel/sdect
At least three (3) years from delivery of this
product, Panasonic System Networks Co.,
Ltd. will give to any third party who contacts us
at the contact information provided below, for
a charge of no more than the cost of
physically distributing source code, a complete
machine-readable copy of the corresponding
source code and the copyright notices
covered under the GPL and the LGPL. Please
note that software licensed under the GPL and
the LGPL is not under warranty.
www.panasonic.net/pcc/support/tel/sdect
Disclaimer
Panasonic System Networks Co., Ltd.
(“Panasonic”) shall not be liable for loss of
data or other incidental or consequential
damages resulting from the use of this
product. This product can download, store,
forward, and receive additional content, such
as applications, ringtones, contact information,
and media files. The use of such content may
be restricted or prohibited by the rights of third
parties, including but not limited to restriction
under applicable copyright laws. You are
entirely responsible for additional content that
9
Important Information
PRX120AZ_QG(en-en)_130909_ver.030.pdf 9 2013/09/09 22:58:10

you download to or forward from this product;
Panasonic is not responsible for such content
or its use. Before using such content, it is your
responsibility to verify that your intended use
is properly licenced or is otherwise authorised.
Panasonic does not warrant or guarantee the
accuracy, integrity or quality of any additional
content or any other third-party content. Under
no circumstances will Panasonic be liable in
any way for the improper use of additional
content or other third-party content by this
product or its operator. This document and
any related product documentation may refer
to services and applications that are provided
by third parties. The use of such services or
programs may require separate registration
with the third-party provider and may be
subject to additional terms of use. For
applications accessed on or through a
third-party web site, please review the web
site’s terms of use and applicable privacy
policy in advance.
Specifications
Connectivity
RGAP (Generic Access Profile)
RWi-Fi: IEEE 802.11b/g/n
RBluetooth: version 3.0, Class 2
RUSB: version 2.0
Frequency range
RDECT: 1.88 GHz to 1.90 GHz
RWi-Fi: 2.4 GHz to 2.4835 GHz
RF transmission power
RDECT: Approx. 10 mW (average power per
channel)
RWi-Fi: 80 mW (peak transmission power)
Handset operating system
RAndroid™ 4.0, Ice Cream Sandwich
Hardware
RDisplay: TFT colour 3.5-inch (HVGA:
320 ´ 480 pixels), capacitive touch screen
RFront camera: 0.3 M
RMemory card: microSD, microSDHC up to
32 GB (not supplied)
Battery
RLithium Ion (Li-Ion) 3.7 V/1,450 mAh
Talk time
RLandline calls: up to 10 hours
Standby time
RUp to 220 hours
Power source
R220–240 V AC, 50/60 Hz
Base unit power consumption
RStandby: approx. 0.4 W
RMaximum: approx. 0.8 W
Charger power consumption
RStandby: approx. 0.1 W
RMaximum: approx. 4.0 W
Operating conditions
R0 °C–40 °C, 20 %–80 % relative air
humidity (dry)
Charging conditions
R5 °C–40 °C
10
Important Information
PRX120AZ_QG(en-en)_130909_ver.030.pdf 10 2013/09/09 22:58:10

Preparing the base unit
AInsert the AC adaptor plug firmly into the
base unit.
D
E
C
D
A
B
BSecure the cord by wrapping around the
hook.
CConnect the AC adaptor to the power
outlet.
DInsert the telephone line cord into the
base unit and the telephone line socket
until you hear a click.
EDSL/ADSL service users only: Connect
your DSL/ADSL filter (not supplied).*1
*1 For Australia: Connect a DSL/ADSL
filter between the telephone plug and
telephone line cord.
Note:
RUse only the supplied Panasonic AC
adaptor PNLV226AL.
RUse only the supplied telephone line cord.
RThis product is not designed to be used
with rotary/pulse dialling service.
Preparing the charger
AInsert the AC adaptor plug to the unit until
you hear a click.
BB
A
BConnect the AC adaptor to the power
outlet.
Note:
RUse only the supplied Panasonic AC
adaptor PNLV226ALK.
Preparing the handset
Inserting a microSD card and the battery
A microSD card (not supplied) allows you to expand the handset’s storage capabilities.
Important:
RWhen removing the battery, make sure you turn off the handset first.
11
Getting Started
PRX120AZ_QG(en-en)_130909_ver.030.pdf 11 2013/09/09 22:58:10

RTo avoid loss of data or malfunction, do not damage, carelessly handle, or short-circuit the
gold-coloured contacts of the microSD card.
1
Remove the handset’s cover.
2
Open the microSD card cover by sliding it
toward the nearest side of the handset
(A) and then lifting up (B).
A
B
3
Insert the microSD card with the
gold-coloured contacts facing down,
close the microSD cover (A), and then
gently slide the cover toward the opposite
side of the handset (B).
B
A
4
Insert the battery (A) and lower it into the
handset (B).
A
B
5
Attach the cover.
Charging the handset
Charge the handset for about 5 hours before initial use. The charge indicator (A) lights while the
handset is charging and turns off when the handset is fully charged.
12
Getting Started
PRX120AZ_QG(en-en)_130909_ver.030.pdf 12 2013/09/09 22:58:10

Important:
RIf the handset is placed into the charger while talking on the phone, the call is not
disconnected.
A
or
A
Place the handset into the charger. Connect a USB cable (not supplied)
directly to the handset.
Battery power icon
When the screen is turned on, the battery icon in the upper-right corner of the screen indicates
the battery power as described below.
® ® ®
Very low Fully charged
Note:
RWhen the handset is charging, is displayed inside the battery power icon.
RYou can also check the percentage of battery power remaining. From the home screen, tap
® [System settings] ® [Battery].
Information about power and charging
AC adaptor connection
RThe AC adaptor must remain connected at all times. (It is normal for the adaptor to feel warm
during use.)
RThe AC adaptor should be connected to a vertically oriented or floor-mounted AC outlet. Do
not connect the AC adaptor to a ceiling-mounted AC outlet, as the weight of the adaptor may
cause it to become disconnected.
Power failure
RThe unit will not work during a power failure. We recommend connecting a corded-type
telephone (without AC adaptor) to the same telephone line or to the same telephone line
socket using a telephone double adaptor (for Australia)/a BT double adaptor (for New
Zealand).
13
Getting Started
PRX120AZ_QG(en-en)_130909_ver.030.pdf 13 2013/09/09 22:58:10

Battery use and replacement
RUse only the supplied battery. For replacement, use only the Panasonic rechargeable battery
noted on page 2.
RThe battery might swell when its life is close to an end. This is dependent on the usage
conditions and is not a problem.
Battery charging
RIt is normal for the handset to feel warm during charging.
RClean the charge contacts of the handset, base unit, and charger with a soft and dry cloth
once a month. Before cleaning the unit, disconnect from power outlets and any telephone line
cords. Clean more often if the unit is exposed to grease, dust, or high humidity.
Saving battery power
RThe amount of time you can use the handset before the battery needs to be charged varies
depending on how you are using it. Each of the following can help you save battery power.
– Turn off the screen when you are not using the handset (page 16).
– Use the control panel to turn off the handset’s Wi-Fi, GPS, and Bluetooth features. See the
Operating Instructions for more information (download information is on page 1).
– When you are away from home, use the control panel to turn off the handset’s DECT
connection to the base unit. Note that if you do not turn the connection back on when you
return home, you will not be able to make or receive calls using the handset. See the
Operating Instructions for more information (download information is on page 1).
14
Getting Started
PRX120AZ_QG(en-en)_130909_ver.030.pdf 14 2013/09/09 22:58:10

Getting to know your phone system
Handset overview
A
B
CH
J
K
G
D
F
EI
L
AHeadset socket
BPower button
CCharge indicator
DVolume button ( and )
ETouchscreen
FMicro USB socket
GFront camera
HReceiver
I (menu) button
JHome button
K (back) button
LMicrophone
N
M
MSpeaker
NCharge contacts
15
Getting Started
PRX120AZ_QG(en-en)_130909_ver.030.pdf 15 2013/09/09 22:58:10

Base unit overview
A
AM N (locator) button
Handsets registered to the base unit will
ring when you press this button. This can
be useful when you want to locate a
misplaced handset.
Turning the handset on and off
To turn the handset on, press and hold the power button on the top of the handset. If the lock
screen appears, unlock the screen (page 16).
To turn the handset off, press and hold the power button on the top of the handset, and then tap
[Power off] ® [OK].
Note:
RThe first time you turn on the handset, the setup wizard is displayed (page 16).
Turning the screen on and off
You can turn the screen off to save battery power and prevent accidental operation. While the
screen is turned off, you can still receive calls, messages, etc. Any apps that were in use when
the screen was turned off continue to run.
To turn the screen on and off, press the power button on the top of the handset. You can also
turn the screen on by pressing the home button.
Unlocking the screen
When you turn the screen on, the lock screen may be displayed. This screen prevents you from
accidentally tapping the handset and operating it unintentionally. When the default lock screen is
displayed, you can unlock the screen by dragging the lock icon toward the unlock icon or toward
the icon of the desired action.
Setup wizard
The first time you turn on the handset, the setup wizard prompts you to configure the following
settings. Follow the on-screen instructions and configure each item as needed.
1Select the language.
2Configure date and time settings.
16
Getting Started
PRX120AZ_QG(en-en)_130909_ver.030.pdf 16 2013/09/09 22:58:10

3Select the desired automatic time adjustment setting.
RIf you select [Use network provided time], an Internet connection is needed for the
handset to adjust its date and time setting automatically.
4Add or create a Google™ account.
5Configure Wi-Fi settings (displayed only if you choose to configure a Google account).
Note:
RSome items may be displayed in English regardless of the display language setting.
Setting up a Google account
Configuring your handset to synchronise with your Google account is an easy way to synchronise
contacts and other information between different devices, such as computers or smartphones,
and your phone system’s handset. For example, you can use your computer to add your contacts
to your Google account, and then configure the handset to synchronise with your Google
account. Your contacts will be automatically downloaded to your handset.
The setup wizard will prompt you to either add your existing Google account information to the
handset or create a new account. You can skip this step if desired. To configure Google account
settings later, see the Operating Instructions (download information is on page 1).
Note:
RAn Internet connection is required to configure a Google account. If you choose to use or
create a Google account during the setup wizard, you will be prompted to enter Wi-Fi
information so that the handset can connect to the Internet.
Wi-Fi settings
If you have a wireless router and an Internet connection, you can configure the handset to
connect to your Wi-Fi network and access the Internet for synchronising your handset with your
Google account, using the [Browser] app to view web pages, etc. If the setup wizard prompts
you to enter Wi-Fi information, use the following procedure. To configure these settings later, see
the Operating Instructions (download information is on page 1).
1Select a Wi-Fi network.
RIf the desired Wi-Fi network is not displayed, you may need to enter the network name
(also called the “SSID”) manually. See the Operating Instructions for more information
(download information is on page 1).
2Enter the password if you are connecting to a secure Wi-Fi network.
3Tap [Connect].
Home button
You can display the home screen at any time by pressing the home button.
Navigation buttons
(menu) button: Displays a list of options available in the current screen.
17
Getting Started
PRX120AZ_QG(en-en)_130909_ver.030.pdf 17 2013/09/09 22:58:10

(back) button: Returns to the previous screen or closes the current dialogue box, menu,
on-screen keyboard, etc.
Note:
RThe and buttons are displayed in most screens. They appear at the bottom of the
handset next to the home button, and turn off if you do not use them for a while. To display the
and buttons after they have turned off, simply touch the area of the handset where they
would normally be displayed.
Landline app
The [Landline] app is displayed by default on the handset’s home screen, and allows you to
access commonly used features of your phone system.
Allows you to make intercom calls
Allows you to change certain features of your phone system
Allows you to use the phone system’s answering system (KX-PRX120 only)
Allows you to access the base unit’s call log
Allows you to use the base unit’s key finder feature
Making calls
Important:
RWhen the handset is connected to the base unit, or is displayed in the status bar. If
neither of these icons is displayed, the handset cannot make or receive calls.
RIf the handset is placed into the charger while talking on the phone, the call is not
disconnected.
1Tap [Phone] in the home screen or app list.
2Select the tab at the top of the screen.
3Enter the phone number and then tap at the bottom of the screen.
RTo erase a number, tap .
RTo enter a dialling pause, tap and hold .
4When finished, tap to end the call.
Answering calls
1When a call is being received, tap and drag it to .
2Tap to end the call.
18
Getting Started
PRX120AZ_QG(en-en)_130909_ver.030.pdf 18 2013/09/09 22:58:10

Receiver or speaker volume
Press the volume button up ( ) and down ( ) repeatedly during a call.
Using the call logs
The handset and base unit each log your calls, allowing you to check a record of your calls. The
following symbols are used to indicate each type of call stored in the call logs.
Important:
RCaller ID is required to log missed and answered calls (page 24).
Call log Icon Meaning
Handset call
log*1 (blue) Missed call
Answered call
(green) Outgoing call
Base unit call
log (red) Missed call
(blue) Answered call or missed
call that has been confirmed
*1 The handset call log can only log calls that are received while the handset is connected to
the base unit.
Making a call from the handset call log
1Tap [Phone] in the home screen or app list.
2Select the tab at the top of the screen.
3Select the type of calls you want to view by tapping the desired tab.
4Tap next to the phone number or person you want to call.
5When finished, tap to end the call.
Making a call from the base unit call log
1Tap [Landline] in the home screen or app list.
2Tap [Call log list].
RThe handset connects to the base unit.
3Tap next to the phone number or person you want to call.
4When finished, tap to end the call.
19
Getting Started
PRX120AZ_QG(en-en)_130909_ver.030.pdf 19 2013/09/09 22:58:11

Ringtones and audio settings
Selecting an audio profile
1From the home screen, tap ® [System settings] ® [Audio profiles].
2Tap next to the desired audio profile.
Preset audio profiles
–[General]: You can select the desired ringtone, ringer volume, etc.
–[Silent]: The ringer is turned off.
–[Outdoor]: The settings of the [General] profile are used. The ringer volume is set to the
maximum level.
Adding contacts
1Tap [People] in the home screen or app list.
2Tap .
3If prompted, follow the on-screen instructions to determine where the contact will be saved.
RContacts can be stored in the handset’s memory or synchronised with your Google
account.
RTap [Add new account] (if displayed) if you want to register a Google account to the
handset.
4Enter the information as needed.
RTo add an image, tap the image icon.
RTo undo the changes you have made, tap ® [Discard] ® [OK]. Note that if you tap
, the changes will be saved.
RTo add the new contact information to an existing contact, tap ® [Join].
5Tap [DONE].
Calling a contact
1Tap [Phone] in the home screen or app list.
2Select the tab at the top of the screen.
3Tap the desired contact.
4When finished, tap to end the call.
Answering system features (KX-PRX120 only)
Turning the answering system on and off
The answering system is already turned on at the time of purchase.
1Tap [Landline] in the home screen or app list.
20
Getting Started
PRX120AZ_QG(en-en)_130909_ver.030.pdf 20 2013/09/09 22:58:11
Table of contents