manuals.online logo
Brands
  1. Home
  2. •
  3. Brands
  4. •
  5. KYORITSU
  6. •
  7. Multimeter
  8. •
  9. KYORITSU KEW MATE 2000A User manual

KYORITSU KEW MATE 2000A User manual

INSTRUCTIONMANUAL
KEW MATE 2000A/2001A
DIGITAL MULTIMETER
WITH
AC/DC CLAMP SENSOR
KYORITSU ELECTRICAL INSTRUMENTS
WORKS, LTD.
1.SAFETY WARNINGS
ThisinstrumenthasbeendesignedandtestedaccordingtoIECPublication61010:
SafetyRequirementsforElectronicMeasuringApparatus.Thisinstructionmanual
containswarningsandsafetyruleswhichmustbeobservedbytheusertoensure
safeoperationoftheinstrumentandtoretainitinsafecondition.Therefore,read
throughtheseoperatinginstructionsbeforestartingusingtheinstrument.

WARNING
●
Read through and understand instructions contained in this manual before
startingusingtheinstrument.
●
Saveandkeepthemanualhandytoenablequickreferencewhenevernecessary.
●
Be sure to use the instrument only in its intended applications and to follow
measurementproceduresdescribedinthemanual.
●
Besuretounderstandandfollowallsafetyinstructionscontainedinthemanual.
Theinstrumentistobeusedonlyinitsintendedapplications.
Understandandfollowallthesafetyinstructionscontainedinthemanual.
Failure to follow the instructions may cause injury, instrument damage and/or
damage to equipment under test. Kyoritsu is by no means liable for any damage
resultingfromtheinstrumentincontradictiontothiscautionarynote.
Failure to follow the above instructions may cause injury, damage to the instrument
and/ordamagetoequipmentundertest.
Thesymbol indicatedontheinstrument means that the user must refer to related
partsofthemanualforsafeoperationoftheinstrument.Besuretocarefullyreadthe
instructionsfollowingeach symbolinthismanual.
DANGER

isreservedforconditionsandactionsthatarelikelytocauseseriousorfatalinjury.
WARNING

isreservedforconditionsandactionsthatcancauseseriousorfatalinjury.
CAUTION

isreservedforconditionsandactionsthatcancauseminorinjuryorinstrumentdamage.
Following symbols are used on the instrument and in the instruction manual. Attention
shouldbepaidtoeachsymboltoensureyoursafety.
Refertotheinstructionsinthemanual.
Thissymbolismarkedwheretheusermustrefertotheinstructionmanualsoasnot
tocausepersonalinjuryorinstrumentdamage.
Indicatesaninstrumentwithdoubleorreinforcedinsulation.
Indicatesthatthisinstrumentcanclamponbareconductorswhenmeasuring
avoltage correspondingtotheapplicable Measurementcategory,which ismarked
nexttothissymbol
.
IndicatesAC(AlternatingCurrent)
.
IndicatesDC(DirectCurrent).
IndicatesACandDC.
DANGER
●
Never make measurement on circuits with a maximum voltage difference of
600VAC/DC or greater between conductors (300VAC/DC or greater between a
conductorandground).
●
Do not attempt to make measurement in the presence of flammable gasses.
Otherwise, the use of the instrument may cause sparking, which leads to an
explosion.
●
Neverattempttousetheinstrumentifitssurfaceoryourhandiswet.
●
Donotexceedthemaximumallowableinputofmeasuringranges.
●
Neveropenthebatterycompartmentcoverwhilemakingmeasurement.
●
Never try to make measurement if any abnormal conditions, such as broken
Transformerjawsorcaseisnoted.
●
The instrument is to be used only in its intended applications or conditions.
Otherwise, safety functions equipped with the instrument doesn

t work, and
instrumentdamageorseriouspersonalinjurymaybecaused.
are noted,
tothe
Return
undertest
cover for
orcolor
before
e making
use.When
after
abrasives
shes safety
,andcalled
 electrical
t designed
edesigned
pply.
outletbya
tly to the
tlets.
thepower
nel).
that comes
notrequire
category
3.SPECIFICATIONS
●
MeasuringRangesandAccuracy(at23
℃±
5
℃
,relativehumidity75%orless)
※
Electromagnetic
 
RFfield
≦
1V/m
 compatibility
  

ACV/DCV/OHMS/FREQUENCYtotalaccuracy=specifiedaccuracy
 (IEC61000-4-3)
ACA/DCA
       

  
 totalaccuracy=specifiedaccuracy+5dgt
       

 
RF transmitters such as mobile telephones may not be used in close
proximity.
●
SafetyStandard IEC61010-1
  measurementCAT
Ⅲ
,300V,pollutiondegree2
  measurementCAT
Ⅱ
,600V,pollutiondegree2
  IEC61010-031
  IEC61010-2-032,IEC61010-2-033
  IEC61326-1(EMC),EN50581(RoHS)
●
OperatingSystem Dualintegration
●
Display  Liquid crystal display with maximum reading of 3399 as
wellasunitsandannunciators
  Bargraphwithmaximumpointsof33
●
OverInputIndication "OL"ontheLCD(
Ω
rangesonly)
●
Auto-rangingOperation Shifts tothenexthigherrangewhenbar graphincreases
to33points
  Shifts tothenext lowerrangewhen bargraph decreases
to3points
●
SampleRateNumericreading:about400ms,
  bargraph:about20ms
MODEL
2000A
2001A
Range
60A
100A
ACCurrent
 
A
 

DCCurrent
 
 A 
ACVoltage
 
V
 
Inputimpedance:10M
Ω
DCVoltage
 
VInputimpedance:10M
Ω
MeasuringRange
0-60.0A
0-100.0A
Accuracy

±
2.0%rdg
±
5dgt(50/60Hz)

±
2.0%rdg
±
5dgt(50/60Hz)
MODEL
2000A
2001A
Range
60A
100A
MeasuringRange
0-
±
60.0A
0-
±
100.0A
Accuracy
±
2.0
%
rdg
±
5dgt
±
2.0
%
rdg
±
5dgt
Range
3.4V
34V
340V
600V
MeasuringRange
0-600V
(Auto-ranging)
Accuracy
±
1.5%rdg
±
5dgt(50-400Hz)
Range
340mV
3.4V
34V
340V
600V
MeasuringRange
0-
±
600V
(Auto-ranging)
Accuracy
±
1.5%rdg
±
4dgt
Resistance
Ω/

Range
340
Ω
3.4k
Ω
34k
Ω
340k
Ω
3.4M
Ω
34M
Ω
MeasuringRange
0-33.99M
Ω
(Auto-ranging)
Accuracy
±
1.0%rdg
±
3dgt
Buzzerbeepsbelow30
±
10
Ω
(
Continuity buzzer works on 340
Ω
 range
only
)
±
5%rdg
±
5dgt
±
15%rdg
±
5dgt
Frequency
 
Hz
Range
Current
Voltage
MeasuringRange
0-3.399kHz
3.4kHz-10kHz
(Auto-ranging)
0-3.399kHz
3.4kHz-33.99kHz
34kHz-300kHz
(Auto-ranging)
Accuracy
±
0.1%rdg
±
1dgt
±
0.1%rdg
±
1dgt
●
Locationforuse Indooruse,Altitudeupto2000m
●
Accuracy-insured 23
℃±
5
℃
,relativehumidity75%orless
 
Temperatureand (withoutcondensation)
 
HumidityRanges
●
OperatingTemperature 0-40
℃
,relativehumidity85%orless
 
andHumidityRange (withoutcondensation)
   
●
StorageTemperature -20-60
℃
,relativehumidity85%orless
 
andHumidityRange (withoutcondensation)
●
Source  Two1.5VDCR03(UM-4)batteries
●
CurrentConsumption Approx.10mA
●
Power-saveFunction Shiftstothepower-savestateabout10minutesafterthe
lastswitchoperation
  (currentconsumption:approx.10
μ
A)
   
●
OverloadProtection AC/DCcurrentranges:MODEL2000A AC/DC 72A for
10seconds
           
 AC/DCcurrentranges:MODEL2001A AC/DC
120
A for
10seconds
           
 AC/DCvoltageranges:AC/DC720Vfor10seconds
  Resistanceranges:AC/DC720Vfor10seconds
  Frequencyranges:AC/DC720Vfor10seconds
●
WithstandVoltage AC3470V for 5 sec. between electrical circuit and
housingcase
●
InsulationResistance 10M
Ω
orgreaterat1000Vbetweenelectricalcircuitand
housingcase
●
ConductorSize MODEL2000AApprox.
 
6mmdiametermax.
           
 MODEL2001AApprox.10mmdiametermax.
●
Dimensions  MODEL2000A128(L)
×
87(W)
×
24(D)mm
           
 MODEL2001A128(L)
×
92(W)
×
27(D)mm
●
Weight  MODEL2000AApprox.210g
           
 MODEL2001AApprox.220g
●
Accessories TwoR03(UM-4)batteries
  InstructionManual
4.INSTRUMENT LAYOUT
Data Hold Button
MODEL2001 MODEL2000
Range Hold Button
Digital Multimeter
Function Selector Switch
Holster
Test Lead
LCD Display
AC/DC Clamp Sensor
Barrier Protective fingerguard
DCA
Zero Adjust
Knob
5.PREPARATIONS FOR MEASUREMENT
(
1
)
Checkingbatteryvoltage
SettheFunctionSelectorSwitchtoanypositionotherthantheOFFposition.
Ifthemarksonthedisplayisclearlylegiblewithoutsymbol
"BATT"
showing,battery
voltage is OK. If the display blanks or
"BATT"
 is indicated, replace the batteries
accordingtosection
8: Battery Replacement
.
NOTE
Whentheinstrumentisleftpoweredon,theauto-power-savefunctionautomatically
shutthepoweroff;ThedisplayblankseveniftheFunctionSelectorSwitchissetto
apositionother than the OFFpositionin this state. To power on theinstrument,
turntheFunctionSelectorSwitchorpresstheDataHoldButton.Ifthedisplaystill
blanks,thebatteriesareexhausted.Replacethebatteries.
(
2
)
MakesurethattheFunctionSelectorSwitchissettotheappropriaterange.

Also make sure that data hold function is not enabled.  If inappropriate range is
selected,desiredmeasurementcannotbemade.
(
3
)
InstallTestLeadtotheHolsteronthesideofbody

ItispossibletomeasurewithseeingtheLCDDisplaykeep
TestLeadinstallingtotheHolster.
AC/DC
Battery Voltage Warning
Auto Range
Data Hold
Unit
Bar Graph
Buzzer
Manual
Range
Wind the lead around the folder.
Test Leads
AC/DC Clamp Sensor
6.HOW TO MAKE MEASUREMENT
6-1 Current
Measurement
DANGER
●
Inordertoavoidpossibleshockhazard,nevermakemeasurementoncircuitswitha
maximum voltage difference of 600VAC/DC or greater between conductors
(300VAC/DCorgreaterbetweenaconductorandground).
●
Donotmakemeasurementwiththe testleads connectedtothecircuitunder test.
Nevermakemeasurementwiththebatterycompartmentcoverremoved.
●
Keepyourfingersandhandsbehindthebarrierduringmeasurement.
  CAUTION
●
Whenhandlingtheclampsensor,exercisecautionnottoapplyexcessiveshocksor
vibrationtothesensor.
●

M
aximum measurable conductor size is MODEL2000A 6mm / MODEL2001A
10mmindiameter.
 
6-1-1DCCurrentMeasurement
(1)TheFunctionSelectorSwithtothe"
 
A"position.
 
("DC"and"AUTO"marksareshownonthetopofthedisplay.)
(2)Turnthe0(Zero)ADJknobtosetthereadingofthemultimetertozero.(Ifthiszero
adjustmentismadeincorrectly,measurementerrorswillresult.)
(3)Adjustoneoftheconductorstothecenteroftheclampsensor'sarrow.
 
( When the position of the conductor is not at the center of the arrow, the error
occurs.)
Measuredvalueisshownonthedisplay.
Note:Whencurrentflowsfromtheupsidetotheundersideoftheinstrument,thepolarity
ofthereadingispositive(+).Otherwise,thepolarityofthereadingisnegative(-).
 
6-1-2ACCurrentMeasurement
(1)SettheFunctionSelectorSwitchto"
 
A."
 
("AC"and"AUTO"marksareshownonthetopoftheLCD.)
(2)Adjustoneoftheconductorstothecenteroftheclampsensor'sarrow.
 
( When the position of the conductor is not at the center of the arrow, the error
occurs.)
Measuredvalueisshownonthedisplay.
Note:UnlikeDC currentmeasurement, zero adjustmentisnot necessary. There is not
polarityindicationeither.
6-2 Voltage Measurement
DANGER
●
Inordertoavoidpossibleshockhazard,nevermakemeasurementoncircuitswitha
maximum voltage difference of 600VAC/DC or greater between conductors
(300VAC/DCorgreaterbetweenaconductorandground).
●
Donotmakemeasurementwiththebatterycompartmentcoverremoved.
●
Keepyourfingersandhandsbehindtheprotectivefingerguardduringmeasurement.
 
6-2-1DCVoltageMeasurement
(1)SettheFunctionSelectorSwitchto"
 
V."
 

(
"DC"and"AUTO"marksareshownonthetopoftheLCD.
)
(2)Connectthe redtestleadtothepositive(+)sideof thecircuitundertestandthe
blacktest leadtothe negative(-) side.Measured voltagevalue is shownon the
display.
 
Whentheconnectionisreversed,"-"isshownonthedisplay.
Conductor
MODEL2000A MODEL2001A
Adjust a
conductor to
the center of
the arrow.
Correct Wrong
thatthe
value is
,thebuzzer
value.

witha

undertest.
under
Measured
isshownon
input
input
leadsto
7.OTHER FUNCTIONS
7-1Auto-Power-SaveFunction
NOTE
Asmallamountofcurrentisconsumedeveninthepower-savestate.Makesure
tosettheFunctionSelectorSwitchtotheOFFpositionwhentheinstrumentisnot
used.
This function helps to avoid unwanted exhaustion of the batteries because of
leaving the instrument powered on and extend battery life.  The instrument
automatically shifts to the power-save state about 10 minutes after the last
FunctionSelectorSwitchorotherswitchoperation.
Toreturnto the normalstate: Turn theFunctionSelectorSwitch or pressthe
Data Hold Button twice to exit the power-save state and enable measurement
functions.
7-2DataHoldFunction
This is a function to freeze a measured value on the display.  Press the Data
HoldButtononcetoholdthecurrentreading.Inthisdataholdstate,thereading
isheldevenifinputvaries."H"and"
 
"marksareshownontheLCDinstead
of"AUTO"mark.
Toexitthedataholdstate,presstheDataHoldButtonagain.
7-3RangeHoldFunction
The instrument defaults to auto-ranging ("AUTO" is shown on the LCD).
Pressingthe RangeHold Buttonenablesmanual selectionamong measurement
ranges
(
"
 
"markisshownontheLCDinsteadof"AUTO"mark
)
PresstheRangeHoldButtontoselectahigherrange.
 
To switch from manual range selection to auto-ranging, press down the Range
Hold Button for about one seconds, or turn the Function Selector Switch to
anotherpositionbeforesettingitbacktothecurrentrange.
8.BATTERY REPLACEMENT
WARNING
●
In order to avoidpossibleshock hazard, alwaysdisconnectthetest leads from
thecircuitunder testandsettheFunctionSelectorSwitchtotheOFFposition
beforetryingtoreplacethebatteries.
  CAUTION
●
Donotmixnewandoldbatteries.
●
Install batteries in the orientation as shown inside the battery compartment,
observingcorrectpolarity.
Whenthebatteryvoltagewarningmark"BATT"isshownonthetopleftcornerofthe
LCD, replace the batteries.  Note that the display blanks and "BATT" mark is not
shownifthebatteriesarecompletelyexhausted.
 
(1)SettheFunctionSelectorSwitchto"OFF."
 
(2)Removetheinstrumentfromtheholster.
 
(3)Loosen the battery-compartment-cover-fixing screw on the lower back of the
instrument.
 
(4)ReplacethebatterieswithtwonewR03(UM-4)1.5Vbatteries.
 
(5)Putthebatterycompartmentcoverbackinplaceandtightenthescrew.
Screw
Battery
Compartment
Cover
Batteries
92-2318A6-18
DISTRIBUTOR
Kyoritsureservestherightstochangespecificationsor
designs described in this manual without notice and without
obligations.
Test Lead Cap
:
Test leads can be used under the CAT.II and III environments by
attaching a Protective cap as illustrated below. Use of our Protective cap offers
differentlengthssuitableforthetestenvironments.
Barrer
Protectivefingerguard
:
It is a part providing protection against electrical shock and
ensuringtheminimumrequiredairandcreepagedistances.
Protective Cap
Exposed metal part
Uncapped condition for CAT.II environment
Capped condition for CAT.III environments
This instrument satisfies the marking requirement defined in the WEEE
Directive. This symbol indicates separate collection for electrical and
electronicequipment.
Thismarkingmeanstheyshallbesortedoutandcollectedasordainedin
DIRECTIVE.
This directive is valid only in the EU. When you remove batteries from
thisproductanddisposethem,discardtheminaccordancewithdomestic
lawconcerningdisposal.Takearightactiononwastebatteries,because
thecollectionsystemintheEUonwastebatteriesareregulated.
www.GlobalTestSupply.com
Find Quality Products Online at: sales@GlobalTestSupply.com
INSTRUCTIONMANUAL
KEW MATE 2000A/2001A
DIGITAL MULTIMETER
WITH
AC/DC CLAMP SENSOR
KYORITSU ELECTRICAL INSTRUMENTS
WORKS, LTD.
This
Safety
contains
safe
●
Read
●

●
Be sure
●
Besuret
Failure to
damage to
Failure to
Thesymbol
partsofthe
Following
This
a
●
Never
●
Do not
●

●
●

●
Never
●
The
WARNING
●
Never attempt to make any measurement, if any abnormal conditions are noted,
suchasbrokencase,crackedtestleadsandexposedmetalparts.
●
DonotturntheFunctionSelectorSwitchwhilethetestleadsareconnectedtothe
circuitundertest.
●
Do not install substitute parts ormakeanymodificationto the instrument.  Return
theinstrumenttoKyoritsuoryourdistributorforrepairorre-calibration.
●
Donottrytoreplacethebatteriesifthesurfaceoftheinstrumentiswet.
●
Alwaysdisconnecttheclampsensor andthetestleadsfrom thecircuitundertest
and switch off the instrument before opening the battery compartment cover for
batteryreplacement.
●
Stopusingthetestleadiftheouterjacketisdamagedandtheinnermetalorcolor
jacketisexposed.
CAUTION
●
MakesurethattheFunctionSelectorSwitchissettoanappropriatepositionbefore
makingmeasurement.
●
Always make sure to place the test leads in the test lead holder before making
currentmeasurement.
●
Donotexposetheinstrumenttothedirectsun,extremetemperaturesordewfall.
●
BesuretosettheFunctionSelectorSwitchtothe"OFF"positionafteruse.When
the instrument will not be used for a long period of time, place it in storage after
removingthebatteries.
●
Useadampclothanddetergentforcleaningtheinstrument.Donotuseabrasives
orsolvents.
●
Keepyourfingersandhandsbehindtheprotectivefingerguardduringmeasurement.
Measurement Category:
To ensure safe operation of measuring instruments, IEC 61010 establishes safety
standardsforvariouselectricalenvironments,categorizedasOtoCATIV,andcalled
measurement categories. Higher-numbered categories correspond to electrical
environments with greater momentary energy, so a measuring instrument designed
for CATIII environments can endure greater momentary energy than onedesigned
forCATII.
O :Circuitswhicharenotdirectlyconnectedtothemainspowersupply.
CATII :ElectricalcircuitsofequipmentconnectedtoanACelectricaloutletbya
powercord.
CATIII :Primary electrical circuits of the equipment connected directly to the
distributionpanel,andfeedersfromthedistributionpaneltooutlets.
CATIV :Thecircuitfromtheservicedroptotheserviceentrance,andtothepower
meterandprimaryover-currentprotectiondevice(distributionpanel).
2.FEATURES
●
Permits AC/DC current measurement up to 60A using a clamp sensor that comes
standardwiththeinstrument
●
Clampsensorforeaseofuseincrowdedcableareasandothertightplaces
●
Permitscurrentmeasurementwithanopencurrent-clampsensorthatdoesnotrequire
openingandclosingoperationsbytheuser
●
Auto-power-savefunction
●
Buzzerforeasycontinuitychecking
●
Dataholdfunctiontofreezethereadings
●
LCDwitha3400countfullscalebargraph
●
Shockabsorbingholsterforeaseofstorage
●
Designed to international safety standard IEC61010-1: measurement category
CAT
Ⅲ
,300Vandpollutiondegree2.
O: Device which is
not directly
connected to the
mains power supply
●
Locationforuse Indooruse,Altitudeupto2000m
●
Accuracy-insured 23
℃±
5
℃
,relativehumidity75%orless
 
Temperatureand (withoutcondensation)
 
HumidityRanges
●
OperatingTemperature 0-40
℃
,relativehumidity85%orless
 
andHumidityRange (withoutcondensation)
   
●
StorageTemperature -20-60
℃
,relativehumidity85%orless
 
andHumidityRange (withoutcondensation)
●
Source  Two1.5VDCR03(UM-4)batteries
●
CurrentConsumption Approx.10mA
●
Power-saveFunction Shiftstothepower-savestateabout10minutesafterthe
lastswitchoperation
  (currentconsumption:approx.10
μ
A)
   
●
OverloadProtection AC/DCcurrentranges:MODEL2000A AC/DC 72A for
10seconds
           
 AC/DCcurrentranges:MODEL2001A AC/DC
120
A for
10seconds
           
 AC/DCvoltageranges:AC/DC720Vfor10seconds
  Resistanceranges:AC/DC720Vfor10seconds
  Frequencyranges:AC/DC720Vfor10seconds
●
WithstandVoltage AC3470V for 5 sec. between electrical circuit and
housingcase
●
InsulationResistance 10M
Ω
orgreaterat1000Vbetweenelectricalcircuitand
housingcase
●
ConductorSize MODEL2000AApprox.
 
6mmdiametermax.
           
 MODEL2001AApprox.10mmdiametermax.
●
Dimensions  MODEL2000A128(L)
×
87(W)
×
24(D)mm
           
 MODEL2001A128(L)
×
92(W)
×
27(D)mm
●
Weight  MODEL2000AApprox.210g
           
 MODEL2001AApprox.220g
●
Accessories TwoR03(UM-4)batteries
  InstructionManual
4.INSTRUMENT LAYOUT
Data Hold Button
MODEL2001 MODEL2000
Range Hold Button
Digital Multimeter
Function Selector Switch
Holster
Test Lead
LCD Display
AC/DC Clamp Sensor
Barrier Protective fingerguard
DCA
Zero Adjust
Knob
5.PREPARATIONS FOR MEASUREMENT
(
1
)
Checkingbatteryvoltage
SettheFunctionSelectorSwitchtoanypositionotherthantheOFFposition.
Ifthemarksonthedisplayisclearlylegiblewithoutsymbol
"BATT"
showing,battery
voltage is OK. If the display blanks or
"BATT"
 is indicated, replace the batteries
accordingtosection
8: Battery Replacement
.
NOTE
Whentheinstrumentisleftpoweredon,theauto-power-savefunctionautomatically
shutthepoweroff;ThedisplayblankseveniftheFunctionSelectorSwitchissetto
apositionotherthan the OFF position in thisstate.To power on the instrument,
turntheFunctionSelectorSwitchorpresstheDataHoldButton.Ifthedisplaystill
blanks,thebatteriesareexhausted.Replacethebatteries.
(
2
)
MakesurethattheFunctionSelectorSwitchissettotheappropriaterange.

Also make sure that data hold function is not enabled.  If inappropriate range is
selected,desiredmeasurementcannotbemade.
(
3
)
InstallTestLeadtotheHolsteronthesideofbody

ItispossibletomeasurewithseeingtheLCDDisplaykeep
TestLeadinstallingtotheHolster.
AC/DC
Battery Voltage Warning
Auto Range
Data Hold
Unit
Bar Graph
Buzzer
Manual
Range
Wind the lead around the folder.
Test Leads
AC/DC Clamp Sensor
●
Inorder
●
Do not
●
●
When
●

M
 
 
(2)Turn
(3)

 
( When
occurs.)
Note:When
 
 
(2)
 
(
Note:Unlike
●
Inorder
●

●
 
 

(
(2)
black
display.
 
Correct
 
6-2-2ACVoltageMeasurement
(1)SettheFunctionSelectorSwitchto"
 
V."
 

(
"AC"and"AUTO"marksareshownontheLCD.
)
(2)Connectthetestleadstothecircuitundertest.
 
Measuredvoltagevalueisshownonthedisplay.
6-3 Resistance Measurement
DANGER
●
Nevermakemeasurementoncircuitsthatarelive.
●
Nevermakemeasurementwiththebatterycompartmentcoverremoved.
●
Keepyourfingersandhandsbehindtheprotectivefingerguardduringmeasurement.
(1)SettheFunctionSelectorSwitchto"
Ω/

 
."
(2)Checkthatthedisplayshowsover-range. Shortthetestleadsandcheck thatthe
buzzerbeepsandthedisplayreadszero.
(3)Connect the test leads to the circuit under test. Measured resistance value is
shownonthedisplay.Whenthemeasuredvalueisbelowabout30
Ω
,thebuzzer
beeps.
Note:When the test leads are shorted, the display may read a small resistance value.
Thisistheresistanceofthetestleads.
Ifthereisanopenineitherofthetestleads,"OL"isshownonthedisplay.

 
Onthe340
Ω
range,"
 
"isshownontheleftsideoftheLCD.
6-4 Frequency Measurement
DANGER
●
Inordertoavoidpossibleshockhazard,nevermakemeasurementoncircuitswitha
maximum voltage difference of 600VAC/DC or greater between conductors
(300VAC/DCorgreaterbetweenaconductorandground).
●
Do notmakemeasurementwiththetestleadsconnectedtothecircuit undertest.
Nevermakemeasurementwiththebatterycompartmentcoverremoved.
●
Donotmakecurrentmeasurementwiththetestleadsconnectedtothecircuitunder
test.
●
Keepyourfingersandhandsbehindtheprotectivefingerguardduringmeasurement.
(1)SettheFunctionSelectorSwitchto"Hz."
(2)Measuringfrequencyofcurrent:
  
Adjustoneoftheconductorstothecenteroftheclampsensor'sarrow.Measured
valueisshownonthedisplay.
  
Measuringfrequencyofvoltage:
  
Connectthetestleadstothecircuitundertest.Measuredfrequencyisshownon
thedisplay.
Note:Measuringrangeofcurrentfrequencyis0-10kHzwithminimummeasurableinput
ofMODEL2000A15A
(
Typ
)
/MODEL2001A25A
(
Typ
)
.

 
Measuringrangeofvoltagefrequencyis0-300kHzwithminimummeasurableinput
of30V
(
Typ
)
.

 
Whenmeasuringfrequency,donotattachtheclampsensorandthetestleadsto
thecircuitundertestsimultaneously.
Prohibition












o


92-2318A6-18
DISTRIBUTOR
Kyoritsu reserves therightstochangespecifications or
designs described in this manual without notice and without
obligations.
Test Lead Cap
:
Test leads can be used under the CAT.II and III environments by
attaching a Protective cap as illustrated below. Use of our Protective cap offers
differentlengthssuitableforthetestenvironments.
Barrer
Protectivefingerguard
:
It is a part providing protection against electrical shock and
ensuringtheminimumrequiredairandcreepagedistances.
Protective Cap
Exposed metal part
Uncapped condition for CAT.II environment
Capped condition for CAT.III environments
This instrument satisfies the marking requirement defined in the WEEE
Directive. This symbol indicates separate collection for electrical and
electronicequipment.
Thismarkingmeanstheyshallbesortedoutandcollectedasordainedin
DIRECTIVE.
This directive is valid only in the EU. When you remove batteries from
thisproductanddisposethem,discardtheminaccordancewithdomestic
lawconcerningdisposal.Takearightactiononwastebatteries,because
thecollectionsystemintheEUonwastebatteriesareregulated.
www.GlobalTestSupply.com
Find Quality Products Online at: sales@GlobalTestSupply.com
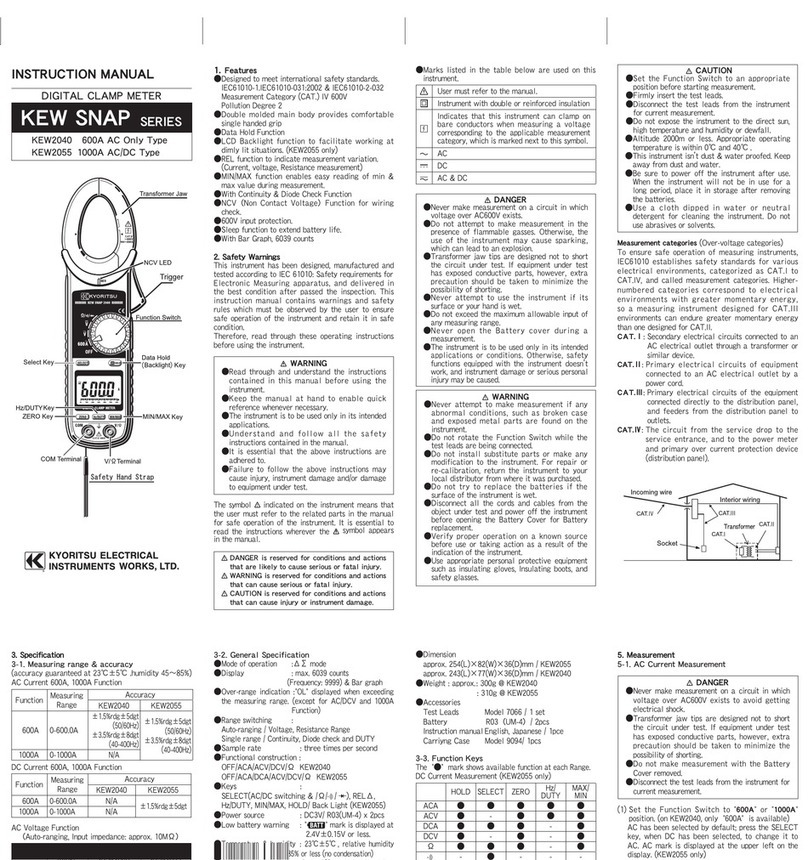
INSTRUCTIONMANUAL
KEW MATE 2000A/2001A
DIGITAL MULTIMETER
WITH
AC/DC CLAMP SENSOR
KYORITSU ELECTRICAL INSTRUMENTS
WORKS, LTD.
1.SAFETY WARNINGS
ThisinstrumenthasbeendesignedandtestedaccordingtoIECPublication61010:
SafetyRequirementsforElectronicMeasuringApparatus.Thisinstruction manual
containswarningsandsafetyruleswhichmustbeobservedbytheusertoensure
safeoperationoftheinstrumentandtoretainitinsafecondition.Therefore,read
throughtheseoperatinginstructionsbeforestartingusingtheinstrument.

WARNING
●
Read through and understand instructions contained in this manual before
startingusingtheinstrument.
●
Saveandkeepthemanualhandytoenablequickreferencewhenevernecessary.
●
Be sure to use the instrument only in its intended applications and to follow
measurementproceduresdescribedinthemanual.
●
Besuretounderstandandfollowallsafetyinstructionscontainedinthemanual.
Theinstrumentistobeusedonlyinitsintendedapplications.
Understandandfollowallthesafetyinstructionscontainedinthemanual.
Failure to follow the instructions may cause injury, instrument damage and/or
damage to equipment under test. Kyoritsu is by no means liable for any damage
resultingfromtheinstrumentincontradictiontothiscautionarynote.
Failure to follow the above instructions may cause injury, damage to the instrument
and/ordamagetoequipmentundertest.
Thesymbol indicatedontheinstrument means that the user must refer to related
partsofthemanualforsafeoperationoftheinstrument.Besuretocarefullyreadthe
instructionsfollowingeach symbolinthismanual.
DANGER

isreservedforconditionsandactionsthatarelikelytocauseseriousorfatalinjury.
WARNING

isreservedforconditionsandactionsthatcancauseseriousorfatalinjury.
CAUTION

isreservedforconditionsandactionsthatcancauseminorinjuryorinstrumentdamage.
Following symbols are used on the instrument and in the instruction manual. Attention
shouldbepaidtoeachsymboltoensureyoursafety.
Refertotheinstructionsinthemanual.
Thissymbolismarkedwheretheusermustrefertotheinstructionmanualsoasnot
tocausepersonalinjuryorinstrumentdamage.
Indicatesaninstrumentwithdoubleorreinforcedinsulation.
Indicatesthatthisinstrumentcanclamponbareconductorswhenmeasuring
avoltagecorresponding totheapplicableMeasurement category,whichismarked
nexttothissymbol
.
IndicatesAC(AlternatingCurrent)
.
IndicatesDC(DirectCurrent).
IndicatesACandDC.
DANGER
●
Never make measurement on circuits with a maximum voltage difference of
600VAC/DC or greater between conductors (300VAC/DC or greater between a
conductorandground).
●
Do not attempt to make measurement in the presence of flammable gasses.
Otherwise, the use of the instrument may cause sparking, which leads to an
explosion.
●
Neverattempttousetheinstrumentifitssurfaceoryourhandiswet.
●
Donotexceedthemaximumallowableinputofmeasuringranges.
●
Neveropenthebatterycompartmentcoverwhilemakingmeasurement.
●
Never try to make measurement if any abnormal conditions, such as broken
Transformerjawsorcaseisnoted.
●
The instrument is to be used only in its intended applications or conditions.
Otherwise, safety functions equipped with the instrument doesn

t work, and
instrumentdamageorseriouspersonalinjurymaybecaused.
●
Never attempt to make any
●
DonotturntheFunction
circuitundertest.
●
Do not installsubstituteparts
●

●
Always disconnectthe clamp
and switch off the instrument
batteryreplacement.
●
Stopusingthetestleadifthe
jacketisexposed.
●
MakesurethattheFunction
makingmeasurement.
●
Always make sure to place the
currentmeasurement.
●
●
BesuretosettheFunction
the instrument will not be used
removingthebatteries.
●
Useadampclothand
orsolvents.
●
Measurement Category:
To ensure safe operation of mea
standardsforvariouselectricale
measurement categories. Hig
environments with greater mome
for CATIII environments canen
forCATII.
O :Circuitswhichareno
CATII :Electricalcircuitsofe
powercord.
CATIII :Primary electrical cir
distributionpanel,an
CATIV :Thecircuitfromthese
meterandprimaryover
2.FEATURES
●
Permits AC/DC current
standardwiththeinstrument
●
●
Permitscurrentmeasurement
●
Auto-power-savefunction
●
●
●
●
●
Designed to international
CAT
Ⅲ
3.SPECIFICATIONS
●
MeasuringRangesandAccuracy(at23
℃±
5
℃
,relativehumidity75%orless)
※
Electromagnetic
 
RFfield
≦
1V/m
 compatibility
  

ACV/DCV/OHMS/FREQUENCYtotalaccuracy=specifiedaccuracy
 (IEC61000-4-3)
ACA/DCA
       

  
 totalaccuracy=specifiedaccuracy+5dgt
       

 
RF transmitters such as mobile telephones may not be used in close
proximity.
●
SafetyStandard IEC61010-1
  measurementCAT
Ⅲ
,300V,pollutiondegree2
  measurementCAT
Ⅱ
,600V,pollutiondegree2
  IEC61010-031
  IEC61010-2-032,IEC61010-2-033
  IEC61326-1(EMC),EN50581(RoHS)
●
OperatingSystem Dualintegration
●
Display  Liquid crystal display with maximum reading of 3399 as
wellasunitsandannunciators
  Bargraphwithmaximumpointsof33
●
OverInputIndication "OL"ontheLCD(
Ω
rangesonly)
●
Auto-rangingOperation Shiftstothe nexthigherrange whenbargraph increases
to33points
  Shiftstothenext lowerrangewhenbar graph decreases
to3points
●
SampleRateNumericreading:about400ms,
  bargraph:about20ms
MODEL
2000A
2001A
Range
60A
100A
ACCurrent
 
A
 

DCCurrent
 
 A 
ACVoltage
 
V
 
Inputimpedance:10M
Ω
DCVoltage
 
VInputimpedance:10M
Ω
MeasuringRange
0-60.0A
0-100.0A
Accuracy

±
2.0%rdg
±
5dgt(50/60Hz)

±
2.0%rdg
±
5dgt(50/60Hz)
MODEL
2000A
2001A
Range
60A
100A
MeasuringRange
0-
±
60.0A
0-
±
100.0A
Accuracy
±
2.0
%
rdg
±
5dgt
±
2.0
%
rdg
±
5dgt
Range
3.4V
34V
340V
600V
MeasuringRange
0-600V
(Auto-ranging)
Accuracy
±
1.5%rdg
±
5dgt(50-400Hz)
Range
340mV
3.4V
34V
340V
600V
MeasuringRange
0-
±
600V
(Auto-ranging)
Accuracy
±
1.5%rdg
±
4dgt
Resistance
Ω/

Range
340
Ω
3.4k
Ω
34k
Ω
340k
Ω
3.4M
Ω
34M
Ω
MeasuringRange
0-33.99M
Ω
(Auto-ranging)
Accuracy
±
1.0%rdg
±
3dgt
Buzzerbeepsbelow30
±
10
Ω
(
Continuity buzzer works on 340
Ω
 range
only
)
±
5%rdg
±
5dgt
±
15%rdg
±
5dgt
Frequency
 
Hz
Range
Current
Voltage
MeasuringRange
0-3.399kHz
3.4kHz-10kHz
(Auto-ranging)
0-3.399kHz
3.4kHz-33.99kHz
34kHz-300kHz
(Auto-ranging)
Accuracy
±
0.1%rdg
±
1dgt
±
0.1%rdg
±
1dgt
●
Locationforuse Indooruse,Altitudeupto2000m
●
Accuracy-insured 23
℃±
5
℃
,relativehumidity75%orless
 
Temperatureand (withoutcondensation)
 
HumidityRanges
●
OperatingTemperature 0-40
℃
,relativehumidity85%orless
 
andHumidityRange (withoutcondensation)
   
●
StorageTemperature -20-60
℃
,relativehumidity85%orless
 
andHumidityRange (withoutcondensation)
●
Source  Two1.5VDCR03(UM-4)batteries
●
CurrentConsumption Approx.10mA
●
Power-saveFunction Shiftstothepower-savestateabout10minutesafterthe
lastswitchoperation
  (currentconsumption:approx.10
μ
A)
   
●
OverloadProtection AC/DCcurrentranges:MODEL2000A AC/DC 72A for
10seconds
           
 AC/DCcurrentranges:MODEL2001A AC/DC
120
A for
10seconds
           
 AC/DCvoltageranges:AC/DC720Vfor10seconds
  Resistanceranges:AC/DC720Vfor10seconds
  Frequencyranges:AC/DC720Vfor10seconds
●
WithstandVoltage AC3470V for 5 sec. between electrical circuit and
housingcase
●
InsulationResistance 10M
Ω
orgreaterat1000Vbetweenelectricalcircuitand
housingcase
●
ConductorSize MODEL2000AApprox.
 
6mmdiametermax.
           
 MODEL2001AApprox.10mmdiametermax.
●
Dimensions  MODEL2000A128(L)
×
87(W)
×
24(D)mm
           
 MODEL2001A128(L)
×
92(W)
×
27(D)mm
●
Weight  MODEL2000AApprox.210g
           
 MODEL2001AApprox.220g
●
Accessories TwoR03(UM-4)batteries
  InstructionManual
4.INSTRUMENT LAYOUT
Data Hold Button
MODEL2001 MODEL2000
Range Hold Button
Digital Multimeter
Function Selector Switch
Holster
Test Lead
LCD Display
AC/DC Clamp Sensor
Barrier Protective fingerguard
DCA
Zero Adjust
Knob
5.PREPARATIONS FOR MEASUREMENT
(
1
)
Checkingbatteryvoltage
SettheFunctionSelectorSwitchtoanypositionotherthantheOFFposition.
Ifthemarksonthedisplayisclearlylegiblewithoutsymbol
"BATT"
showing,battery
voltage is OK. If the display blanks or
"BATT"
 is indicated, replace the batteries
accordingtosection
8: Battery Replacement
.
NOTE
Whentheinstrumentisleftpoweredon,theauto-power-savefunctionautomatically
shutthepoweroff;ThedisplayblankseveniftheFunctionSelectorSwitchissetto
apositionotherthan the OFF position in thisstate.To power on the instrument,
turntheFunctionSelectorSwitchorpresstheDataHoldButton.Ifthedisplaystill
blanks,thebatteriesareexhausted.Replacethebatteries.
(
2
)
MakesurethattheFunctionSelectorSwitchissettotheappropriaterange.

Also make sure that data hold function is not enabled.  If inappropriate range is
selected,desiredmeasurementcannotbemade.
(
3
)
InstallTestLeadtotheHolsteronthesideofbody

ItispossibletomeasurewithseeingtheLCDDisplaykeep
TestLeadinstallingtotheHolster.
AC/DC
Battery Voltage Warning
Auto Range
Data Hold
Unit
Bar Graph
Buzzer
Manual
Range
Wind the lead around the folder.
Test Leads
AC/DC Clamp Sensor
6.HOW TO MAKE MEASUREMENT
6-1 Current
Measurement
DANGER
●
Inordertoavoidpossibleshockhazard,nevermakemeasurementoncircuitswitha
maximum voltage difference of 600VAC/DC or greater between conductors
(300VAC/DCorgreaterbetweenaconductorandground).
●
Do notmake measurementwith thetest leadsconnected tothe circuitunder test.
Nevermakemeasurementwiththebatterycompartmentcoverremoved.
●
Keepyourfingersandhandsbehindthebarrierduringmeasurement.
  CAUTION
●
Whenhandlingtheclampsensor,exercisecautionnottoapplyexcessiveshocksor
vibrationtothesensor.
●

M
aximum measurable conductor size is MODEL2000A 6mm / MODEL2001A
10mmindiameter.
 
6-1-1DCCurrentMeasurement
(1)TheFunctionSelectorSwithtothe"
 
A"position.
 
("DC"and"AUTO"marksareshownonthetopofthedisplay.)
(2)Turnthe0(Zero)ADJknobtosetthereadingofthemultimetertozero.(Ifthiszero
adjustmentismadeincorrectly,measurementerrorswillresult.)
(3)Adjustoneoftheconductorstothecenteroftheclampsensor'sarrow.
 
( When the position of the conductor is not at the center of the arrow, the error
occurs.)
Measuredvalueisshownonthedisplay.
Note:Whencurrentflowsfromtheupsidetotheundersideoftheinstrument,thepolarity
ofthereadingispositive(+).Otherwise,thepolarityofthereadingisnegative(-).
 
6-1-2ACCurrentMeasurement
(1)SettheFunctionSelectorSwitchto"
 
A."
 
("AC"and"AUTO"marksareshownonthetopoftheLCD.)
(2)Adjustoneoftheconductorstothecenteroftheclampsensor'sarrow.
 
( When the position of the conductor is not at the center of the arrow, the error
occurs.)
Measuredvalueisshownonthedisplay.
Note:Unlike DC current measurement,zeroadjustment is not necessary.There is not
polarityindicationeither.
6-2 Voltage Measurement
DANGER
●
Inordertoavoidpossibleshockhazard,nevermakemeasurementoncircuitswitha
maximum voltage difference of 600VAC/DC or greater between conductors
(300VAC/DCorgreaterbetweenaconductorandground).
●
Donotmakemeasurementwiththebatterycompartmentcoverremoved.
●
Keepyourfingersandhandsbehindtheprotectivefingerguardduringmeasurement.
 
6-2-1DCVoltageMeasurement
(1)SettheFunctionSelectorSwitchto"
 
V."
 

(
"DC"and"AUTO"marksareshownonthetopoftheLCD.
)
(2)Connecttheredtestleadtothepositive(+)sideofthecircuitundertestandthe
blacktest lead tothenegative (-)side. Measuredvoltagevalue isshownon the
display.
 
Whentheconnectionisreversed,"-"isshownonthedisplay.
Conductor
MODEL2000A MODEL2001A
Adjust a
conductor to
the center of
the arrow.
Correct Wrong
 
6-2-2ACVoltageMeasurement
 

(
(2)
 
6-3 Resistance Measuremen
●

●

●
(2)Check thatthe displayshows
(3)Connect the test leads to
shownonthedisplay.When
beeps.
Note:
When the test leads are


 
Onthe340
Ω
range,"
 
6-4 Frequency Measurement
●
Inordertoavoidpossibleshock
maximum voltage difference
●
Donotmakemeasurementwith
●
Donotmakecurrent
test.
●
(2)
  
Adjustoneoftheconductors
  
  
Connectthetestleadsto
thedisplay.
Note:Measuring rangeofcurrent
ofMODEL2000A15A
(
Typ
)

 
Measuringrangeofvoltage
of30V
(
Typ
)
.

 
Whenmeasuringfrequency,
Prohibition
7.OTHER FUNCTIONS
7-1Auto-Power-SaveFunction
NOTE
Asmallamountofcurrentisconsumedeveninthepower-savestate.Makesure
tosettheFunctionSelectorSwitchtotheOFFpositionwhentheinstrumentisnot
used.
This function helps to avoid unwanted exhaustion of the batteries because of
leaving the instrument powered on and extend battery life.  The instrument
automatically shifts to the power-save state about 10 minutes after the last
FunctionSelectorSwitchorotherswitchoperation.
Toreturntothenormalstate: Turn the Function Selector Switch or press the
Data Hold Button twice to exit the power-save state and enable measurement
functions.
7-2DataHoldFunction
This is a function to freeze a measured value on the display.  Press the Data
HoldButtononcetoholdthecurrentreading.Inthisdataholdstate,thereading
isheldevenifinputvaries."H"and"
 
"marksareshownontheLCDinstead
of"AUTO"mark.
Toexitthedataholdstate,presstheDataHoldButtonagain.
7-3RangeHoldFunction
The instrument defaults to auto-ranging ("AUTO" is shown on the LCD).
PressingtheRange HoldButtonenables manualselectionamongmeasurement
ranges
(
"
 
"markisshownontheLCDinsteadof"AUTO"mark
)
PresstheRangeHoldButtontoselectahigherrange.
 
To switch from manual range selection to auto-ranging, press down the Range
Hold Button for about one seconds, or turn the Function Selector Switch to
anotherpositionbeforesettingitbacktothecurrentrange.
8.BATTERY REPLACEMENT
WARNING
●
Inordertoavoidpossibleshockhazard,alwaysdisconnectthetestleadsfrom
thecircuitundertestandsetthe FunctionSelectorSwitchtotheOFFposition
beforetryingtoreplacethebatteries.
  CAUTION
●
Donotmixnewandoldbatteries.
●
Install batteries in the orientation as shown inside the battery compartment,
observingcorrectpolarity.
Whenthebatteryvoltagewarningmark"BATT"isshownonthetopleftcornerofthe
LCD, replace the batteries.  Note that the display blanks and "BATT" mark is not
shownifthebatteriesarecompletelyexhausted.
 
(1)SettheFunctionSelectorSwitchto"OFF."
 
(2)Removetheinstrumentfromtheholster.
 
(3)Loosen the battery-compartment-cover-fixing screw on the lower back of the
instrument.
 
(4)ReplacethebatterieswithtwonewR03(UM-4)1.5Vbatteries.
 
(5)Putthebatterycompartmentcoverbackinplaceandtightenthescrew.
Screw
Battery
Compartment
Cover
Batteries
Kyoritsu reserves therights tochangespecifications or
designs described in this manual without notice and without
obligations.
Test Lead Cap
:
Test leads can be used under the CAT.II and III environments by
attaching a Protective cap as illustrated below. Use of our Protective cap offers
differentlengthssuitableforthetestenvironments.
Barrer
Protectivefingerguard
:
It is a part providing protection against electrical shock and
ensuringtheminimumrequiredairandcreepagedistances.
Protective Cap
Exposed metal part
Uncapped condition for CAT.II environment
Capped condition for CAT.III environments
This instrument satisfies the marking requirement defined in the WEEE
Directive. This symbol indicates separate collection for electrical and
electronicequipment.
Thismarkingmeanstheyshallbesortedoutandcollectedasordainedin
DIRECTIVE.
This directive is valid only in the EU. When you remove batteries from
thisproductanddisposethem,discardtheminaccordancewithdomestic
lawconcerningdisposal.Takearightactiononwastebatteries,because
thecollectionsystemintheEUonwastebatteriesareregulated.
www.GlobalTestSupply.com
Find Quality Products Online at: sales@GlobalTestSupply.com
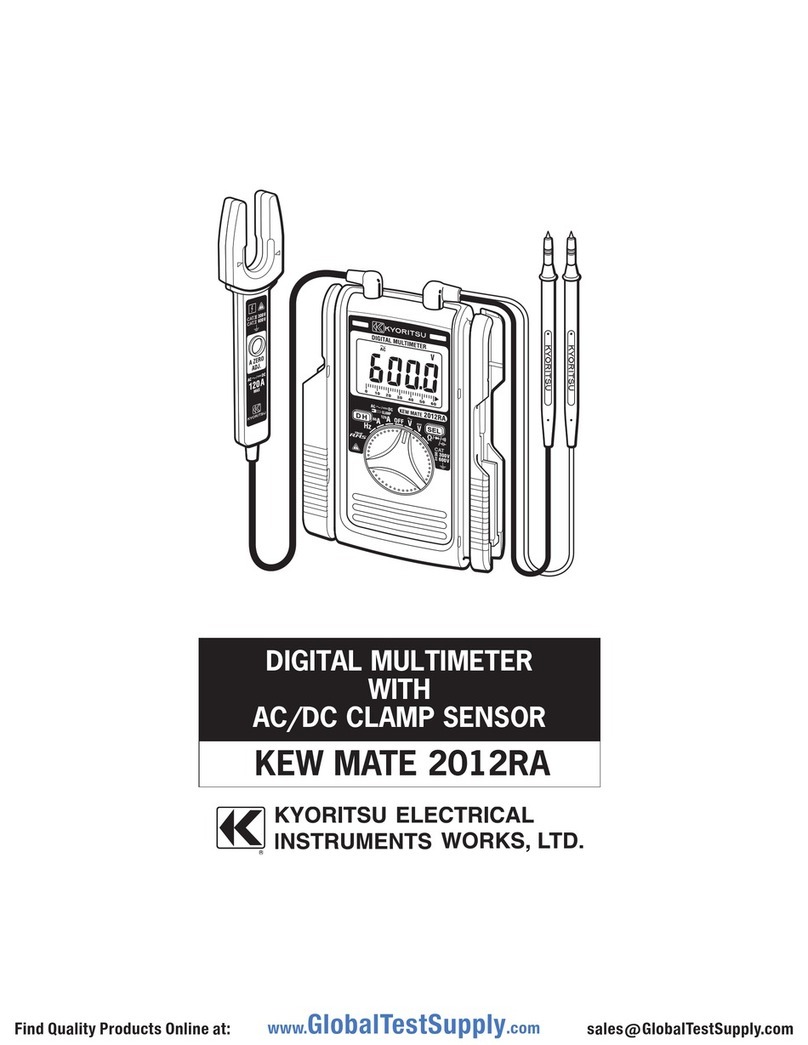
This manual suits for next models

1

Other KYORITSU Multimeter manuals

KYORITSU New SNAP 7 User manual

KYORITSU

KYORITSU New SNAP 7 User manual

KYORITSU KEW 1018 User manual

KYORITSU

KYORITSU KEW 1018 User manual

KYORITSU KEW1021R User manual

KYORITSU

KYORITSU KEW1021R User manual

KYORITSU KEW MATE 2012R User manual

KYORITSU

KYORITSU KEW MATE 2012R User manual

KYORITSU KEW 1052 User manual

KYORITSU

KYORITSU KEW 1052 User manual

KYORITSU KEW 4106 User manual

KYORITSU

KYORITSU KEW 4106 User manual

KYORITSU 1110 User manual

KYORITSU

KYORITSU 1110 User manual

KYORITSU KEW1011 User manual

KYORITSU

KYORITSU KEW1011 User manual

KYORITSU KEW1020R User manual

KYORITSU

KYORITSU KEW1020R User manual

KYORITSU KEW 1061 User manual

KYORITSU

KYORITSU KEW 1061 User manual

KYORITSU KM2012RA User manual

KYORITSU

KYORITSU KM2012RA User manual

KYORITSU KEW 1018 User manual

KYORITSU

KYORITSU KEW 1018 User manual

KYORITSU 1009 User manual

KYORITSU

KYORITSU 1009 User manual

KYORITSU KEW MATE 2012RA User manual

KYORITSU

KYORITSU KEW MATE 2012RA User manual

KYORITSU KEW SNAP Series KEW2040 User manual

KYORITSU

KYORITSU KEW SNAP Series KEW2040 User manual

KYORITSU KEW 1109 User manual

KYORITSU

KYORITSU KEW 1109 User manual

Popular Multimeter manuals by other brands

LEM LH240 operating instructions

LEM

LEM LH240 operating instructions

Greenlee 93-97 instruction manual

Greenlee

Greenlee 93-97 instruction manual

Fluke 110 user manual

Fluke

Fluke 110 user manual

Fluke 87 Series IV user manual

Fluke

Fluke 87 Series IV user manual

Chauvin Arnoux F407 Start guide

Chauvin Arnoux

Chauvin Arnoux F407 Start guide

Greenlee DM-25 instruction manual

Greenlee

Greenlee DM-25 instruction manual

Sperry instrument HSP5 owner's manual

Sperry instrument

Sperry instrument HSP5 owner's manual

Mastech MS8235 Operation manual

Mastech

Mastech MS8235 Operation manual

Kane 505 instruction manual

Kane

Kane 505 instruction manual

Fluke MD73AS3 user manual

Fluke

Fluke MD73AS3 user manual

Rishabh RISHMax 10 user manual

Rishabh

Rishabh RISHMax 10 user manual

PROSOL UK IEC-1010 Operator's instruction manual

PROSOL UK

PROSOL UK IEC-1010 Operator's instruction manual

FANOX EMM-6 manual

FANOX

FANOX EMM-6 manual

REED LM-8000 instruction manual

REED

REED LM-8000 instruction manual

Greenlee CMT-80 instruction manual

Greenlee

Greenlee CMT-80 instruction manual

Fluke 115 Specifications

Fluke

Fluke 115 Specifications

Extech Instruments MultiMaster MM560 user guide

Extech Instruments

Extech Instruments MultiMaster MM560 user guide

Gossen MetraWatt METRACLIP 63 operating instructions

Gossen MetraWatt

Gossen MetraWatt METRACLIP 63 operating instructions

manuals.online logo
manuals.online logoBrands
  • About & Mission
  • Contact us
  • Privacy Policy
  • Terms and Conditions

Copyright 2025 Manuals.Online. All Rights Reserved.