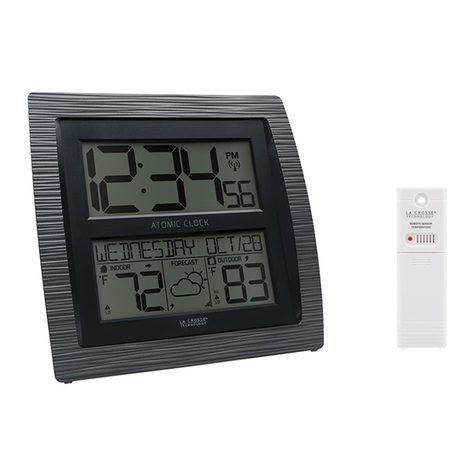
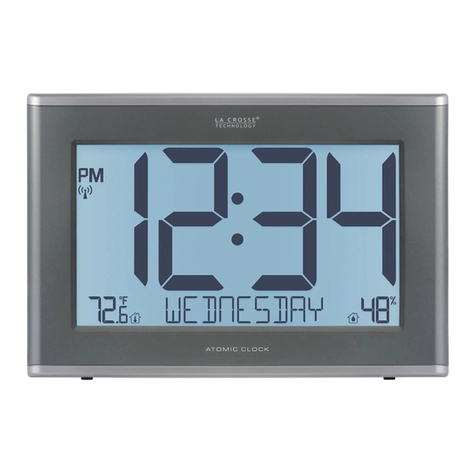
La Crosse Technology 513-05867 Dimensions

1 | Page
513-05867 FAQS
We are weather enthusiasts like you and know proper running equipment is important. These
FAQS provide valuable information on setup, positioning, and troubleshooting your clock.
We recommend Adobe Reader version 10 or greater available at: http://get.adobe.com/reader
CONTENTS
513-05867 FAQS ............................................................................................................................................................... 1
CONTENTS ......................................................................................................................................................................... 1
BATTERIES: What do I need to know about batteries?................................................................................................... 1
What are the power requirements for this clock?............................................................................................................ 1
SETUP: How do I setup my clock? .................................................................................................................................... 2
How do I manually set the time? ....................................................................................................................................... 2
Does this clock have 12 hour and 24 hour time options? ............................................................................................... 3
What do the Daylight Saving Time (DST) Settings mean? .............................................................................................. 3
How do I select Fahrennheit or Celsius?.......................................................................................................................... 3
TIME: Does this clock have Atomic Time?........................................................................................................................ 3
What is Desired Hour (Time Adjust) and how do I set it? ................................................................................................ 4
Can I change the Calender Display? ................................................................................................................................ 5
How do I select where Time and Temperature are Display? ......................................................................................... 5
Can I add sensors? ............................................................................................................................................................. 5
What does a reading of “HI” or “LO” mean? .................................................................................................................... 5
What does “NO” mean? ..................................................................................................................................................... 6
FACTORY RESET: How do I factory reset my clock? ...................................................................................................... 6
BATTERIES: WHAT DO I NEED TO KNOW ABOUT BATTERIES?
•Good fresh batteries are important for best performance in your clock.
•Batteries with an expiration date of 2028, were manufactured in 2018.
•We recommend batteries with an expiration date 6 years in advance of the current year for
best performance.
•A minimum voltage of 1.48 v per battery is required for best performance.
WHAT ARE THE POWER REQUIREMENTS FOR THIS CLOCK?
513-1429:6 “AA” batteries.

2 | Page
SETUP: HOW DO I SETUP MY CLOCK?
1. Insert 6 “AA” batteries into your clock.
2. Enter Basic Settings.
HOW DO I MANUALLY SET THE TIME?
IMPORTANT:Only press or hold one button at a time.
1. Hold the button 2 seconds to enter settings mode.
2. Press the + or - button to adjust the flashing values.
3. Hold the + or - buttons to adjust quickly.
4. Press the button to confirm adjustments and move to the next item.
5. Press the F/C button at any time to exit.
Settings order:
•Language (English, Spanish, French, German)
•Beep ON/OFF
•Atomic ON/OFF
•DST AUTOMATIC/ DST OFF / DST ON
•Time Zone
•12/24 Format
•Hour
•Minutes
•Year
•Month
•Date
•Month/Date or Date/Month
Notes:
• The language selected in this menu will adjust the Weekday readout and menu items.
• If “Atomic OFF: is selected, menu will skip DST and Time Zone settings and move straight to
the 12/24 Hour Format setting.
• Weekday sets automatically when Year, Month and Date are set..
Settings Menu
1. Hold the button for 2 seconds to enter setting mode. ENGLISH will show. Press the + or -
button to change to another language (Español, or Français or Deutsch). Press the button
to select Beep ON/OFF.
2. BEEP ON will show. Press the + or – button to turn beep sound OFF. Press the button to
move to Atomic Time ON/OFF.
3. Press to confirm and move to the atomic time ON/OFF. ATOMIC ON will show. ON
flashes. Use the + or - button if you do not want Atomic Time signal (OFF).

3 | Page
4. Press to confirm and move to the Daylight Saving Indicator. DST AUTO ON will show.
USE the + or - button to Select DST ALWAYS ON (DST all year) or DST ALWAYS OFF
(Standard Time all year).
5. Press to confirm and move to the Time Zone. EASTERN will flash. Use the + or - button to
select your time zone.
6. Press to confirm and move to 12/24 hour time. 12/24 FORMAT will show. 12HR flashes.
Press the + or - button to turn select 24 hour time format.
7. Press to confirm and move to the hour. HOUR will show. The hour flashes. Press the + or -
button to choose the hour.
8. Press to confirm and move to the minutes. MINUTES will show. Minutes flash. Press the +
or - button to choose the minutes.
9. Press to confirm and move to the year. The YEAR 2020 will show. Year will flash. Press
the + or - button to change the year.
10. Press to confirm and move to the month. The MONTH will show. The Month will flash.
Press the + or - button to change the month.
11. Press to confirm and move to the date. DATE will show. Date will flash. Press the + or -
button to change the date.
12. Press to confirm and select MONTH/DATE or DATE/MONTH. MONTH/DATE will show.
Press the + or - button to select DATE/MONTH.
13. Press to confirm and exit.
Note: After 10 seconds with no button press, station returns to normal time display.
DOES THIS CLOCK HAVE 12 HOUR AND 24 HOUR TIME OPTIONS?
•Yes. You can select 12-hour or 24-hour time in the Settings Menu.
WHAT DO THE DAYLIGHT SAVING TIME (DST) SETTINGS MEAN?
DST AUTOMATIC: Clock gains 1 hour in spring and loses 1 hour in the fall (default).
DST ALWAYS OFF: Clock remains in Standard Time all year long.
DST ALWAYS ON: Clock remains in Daylight Saving Time all year long.
HOW DO I SELECT FAHRENNHEIT OR CELSIUS?
•Press the F/C button to select Fahrenheit or Celsius Temperature display.
TIME: DOES THIS CLOCK HAVE ATOMIC TIME?
Yes:
•The clock will search for the WWVB Atomic Time Signal when powered on. If no reception is
made, it will search or automatically at UTC: 7:00, 8:00, 9:00, 10:00, and 11:00.
•If there is no WWVB reception, the clock will search for the atomic time signal every 2 hours
until the WWVB time is received.

4 | Page
•The atomic time signal icon will flash while searching. The tower icon will be solid when it
has connected.
•From normal time display, press the button to search for the WWVB time signal.
•Please be sure you have selected your time zone from the list in the Settings menu.
•When the Atomic time signal is received, the clock will set to the time zone selected. Default
is Eastern Time.
Reception:
•The WWVB time signal can be received up to 2,000 miles away from Boulder Colorado.
However, due to the nature of the Earth’s Ionosphere, reception is very limited during
daylight hours. The Radio-controlled display will search for a signal every night when
reception is best.
•Allow up to 5 nights for the change from Daylight Savings Time to Standard Time and vice-
versa to occur, depending on your location and atmospheric conditions.
Loss of WWVB signal, follow these steps:
1. Check for a Tower Icon showing on the display near the time. The tower icon indicates
successful reception of the WWVB signal in the past 24-hours.
2. Check that the Clock is in the correct Time Zone.
3. Check that ATOMIC is ON.This must be ON to receive a WWVB atomic time signal.
4. Check that the DST indicator is ON. If the indicator is OFF the clock will not change into or
out of Daylight Saving Time.
5. Position clock with front or back facing Fort Collins, Colorado so the widest part of the
antenna is positioned to receive.
For information about WWVB visit: http://bit.ly/AtomicTime
WHAT IS DESIRED HOUR (TIME ADJUST) AND HOW DO I SET IT?
Have your clock match other times around the world by setting a Desired Hour, kept accurate
by the Atomic Time Signal. Note: Only the hour can be changed.
Set Desired Hour:
1. Hold the button until the Hour flashes, “Desired Hour” will show.
2. Press the + (PLUS) button to adjust the hour. Press the - (MINUS) button to reset hour to
“current hour”.
3. Press the button to confirm and exit.
Switch between Desired Time and Local time:
• Press the button to switch between Desired Time and Local Time.
• Desired Time is indicated with the icon.

5 | Page
CAN I CHANGE THE CALENDER DISPLAY?
Press the button to change how the Calendar is displayed.
•Full Weekday
•Month/Date/Year
•Weekday/Month/Date.
HOW DO I SELECT WHERE TIME AND TEMPERATURE ARE DISPLAY?
Press the button to adjust the data displayed on screen.
• Current Time/Indoor Temp
• Current Time/Outdoor Temp
• Desired Time/Indoor Temp
• Outdoor Temp/Desired Time
• Indoor Temp/Desired Time
• Auto-Scroll
When the Auto-scroll Icon is showing, the clock will switch between these options every 5
seconds. Continue to press the button to stop the auto-scroll. Your clock will stay on the last
selection.
CAN I ADD SENSORS?
For outdoor readings, an add-on Temperature & Humidity Sensor can be purchased here:
www.lacrossetechnology.com/products/513-1429#parts
Add-on Sensor:
1. Install batteries Temperature & Humidity sensor.
2. Hold the + (PLUS) button until the Reception Indicator starts to animate. This will start a
search for your sensor. Press the TX button on the sensor.
3. Your sensor should connect within the next few minutes.
View Add-on Sensor:
•Press the button to view Add-on Sensor readings, Time, Desired Time, or Indoor
Temperature & Humidity.
WHAT DOES A READING OF “HI” OR “LO” MEAN?
•If your outdoor temperature reading shows “HI” or “LO”, check that your batteries are good.
•Overpowered or underpowered batteries can cause this reading.
•If batteries are good, replace the outdoor sensor.

6 | Page
•If your temperature is fine but your humidity is reading “HI” or “LO” or dashes, your humidity
may be below 10% Relative Humidity. Your sensor does not read below 10% humidity.
WHAT DOES “NO” MEAN?
•If a sensor loses connection to the station for any reason, the station will show NO after 30
minutes.
•The station will search for 3 minutes every hour to reconnect with sensor.
•Hold the + (PLUS) button to search for the sensors in the Outdoor Area
•Icon will flash while searching for sensor. Outdoor area will show dashes during the
search. When sensor is received the icon will be solid.
•If no sensor received, icon disappears after 3 minutes of searching if sensor is not
found.
•NO will again show in the outdoor sensor area.
FACTORY RESET: HOW DO I FACTORY RESET MY CLOCK?
To factory reset your clock:
1. Remove batteries and press any button 20 times.
2. Reinsert batteries.
Table of contents
Other La Crosse Technology Time Clock manuals
La Crosse Technology
La Crosse Technology WT-3129Sx1 User manual

La Crosse Technology
La Crosse Technology WT-3126Bx1 User manual

La Crosse Technology
La Crosse Technology L73859 User manual
La Crosse Technology
La Crosse Technology BBB86118 Dimensions

La Crosse Technology
La Crosse Technology WT-3161WHx1 User manual

La Crosse Technology
La Crosse Technology 617-1392B Dimensions

La Crosse Technology
La Crosse Technology 513-21867 Dimensions

La Crosse Technology
La Crosse Technology WT-3102S User manual

La Crosse Technology
La Crosse Technology 513-75624 User manual
La Crosse Technology
La Crosse Technology 433-3256B User manual