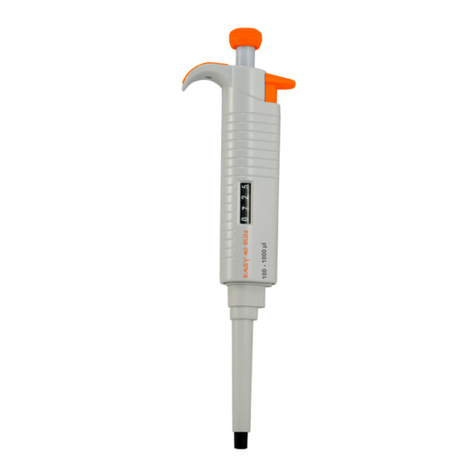
LABBOX EASY 40 Xpert User manual

EASY 40 Xpert
Variable volume micropipetter
user manual
Please read the User manual carfully before use,
and follow all operating and safety instructions!

Sr. No. Descripon Page #
1 Introducon 1
1.1 Operang instrucons for using this manual 1
1.2 Danger symbols and danger levels 1
2 Intended use 1
3 Package Contents 1
4 Product descripon 1
4.1 Variable volume pipee range 4
4.2 Fixed volume pipee range 4
4.3 Mul channel pipee range 5
4.4 Seng the volume 5
4.5 Volume indicator display example 6
4.6 Materials 6
5 Pipee operaon 6
5.1 Pipeng guidelines 6
5.2 Seng the volume 7
5.3 Loading ps 8
5.4 Opmum immersion depths 8
5.5 Forward pipeng 8
5.6 Reverse pipeng 9
5.7 Aspiraon of sample 9
5.8 Dispensing sample 9
5.9 Ejecon of ps 9
6 Calibraon and adjustment 9
6.1 Device requirements and test condions 10
6.2 Calibraon adjustment 10
6.3 Procedure to check calibraon 10
6.3.1 Conversion of weight readings to volume 11
6.3.2 Calculaon for in-accuracy (systemac error) 11
6.3.3 Calculaon for imprecision (random error) 11
7 Maintenance and servicing 11
7.1 Disassembly 11
7.2 Disassembling the lower part 11
7.2.1 Disassembling the single channel pipee up to 1ml 12
7.2.2 Disassembling the single channel pipee: 5-10ml 12
7.3 Assembling the pipee 12
7.3.1 Assembling the single channel pipee up to 1ml 12
7.3.2 Assembling the single channel pipee: 5-10ml 12
7.4 Checking the funcon 13
7.5 Disassembling the mul channel pipee 13
7.5.1 Removing the lower assembly 13
7.5.2 Opening the lower assembly 13
7.5.3 Removing the channel 13
7.5.4 Fing the channel 13
7.5.5 Assembling the lower assembly 13
7.5.6 Checking the funcon 13
14
14
7.6
8
Autoclaving
Trouble shooting guide
TABLE OF CONTENTS

1. INTRODUCTION
This manual will guide you on how to take care of your pipee
and benefit the most from its advanced features as follows:
• Magnet assisted piston for precise results
• Innovave spring and seal design for one of the lowest plunge
force requirement
• Corrosion resistant plasc p ejector mechanism with unique
shock absorbing design
• Volume lock
• Fully autoclavable
• Ergonomic design
• Easy in-house calibraon
• Highly durable universal p cone
1.2 DANGER SYMBOLS
The safety instructions in this manual have the following
danger symbols and danger levels:
Material damage
Hazard point
• Read this manual completely before using the device for the
first me.
• This manual is part of the product. Please keep it in an easily
accessible place.
• Enclose this manual when transferring the EASY 40 Xpert
to third parties.
1.1 OPERATING INSTRUCTIONS FOR USING THIS MANUAL
2. INTENDED USE
This pipee is designed and manufactured for dispensing liquids in a
measured way and to be used in combina on with same brand ps
for general laboratory use only.
This pipee is intended exclusively for indoor usage, and for
opera on by trained and skilled personnel.
3. PACKAGE CONTENTS
Descripon Quanty
1
ŸCerficate of conformity including calibraon cerficate 1
1
1
1
1
1
ŸEASY 40 Xpert
ŸWarranty card
ŸProduct manual
ŸShelf-moun ng stand
ŸCalibra on tool
ŸSilicone grease
ŸSample pack of ps 1
4. PRODUCT DESCRIPTION
Fab pipee works on air-displacement principle with the help of
magnet assisted piston for aspira ng and dispensing measured
volume of liquid. It has to be used with disposable ps. The pipee
ps are ejected with the help of ejector.
- 1 -

- 2 -
SINGLE CHANNEL VARIABLE VOLUME
Volume adjustment knob
Volume lock
Tip ejector pusher
Volume range
Coupler
Tip ejector
Tip cone
10
-
100
µl
EASY 40 Xpert

- 3 -
MULTICHANNEL VARIABLE VOLUME
Volume adjustment knob
Volume lock
Tip ejector pusher
Volume range
Coupler
Tip cone with O-ring
Manifold
10
-
100
µl
EASY 40 Xpert

- 4 -
4.1 VARIABLE VOLUME PIPETTE RANGE
0.1-2.5 μl 0.002
0.25
1.25
2.5
12
2.5
2.5
6
1.5
0.7
0.5-10 μl 0.02
1
5
10
2.5
1.5
1
1.5
0.8
0.4
5-50 μl 0.1
5
25
50
2
0.8
0.6
2
0.4
0.3
10-100 μl 0.1
10
50
100
3
1
0.8
1
0.3
0.2
EASD-X02
EASD-X10
EASD-X50
EASD-10X
2-20 μl 0.02
2
10
20
3
1.2
0.9
1.5
0.6
0.3
EASD-X20
Color
Code
Volume
Range
[ μl ]
Incre-
ments
[ μl ]
Test
Volume
[ μl ]
Inac-
curacy
(±) %
Impreci-
sion
(±) %
CAT No.
500-5000 μl 10
500
2500
5000
2.4
1.2
0.6
0.6
0.25
0.2
1000-10000 μl 20
1000
5000
10000
3
0.8
0.6
0.6
0.2
0.15
EASD-5KX
EASD-1XX
20-200 μl 0.2
20
100
200
2.5
0.7
0.6
0.7
0.3
0.2
100-1000 μl 1
100
500
1000
3
1
0.6
0.6
0.2
0.2
EASD-1KX
EASD-20X
30-300 μl 0.2
30
150
300
2.5
1
0.6
0.7
0.3
0.2
EASD-30X

- 5 -
4.3 MULTI-CHANNEL PIPETTE RANGE
8 Channels & 12 Channels
10-100 μl 0.1
10
50
100
3
1
0.8
2
0.8
0.3
EASD-10G
EASD-10T
20-200 μl 0.2
20
100
200
5
1
0.7
1.4
0.4
0.25
EASD-20G
EASD-20T
30-300 μl 0.2
30
150
300
3
1
0.6
1
0.5
0.3
EASD-30G
EASD-30T
0.5-10 μl 0.02
1
5
10
8
4
2
5
2
1
EASD-G10
EASD-T10
2-20 μl 0.02
2
10
20
7
3
2
3
2
1.6
EASD-G20
EASD-T20
5-50 μl 0.1
5
25
50
3
1.5
1
2
1
0.7
EASD-G50
EASD-T50
4.4 SETTING THE VOLUME
Delivery volume is clearly indicated in the
volume display seen in the main body of
the pipee.
In variable volume models, the boom
volume wheel includes a small increment
scale for precise setpoint and delivery
capabili es.
Some variable volume pipees include one
or two decimal places in the setpoint volume
wheels. This is indicated by the use of a black
horizontal line as seen in the following
examples sec on.
Color
Code
Volume
Range
[ μl ]
Incre-
ments
[ μl ]
Test
Volume
[ μl ]
Inac-
curacy
(±) %
Impreci-
sion
(±) %
CAT No.
1
0
0
0

- 6 -
4.6 MATERIALS
NOTICE! Aggressive substances may damage components,
consumables and accessories.
• Check the chemical resistance before using organic solvents or
aggressive chemicals.
• Only use liquids whose vapors do not aack the materials used.
5 PIPETTE OPERATION
5.1 PIPETTING GUIDELINES
• Check the p cone to make sure it is clean.
• While using the pipee make sure that operang plunger is
handled slowly and smoothly.
• Ensure that the p is firmly aached on the p cone. Please
check for foreign parcles and remove if any, around the p
cone.
• Make sure that the temperature of p, pipee and liquid are at
equilibrium.
• While aspirang, hold the pipee in upright posion and keep
the ps at a constant depth below the surface of the liquid.
• Pre-rinse the pipee p before aspirang the sample by
filling and emptying the pipee p five (5) mes. This is
important when dispensing samples that have a viscosity and
density different from water and for volale solvents.
• Do not pre-rinse the p when pipeng samples with
tempe ratures d ifferent fro m the current amb ient
temperature. Be sure to change the pipee p aer each
pipeng.
• For the volale solvents you should saturate the air-cushion of
your pipee by aspirang and dispensing the solvent
repeatedly before aspirang the sample.
• When pipeng liquids with temperature different to the
ambient temperature, pre-rinse ps p several mes before
use.
2.25 μl 18.3 μl10 μl
4.5 VOLUME INDICATOR DISPLAY EXAMPLE
EASD-X02 EASD-X10 EASD-X20
300 μl
EASD-30G
9.30 ml
EASD-1XX
1 ml
EASD-1KX
100 μl
EASD-10X
4.85 ml
EASD-5KX
2
2
5
1
0
0
1
8
3
1
0
0
0
1
0
0
0
3
0
0
0
9
3
4
8
5

- 7 -
• To decrease the volume, turn the
volume seng knob clockwise.
• To increase the volume, turn the
volume seng knob counterclock-
wise.
• Do make sure that the d e s ired
delivery volume is set in-line with
pointer.
• Turn the volume lock to “lock” the
vol um e se ng , p reve nn g any
accidental change in the volume
during pipeng.
For this pipee the delivery volume of
liquid is set using the digital display. A
pointer is u sed to set exact or
intermediate volumes using the scale
on the last wheel of digital display
(refer point # 4.6)
The Locking mechanism ensures that the volume adjustment
knob remains at the setpoint while aspirang or dispensing sample
liquids. Any effort to rotate the volume adjustment knob with the
locking mechanism engaged will damage the locking mechanism
and void the warranty.
5.2 SETTING THE VOLUME
• To set the volume turn the volume lock lever to the “unlock”
posion so that the volume can be adjusted to the desired
setpoint within the permied volume range. Refer following
images
• Aer pipeng acids or other corrosive liquids that emit vapors,
remove the p-cone and rinse the piston, O-ring and seal with
dislled water.
• Do not pipee liquids having temperatures above 70°C. (Not
recommendable)
• Make sure that liquids never enter the p-cone. To prevent
this:
Avoid laying the pipee horizontally when p is filled with
sample. As liquid may enter in and contaminate the sample
during next pipeng cycle.
When there is liquid in the p, press and release the volume
adjustment knob slowly and smoothly.
Never turn the pipee upside down.
• Always store the pipee without p on a shelf mounng
stand supplied with or a pipee carousel stand.
• Highly recommended to calibrate the pipee once in every 3-
6 months (depending on the sensivity of usage) for beer
performance. The calibraon must be carried by gravimetric
method in accordance of DIN ISO 8655-6.
Volume
adjustment
Knob
100
1000
100
1000
µl
100
1000
µl

- 8 -
Tip immersion depth is crical and should not be exceeded, as then
the volume measured may be inaccurate, possibly out of
specificaon. The p angle is also important; the pipee should
always be used in a posion within 20° angle of vercal. See figure
below.
Seng the volume beyond the allowable volume range is not
permied. Using excessive force to turn the volume adjustment
knob outside the permied range will jam the mechanism, damage
the pipee and void the warranty.
5.3 LOADING TIPS
Using correct pipee tip according to the pipee volume range is
recommended. It is necessary to check that the tip cone is clean
before fing a tip. Press the tip on the cone of the pipee firmly
to ensure an air tight seal. Always ensure that the tip is correctly
sealed to avoid any leakage while pipeng.
5.4 OPTIMUM IMMERSION DEPTHS
Volume Immersion depth
0.1 μl - 1 μl 1 mm
1 μl - 100 μl 2 - 3 mm
100 μl - 1000 μl 2 - 4 mm
1ml - 10ml 3 - 5 mm
5.5 FORWARD PIPETTING
1. Press the operang knob unl the first stop.
2. Dip the p under the surface of the liquid in the reservoir and
slowly release the operang knob. Withdraw the p from the
liquid, touching it against the edge of the reservoir to remove
excess liquid.
3. Dispense the liquid by gently pressing
the operang knob to the first stop.
Aer a delay of about one second,
connue to press the operang knob all
the way to the second stop. This acon
will empty the p.
4. Release the operang buon to the
ready posion. Change the p and
connue pipeng.
TIP
ANGLE
IMMERSION DEPTH
TIP
20°

1. Place the pipee p against the reservoir wall to avoid any
bubbles or splashing of sample out of the reservoir.
2. Press the plunger slowly past the first stroke and second stroke
for complete blow out of liquid sample. For viscous samples, it
is recommended to wait for few seconds ll the fluid passes out
to the reservoir.
3. Pull the p gently along the wall of the reservoir and release the
plunger slowly.
4. Discard the p to avoid any carry over sample or cross
contaminaon. It is highly recommended to change the p and
then repeat the pipeng cycle.
3. Dispense the preset volume of liquid
by gently pressing the operang knob
to the first stop. Hold the operang
knob at the first stop. Some liquid will
remain in the p and it should not be
dispensed.
4. The remaining liquid should either be
discarded with the p or should be
dispensed back into the reagent
reservoir.
1. Press the operang knob unl the second stop.
2. Dip the p under the surface of the liquid in the reservoir and
slowly release the operang knob. This acon will fill the p.
Withdraw the p from the liquid touching it against the edge of
the reservoir to remove excess liquid.
5.6 REVERSE PIPETTING
The reverse pipeng technique is suitable for
dispensing liquids that have high viscosity or a tendency to foam
easily. This technique is also recommended for dispensing very
small volumes.
5.7 ASPIRATION OF SAMPLE
• Hold the pipee vercally; press volume adjustment knob
to its first stop. Place the p into the sample at proper depth
(refer point # 5.4) and relax your thumb pressure on the
plunger. The light piston spring will move the piston upward,
aspirang sample.
• Pause for about 1 second (longer for macro-volume pipees)
to ensure that the full volume of sample is drawn into the p.
• Withdraw the p from the sample. If any liquid remains on
the outer surface of the p, touch it off carefully onto a lint-
free ssue, taking care not touch the tip orifice
5.8 DISPENSING SAMPLE
5.9 EJECTION OF TIPS
The tip ejector needs to be pressed downwards firmly with the
thumb to ensure proper tip ejection. Once the process is
complete, make sure the tips are disposed of into a suitable waste
container.
6 CALIBRATION AND ADJUSTMENT
All pipees hae been quality tested according to ISO8655-6.
The quality control process according to ISO 8655-6 involves
gravimetric tes ng of each pipee with double dis lled water.
All pipees are calibrated in ISO/IEC 17025 accredited laboratory.
Each Pipee is calibrated, inspected and validated by qualified
technicians according to defined quality system.
- 9 -

Depending upon use, we recommend checking of calibraon
every six months. However this can be adjusted to individual
requirements.
6.3 PROCEDURE TO CHECK CALIBRATION
The pipee is checked at maximum volume, at 50 % of maximum
volume and at minimum or 10% of maximum volume, whichever is
higher.
• A new p is first pre-weed 3-5 mes and a series of ten
pipeng is done at each volume.
• Use of forward pipeng technique is recommended.
- 10 -
6.1 DEVICE REQUIREMENTS AND TEST CONDITIONS
An analy cal balance must be used. The balance selec on depends
upon selected model of the pipee and sensi vity of balance
reading.
Test liquid: Water, dis lled or de-ionized, grade 3 water conforming
ISO3696 Calibra on should be carried out in a dra-free room at a
constant (±0.5°C temperature of water, pipee and air between
15°C to 30°C.
The rela ve humidity must be above 50% especially with volumes
under 50 µl, the air humidity should be as high as possible to reduce
the effect of evapora on loss.
Special accessories for analy cal balance, such as the evapora on
trap are recommended for the calibra on of volumes under 50 µl.
6.2 CALIBRATION ADJUSTMENT
1. Calibraon adjustment is done with the calibraon tool
provided along with pipee.
2. Rotate the volume locking lever to the “lock” posion so the
volume seng mechanism is locked and able to turn the
calibraon screw.
3. Remove volume adjustment knob by pulling it upwards.
4. Place the calibraon tool into the calibraon grooves.
5. Rotate the calibraon tool counter clockwise to increase and
clockwise to decrease the volume.
6. Aer adjustment, check the calibraon according to the
instrucon in point number 6.3
7. Once within permissible error range, remove the calibraon
tool from pipee and place volume adjustment knob in its
original posion.
100
1000
µl

7 MAINTENANCE & SERVICING
When the pipee is not in use it should be stored in an
upright posi on. The pipee should be inspected prior to use each
day for any dust or contamina on on outside surfaces. Special
aen on should be given to the p cone. No solvent other than
isopropanol should be used to clean the pipee. If the pipee is
used daily, an internal parts inspection should be performed
every three (3) months.
7.1 DISASSEMBLY
The servicing procedure starts with the disassembly of the pipee.
Please refer to the spare parts lists for beer understanding of the
components.
7.2 DISASSEMBLING THE LOWER PART
1. Press p ejector pusher completely down and hold.
2. Pull down the p ejector and release the p ejector pusher.
- 11 -
• Calculate the inaccuracy and imprecision for all three
volumes as per EN ISO 8655-6 standards on the basis of the
following calculaon
6.3.1 CONVERSION OF WEIGHT READINGS TO VOLUME
Mean Volume
Mean Weight
Balance Reading
number of reading
Conversion factor
[example Z=1.0040 µl/mg at 25°C and 1013 hPa]
Mean Value
Particular volume at which readings are taken
S = Standard Deviation
n = number of readings
S= V = Mean Value
i=1
n
∑ ( Vi - V)2
n - 1
CV% = 100 · S
_
V
Compare the results to the
limits in the earlier tables (Page )# 4, 5
6.3.2 CALCULATION FOR IN-ACCURACY (SYSTEMATIC ERROR)
6.3.3 CALCULATION FOR IMPRECISION (RANDOM ERROR)

7.2.2 DISASSEMBLING THE SINGLE-CHANNEL PIPETTE: 5 - 10ml
1. As per earlier process remove the
ejector by pulling it aer pressing
the p ejector pusher completely down.
2. Unscrew the coupler to p cone and
pull out the piston and other parts from
p cone.
- Remember to keep all parts in order for
reassembly.
- Clean the piston, the piston spring, seal
and the o-ring with isopropanol and lint
free ssue. Allow them to dry.
- Check the p cone for foreign parcles
and remove, if any. Grease the cleaned
parts with the approved lubricant
provided with each pipee.
- 12 -
1. Unscrew the coupler and remove p
cone.
2. Remove the lower part and pull out
the piston and other parts from
p cone.
- Remember to keep all parts in order
for reassembly.
- Clean the piston, the piston spring,
seal and the o-ring with isopropanol
and lint free ssue. Allow them to
dry.
- Check the p cone for fo reign
arcles and remove, if any. Grease the
cleaned parts with the approved
lubricant provided with each pipee.
7.2.1 DISASSEMBLING THE SINGLE-CHANNEL PIPETTE UP TO 1ml
1. Carefully insert the piston into the p cone.
2. Press on piston from above and check for free movement.
The piston must be able to move freely without resistance.
3. Reconnect the p cone to the main body by screwing into the
threaded secon.
4. Reinstall the p ejecon collar.
7.3 ASSEMBLING THE PIPETTE
7.3.1 ASSEMBLING THE SINGLE-CHANNEL PIPETTE UP TO 1ml
7.3.2 ASSEMBLING THE SINGLE-CHANNEL PIPETTE: 5 - 10ml
1. Insert the seal on posion.
2. Keep retainer on piston and spring. Press the spring to fit
with piston.
3. Carefully insert the piston into the p cone.
4. Press on piston from above and check for free movement.
The piston must be able to move freely without resistance.
5. The coupler screw to p cone and screw with body.
6. Fit the ejector collar.

1. Press the p ejector pusher completely
and hold it while unscrewing the coupler
from upper part of pipee.
2. Remove the lower assembly.
7.5.2 OPENING THE L7.5.2 OPENING THE LOOWER ASSEMBLWER ASSEMBLYY
1. Unscrew the two small screw from back side and safely keep it.
(Refer image -1)
2. Press and push up from side to open the front cover.
(Refer image -2)
- 13 -
7.4 CHECKING THE FUNCTION
It is to ensure that the pipee has been assembled correctly.
- Carry out a gravimetric test for the systemac and random
error.
7.5 DISASSEMBLING THE MULTI-CHANNEL PIPETTE
7.5.1 REMOVING THE LOWER ASSEMBLY
1. Slightly push the spring and pull up p cone to remove it from
the lower rail. (image -3)
2. Carefully release the piston from the upper rail and move
upward to remove it. (image -4)
7.5.3 REMOVING THE CHANNEL
1. Insert the spring with cylinder into the centre rail.
2. Insert the piston into the cylinder and fit into upper rail.
3. Compress the spring with the cylinder and insert the cylinder
into the lower rail.
7.5.5 ASSEMBLING THE LOWER ASSEMBLY
1. Aach the front cover and screw it.
2. Press the pusher completely and hold it while screwing the
coupler nut to body.
7.5.6 CHECKING THE FUNCTION
It is to ensure that the pipee has been assembled correctly.
- Carry out a gravimetric test for the systemac and random
error.
image -1 image -2
7.5.4 FITTING THE CHANNEL
image -4image -3
Move
Upward
Push

7.6 AUTOCLAVING
Fab pipee is completely autoclavable at 1 bar pressure and 121°
C temperature for 20 minutes exposure me.
AUTOCLAVING INSTRUCTIONS
ŸKeep digital counter in unlock posion.
ŸDo not dis-assemble the pipee for autoclaving.
ŸAer autoclaving, allow the pipee to completely cool and fully
dry for a minimum of four (4) hours.
Pipette is leaking
Pipette does not
aspirate the
solution
Pipette is
inaccurate
Inaccurate
dispensing with
certain liquids
Worn o-ring or seal
Worn o-ring or seal
Tip cone is loose
Damaged tip cone
Improper assembly
Tip incorrectly attached
Calibration altered
Calibration not suitable for
particular liquid
Recalibrate with the
liquid in question
Attach firmly
Recalibrate according to
instructions
See “Maintenance”
section
Replace the tip cone
Piston is damaged
(Chemically or mechanically)
Return pipette to
authorised distributor
Tighten tip cone
Foreign particles between tip
and tip cone
Foreign particles between
piston and seal
Clean tip cone, attach
new tip
Replace worn parts
Replace worn parts
Clean seal and piston
Problem area Possible Cause Solution
Tip cone is loose Tighten tip cone
- 14 -
If the pipee is autoclaved frequently, the piston and springs should
be greased with supplied lubricant along with each pipee to
maintain smooth movement.
8 TROUBLE SHOOTING GUIDE
Table of contents
Other LABBOX Laboratory Equipment manuals