Lafferty 950810 Installation instructions

Lafferty Equipment Manufacturing, Inc.
Installation & Operation Instructions
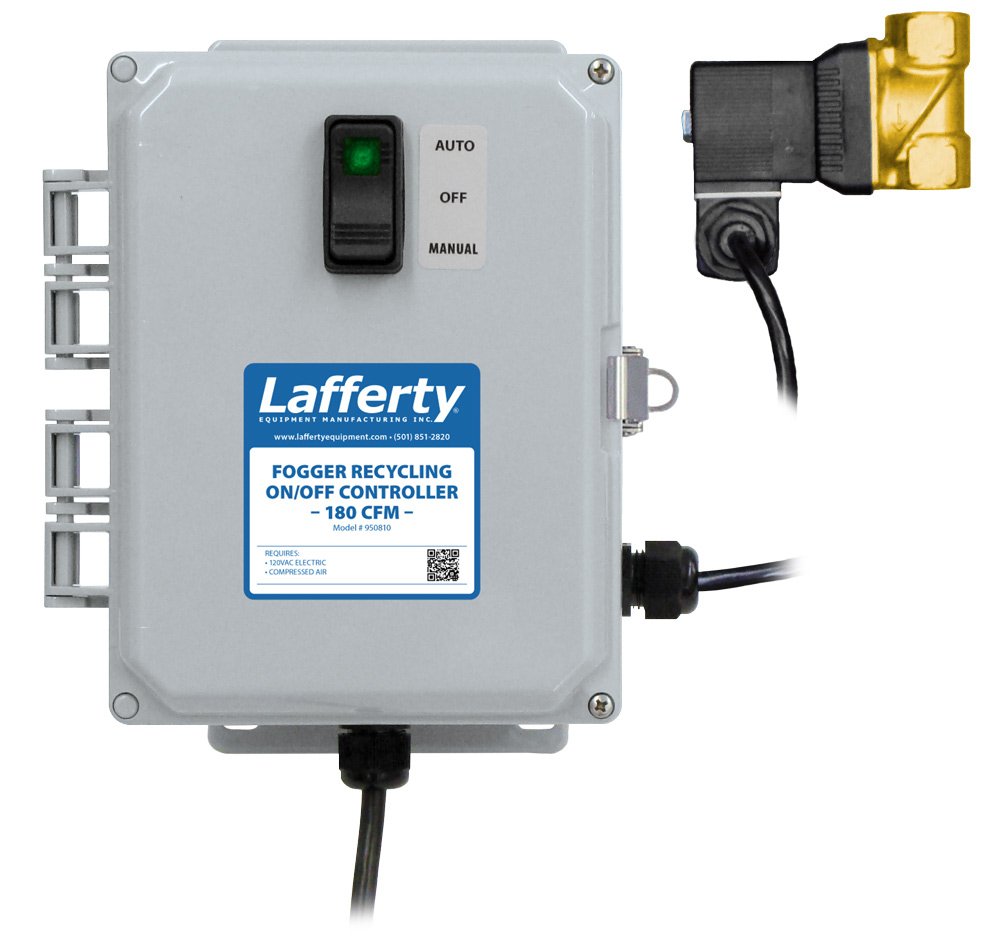
Model # 950810 · Fogger Recycling On / Off Controller - 180 CFM
REQUIREMENTS
Electric 120V / 2 Amps
Compressed Air Up to 180 CFM
www.laffertyequipment.com
501-851-2820
OVERVIEW
When activated, the Fogger Recycling Controller starts fogger operation immediately and runs for a predetermined period of time then switches off for a
predetermined period (the Delay cycle), after which the fogging cycle starts again. The complete cycle will repeat until the unit is switched off or reprogrammed. The
Run and Delay times are set independently by rotating the arrow on a dial to select the number of hours desired for the cycle --up to 6 hours each. Hash marks
indicate 15 minute increments.
• NOTE: The total air CFM requirement of all the foggers connected to this controller must be less than 180 CFM, which is the air CFM capacity of the controller's 1/2
inch solenoid. (For a higher air capacity up to 460 CFM, see controller model #950812.)
W AR N I N G ! R E A D A L L
I N S T R U C T I O N S B E F O R E
U S I N G E Q U I P M E N T !
Lafferty Equipment Manufacturing, Inc. • 5614 Oak Grove Road • North Little Rock, Arkansas 72118

SAFETY & OPERATIONAL PRECAUTIONS
See Additional Safety Precautions included with the Electrical Control Box Installation Information
Always consider electrical shock hazard when working with and handling electrical equipment. If uncertain, consult an Electrician. Electrical wiring should only
be done by a qualified Electrician, per Local and State Electrical Codes.
Manufacturer assumes no liability for the use or misuse of this unit.
Wear proper respiratory protection, protective clothing, gloves and eye-wear when working with chemicals.
Always direct the discharge away from electrical devices.
Carefully follow chemical manufacturer's safe handling instructions and recommended precautions/practices especially when using flammable chemicals.
For proper performance do NOT modify electrical control box.
Disconnect electrical power to the control box prior to opening it.
Remove any packing material from inside the control box before operating.
SPECIAL CAUTION: This fogger atomizes chemical into the air. Ensure that the chemical is safe to be around or the area to be fogged has been evacuated of all
people and/or animals before starting fogging. Upon completion of fogging, ensure that sufficient time has elapsed for all the fog to have dissipated before
returning to the area without proper respiratory protection.
TO INSTALL (REFER TO DIAGRAM ON NEXT PAGE)
1. Mount the control box to a secure surface. It may be mounted vertically, on a wall, post or other vertical surface, or horizontally on a flat surface. Commercially available
mounting hardware (not provided), appropriate to the surface material of construction, should be used to secure the control box to the surface. Mounting holes are located at the
four corners of the base of the control box.
2. Do NOT connect to electricity yet.
3. Connect your compressed air to the 1/2" solenoid in the direction of the arrow and connect the discharge to piping leading to the fogger head(s)
TO OPERATE
TIMER ADJUSTMENT
FOG TIME –"RUN"– dial (bottom) sets how long the foggers will run during chemical application — maximum of 6
hrs. Each number on the dial represents 1 hour with hash marks for each 1/4 hour (15 minutes).
OFF TIME –"DELAY"– dial (top) sets the amount of time the foggers will be off between applications — maximum
of 6 hours. Each number on the dial represents one hour.
1. Set the required FOG time and OFF time, by turning the knobs to point the red arrows to the settings required for
your application. Do not turn the dials below zero or past six.
(See Illustration at right) >>>
The FOG (RUN) TIME is set to approximately 45 minutes / 3/4 hr.
The OFF (DELAY) TIME is set to approximately 6 hours.
2. Replace control box cover and set the rocker switch to the OFF (middle) position, then plug the power cord into a
120 VAC power outlet (GFI recommended).
3. Read and follow the Installation and Operation Instructions for the Fogger(s) that will be controlled by this timer.
TO FOG
Select the AUTO/ON setting as shown below. (Use the MANUAL ON setting for testing or press briefly and
release to stop timed fogging.) CAUTION: The MANUAL ON setting overrides all AUTO timer settings.
Note: If power is interrupted after the timers are set, the system stops all timer operations. To re-start, set the
controller rocker switch to OFF, then return the controller rocker switch to AUTO.
950810 • Fogger Recycling On / Off Controller - 180 CFM
- Page 2 -

950810 • Fogger Recycling On / Off Controller - 180 CFM
- Page 3 -

950810 • Fogger Recycling On / Off Controller - 180 CFM
July 15th 2021 - Page 4 -
Table of contents
Popular Controllers manuals by other brands

Digiplex
Digiplex DGP-848 Programming guide

YASKAWA
YASKAWA SGM series user manual

Sinope
Sinope Calypso RM3500ZB installation guide

Isimet
Isimet DLA Series Style 2 Installation, Operations, Start-up and Maintenance Instructions

LSIS
LSIS sv-ip5a user manual

Rockwell Automation
Rockwell Automation 1769-L31 installation instructions


