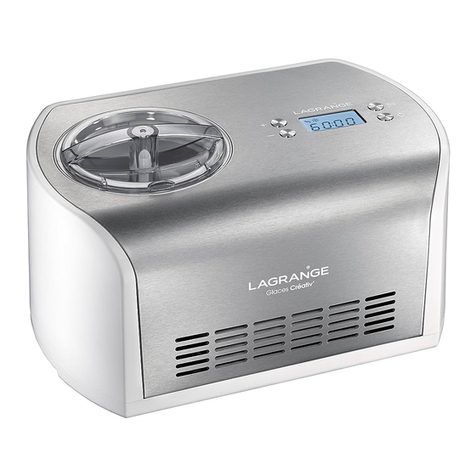
Lagrange LGIMS User manual

INSTRUCTIONS
EN
FR
Ice Cream Maker
Sorbetière

When using electrical appliances, basic safety
precautions should always be followed, including
the following:
• READ ALL INSTRUCTIONS.
• To protect against electric shock, do not immerse the
appliance, its cord or its plugs in water or other liquid.
• Close supervision is necessary when any appliance is used
by or near children.
• The use of accessory attachments not recommended by
may result in re, electric shock, or injury
to persons.
• Unplug from outlet when not in use, before cleaning and
before putting on or taking off parts.
• Do not let cord hang over edge of table or counter.
• Unplug the appliance before tting, removing or cleaning
parts.
• Children should not use this appliance unsupervised. Do
not let the cord hang down where a child could grab it.
• Do not operate any appliance with a damaged cord or plug
or after the appliance malfunctions, or has been damaged
in any manner. Return appliance to the nearest authorized
service facility for examination, repair or adjustment.
• To protect against re or personal injury, do not immerse
the appliance, its cord or its plugs in water or other liquid.
• Never use an unauthorized attachment.
• Avoid contact with moving parts. Keep hands, hair,
clothing, spatulas and other utensils away during
operation to reduce the risk of injury to persons and/or
damage to the appliance.
• Do not use outdoors.
• Never leave the appliance on unattended.
• Do not let children play with this appliance.
• Only use this appliance for its intended domestic use.
• Always make sure everything is thoroughly clean before
making ice cream or sorbet.
• Never freeze ice cream that has been fully or partially
defrosted.
IMPORTANT SAFEGUARDS
2

• Any ice cream or sorbet containing raw ingredients should
be consumed within one week. Ice cream tastes best when
fresh.
• Ice cream or sorbet that contains raw or partially cooked
eggs should not be given to infants, young children,
pregnant women, elderly or people who are generally
unwell.
• To prevent freezer burns, always ensure hands are protected
when handling the bowl, especially when removed from
the freezer.
• If the freezing solution appears to be leaking from the
bowl, discontinue use. The freezer solution is nontoxic.
• Do not place the appliance on hot surfaces such as stoves,
hotplates or near open gas ames.
• Switch off the appliance and disconnect from supply
before changing accessories or approaching parts that
move in use.
SAVE THESE INSTRUCTIONS
Polarized plug
• This appliance has a polarized plug (one blade is wider
than the other). To reduce the risk of electric shock, this
plug will t in a polarized outlet only one way. If the plug
does not t fully into the outlet, reverse the plug. If it
still does not t, contact a qualied electrician. Do not
attempt to modify the plug in any way.
Before plugging in
Make sure your electricity supply is the same as the electrical
rating specied on the underside of the power unit.
Before using for the rst time
• Remove all of the packaging.
• Wash the parts: see “cleaning”.
• Eight hours in advance, place the bowl in the freezer.
• Prepare the ice cream or sorbet mix. Allow the mix to cool
in the refrigerator.
EN
3

1. Motor block
2. Electronic screen with backlighting
3. Start/stop button
4. Time adjustment button
5. Cover with opening
6. Pin
7. Blade
8. Vat – Volume 1 ½ quarts
9. Storage cover
10. Cord
11. Anti-skid pads
12. Ice cream scoop
Ice Cream Maker
LGIMS
DESCRIPTION OF THE UNIT
5
7
9
8
12
11
6
2
3
4
1
10
4

• Motor block
• Electronic screen with backlighting and displaying of the
preparation time remaining
• AS cover with opening
• Polypropylene vat with aluminum interior
Volume 1 ½ quarts
• AS storage cover
• Stainless steel ice cream scoop with polypropylene
handle
• 120V - 60Hz - 12W
CORD
Examine the power cord carefully before using it. If it is
damaged, don’t use the unit.
The cord should only be replaced by , its after-
sale service department or a person who is qualied and
approved by in order to avoid danger for the
user.
The cord used is a SPT-2, 2x18 AWG.
FIRST USE
• When you unwrap your unit, carefully remove all of the
securing elements, bags and labels from the packaging.
• Make sure that all of the parts and accessories are present
and intact.
• Before using your unit, thoroughly clean all of the parts in
water with soap or dishwashing liquid added.
• Rinse and carefully dry all of the parts.
See upkeep section.
FREEZING OF THE VAT
• Only put the vat in the freezer, rst remove the cover and
its motor block and the blade.
• Put the vat in the freezer *** or **** (-18°C) for at least
12 hours. The vat must be stored vertically for a good
distribution of the freezing liquid.
• Take out the vat at the last moment once your preparation
is ready and refrigerated.
To check to see whether your vat is properly frozen, shake
it. It should not make any noise.
CHARACTERISTICS STARTING AND USE
EN
5

BASIC PREPARATION
• Choose a recipe and follow the instructions.
• Refrigerate the preparation before putting it in the frozen vat.
• It takes the preparation about 30 to 40 minutes to set.
• NB: the use of alcohol in your preparation can slow
down the setting. It is better to use concentrates or
avorings to avor your preparation.
If you nonetheless want to add a little alcohol to your
preparation, do it once the preparation has solidied
somewhat, through the opening on the cover.
• NB: an excessive proportion of sugar or fat can also
slow down the setting of the ice cream.
• Ice creams and sorbets that contain raw or partially cooked
eggs must not be served to young children, pregnant
women, elderly people or people who are fragile.
OPERATION
• Take the vat out of freezer. Warning: do not touch the
inside of the frozen vat with your ngers if they are wet
because they can stick to the metal. Use a dry cloth.
• Put the blade in place.
• Lock in the cover with motor block on the vat.
• Plug in the unit.
• Press the on/off button.
6

• Select the preparation time. To do this, successively push
the time adjustment button which ranges from 5 to 45
minutes. With each pressing of the button, 5 minutes
are added to the preparation time. By default, the screen
displays 40 minutes.
30 to 40 minutes are needed for the preparation to set.
NB: the outside temperature has an impact on the
ice cream setting time. The hotter it is, the longer
it will take the ice cream to set. The recipe, the
preparation quantity and the initial temperature
of the preparation will also have an impact on the
preparation time.
• Once the time has been chosen, the blade will start turning
3 seconds later.
• The preparation time remaining will then be displayed on
the screen and the preparation will thicken.
• Pour the preparation, previously refrigerated, through the
opening located on the cover. Warning: do not pour
the preparation unless the blade is turning to avoid
the preparation sticking to the walls.
Only ll the vat half full, because the volume of the
preparation will increase. Warning: never put your
ngers or a utensil into the opening on the cover.
• You can add, when you want to, chocolate chips, fruit,
small pieces of cookies, etc. during the preparation,
through the opening of the cover.
• 30 seconds before the end of the cycle, the time displayed
will start blinking. Once the cycle is over, the unit stops
functioning.
• Once the preparation has the consistency of Italian ices,
it is ready to eat. If you want a rmer texture, put the
preparation in the freezer for ½ hour to one hour so that
it is well frozen and so that you can easily form scoops
with the scoop provided. To do this, remove the cover and
motor block of the unit and use the storage cover.
• Be careful not to scratch the vat when you use your
ice cream.
• Do not stop and restart the unit during the process of
freezing of the preparation. Otherwise, the preparation
may freeze in contact with the vat and thereby hinder the
movement of the blade.
• NB: in order to prevent the motor from overheating, if the
preparation becomes too thick, the blade rotation direction
will be inverted. If this happens without interruption, stop
the unit, it means that the ice cream is ready.
• Attention, if the motor is overheated, the unit will
trip out and stop. If this happens, turn off the unit and
EN
7

unplug it and then let it cool for a few minutes. Then
it will restart normally. The unit can overheat for various
reasons: an overly thick preparation, excessive preparation
time, excessively large pieces added during preparation.
• If you want to continue with the preparation of a new ice
cream preparation, once the vat has been cleaned and
dried, it will only take about 5 hours for the vat to become
chilled in the freezer.
CONSERVATION OF THE ICE CREAM
• Use the storage cover if you want to store your ice cream
directly in the vat. NB: stored in the vat of your ice-cream
maker, the ice cream will harden more than in a standard
recipient. Remember to take it out of the freezer some
time before you plan to eat it.
• For long-term conservation, it is preferable to transfer the
ice cream preparation into a hermetic container. In that
way, the vat will be available in your freezer if you want
to start a new ice cream preparation.
• NB: never refreeze ice cream once it has defrosted.
• We do not advise you to keep ice cream for more than 10
days unless all of ingredients were cooked rst.
UPKEEP
Always unplug the unit before dismantling and
washing it.
Dismantling:
• Turn the cover counterclockwise to unlock it.
• Lift the cover to remove it.
• Dismantle the blade and its pin, being careful not to lose it.
• Disengage the motor block by pressing on the sides of the
cover and then remove it.
8

Cleaning:
• Let the vat reach room temperature before cleaning it.
• Clean the vat, the blade and the covers with warm, soapy
water. Do not wash the parts in a dishwasher. Dry each
part thoroughly.
• Be careful to completely dry the interior of the vat before
putting it back in the freezer. If water remains in it, it will
freeze and then prevent the blade from turning.
• If the motor block needs to be cleaned, use a well wrung
out sponge and carefully dry it with a soft cloth.
WARNING:
Never put the body of the unit or the cord in
water and never put them in the dishwasher.
Never use aggressive or abrasive fabrics or
products on the plastic parts to preserve the
plastic and its shine.
EN
9

Two-Year Limited Warranty
sets high quality standards allowing us to
offer you a 2 years warranty from the date of purchase
against defects in materials and workmanship under normal
household use. This warranty remains available to any
subsequent owner within the covered period.
If your product should prove to be defective
within the warranty period, will, at its
option, either repair or replace the product or the defective
component, including labor. Repair will be made with new
or recycled components.
Proof of purchase will be required to obtain warranty service,
please have your original sales receipt available.
If no proof of purchase is available, the applicable warranty
period will start from the manufacturing production week
and year.
THIS WARRANTY APPLIES TO CONSUMERS AND TO
HOUSEHOLD USES ONLY.
IT CANNOT APPLY TO RETAILERS NOR TO PROFESSIONAL
USERS.
IT DOES NOT APPLY TO PROFESSIONAL OR SEMI-
PROFESSIONAL USES.
The warranty applies only for products
purchased and used in USA and Canada.
Our warranty does not cover results of misuse, negligence
or non-observance of the instructions, unauthorized
modications, breakage due to falling, use on current other
than specied.
It also does not cover normal wear and tear and the
following:
• use of unauthorized accessories and replacement parts
• damages due to water, re, dust or insects
• damages caused by overheating
• damages caused by professional use
• damages caused by use with a converter
• aesthetical damages such as scratches, stains,
discoloration, etc.
• external or internal damages without impact on the
product functionality
• damages to objects left inside or in immediate proximity
of the product
WARRANTY
10

• incidental or consequential damages (please note,
however, that some states do not allow the exclusion
or limitation of consequential or incidental damages, so
this limitation may not apply to you).
Products with removed or altered identication numbers
won’t be covered.
This warranty does not apply to damages incurred through
improper faulty packaging by you or mishandling by any
common carrier.
will not pay for shipping, insurance or
transportation charges from you to us, or any import fees,
duties and taxes.
THE DURATION OF ANY IMPLIED WARRANTY, INCLUDING
WARRANTIES OF MERCHANTABILITY AND FITNESS FOR A
PARTICULAR PURPOSE, IS LIMITED TO THE DURATION OF
THE PRESENT WARRANTY. Nevertheless, some States do not
allow time limitations on implied warranty, so the above
limitation may not apply to you.
Certain legal rights vary from Country to Country, State to
State or Province to Province. The consumer may assert any
such rights at his sole discretion.
To obtain warranty service:
• Easy warranty: you do not need to return the product
to the retailer from which it was purchased.
• Have the product model number and serial number
available. These can be found on a sticker which is
typically located underneath or on the back of the
product.
• Please contact our toll-free consumer service department
from 1-855-238-4875 to ensure the fastest possible
service and solution. If you are advised to return your
product or one of its components, you will be given a
return authorization number.
• Return the product or component postage-paid to our
consumer service together with a proof of purchase, a
description of the problem, and the return authorization
number you were given. Do not forget to include your
name, address and home (or ofce) telephone number.
• Carefully protect the product or component and use
a traceable shipping service. will not be
held responsible for in-transit damage or for packages
that are not delivered to us.
• Defective products will be repaired, or at
’s discretion, replaced at no charge
including return postage.
11
EN

LAGRANGE USA Inc.
Website: www.lagrange-cuisine.com
Head ofce address:
44 West Flagler Street, Suite 2300
MIAMI, FL33130
USA
Toll free phone number: 1-855-238-4875
from USA and Canada
Email: [email protected]
12
LAGRANGE CONTACT INFORMATION

Lorsque vous utilisez un appareil électrique, il faut
toujours respecter certaines règles de sécurité
élémentaires, dont les suivantes :
• LISEZ TOUTES LES INSTRUCTIONS.
• An d’éviter tout risque de choc électrique, ne jamais
immerger l’appareil, les cordons d’alimentation ou les
ches dans l’eau ou tout autre liquide.
• Placer sous étroite surveillance tout appareil utilisé par ou
en présence d’enfant.
• L’utilisation d’accessoires non recommandés par
peut entrainer un incendie, un choc
électrique, ou des dommages corporels.
• Débrancher l’appareil après chaque utilisation, avant de le
nettoyer et avant d’ajouter ou de retirer des pièces.
• Ne pas laisser le cordon pendre d’une table ou d’un
comptoir.
• Débrancher l’appareil avant de monter, de retirer ou de
nettoyer des pièces.
• Ne jamais laisser sans surveillance un enfant qui utilise
l’appareil. Ne pas laisser pendre un cordon auquel un
enfant aurait facilement accès.
• Ne pas utiliser un appareil dont le cordon ou la prise/
che est endommagé, après une utilisation défaillante ou
après avoir été endommagé de quelque façon que ce soit.
Retourner l’appareil au service après-vente le plus proche
an qu’il soir vérié, réparé ou réglé.
• An d’éviter tout incendie ou toute blessure, ne pas
immerger l’appareil, les cordons et les ches dans l’eau
ou tout autre liquide.
• Ne jamais utiliser un accessoire non autorisé.
• Éviter tout contact avec les pièces mobiles. Éloigner
mains, cheveux, vêtements spatules et autres ustensiles
lorsque l’appareil est en marche an d’éviter tout risque
de dommage corporel et/ou dommage de l’appareil.
• Ne pas utiliser l’appareil à l’extérieur.
• Ne jamais laisser l’appareil sans vigilance.
• Ne pas laisser les enfants jouer avec cet appareil.
• Cet appareil est uniquement prévu pour un usage
domestique.
• S’assurer que tout est propre avant de faire des glaces ou
des sorbets.
CONSIGNES DESÉCURITÉ
13
FR

• Ne jamais congeler de la glace totalement ou partiellement
dégelée.
• Les glaces ou sorbets contenant des ingrédients frais
doivent être consommés dans la semaine qui suit. Plus la
glace est récente, plus elle est savoureuse.
• Il est déconseillé de donner de la glace ou des sorbets
contenant des œufs crus ou partiellement cuits à des
nourrissons, des enfants en bas-âge, des femmes enceintes,
des personnes âgées ou des personnes habituellement
malades.
• An d’éviter les brûlures de congélation, toujours protéger
les mains au moment de prendre le bol, particulièrement
lorsque celui-ci sort tout juste du congélateur.
• En cas de fuite du liquide de la cuve, ne plus utiliser
l’appareil. Le liquide n’est cependant pas toxique.
• Ne pas placer l’appareil sur des surfaces chaudes telles que
des cuisinières, des plaques de cuisson ou des ammes de
gaz nues à proximité.
• Éteindre et débrancher l’appareil avant de changer les
accessoires ou toucher les pièces habituellement mobiles
pendant l’utilisation.
CONSERVEZ CES INSTRUCTIONS
Fiche polarisée
Cet appareil est muni d’une che polarisée (une des broches
est plus large que l’autre). An de réduire les risques de
choc électrique, cette che s’insère dans la prise de courant
polarisée uniquement dans un sens. Si la che ne s’insère pas
entièrement dans la prise, tournez la che. Si elle ne s’insère
toujours pas, contactez un électricien qualié. N’essayez en
aucun cas de modier la che.
Avant de brancher l’appareil
Vérier que l’installation électrique soit compatible avec la
puissance et la tension indiquées sous le bloc d’alimentation
de l’appareil.
Avant toute première utilisation
• Retirer toutes les pièces de l’emballage.
• Nettoyer les pièces : voir « nettoyage ».
• 8 heures avant, placer le bol dans le congélateur.
• Préparer le mélange de glace ou de sorbet. Laissez refroidir
le mélange dans le réfrigérateur.
14

1. Bloc moteur
2. Écran électronique avec rétro-éclairage
3. Bouton départ/arrêt
4. Bouton de réglage du temps
5. Couvercle avec ouverture
6. Axe
7. Pale
8. Cuve – Contenance 1,5 L
9. Couvercle de stockage
10. Cordon
11. Patins antidérapants
12. Cuillère à glace
Sorbetière
LGIMS
DESCRIPTION DE L’APPAREIL
5
7
9
8
12
11
6
2
3
4
1
10
15
FR

• Bloc moteur
• Écran électronique avec rétro-éclairage et afchage du
temps restant de préparation
• Couvercle en AS avec ouverture
• Cuve en polypropylène avec intérieur en aluminium
Contenance 1,5 L
• Couvercle de stockage en AS
• Cuillère à glace en inox avec manche en polypropylène
• 120V - 60Hz - 12W
CORDON
Il faut examiner attentivement le câble d’alimentation avant
toute utilisation. Si celui-ci est endommagé, il ne faut pas
utiliser l’appareil. Le cordon ne doit être remplacé que par
son service après-vente ou une personne
qualiée et agréée par an d’éviter un danger
pour l’usager.
Le cordon utilisé est un SPT-2, 2x18 AWG.
AVANT LA 1ÈRE UTILISATION
• En déballant votre appareil, veillez à enlever soigneusement
tous les éléments de calage ainsi que les sachets et autres
étiquettes du packaging.
• Vériez que toutes les pièces et accessoires sont présents
et sans défaut.
• Avant d’utiliser votre appareil, nettoyez bien toutes
les pièces à l’eau savonneuse ou additionnée de
liquide vaisselle.
• Rincez et séchez soigneusement toutes les pièces.
Voir paragraphe entretien.
CONGÉLATION DE LA CUVE
• Ne mettez que la cuve au congélateur, retirez au préalable
le couvercle et son bloc moteur ainsi que la pale.
• Placez la cuve dans le congélateur *** ou **** (-18 °C)
pendant au moins 12 heures. La cuve doit être stockée
verticalement pour une bonne répartition du liquide
de congélation.
CARACTÉRISTIQUES MISE EN SERVICE ETUTILISATION
16

• Sortez la cuve au dernier moment, une fois votre
préparation prête et réfrigérée.
• Pour savoir si votre cuve est bien congelée, secouez-la, elle
ne doit pas faire de bruit.
PRÉPARATION DE BASE
• Choisir une recette et suivre les instructions.
• Réfrigérer la préparation avant de la mettre dans la
cuve congelée.
• Pour prendre, il faudra environ 30 à 40 minutes à
la préparation.
• Attention, l’utilisation d’alcool dans votre
préparation peut ralentir voire empêcher sa prise.
Utilisez plutôt des concentrés ou arômes pour
aromatiser votre préparation.
Néanmoins, si vous souhaitez malgré tout ajouter un peu
d’alcool à votre préparation, le faire plutôt une fois la
préparation un peu solidiée, par l’ouverture située sur
le couvercle.
• Attention, la proportion excessive de sucre ou de
matière grasse peut également freiner la prise de
la glace.
• Les glaces ou sorbets qui contiennent des œufs crus ou
partiellement cuits ne doivent pas être servis aux jeunes
enfants, aux femmes enceintes, aux personnes âgées ou
à toutes personnes fragilisées.
UTILISATION DE L’APPAREIL
• Sortir la cuve du congélateur. Attention à ne pas toucher
l’intérieur de la cuve congelée avec vos doigts si ceux-ci
sont mouillés car ils pourraient coller au métal. Utilisez
plutôt un linge sec.
• Mettre la pale en place.
17
FR

• Enclencher le couvercle avec le bloc moteur sur la cuve.
• Brancher l’appareil.
• Appuyer sur le bouton marche/arrêt.
• Sélectionner le temps de préparation. Pour cela, appuyer
successivement sur le bouton de réglage du temps qui
va de 5 à 45 minutes. À chaque pression du bouton,
5 minutes sont ajoutées au temps de préparation. Par
défaut, l’écran afche 40 minutes.
30 à 40 minutes sont nécessaires pour que la
préparation prenne.
Attention, la température extérieure a une inuence
sur le temps de prise de la glace. Plus il fera chaud,
plus la glace mettra du temps pour prendre. La
recette, la quantité de préparation ou encore la
température initiale de la préparation auront aussi
un impact sur le temps de préparation.
• Une fois le temps choisi, la pale se mettra à tourner 3
secondes plus tard.
• Le temps restant de préparation va alors s’afcher sur
l’écran et la préparation va épaissir.
• Verser la préparation, préalablement réfrigérée, par
l’ouverture située sur le couvercle. Attention, ne verser
la préparation que lorsque la pale tourne, an que
la préparation ne gèle pas sur les parois.
Ne remplissez la cuve qu’à moitié de sa contenance environ,
car la préparation va prendre du volume. Attention, ne
jamais introduire les doigts ou un ustensile dans
l’ouverture située sur le couvercle.
• Vous pouvez ajouter, lorsque vous le souhaitez, des pépites
de chocolat, des fruits, des petits morceaux de biscuits…
en cours de préparation, par l’ouverture du couvercle.
• 30 secondes avant la n du cycle, le temps afché va
clignoter. Une fois le cycle terminé, l’appareil s’arrête
de fonctionner.
• Une fois que la préparation a la consistance d’une glace à
l’italienne, elle est prête à déguster. Si vous souhaitez une
texture plus ferme, mettez la préparation au congélateur
pendant ½ heure à une heure pour qu’elle soit bien
congelée et que vous puissiez plus facilement former
des boules avec la cuillère fournie. Pour cela, enlevez
18

le couvercle et bloc moteur de l’appareil et utilisez le
couvercle de stockage.
• Attention à ne pas rayer la cuve lorsque vous utilisez
votre cuillère à glace.
• Ne pas arrêter et redémarrer l’appareil pendant le processus
de congélation de la préparation. Sinon, la préparation
risque de congeler au contact de la cuve et ainsi empêcher
le mouvement de la pale.
• À noter, an d’empêcher une surchauffe du moteur, si la
préparation devient trop épaisse, le sens de rotation de
la pale va s’inverser. Si cela se répète sans interruption,
arrêter l’appareil, c’est que la glace est prête.
• Attention, si le moteur est en surchauffe, l’appareil
va se mettre en sécurité et s’arrêter. Si cela arrive,
éteindre l’appareil et le débrancher puis le laisser refroidir
quelques minutes. Il repartira ensuite normalement.
L’appareil peut être en surchauffe pour diverses raisons :
une préparation trop épaisse, un temps de préparation
excessif, de trop gros morceaux ajoutés en cours
de préparation.
• Si vous souhaitez enchainer avec la préparation d’une
nouvelle préparation glacée, une fois nettoyée et séchée,
il ne faudra plus que 5 heures environ à la cuve pour se
réfrigérer au congélateur.
CONSERVATION DE LA GLACE
• Utilisez le couvercle de stockage si vous souhaitez conserver
votre glace directement dans la cuve. Attention, stockée
dans la cuve de votre sorbetière, la glace durcira plus que
dans un récipient classique. Pensez à la sortir un peu en
avance avant de la déguster.
• Pour une conservation longue durée, il est préférable
de transvaser la préparation glacée dans un récipient
hermétique. La cuve sera ainsi disponible dans votre
congélateur si vous souhaitez lancer une nouvelle
préparation glacée.
• Attention, ne recongelez jamais une glace qui a
été décongelée.
• Il est déconseillé de garder plus de 10 jours une glace dont
les ingrédients n’auraient pas été cuits au préalable.
19
FR

Toujours débrancher l’appareil avant de le
démonter et de le nettoyer.
Démontage :
• Tourner le couvercle en sens inverse des aiguilles d’une
montre pour le déverrouiller.
• Soulever le couvercle pour le retirer.
• Démonter la pale et son axe en prenant garde de ne pas
le perdre.
• Désenclencher le bloc moteur en appuyant sur les côtés
du couvercle puis le retirer.
Nettoyage :
• Laisser la cuve atteindre la température de la pièce avant
de la nettoyer.
• Nettoyer la cuve, la pale et les couvercles avec de l’eau
tiède et savonneuse. Ne pas laver les éléments au lave-
vaisselle. Bien sécher chaque élément.
• Attention à bien sécher l’intérieur de la cuve avant de la
remettre au congélateur. En effet, s’il reste de l’eau, celle-ci
va congeler et empêchera ensuite la pale de tourner.
• Si le bloc moteur doit être nettoyé, utiliser une éponge bien
essorée et essuyer soigneusement avec un chiffon doux.
ATTENTION :
Ne jamais plonger le corps de l’appareil ou la
prise dans l’eau et ne jamais les passer au lave-
vaisselle. Ne jamais utiliser de tissus ou de produits
agressifs ou abrasifs sur les parties plastiques
pour préserver le plastique et sa brillance.
ENTRETIEN
20
Table of contents
Languages:
Other Lagrange Ice Cream Maker manuals