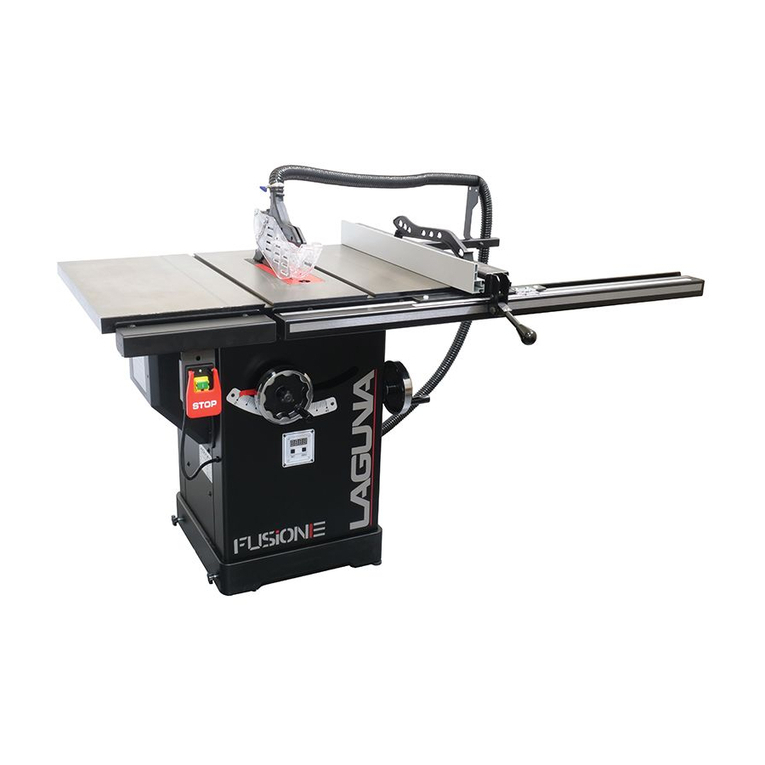
laguna Fusion 2 Operating manual

1
SET UP AND MAINTENANCE MANUAL
Fusion Tablesaws
Laguna Tools UK
www.lagunatools.uk
Tel +44 (0) 1530 516921
sales@lagunatools.uk

2
© 09/2019, Laguna Tools, Inc.
A
b
out
This
Manual
warning: Indicates a possible threat that can result in death to
the operator and/or bystanders and cause severe damage to the
machine.
Use
Caution: Indicates a possible threat that will result in minor
injury and damage to the machine.
Tech
Tip: Indicates a technical tip that can help the
action, process, or procedure described. The QR Code
will be present when applicable content is available.
Notice: Indicates important information to the user about
questionable subject, objects of importance, or is used to explain an
event that may result in unwarranted damage to the machine.
Fusion Tablesaw
Dear Woodworker
Thank
you for your purchase and welcome to the Laguna Tools group of discerning woodworkers. We understand that you have a choice of where to
purchase your machines and appreciate the confidence you have in the Laguna Tools brand.
Every machine sold by Laguna Tools has been carefully designed and well thought through from a woodworker’s perspective. Through hands-on
experience, Laguna Tools are constantly working hard to make innovative, precision products. Products that inspire you to create works of art, are a
joy to run and work on, and encourage your performance.
Laguna Tools®
Imagination, Innovation, and Invention at work.
This manual is intended to thoroughly cover the setup up, maintenance,
and proper adjustments of your new purchase. Aside from the
proceeding general safety considerations, this manual DOES NOT cover
woodworking or metalworking techniques that are possible with this
product and the appropriate safety precautions necessary for safe
practices. There are several organizations with published safe practices,
techniques, and proper operation of this tool:
Power Tool
Institute
www.powertoolinstitute.com
Please dispose of packaging for the product in a responsible manner. It is suitable for
recycling. Help to protect the environment, take the packaging to the local amenity tip and
place into the appropriate recycling bin.
Only for EU countries Do not dispose of electric tools together with household waste
material! In observance of European Directive 2002/96/EC on waste electrical and
electronic equipment (EEE) and its implementation in accordance with national law, electric
tools that have reached the end of their life must be collected separately and returned to an
environmentally compatible recycling facility. Your local refuse amenity will have a separate
collection area for EEE goods.

3
© 09/2019, Laguna Tools, Inc.
F
u
si
o
n
T
ab
l
e
s
aw
Table of Contents
Dear Woodworker
.........................................................................................................................................................................................................
2
Fusion 3 Tablesaw
Specifications
.................................................................................................................................................................................
4
Fusion 2 Tablesaw
Specifications
..................................................................................................................................................................................6
General Safety
.............................................................................................................................................................................................................
8
Tool Overview
.............................................................................................................................................................................................................
15
Controls...................................................................................................................................................................................................................
15
Setup
...........................................................................................................................................................................................................................
16
Receiving and Unpacking
.......................................................................................................................................................................................
16
Inventory .................................................................................................................................................................................................................
16
Loose Parts & Overview
.........................................................................................................................................................................................
17
General
Setup
.........................................................................................................................................................................................................
17
Installing/Removing the Throatplate
.......................................................................................................................................................................
18
Installing/Removing Safety
Accessories
.................................................................................................................................................................
19
Installing/Removing the Blade
................................................................................................................................................................................
20
Adjustments.................................................................................................................................................................................................................
21
Fence
Adjustments .................................................................................................................................................................................................
21
Table
Adjustments ..................................................................................................................................................................................................
22
Arbor and Tilt
Adjustments......................................................................................................................................................................................
24
Accessory
Adjustments...........................................................................................................................................................................................
25
Push Block And Push Stick
.....................................................................................................................................................................................
26
Type of Cut
..................................................................................................................................................................................................................
27
Maintenance
................................................................................................................................................................................................................
29
Internal Components
Map.......................................................................................................................................................................................
29
Trouble-Shooting
.........................................................................................................................................................................................................
30
Wiring Diagram: Fusion F2
230V.................................................................................................................................................................................
31
Wiring Diagram: Fusion F3
230V................................................................................................................. ...............................................................
32
Parts
Diagrams............................................................................................................................................................................................................
33
Fence Assembly
.....................................................................................................................................................................................................
33
Miter Gauge, Blade
Guard
......................................................................................................................................................................................
35
Motor and
Trunnion.................................................................................................................................................................................................
35
Cabinet....................................................................................................................................................................................................................
36
F3 Cabinet
..............................................................................................................................................................................................................
37
Parts List
.....................................................................................................................................................................................................................
38
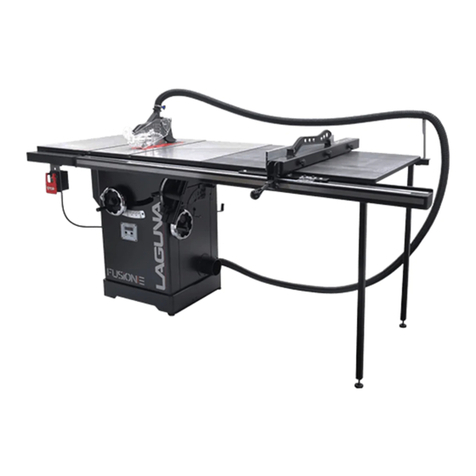
4
© 09/2019, Laguna Tools, Inc.
F
u
si
o
n
T
ab
l
e
s
aw
TAB
L
E
S
AW
S
P
EC
I
F
IC
G
E
N
E
R
A
L
E
L
EC
T
RI
C
AL
N
C
LU
D
E
D
W
I
TH
PUR
C
H
A
S
E
NA
M
E
&
MO
D
E
L
Fusion Tablesaw
Fusion
3
Tablesaw
Specifications
Advertised Name Fusion 3 Table saw
Stock Model CEF33623003
Professional Square Zero Clearance Throat Plate (pre-installed)
10" 40T Blade (pre-installed)
Riving Knife (pre-installed)
Mitre Gauge (ships in tool holder)
Tool Holder (pre-installed)
Fence
Blade Guard
Arbor Wrench
Installation and Adjustment Tools
Phase 1PH
Voltage 230V
Motor Type TEFC Capacitor Start AC Induction
Rating Input 2200 W
Motor Speed 2850 /min-1
Cycle 50 Hz.
Full Load Amperage 14.5 Amp.
Start Capacitor 400 µF-U
Run Capacitor 50 µF-U
Switch Type Magnetic with Overload Protection
Power Transfer Single V-Ribbed Belt 142J FJ
Power Cord 2m. H07RNF
Power Plug Included CEE 7/7 Plug
Breaker Recommendation 30 Amp.
Foot Print (LxW) 503 x 520 mm
Overall Dimensions (LxWxH) 1663 x 1652 x 1080.9 mm
Shipping Dimensions (LxWxH) 870 x 1190 x 1085 mm
Net Weight (No Accessories) 157Kgs
Shipping Weight 202 Kgs
Dust Collection: Outlet Dia. 101.6 mm
Dust Collection: m3/h Min. Req. 934 m3/h
Sound Emissions N/A
Blade Diameter 250 mm
Bore Diameter Of The Saw Blade 30 mm
Arbor Speed 3800 /min-1
Blade Rotation Count-Clockwise (Face arbor)
Rip Capacity, with Fence 914.4 mm Right, 431.8 mm Left (1,320.8 mm option)
Maximum Depth of Cut @ 90° 79mm
Maximum Depth of Cut @ 45° 56mm
Blade Tilt 45° Left, 3° Arbor Adjustment
Table Dimension, with Extensions 1117.5mm x 1663mm
(LxWxth.)
Extension Wing Dimension (LxW) 792 x 305 mm
Mitre Slot 19 to 23 mm T-slot
Fence Type Sliding Cam Action Fully Adjustable
Fence Face Dimensions (LxWxth.) 670 x 80 x 17 mm
Throat Plate Type Professional Square Zero Clearance
Throat Plate Dimensions (LxWxth.) 372 x 104.5 x 13 mm
Floor to Table Height 887 mm

5
© 09/2019, Laguna Tools, Inc.
F
u
si
o
n
T
ab
l
e
s
aw
TOP 10
FEATURES
Newly designed precision arbor mounted directly to cabinet top.
Height adjustment moves straight up easily with mechanical assist.
Arbor tilt
is
now on 2:1 ratio gear box.
The new Laguna Arbor is Sturdy and built to
last.
Perfectly flat and precision ground mirror finished
tabletop.
Designed for industrial use.
The Fusion F3 features an industrial strength 3HP motor, increased thickness cabinet, and an electromagnetic
starter
for industrial
use.
Quick release blade guard
attachments.
Quick Arbor Adjustments with the 2:1 assisted tilt mechanism and mechanically assisted height
adjustments.
Quick blade change

F
u
si
o
n
T
ab
l
e
s
aw
6
TAB
L
E
S
AW
S
P
EC
I
F
IC
G
E
N
E
R
A
L
E
L
EC
T
RI
C
AL
N
C
LU
D
E
D
W
I
TH
PUR
C
H
A
S
E
NA
M
E
&
MO
D
E
L
Fusion Tablesaw
Fusion
2
Tablesaw
Specifications
Advertised Name Fusion 2 Table saw
Stock Model CEF236230175
Professional Square Zero Clearance Throat Plate (pre-installed)
10" 40T Blade (pre-installed)
Riving Knife (pre-installed)
Mitre Gauge (ships in tool holder)
Tool Holder (pre-installed)
Fence
Blade Guard
Arbor Wrench
Installation and Adjustment Tools
Phase 1 PH
Voltage 230V
Motor Type TEFC Capacitor Start AC Induction
Rating Input 1300 W
Motor Speed 2850 /min-1
Cycle 50 Hz.
Full Load Amperage 7.5 Amp.
Start Capacitor 200 µF-U
Run Capacitor 35 µF-U
Switch Type Magnetic
Power Transfer Single V-Ribbed Belt 142J FJ
Power Cord 2m. H07RNF
Power Plug Included CEE 7/7 Plug
Breaker Recommendation 20 Amp.
Foot Print (LxW) 473 x 490 mm
Overall Dimensions (LxWxH) 1663 x 1652 x 1080.9 mm
Shipping Dimensions (LxWxH) 870 x 1190 x 1085 mm
Net Weight (No Accessories) 155 Kgs
Shipping Weight 200 Kgs.
Dust Collection: Outlet Dia. 101.6 mm
Dust Collection: m3/h Min. Req. 934 m3/h
Sound Emissions N/A
Blade Diameter 250 mm
Bore Diameter Of The Saw Blade 30 mm
Arbor Speed 3800 /min-1
Blade Rotation Count-Clockwise (Face arbor)
Rip Capacity, with Fence 914.4 mm Right, 431.8 mm Left (1,320.8 mm option)
Maximum Depth of Cut @ 90° 79mm
Maximum Depth of Cut @ 45° 56mm
Blade Tilt 45° Left, 3° Arbor Adjustment
Table Dimension, with Extensions 1117.5mm x x 1663mm
(LxWxth.)
Extension Wing Dimension (LxW) 792 x 305 mm
Mitre Slot 19 to 23 mm T-slot
Fence Type Sliding Cam Action Fully Adjustable
Fence Face Dimensions (LxWxth.) 670 x 80 x 17 mm
Throat Plate Type Professional Square Zero Clearance
Throat Plate Dimensions (LxWxth.) 372 x 104.5 x 13 mm

F
u
si
o
n
T
ab
l
e
s
aw
7
Floor to Table Height 887 mm
TOP 10
FEATURES
Newly designed precision arbor mounted directly to cabinet top.
Height adjustment moves straight up easily with mechanical assist.
Arbor tilt
is
now on 2:1 ratio gear box. The new Laguna Arbor is Sturdy and built to
last.
Perfectly flat and precision ground mirror finished
tabletop.
Designed for user adjustability. Every accessory and control is adjustable to ensure the saw is
accurate.
Quick release blade guard
attachments.
Quick Arbor Adjustments with the 2:1 assisted tilt mechanism and mechanically assisted height
adjustments.
Quick blade changes with the push button blade lock.
Single
poly V-Ribbed belt and double sealed large
bearings.
Reliable totally enclosed fan cooled AC Induction
motor.
Powder coated Laguna black body and shrouded dust
control.

F
u
si
o
n
T
ab
l
e
s
aw
8
General Safety
warning: Read all safety considerations. Failure to follow this set of guidelines can result in unwarranted damage to the machine and serious injury to
the operator and bystanders. Save all warnings and instructions for future reference.
Intended Use
Table saw and the workpiece guide equipment supplied with it are intended to be used exclusively for the following purposes:
● Laminated and unlaminated board materials (e.g. chipboard, coreboard, MDF board, ...)
● Solid wood
● Gypsum plasterboard, Cardboard, Veneer with a suitable clamping device
●Dimensionally stable plastics (thermoset plastics, thermoplastics).Sawing these materials does not normally involve any risks in respect of dust, chips, and thermal
degradation products.
Tools:
● The chosen saw blade must be suitable both for the specific work cycle and for the specific material.
● Only circular blades which are solid chrome vanadium (CV) or tungsten carbide tipped (TCT) and have a diameter of 250mm , arbor size 30mm,as well as a
maximum width of 20mm are allowed for the main saw 。
● Saw blades made of high-alloy high-speed steel (HSS) are not allowed to be used.
● Saw blades and their fixing devices shall conform to EN 847-1:2013。
Site of installation/use:
● The machine is not suitable for use outdoors, or in rooms that are subject to moisture or the risk of explosions.
● The intended use of the machine involves connection to a suitably dimensioned extraction system .
● The intended ambient temperature used of the machine : + 10 °C to +35 °C
● The intended Altitude used of the machine : shall be at altitudes up to 1000m above mean sea level
● The intended Relative humidity used of the machine : not exceed 50% at 40°C
● Intended use also involves compliance with our specified operating, maintenance and repair conditions and the safety information contained in the operating
instructions.
● The table saw may only be used, set up and maintained by persons who are familiar with the machine and aware of the dangers.
●The pertinent accident prevention regulations as well as any other generally recognized technical safety and industrial medicine rules must be observed.
● Repair work must be carried out by our own customer service or by an organization that we have authorized. Only original spare parts are allowed to be used for
this. we will assume no warranty for any damage that is caused by using non-original spare parts.
warning: The machine is prohibited to be used in a potentially explosive atmosphere!
Work area
KEEP ALL CHILDREN AND UNTRAINED PERSONS AWAY FROM THE MACHINE.
Do not allow bystanders to touch the machine or power cord.
All people but the operator should be away from the work area.
KEEP WORK AREA CLEAN AND WELL LIT.
A cluttered area can limit the range of motion needed by the machine and cause serious injury to the operator or damage to the machine.
MAKE SURE THE WORK AREA IS CHILD-PROOF AND UNACCESABLE TO UNTRAINED PERSONS.
Use padlocks where possible and keep all machines unplugged when not in use.
DO NOT KEEP OR PLACE TOOLS IN OUTDOOR, DAMP, OR DANGEROUS ENVIRONMENTS.
Never operate the tool under wet or damp conditions; there is a serious risk of electrical shock. Exposing this product to those environments may result in
damage to the tool and operator injury. Do not use tool in the presence of flammable liquids or gasses.
DO NOT OPERATE MACHINE IN EXPLOSIVE ATMOSPHERES, SUCH AS IN THE PRESENCE OF FLAMMABLE LIQUIDS, GASES OR DUST.
Machine create sparks which may ignite the dust or fumes.
Personal Safety
STAY ALERT, WATCH WHAT YOU ARE DOING AND USE COMMON SENSE WHEN OPERATING A POWER TOOL. DO NOT USE A POWER TOOL WHILE
YOU ARE TIRED OR UNDER THE INFLUENCE OF DRUGS, ALCOHOL OR MEDICATION.
A moment of inattention while operating power tools may result in serious personal injury.
USE PERSONAL PROTECTIVE EQUIPMENT. ALWAYS WEAR EYE PROTECTION.
Protective equipment such as a dust mask, non-skid safety shoes, hard hat or hearing protection used for appropriate conditions will reduce personal injuries.
PREVENT UNINTENTIONAL STARTING. ENSURE THE SWITCH IS IN THE OFF-POSITION BEFORE CONNECTING TO POWER SOURCE AND/OR

F
u
si
o
n
T
ab
l
e
s
aw
9
BATTERY PACK, PICKING UP OR CARRYING THE TOOL.
Carrying power tools with your finger on the switch or energizing power tools that have the switch on invites accidents.
REMOVE ANY ADJUSTING KEY OR WRENCH BEFORE TURNING THE POWER TOOL ON.
A wrench or a key left attached to a rotating part of the power tool may result in personal injury.
DO NOT OVERREACH. KEEP PROPER FOOTING AND BALANCE AT ALL TIMES.
This enables better control of the power tool in unexpected situations.
DRESS PROPERLY. DO NOT WEAR LOOSE CLOTHING OR JEWELLERY. KEEP YOUR HAIR AND CLOTHING AWAY FROM MOVING PARTS.
Loose clothes, jewellery or long hair can be caught in moving parts.
IF DEVICES ARE PROVIDED FOR THE CONNECTION OF DUST EXTRACTION AND COLLECTION FACILITIES, ENSURE THESE ARE CONNECTED AND
PROPERLY USED.
Use of dust collection can reduce dust-related hazards.
DO NOT LET FAMILIARITY GAINED FROM FREQUENT USE OF TOOLS ALLOW YOU TO BECOME COMPLACENT AND IGNORE TOOL SAFETY
PRINCIPLES.
A careless action can cause severe injury within a fraction of a second.
KNOW YOUR MACHINE.
Read and understand the owner’s manual and labels affixed to the tool. Learn its application and limitations as well as the specific potential hazards peculiar
to this tool.
USE SAFETY GOGGLES.
Some machines require additional face shielding than offered by safety goggles alone. Know your machine and the proper PPE to use.
USE EAR PROTECTION.
Some machines operate at very high noise levels. To prevent harm, be sure to use ear protection always.
GUARD AGAINST ELECTRIC SHOCK.
Prevent all bodily contact with grounded surfaces and parts of the machine that pose electrical threats.
AVOID ACCIDENTAL STARTING FOR MACHINES WITHOUT MAGNETIC OR AUTOMATIC SHUT-OFF SWITCHES.
Make sure the tool is in the off position prior to plugging it in.
KEEP GUARDS IN PLACE.
Machine parts like riving knifes, blade guard, cutter-head guards, feather boards, push sticks, etc. are designed to minimize possible injury. Keep those parts in
place unless a safer means of operation is available.
BE ALERT ALWAYS AND GIVE 100% OF YOUR ATTENTION TO THE OPERATION OF THIS TOOL.
Failure to do so can result in serious injury to both the operator and bystanders.
DO NOT RELY ON GUARDS.
The operator of this tool is 100% responsible for his/her own safety. The guards and safety components sold with this machine are not enough to ensure safety.
CHECK FOR DAMAGED PARTS.
Before every use of this tool, makes sure the machine and any components of the machine are not damaged or at the risk of being damaged. If a damaged part
is discovered, stop immediately and put the machine out of service until the part is replaced.
warning: All repairs should be done by trained repairmen. Contact your supplier or a competent repair service.
warning: Use only supplier Tools or compatible and marked replacement parts. All others may cause damage or harm.
warning: Use only manufacturer-recommended accessories. Some accessories may cause damage or harm.
Tool Use
DO NOT FORCE THE POWER TOOL. USE THE CORRECT POWER TOOL FOR YOUR APPLICATION.
The correct power tool will do the job better and safer at the rate for which it was designed.
DO NOT USE THE POWER TOOL IF THE SWITCH DOES NOT TURN IT ON AND OFF.
Any power tool that cannot be controlled with the switch is dangerous and must be repaired.
DISCONNECT THE PLUG FROM THE POWER SOURCE AND/OR REMOVE THE BATTERY PACK, IF DETACHABLE, FROM THE POWER TOOL BEFORE
MAKING ANY ADJUSTMENTS, CHANGING ACCESSORIES, OR STORING POWER TOOLS.
Such preventive safety measures reduce the risk of starting the power tool accidentally.

F
u
si
o
n
T
ab
l
e
s
aw
10
STORE IDLE POWER TOOLS OUT OF THE REACH OF CHILDREN AND DO NOT ALLOW PERSONS UNFAMILIAR WITH THE POWER TOOL OR THESE
INSTRUCTIONS TO OPERATE THE POWER TOOL.
Power tools are dangerous in the hands of untrained users.
MAINTAIN POWER TOOLS AND ACCESSORIES. CHECK FOR MISALIGNMENT OR BINDING OF MOVING PARTS, BREAKAGE OF PARTS AND ANY OTHER
CONDITION THAT MAY AFFECT THE
power tool’s operation. If damaged, have the power tool repaired before use.
Many accidents are caused by poorly maintained power tools.
KEEP CUTTING TOOLS SHARP AND CLEAN.
Properly maintained cutting tools with sharp cutting edges are less likely to bind and are easier to control.
USE THE POWER TOOL, ACCESSORIES AND TOOL BITS ETC. IN ACCORDANCE WITH THESE INSTRUCTIONS, TAKING INTO ACCOUNT THE WORKING
CONDITIONS AND THE WORK TO BE PERFORMED.
Use of the power tool for operations different from those intended could result in a hazardous situation.
KEEP HANDLES AND GRASPING SURFACES DRY, CLEAN AND FREE FROM OIL AND GREASE.
Slippery handles and grasping surfaces do not allow for safe handling and control of the tool in unexpected situations.
USE PROPER SPEED.
A machine will do a better and safer job when operated at the proper speed;
USE THE CORRECT TOOL FOR THE JOB.
Know the limitations and capabilities of your new purchase. Do not try to “fit a square peg in a round hole.”
SECURE THE WORK PIECE.
For all woodworking and metalworking applications, the workpiece should be secured correctly by the operator using appropriate clamps and vises. Always use a clamp
or vise when available — it is safer than using your hands.
FEED DIRECTION.
If feed rate is applicable, then there is only one direction of feed rate for the tool. Do not force the workpiece in the wrong feed direction.
NEVER LEAVE TOOL RUNNING UNATTENDED.
Do not leave the tool until it comes to a complete stop. When unattended, unplug the tool.
MAINTAIN TOOLS WITH CARE
Keep cutting tools sharp and clean for better and safer performance
Follow instruction for lubricating and changing accessories
Inspect tool cords periodically and if damaged have then repaired by an authorized service facility.
Inspect extension cords periodically and replace if damaged.
Keep hand dry, clean and free from oil and grease.
ILLUMINATION
Adequate general or localized lighting shall be provided
Dust Collection
During use the saw benches shall be connected to an external chip and dust extraction system
Guarding related warnings
KEEP GUARDS IN PLACE. GUARDS MUST BE IN WORKING ORDER AND BE PROPERLY MOUNTED.
A guard that is loose, damaged, or is not functioning correctly must be repaired or replaced.
ALWAYS USE SAW BLADE GUARD AND RIVING KNIFE FOR EVERY THROUGH–CUTTING OPERATION.
For through-cutting operations where the saw blade cuts completely through the thickness of the workpiece, the guard and other safety devices help reduce the risk of
injury.
MAKE SURE THE SAW BLADE IS NOT CONTACTING THE GUARD, RIVING KNIFE OR THE WORKPIECE BEFORE THE SWITCH IS TURNED ON.
Inadvertent contact of these items with the saw blade could cause a hazardous condition.
ADJUST THE RIVING KNIFE AS DESCRIBED IN THIS INSTRUCTION MANUAL.
Incorrect spacing, positioning and alignment can make the riving knife ineffective in reducing the likelihood of kickback.
FOR THE RIVING KNIFE TO WORK, IT MUST BE ENGAGED IN THE WORKPIECE.
The riving knife is ineffective when cutting workpieces that are too short to be engaged with the riving knife. Under these conditions a kickback cannot be prevented by
the riving knife.
USE THE APPROPRIATE SAW BLADE FOR THE RIVING KNIFE.
For the riving knife to function properly, the saw blade diameter must match the appropriate riving knife and the body of the saw blade must be thinner than the
thickness of the riving knife and the cutting width of the saw blade must be wider than the thickness of the riving knife.

F
u
si
o
n
T
ab
l
e
s
aw
11
Guarding related warnings
DANGER: NEVER PLACE YOUR FINGERS OR HANDS IN THE VICINITY OR IN LINE WITH THE SAW BLADE.
A moment of inattention or a slip could direct your hand towards the saw blade and result in serious personal injury.
FEED THE WORKPIECE INTO THE SAW BLADE OR CUTTER ONLY AGAINST THE DIRECTION OF ROTATION.
Feeding the workpiece in the same direction that the saw blade is rotating above the table may result in the workpiece, and your hand, being pulled into the saw blade.
NOTE If cutters other than the saw blade are not permitted in accordance with 8.14.2 then “or cutter” is omitted.
NEVER USE THE MITRE GAUGE TO FEED THE WORKPIECE WHEN RIPPING AND DO NOT USE THE RIP FENCE AS A LENGTH STOP WHEN CROSS
CUTTING WITH THE MITRE GAUGE.
Guiding the workpiece with the rip fence and the mitre gauge at the same time increases the likelihood of saw blade binding and kickback.
WHEN RIPPING, ALWAYS APPLY THE WORKPIECE FEEDING FORCE BETWEEN THE FENCE AND THE SAW BLADE. USE A PUSH STICK WHEN THE
DISTANCE BETWEEN THE FENCE AND THE SAW BLADE IS LESS THAN 150 MM, AND USE A PUSH BLOCK WHEN THIS DISTANCE IS LESS THAN 50 MM.
“Work helping” devices will keep your hand at a safe distance from the saw blade.
USE ONLY THE PUSH STICK PROVIDED BY THE MANUFACTURER OR CONSTRUCTED IN ACCORDANCE WITH THE INSTRUCTIONS.
This push stick provides sufficient distance of the hand from the saw blade.
NEVER USE A DAMAGED OR CUT PUSH STICK.
A damaged push stick may break causing your hand to slip into the saw blade.
DO NOT PERFORM ANY OPERATION “FREEHAND”. ALWAYS USE EITHER THE RIP FENCE OR THE MITRE GAUGE TO POSITION AND GUIDE THE
WORKPIECE.
“Freehand” means using your hands to support or guide the workpiece, in lieu of a rip fence or mitre gauge. Freehand sawing leads to misalignment, binding and
kickback.
NEVER REACH AROUND OR OVER A ROTATING SAW BLADE.
Reaching for a workpiece may lead to accidental contact with the moving saw blade.
PROVIDE AUXILIARY WORKPIECE SUPPORT TO THE REAR AND/OR SIDES OF THE SAW TABLE FOR LONG AND/OR WIDE WORKPIECES TO KEEP THEM
LEVEL.
A long and/or wide workpiece has a tendency to pivot on the table’s edge, causing loss of control, saw blade binding and kickback.
FEED WORKPIECE AT AN EVEN PACE. DO NOT BEND OR TWIST THE WORKPIECE. IF JAMMING OCCURS, TURN THE TOOL OFF IMMEDIATELY, UNPLUG
THE TOOL THEN CLEAR THE JAM.
Jamming the saw blade by the workpiece can cause kickback or stall the motor.
DO NOT REMOVE PIECES OF CUT-OFF MATERIAL WHILE THE SAW IS RUNNING.
The material may become trapped between the fence or inside the saw blade guard and the saw blade pulling your fingers into the saw blade. Turn the saw off and wait
until the saw blade stops before removing material.
USE AN AUXILIARY FENCE IN CONTACT WITH THE TABLE TOP WHEN RIPPING WORKPIECES LESS THAN 2 MM THICK.
A thin workpiece may wedge under the rip fence and create a kickback.
Kickback causes and related warnings
Kickback is a sudden reaction of the workpiece due to a pinched, jammed saw blade or misaligned line of cut in the workpiece with respect to the saw blade or when a
part of the workpiece binds between the saw blade and the rip fence or other fixed object. Most frequently during kickback, the workpiece is lifted from the table by the rear
portion of the saw blade and is propelled towards the operator. Kickback is the result of saw misuse and/or incorrect operating procedures or conditions and can be
avoided by taking proper precautions as given below.
NEVER STAND DIRECTLY IN LINE WITH THE SAW BLADE. ALWAYS POSITION YOUR BODY ON THE SAME SIDE OF THE SAW BLADE AS THE FENCE.
Kickback may propel the workpiece at high velocity towards anyone standing in front and in line with the saw blade.
NEVER REACH OVER OR IN BACK OF THE SAW BLADE TO PULL OR TO SUPPORT THE WORKPIECE.
Accidental contact with the saw blade may occur or kickback may drag your fingers into the saw blade.
NEVER HOLD AND PRESS THE WORKPIECE THAT IS BEING CUT OFF AGAINST THE ROTATING SAW BLADE.
Pressing the workpiece being cut off against the saw blade will create a binding condition and kickback.
ALIGN THE FENCE TO BE PARALLEL WITH THE SAW BLADE.
A misaligned fence will pinch the workpiece against the saw blade and create kickback.
USE EXTRA CAUTION WHEN MAKING A CUT INTO BLIND AREAS OF ASSEMBLED WORKPIECES.
The protruding saw blade may cut objects that can cause kickback.
NOTE The above safety warning only applies to tools where such cuts are permitted by design and instruction.
SUPPORT LARGE PANELS TO MINIMISE THE RISK OF SAW BLADE PINCHING AND KICKBACK.

F
u
si
o
n
T
ab
l
e
s
aw
12
Large panels tend to sag under their own weight. Support(s) must be placed under all portions of the panel overhanging the table top.
USE EXTRA CAUTION WHEN CUTTING A WORKPIECE THAT IS TWISTED, KNOTTED, WARPED OR DOES NOT HAVE A STRAIGHT EDGE TO GUIDE IT WITH A
MITRE GAUGE OR ALONG THE FENCE.
A warped, knotted, or twisted workpiece is unstable and causes misalignment of the kerf with the saw blade, binding and kickback.
NEVER CUT MORE THAN ONE WORKPIECE, STACKED VERTICALLY OR HORIZONTALLY.
The saw blade could pick up one or more pieces and cause kickback.
WHEN RESTARTING THE SAW WITH THE SAW BLADE IN THE WORKPIECE, CENTRE THE SAW BLADE IN THE KERF SO THAT THE SAW TEETH ARE NOT
ENGAGED IN THE MATERIAL.
If the saw blade binds, it may lift up the workpiece and cause kickback when the saw is restarted.
KEEP SAW BLADES CLEAN, SHARP, AND WITH SUFFICIENT SET. NEVER USE WARPED SAW BLADES OR SAW BLADES WITH CRACKED OR BROKEN
TEETH.
Sharp and properly set saw blades minimise binding, stalling and kickback.
TABLE SAW OPERATING PROCEDURE WARNINGS
TURN OFF THE TABLE SAW AND DISCONNECT THE POWER CORD WHEN REMOVING THE TABLE INSERT, CHANGING THE SAW BLADE OR MAKING
ADJUSTMENTS TO THE RIVING KNIFE OR SAW BLADE GUARD, AND WHEN THE MACHINE IS LEFT UNATTENDED.
Precautionary measures will avoid accidents.
NEVER LEAVE THE TABLE SAW RUNNING UNATTENDED. TURN IT OFF AND DON’T LEAVE THE TOOL UNTIL IT COMES TO A COMPLETE STOP.
An unattended running saw is an uncontrolled hazard.
LOCATE THE TABLE SAW IN A WELL-LIT AND LEVEL AREA WHERE YOU CAN MAINTAIN GOOD FOOTING AND BALANCE. IT SHOULD BE INSTALLED IN AN
AREA THAT PROVIDES ENOUGH ROOM TO EASILY HANDLE THE SIZE OF YOUR WORKPIECE.
Cramped, dark areas, and uneven slippery floors invite accidents.
FREQUENTLY CLEAN AND REMOVE SAWDUST FROM UNDER THE SAW TABLE AND/OR THE DUST COLLECTION DEVICE.
Accumulated sawdust is combustible and may self-ignite.
THE TABLE SAW MUST BE SECURED.
A table saw that is not properly secured may move or tip over.
REMOVE TOOLS, WOOD SCRAPS, ETC. FROM THE TABLE BEFORE THE TABLE SAW IS TURNED ON.
Distraction or a potential jam can be dangerous.
ALWAYS USE SAW BLADES WITH CORRECT SIZE AND SHAPE (DIAMOND VERSUS ROUND) OF ARBOUR HOLES.
Saw blades that do not match the mounting hardware of the saw will run off-centre, causing loss of control.
NEVER USE DAMAGED OR INCORRECT SAW BLADE MOUNTING MEANS SUCH AS FLANGES, SAW BLADE WASHERS, BOLTS OR NUTS.
These mounting means were specially designed for your saw, for safe operation and optimum performance.
NEVER STAND ON THE TABLE SAW, DO NOT USE IT AS A STEPPING STOOL.
Serious injury could occur if the tool is tipped or if the cutting tool is accidentally contacted.
MAKE SURE THAT THE SAW BLADE IS INSTALLED TO ROTATE IN THE PROPER DIRECTION. DO NOT USE GRINDING WHEELS, WIRE BRUSHES, OR
ABRASIVE WHEELS ON A TABLE SAW.
Improper saw blade installation or use of accessories not recommended may cause serious injury.
Electrical
MACHINE PLUGS MUST MATCH THE OUTLET. NEVER MODIFY THE PLUG IN ANY WAY. DO NOT USE ANY ADAPTER PLUGS WITH EARTHED (GROUNDED)
POWER TOOLS.
Unmodified plugs and matching outlets will reduce risk of electric shock.
DISCONNECT THE POWER FIRST.
Always disconnect machine from power supply BEFORE adjusting, changing tooling, or servicing machine.

F
u
si
o
n
T
ab
l
e
s
aw
13
REQUIREMENTS OF ELECTRICAL POWER
List of the motor using & pre-wired voltage
The input power supply of the machine is AC230V+PE. The steady-state AC power supply is 0.9
~1.1 times of the rated value.
FREQUENCY
0.99~1.01 times of rated frequency ( 50 Hz, continuous working) 0.98 ~ 1.02 times of rated frequency(50Hz, short period working)
HARMONICS
The sum of 2nd-5th distorted harmonic must not exceed 10% of RMS of voltage. An additional 2% of RMS of line voltage is allowed to for the sum of 6th-30th harmonic.
USE A QUALIFIED ELECTRICIAN FOR ALL ELECTRICAL CONNECTIONS.
Failure to do so may result in damage to the tool and electrical shock to the operator and bystanders.
POWER PLUGS.
Your machine may not come with a power plug because of the variance in power receptacles. Consult with a local electrician prior to purchasing a power plug.
DO NOT ABUSE THE CORD. NEVER USE THE CORD FOR CARRYING, PULLING OR UNPLUGGING THE POWER TOOL. KEEP CORD AWAY FROM HEAT, OIL,
SHARP EDGES OR MOVING PARTS.
Damaged or entangled cords increase the risk of electric shock.
EXTENSION CORDS.
Consult with or use a qualified electrician prior to sizing extension cords for use with this machine. Repair any damaged extension cords when discovered. The following
table should only serve as a guideline to choosing the appropriate extension cord.
WHEN OPERATING A POWER TOOL OUTDOORS, USE AN EXTENSION CORD SUITABLE FOR OUTDOOR USE.
Use of a cord suitable for outdoor use reduces the risk of electric shock.
IF OPERATING A POWER TOOL IN A DAMP LOCATION IS UNAVOIDABLE, USE A RESIDUAL CURRENT DEVICE (RCD) PROTECTED SUPPLY.
Use of an RCD reduces the risk of electric shock.
NOTE The term “residual current device (RCD)” can be replaced by the term “ground fault circuit interrupter (GFCI)” or “earth leakage circuit breaker (ELCB)”
UNBALANCED VOLTAGE
Neither Negative nor zero sequence components is allowed to exceed 2% of the positive sequence component.
ELECTRICAL PROTECTION
End user should provide protection device against overvoltage due to lightning and short-circuited protection device at the power supply.
INGRESS PROTECTION AT THE INLET OF INCOMING POWER CABLE
The incoming method of incoming cable should ensure IP54 protection class when finishing installation on the spot.
Noise
REFERENCE STANDARDS.
The measurements of noise emission were conducted according to the EN ISO 11202:2010 for the determination of sound pressure level at the operation positions.
When the measured sound pressure levels at the operation positions exceed 80dB(A), the measurements of sound power levels were conducted according to EN ISO
3746:2010.
OPERATING CONDITIONS.
The operating conditions for noise measurement comply with Annex A of ISO 7960:1995.
TESTING RESULTS.
A-weighted sound pressure level 91.3 dB
A-weighted Sound Power Level 113.8 dB
Associated uncertainty K=4dB
Background noise of measurement surrounding is 55dB
The figures quoted are emission levels and are not necessarily safe working levels. Whilst there is a correlation between the emission and exposure levels, this cannot
be used reliably to determine whether or not further precautions are required. Factors that influence the actual level of exposure of the workforce include the
Motor
1.75HP 3HP 1.5HP
Item
1300KW 2200KW 1100KW
Voltage(V) 230V
Phase 1PH
Freq.(HZ) 50HZ
Nominal
current (A) 7A 14A 7A
Prewired 230V/1PH
Cords 3 3 3

F
u
si
o
n
T
ab
l
e
s
aw
14
characteristics of the work room, the other sources of noise etc. i.e. the number of machines and other adjacent processes. Also the permissible exposure level can
vary from country to country. This information, however, will enable the user of the machine to make a better evaluation of the hazard and risk.”
Grounding
In the event of a malfunction, properly grounding the tool provides a path for electric charge to dissipate in a safe manner.
AVOID BODY CONTACT WITH EARTHED OR GROUNDED SURFACES, SUCH AS PIPES, RADIATORS, RANGES AND REFRIGERATORS.
There is an increased risk of electric shock if your body is earthed or grounded.
DO NOT MODIFY THE PLUG.
Do not remove any of the prongs attached to the proper plug for the machine.
USE ONLY 3-WIRE EXTENSION CORDS.
Some extension cords only have two wires, which does not allow for grounding.
ALLWAYS USE GROUNDED CONNECTIONS.
Rulings
warning: Before connecting this tool to a power supply (receptacle, outlet, etc.) make sure that the voltage supplied is the same that is specified on the
nameplate of the tool.
Also make sure that the power supply is equipped with the appropriate breaker and plug according to your local electrical code.
IF IN DOUBT, DO NOT PLUG IN THE MACHINE. Using this tool with a voltage different than that stated on the nameplate can damage the electrical
components of this machine and any such damage will not be covered by a warranty.
warning: Some dust created by power sanding, sawing, grinding, drilling and other construction activities contains chemicals known to cause cancer, birth
defects or other reproductive harm. Some examples of these chemicals are:
•
Lead from lead-based paint.
•
Crystalline silica from bricks, cement, and other masonry products.
•
Arsenic and chromium from chemically treated lumber.
Your risk of exposure varies, depending on how often you do this type of work. To reduce your exposure to these chemicals, work in a well-ventilated area and
work with approved safety equipment, such as face or dust masks that are specifically designed to filter out microscopic particles.
A notice about safety and Tool Use
The tools sold by Laguna Tools are safe when used properly, described by The American National Safety Institute, the EN Standards of safe tool use, and the IEC standards
of safe tool use. Laguna Tools is in no way responsible for injury or death that occurs while using this product. YOUR PERSONAL SAFTEY IS 100% YOUR
RESPONSIBILITY AND USING THIS PRODUCT REQUIRES 100% OF YOUR ATTENTION.
If there is any concern related to the application you are intending to use this tool for, DO NOT proceed until you have contacted the retailer you purchased it from and
have been advised on the correct application of the product.
This manual is intended to thoroughly cover the setup up, maintenance, and proper adjustments of your new purchase. Aside from the proceeding general safety
considerations, this manual DOES NOT cover woodworking or metalworking techniques that are possible with this product and the appropriate safety precautions
necessary for safe practices. There are several organizations with published safe practices, techniques, and proper operation of this tool.

F
u
si
o
n
T
ab
l
e
s
aw
15
1.
Start/Stop Control Switch
6.
Cabinet with integrated mobility kit 12.
Blade
2.
Rip Fence
7.
Arbor Height adjustment control 13.
Blade Guard
3.
Fence Front Guide
8.
Arbor Tilt adjustment control 14.
Riving Knife
4.
Fence Rear Guide
9.
Dust Extraction outlet. 15.
Arbor Wrench
5.
Table with Miter Slots
10.
Motor Cover 16.
Push Stick
11.
Throat plate 17.
Miter Gauge
Tool Overview
Your new Laguna Tools machine is comprised of different components to make a long lasting and precise piece of machinery that will help you
with your next project. Understanding your new machine and its components will make you a better craftsman.
The basic components of the table saw are:
Controls
Start/Stop/Fuse
Arbor Height Control
&
Tilt
gauge
Arbor Tilt
control
Fence clamp
lock
`
``
1. Magnetic Switch
2. Overload Protector
3. Fuse
CAUTION: ALWAYS TURN OFF AND
UNPLUG THE MACHINE BEFORE
CHANGING THE FUSE
The arbor height control adjusts the
height of the blade. Centered in the
control is the height adjustment lock.
Behind the control is the tile gauge.
CW to raise, CCW to lower blade.
CAUTION: DO NOT ADJUST HEIGHT
WHEEL WHEN LOCKED.
The tilt control, located on the
right of the cabinet, adjusts the tilt
of the arbor. Center is the tilt lock.
CW to tilt left, CCW to tilt the
blade to the right. CAUTION: DO
NOT ADJUST TILT WHEEL
WHEN LOCKED.
The fence clamp securely locks
the fence anywhere on the rail
by a cam action mechanism.

F
u
si
o
n
T
ab
l
e
s
aw
16
Setup
Use
Caution: Your new Laguna Tools machine is heavy. Use a
minimum of two people when lifting the tool into position and moving
the tool into position.
Tech
Tip: A setup video is available at
lagunatools.com/classic-machinery/tablesaws/f2-fusion/
or www.youtube.com/watch?v=FOPstZ61uFs
warning: To avoid set-up problems, to prevent potential damage
to the machine and personal injury, read through the entire setup
section prior to setting up the machine.
warning: DO NOT connect to a power supply until the setup is
complete. DO NOT perform any of the following steps, installations,
or adjustments with the saw connected to the power source.
Receiving and Unpacking
If any damage has occurred because of shipment, note the damage on the bill of lading or refuse the shipment. Immediately call the dealer store
where the machine was purchased
TRANSPORTATION AND STORE The measures of anti-rust and shockproof should be taken during packing. The machine endures transportation
and store in -25~55°C ambient temperature.
Be care of not making machine exposed to rain or damaging the packing during transportation and store.
While transporting or handling the machine, be careful and let the activity be done by qualified personnel especially trained for this kind of activity!
While the machine is being loaded or unloaded, make sure that no person or subject gets pressed by the machine!
Select proper transportation device according to the weight of the machine.
Make sure the lifting capacity of transportation device is competent for the weight of the machine.
TRANSPORTATION BEFORE UNPACKING As standard, the machine is packed in a robust wooden
box. Fig.1 shows the tool can be used to transport the packing box.
UNPACKING
1. Receiving your tablesaw.
2. Unscrew the crate fasteners.
3. Lift crate off pallet.
4. Check Inventory.
5. Wipe off protective oils.
Unscrew the crate
fasteners
This is how the machine is shipped from the
factory.
Use a drill or screw driver with a #2 Phillips head
bit and remove the bottom screws from carton.
These screws may be discarded.
Lift crate
off pallet
Check
Inventory
Wipe
off
protective
plastics
Use two persons to lift the carton away from the
pallet. There should be three packages along with
the table saw.
NOTE: The throat plate, riving knife, and 10” blade is pre-installed in
the machine. The miter gauge, and blade changing tool are positioned
in the tool holder located on the right side of the cabinet.
1. Fence, install tools, push stick, blade
guard assembly
2. Smaller fence rail sections, hardware kit
3. Longer fence rail sections.
Peel back the protective vinyl plastic and wipe
away the oil with a waste rag.
Use
Caution: An oily rag can
be a serious fire hazard. Discard
in an appropriate manner.
Tech
Tip: To help keep your table top clean and to prevent or clean any rust, we recommend waxing your tabletop with an appropriate wax
rubbing compound. This will also reduce friction under operation. Rust can be removed with WD-40.
Inventory
Box
1 contents
Box
2 contents
Box
3 contents
Pre-Installed
on machine
Fence PTSF236110175-0130-1-1 Rear Rail 2 PTSF236110175-0130-127.5 Rear Rail 1 PTSF236110175-0130-127.5 Throat Plate
PTSF236110175-0130-6
Push Stick PTSF236110175-0130-130 Front Rail 2 PTSF236110175-0130-127.6 Front Rail 1 PTSF236110175-0130-127.6 Riving Knife
PTSF236110175-0130-27
Blade Guard PTSF236110175-0130-2-1 Hardware kit - 10” Blade
PTSF236110175-0130-33
Install Tools - Miter Gauge
PTSF236110175-0130-3
Fence Hooks* PTSF236110175-0130-118 Arbor Wrench
PTSF236110175-0130-137
*Fence storage hooks may be pre-installed. Tool Storage
PTSF236110175-0130-120
Fig.1
Re
c
e
ivi
ng
y
o
ur
tab
l
e
s
aw
NOTICE:
For safety reasons, this machine is not sold with a tape-rule for the left side of the blade. It is not a missing part.
Wing (2)
PTSF236110175-0130-4
Notice: The front rail part number is comprised of two pieces – both long and short. The rear rail part
num
b
e
r
i
s
c
ompr
is
e
d
o
f
t
w
o
p
i
e
c
e
s
–
l
on
g
and
s
hor
t.

F
u
si
o
n
T
ab
l
e
s
aw
17
Loose Parts & Overview
Your new machine has been mostly assembled at the certified ISO 91001 factory where it was made. Some parts must be assembled by
the purchaser. Please read all steps first before proceeding with step one.
(5) M8x1.5+ lock washer
+ washer +nut
(5) Square Head
8x1.5+ washer +nut
Fence hooks (step
2)
1. 3.
2.
12.
[See explanation of steps on the following pages.]
10.
6. 7. 8.
9.
4.
11. 5.
General Setup
1.
Attach short rear fence
support 2.
Attach long rear fence
support
1. Attach the short rear fence support
2. Attach the long rear fence support
3. Level the rear rails and fasten
4. Attach T-Slot bolts to front table
5. Insert long front rail fence support
6. Insert short front rail and switch
7. Join front fence supports
8. Align the entire front rail to blade mark
9. Level and fasten the front rail
10. Insert fence
11. Level the saw by adjusting casters
Use the supplied wrench and Alan key to loosely
fasten (2) bolts, lock washers, washers, and nuts
to the short rear fence guide and the back left of
the table. STOP BEFORE TIGHTENING: Keep
bolts loose until entire rail assembly is in place to
properly level rail.
Repeat step 1 for the longer rear fence section with
(3) bolts, lock washers, washers, and nuts. Use the
same assembly diagram in Step 1.
NOTICE: If the fence hooks are not yet installed,
now is a good time to do so.
3.
Level the rear rails and
fasten 4.
Attach T-slot bolts
to
front
table 5.
Insert the long front fence
support
To level the rear fence with the table
top, place a rigid straight edge on top of
the rails. Apply downward force at both
arrow indicators and simultaneously
tighten the bolts with the supplied Allen
key and wrench.
Loosely fasten the (5) square headed bolts,
(5) washers, and (5) nuts. A couple
revolutions of the bolt will be tight enough.
Prepare to insert the (2) aluminum front rail
sections.
I
n
s
er
t t
h
e
l
on
g
F
ro
n
t
Ra
il
.
S
T
OP
BEFORE TIGHTENING: Keep these
bolts loose until the entire rail assembly
is in place to properly level the rail.

F
u
si
o
n
T
ab
l
e
s
aw
18
6.
Insert short rail and
switch 7.
Join front fence
supports 8.
Align the front rail with
blade
Insert the short front rail into the first square head
bolt. IMPORTANT: Insert the switch assembly
before joining the two front rail pieces. STOP
BEFORE TIGHTENING.
Align the pins and join the two front rail pieces and
firmly push together.
Using the blade notching on the measuring tape,
align the entire front rail section to the blade.
9.
Level and fasten front
rail 10.
Install the
fence 11.
Level the tablesaw with
casters
This step may take 2 persons. To level the front
rail sections to the table top, use a ridged straight
edge atop the loosely fit rail sections. Apply
downward force to the straight edge while keeping
the two sections firmly together. Simultaneously
fasten down the bolts.
Install the fence by placing the front end first. Be
sure that the handle is in the open, unlocked,
position prior to installing.
To level the tablesaw with the ground, use the two
leveling casters. The knobs on the left lock the
mobility of the saw.
12. Fix the machine to the floor
Adjust lock plate location and fix the machine on the
floor by screw.
Installing/Removing the Throatplate
Installing the throat
plate
Leveling the throat
plate
1. Un-plug the tablesaw!
2. Insert the throat plate back end first.
3. Lower the throatplate to the table.
4. Lock the throat plate with the thumb-lock.
5. Level the throatplate with the table using
the cat screws.
Notice: This machine is shipped
with a zero-clearance throat plate that
has already been cut at the factory.
Because of this, there may be some
residue already in the saw.
WARNING: MAKE SURE SAW IS UNPLUGGED.
To remove or install the throat plate, first set it to
the unlock position. Then, insert the rear end first
and tilt the other end down into position.
To level the throatplate, adjust the leveling screws.
Use
Caution: Make sure the throat
plate is lower than the cast iron table.
Having the throat plate higher at any
position can interfere with the workpiece
feed and cause injury or harm and
increase the chance of kickback.

F
u
si
o
n
T
ab
l
e
s
aw
19
Warning:
Since Riving Knife, other than those offered by Laguna,
has
not been tested with this product, use of
such accessories with this tool could be hazardous. To reduce the risk of injury, only Laguna,
recommended accessories should be used with this product.
Installing/Removing Safety Accessories
A: Saw
blade
B: Accessory insert
block
C: Cam action
lever
D: Riving
knife
E: Blade
Guard
F: Blade Compliant
Markings
Note on the Riving Knife
Note on the Blade

F
u
si
o
n
T
ab
l
e
s
aw
20
Installing/Removing the Blade
Guard
1. Un-plug the tablesaw!
2. Make sure the lock is in open position
3. Insert the blade guard
4. Position the guard insert
5. Lock the blade guard
6. Reinstall throat plate
3.
insert the blade
guard 4.
position
TO
LEFT
OF CASING
CAUTION: Make sure the blade guard is in-
line with the blade. If it is not in line, please
see the Adjustments Section. WARNING: MAKE SURE SAW IS UNPLUGGED.
With the throat plate removed, and the cam lock
mechanism in the open position (pulled up), insert
the blade guard insert into the slot.
5.
lock THE Blade
Guard 6.
Reinstall the throat
plate
Hold up the pawls and position the blade guard
against the left inside of the casing and push down.
Make sure the guard is positioned correctly and
seated in the bottom of the casing. Grasp the
pawls with one hand, leaving the other hand free
to activate the cam action lock.
Keep firm hold of the blade guard with left hand
and engage the cam lock with the thumb of your
right hand.
Grasp the pawls up and out of the way to re-insert
the throat plate. Lock the throat plate.
CAUTION: Make sure the riving knife is in-line with
the blade. If it is not in line, please see the
Adjustments Section.
Installing/Removing the Blade
2.
Remove
all accessories 3.
Set arbor tilt
to 0
and
lock.
1. Un-plug the tablesaw!
2. Remove any blade guards, riving knifes,
splitters, and the throat plate to access the
blade.
3. Set the arbor tilt to 0 degrees and lock.
4. Raise saw to highest position.
5. Engage blade lock (red component).
6. Remove the arbor nut and flange with
arbor wrench.
7. Remove or install blade.
CAUTION: Make sure the teeth of the blade
are facing the front of the saw as shown.
4.
Raise saw blade
to
highest
pos.
WARNING: MAKE SURE SAW IS UNPLUGGED.
To access the blade remove all accessories
around the blade, including riving knifes, throat
plates, ect.
5.
Engage the blade
lock
Set the arbor tilt to 0 degrees and lock the arbor to
prevent it from moving when installing or removing
blades.
6.
Remove arbor nut and
flange
This manual suits for next models
4
Table of contents
Other laguna Saw manuals

laguna
laguna TS SERIES User manual

laguna
laguna MBAND14BX110-175 User manual

laguna
laguna Fusion F3 User manual

laguna
laguna MBAND18BX2203 User manual

laguna
laguna LT14 series User manual

laguna
laguna MTSAW17536110-0130 User manual

laguna
laguna 18bx User manual

laguna
laguna 14-Twelve Bandsaw User manual

laguna
laguna 16HD classic User manual

laguna
laguna Fusion2 2022 User manual