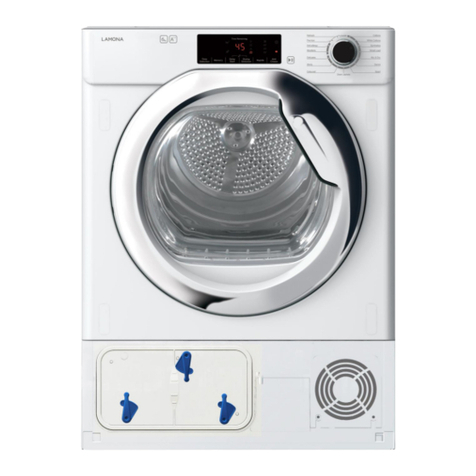
Lamona LAM8800 Guide

Integrated Vented
Tumble Dryer
LAM8800
Instructions & Installation
www.howdens.com/appliance-registration

See back page for product serial number

_ 03
User manual LAM8800
Dear Customer,
Congratulations on your choice of vented tumble dryer.
The user manual will help you use your product quickly and safely.
• Please read this user manual before installing.
• Always follow the safety instructions.
• Keep this user manual within easy reach for future reference.
• Please read any other documents supplied with the product.
Explanation of symbols
Throughout this user manual the following symbols are used:
Important information or useful tips about usage.
Warning for possible hazards to health and property.
Warning possibility of electric shock.
This tumble dryer is intended for use in normal domestic applications, see guarantee page for definition.
Product information correct at the time of publication in November 2017.
The company has a policy of continuous product development and reserves the right to change any
products and specifications given in this manual.
The appliance is marked according to the European Directive 2012/19/EU on waste
Electrical and Electronic Equipment (WEEE). By ensuring this product is disposed of
correctly you will help prevent potential negative consequences for the environment and
human health. The symbol on this product indicates that this product may not be treated
as household waste. Instead it should be handed over to the applicable collection point
for recycling of electronic equipment. Disposal must be carried out in accordance with
local environmental regulations for waste disposal. For more detailed information please
contact your local council household waste site.
i

04_
LAMONA Appliances
Index
01 - Before using the tumble dryer
02 - Safety
03 - User Guide
Control panel
Operation
The filter
04 - Installation
Door reversal
Fitting the feet
Instructions to fit the external vent kit
Decor door fitting
Technical data
05 - Trouble Shooting
06 - Your Guarantee
05
05
08
08
08
10
11
12
13
14
15
15
16
17

_ 05
User manual LAM8800
• Make sure that you have removed all packaging, wrappings, stickers and films from the surface.
• This tumble dryer is intended for domestic use only (see guarantee).
01 - Before using the tumble dryer
02 - Safety
These notes are provided in the
interest of safety.You must read
them before installing or using
the appliance.
• This appliance can be
used by children aged
from 8 years and above
and persons with reduced
physical, sensory or mental
capabilities or lack of
experience and knowledge
if they have been given
supervision or instruction
concerning use of the
appliance in a safe way and
understand the hazards
involved.
• Children shall not play with
the appliance. Cleaning and
user maintenance shall not
be made by children without
supervision. Children of less
than 3 years should be kept
away unless continuously
supervised.
• Any electrical work required
to install the appliance
should be carried out by a
qualified person.
• Adequate ventilation must
be provided to avoid back
flow of gases into the room
from appliances burning
other fuels, including open
fires.
• Exhaust air must not be
discharged into a flue which
is used for exhausting fumes
from appliances burning gas
or other fuel.
• Please note it is not
recommended that the
dryer is placed directly next
to ovens or cookers as the
performance of the dryer
may be affected.
• A carpet must not obstruct
the ventilation openings in
the base of the dryer.
• Do not stack the tumble
dryer on top of other
appliances without the
correct stacking kit.
• The rear of the dryer gets
quite hot during use.
Position the dryer so that
the back is not accessible
while in operation.

06_
LAMONA Appliances
• It is important to clean the
lint filter after each drying
cycle or the restrictions to
airflow will extend drying
times and could cause the
safety cut-out to trip.
• It is important to clean fluff
from the window of the
dryer and around the door
seal after each drying cycle.
Failure to do so could result
in water leaking.
• The tumble dryer should be
serviced by an appointed
service organisation and
only genuine parts used.
• It is dangerous to alter
or modify the product in
any way other than fitting
authorised accessories.
• We recommend that the
appliance is unplugged each
time after use. It should
always be disconnected
from the electricity supply
for long periods (i.e.
weekends, if it is to be left
unattended for holidays etc.)
• WARNING: The appliance
must not be supplied
through an external
switching device, e.g a timer,
or connected to a circuit that
is regularly switched on and
off by a utility.
• DO NOT use the tumble
dryer if you suspect that it is
damaged in any way. Under
no circumstances should
you attempt to repair the
appliance yourself. Repairs
carried out by inexperienced
persons may cause serious
injury. Consult your local
appointed service engineer
and insist on genuine spare
parts.
• It is recommended that the
dryer be serviced regularly
to maintain efficiency and
safety.
• Keep the packaging
materials away from children
to avoid hazards.
• Keep pets away from your
machine.
• Your machine is designed
for use in a domestic
environment. The warranty
will be invalid if you use it for
commercial purposes.
• Please check the drum
before using the appliance
for children or animals.
• Under no circumstances
should anything other than
the recommended articles
be placed in the tumble
dryer.

_ 07
User manual LAM8800
• The special mains cable and
plug assembly must only be
replaced with a genuine part
by the manufacturer or service
agents in order to avoid a
hazard.
• WARNING: If you need
to stop the tumble dryer
before the end of a drying
cycle, ensure that the load
and appliance are cooled by
utilizing the cooldown period
denoted on the control panel.
Once the load is removed,
all items need to be quickly
spread out so that any residual
heat is dissipated.
• Remove all objects from
pockets eg. lighters, matches.
• DO NOT allow fluff to
accumulate around the tumble
dryer. Risk of fire
• DO NOT exceed the
recommended maximum load.
• DO NOT dry unwashed items in
the tumble dryer
• DO NOT place articles in the
dryer if anything other than a
water solution has been used
in the cleaning process.
• DO NOT use tumble dryer if
industrial chemicals have been
used for cleaning.
• DO NOT dry articles singly as
they tend to roll up and so
increase drying time.
• DO NOT dry woolen or wool
mixture articles unless
the article is labelled as
suitable. This should avoid
shrinkage.
• DO NOT block / kink venting
hose.
• Items such as foam rubber
(latex foam) water proof
textiles, rubber backed
articles and clothes / pillows
fitted with foam rubber pads
such not be dried in the
tumble dryer.
• Fabric softeners or similar
products should be used
as specified by the fabric
softener instructions.
• Items that have been soiled
with substances such as
cooking oil, acetone, alcohol,
petrol, kerosene, spot
removers, turpentine, waxes
and wax removers should be
washed in hot water with an
extra amount of detergent
before being dried.
• NEVER SWITCH THE
DRYER OFF AND LEAVE A
HOT LOAD IN THE DRUM –
RISK OF FIRE.

08_
LAMONA Appliances
03 - User Guide
Control Panel Guide
1. Timer Knob: Select the drying time from the recommendations shown on the control panel (3).
2. Heat setting: Select half or full heat as recommended on the control panel.
3. Drying time guidelines
4. Start button
Operation
Sort out the clothes into groups of similar fabrics and colours. Check the care label inside the garment. We
suggest that a fabric conditioner be used to reduce static electricity. Delicate articles e.g. tights should be
placed inside a pillowcase. It is better to dry small and large articles together.
• Switch on the machine (at the socket).
• Check the timer is in the ’0’ position.
• Open the door and load clothes loosely in the drum (Load sheets starting with one corner).
• Close the door.
• Dry your hands (before touching controls).
• Select correct heat position (See programme chart on facia panel).
• Rotate timer knob, to select the drying time.
• Push start button.
HEAT TIMEDRYING
115 mins
40 - 60 mins
20 - 40 mins
66 mins
Standard Cotton
Polyester Cotton
Acrylics
programme-full load
Standard Cotton
programme-half load
TIME SETTING
START
IMPORTANT: Read instructions before use.
HEAT
SETTING
0
40
20
100
115
66
90
60
HEAT TIMEDRYING
115 mi ns
40 - 60 mins
20 - 40 mins
66 mins
Standard Cotton
Polyester Cotton
Acrylics
programme-full load
Standard Cotton
programme-half load
FULL
HEAT
HALF
HEAT
2.3.1. 4.

_ 09
User manual LAM8800
Tumble drying beneficial
Do not tumble dry
Dry flat
• The drum will now begin to rotate and stop when the timer automatically reaches the ‘0’ position.
• Should the clothes become dry before the cycle has finished the thermostat will automatically switch off
the heater and prevent over drying and save energy although the drum will still rotate.
• To stop the machine during the middle of a programme, simply open the door: the drum will stop
rotating automatically and reset when you close the door. To lengthen or shorten the programme, turn
the timer knob.
Note: The final part of the drying cycle occurs without heat (cool down cycle) to ensure items will not be
damaged.
The standard cotton programme is suitable to dry normal damp cotton laundry. It is the most efficient
programme in terms of energy consumption for drying wet cotton laundry.
Your appliance is reversing, has a small door opening; a full load will typically take 115 minutes and will use
approximately 3.92kWh of electricity. A half load will typically take 66 minutes and will use approximately
2.08 kWh of electricity.
The power consumption of the off-mode and the left-on mode is zero. Set the timer to the correct position
(See programme chart on facia panel).
Press the start button.
IMPORTANT
After removing the dried clothes clean the filter as follows:
Switch off the electricity supply.
1. Remove any fluff around the door area by hand or soft brush.
2. Slide the filter out of the machine and clean filter and area around the filter.
(Wash the filter occasionally in detergent solution and with a soft brush remove small particles).
Care labels you may find on your clothes:
Do not use condenser kits

10_
LAMONA Appliances
The Filter
• The filter is found, as seen from the diagram, by opening the door and must always be in position
when drying items in the appliance.
• To allow the dryer to operate efficiently it should be cleaned after each drying cycle.
• Do not be alarmed by the amount of fluff deposited on the mesh. It is not due to excessive wear
caused by the dryer but more an indication of its efficient operation.
• All fabrics lose fluff when drying but it goes unnoticed into the air. In a tumble dryer it simply collects in
the filter.
ELECTRICAL CONNECTIONS: We strongly recommend that any electrical work is carried out by a qualified
person complying with the latest edition of the IEE electrical regulations.
IMPORTANT: Please remember that the tumble dryer must be capable of being switched off, (disconnected
from the supply), when fitted in position.
As the colours of the wires in the mains lead of this appliance may not correspond with the coloured
marking indentifying the terminals in your plug proceed as follows
1. Connect the green - yellow or green (earth) wire terminal in the plug marked ‘E’ or with the symbol
or coloured green and yellow or green.
2. Connect the blue (neutral) wire to the terminal in the plug marked ‘N’ or coloured black.
3. Connect the brown (live) wire to the terminal in the plug marked ‘L’ or coloured red.
With alternative plugs 13 A fuse must be fitted either in the plug or an adapter in the main fuse box.
If in doubt contact a qualified electrican.

_ 11
User manual LAM8800
04 - Installation
The tumble dryer is fully compatible with 575mm deep kitchen units and complies with all current relevant
EU regulations.
Your dryer is provided with a vent hose which will extend to approx 1.6m. We strongly recommend that this
is vented through the wall with the attachment provided. The position of the hole (100mm diameter) for the
vent directly behind the tumble dryer is shown in the diagram below.DO NOT KINK OR FOLD HOSE.
If the through the wall vent is to be positioned other than behind the dryer, the vent hose should be
positioned at floor level and through the adjacent side panel to relevant position. The plinth must be cut-out
to accommodate the air vent grill at the bottom front of the tumble dryer (DO NOT FOLD / KINK HOSE).
The air vent at the front of the appliance must never be covered or blocked in any way as this will
cause the dryer to overheat.The dryer should not be placed directly next to ovens or cookers, as the
performance of the dryer may be affected.
600mm
80mm
125 mm
695 mm

12_
LAMONA Appliances
Door Reversal
The door on the dryer can be positioned either with the left or right hand hinges.
Please follow the instructions below to change the door position.

_ 13
User manual LAM8800
Fitting the Feet
• Important: Lay the dryer on its back to fit the feet. Avoid moving the dryer sideways after the feet are
fitted.
• Using the short self tapping screw (A) attach the foot rails (B) to the bottom of the machine.
• Screw the feet (D) into the inserts (C) and place the dryer in position.
• Using adjustable feet make sure the dryer is level and at the correct height.
• When the dryer is satisfactorily positioned and the vent hose correctly fixed, use the two long screws
(E) to fasten the dryer to the adjacent cabinets (if applicable).
A
B
C
D
E

14_
LAMONA Appliances
Instructions to fit the external vent kit
1. Make a hole in the outside wall to fit the vent kit.
2. Pull the vent hose from the rear of the dryer (A) and remove the end adaptor by removing the screw (B)
3. Pull the vent through the outside wall and attach to the inner venting (D) and tighten the jubilee clip.
4. Slide the wall vent back and fix using 4 suitable screws (not supplied).
B
A
D
D
*Ensure hose is not kinked or crushed!

_ 15
User manual LAM8800
Decor door fitting
The hinges can be fastened through the pre-drilled holes on either the left or right hand with the door stops
being fitted on the other side.
Technical Data
• Overall dimensions: 86.5 - 89cm (H) x 59.5cm (W) x 53cm (D).
• Maximum weight of cotton, linen 6kg, synthetics 6kg.
• For electrical ratings see the plate on the rear of the machine.
• This product is manufactured to comply with all current relevant EU regulations and directives.
• Fuse rating: 13 amp.

16_
LAMONA Appliances
05 - Trouble Shooting
If your machine does not work, check the following points before contacting the service number.
Problem Solution
If the clothes are not dry after normal
drying time
• Check if the filter is clean.
• Check that you used the correct heat setting.
• Check that the venting hose is not blocked (sometimes
a strong wind may cause a back pressure).
• Check that you have not set the timer within a cool
down period.
• Drum over filled with clothes
Machine has cut off or stopped working
• Check there is a supply of electricity.
• Check that the machine is switched on and the door
properly closed.
• Some machines are fitted with a resetable cut-out.
Check this has not operated. If your dryer has a red
button on the right hand side at the back if your
dryer, press it. If it has operated the sharp “click” will
be heard. This cut-out only operates if the air flow is
severely restricted so make sure the filter is clean
and that all other restrictions are removed before
restarting.
• Check the fuse in the moulded plug.

_ 17
User manual LAM8800
06 - Your guarantee
Product Guarantee Details (UK only)
Your appliance has the benefit of a comprehensive manufacturer’s guarantee which covers the cost of
breakdown repairs. (Details of which are shown on your Proof of Purchase Document).
• Any claim during the period of the guarantee (MUST BE ACCOMPANIED BY THE PROOF OF PURCHASE)
• The product must be correctly installed and operated in accordance with the manufacturer’s
instructions and used for normal domestic purposes.
• This guarantee does not cover accidental damage, misuse or alternations which are likely to affect the
product.
• The guarantee is invalid if the product is tampered with, or repaired by any unauthorised person.
(The guarantee in no way affects your statutory or legal rights)
What to do if you need to report a problem-
Please ensure you have ready:
• The product’s model and serial numbers
• Howdens Proof of Purchase document
• Your full contact details
Call the Depot number on your Proof of Purchase Document supplied
with the product / kitchen.
Or
Call the LAMONA Service Line on 0344 460 0006
* Product installed within a domestic kitchen or non-domestic kitchen where 8 or fewer people are
using the appliance.
Where to find the model
and serial number on
your machine.
Open door, under the
porthole.

18_
LAMONA Appliances

_ 19
User manual LAM8800
Capacity 6kg
Technology Air Vented
Energy Class C
AEc 459kWh/a
Automa on Non - Automa c
E,Dry 3.92kWh
E,Dry 1/2 2.08 kWh
Eg,Dry N/A
Eg,Dry 1/2 N/A
Eg,Dry,a N/A
Eg,Dry 1/2,a N/A
Po0W
Pl0W
Dura on of le on mode N/A
Tt86 min
Tdry 115 mins
Tdry1/2 66 mins
Installa on Built In
Product Fiche
Commissi on Regula on (EU) No
392/2012
The standard co on program used at full and par al load is the standard drying
programme to which the informa on in the label and che relates. This
programme is suitable for drying normal wet co on laundry is the most e cient
program in terms of energy consump on for co on.
LAM8800
N/A
Model
EU Eco-label
Noise 62dBA
The figures above are based on 160 drying cycles of the standard cotton programme
at full and partial load, and the consumption of the low-power modes. Actual energy
consumption per cycle will depend on how the appliance is used.

Product serial number
(Place sticker here)
ISSUE v8.1 131117
Other manuals for LAM8800
1
Table of contents
Other Lamona Dryer manuals
Popular Dryer manuals by other brands

Stirling
Stirling SVDM70 instruction manual

Whirlpool
Whirlpool Duet Sport W10151581A Use & care guide

Kenmore
Kenmore 110.6813*410 Use & care guide

Bosch
Bosch Nexxt WTMC6521UC Operating, care and installation instructions

Maytag
Maytag MGDZ600TB1 parts list

GE
GE DCVH485EK Owner's Manual & Installation Instructions