FEATURES & OPERATING
Connection:
Connect as diagram below. Usually, there is no
need to install driver for DAC Fire to your
system.
Connector:
USB In:
1) USB plug connect to PC.
2) Micro USB plug to DAC Fire and light
indicatorON.
Head-Phone:
1) Headphone plug to DAC Fire .
2) For first connection, It should be automatic
connected and DAC Fire will pop up on right
status bar. For some OS or PC system, you
may need to manually select DAC Fire from
your USB audio device on your PC.
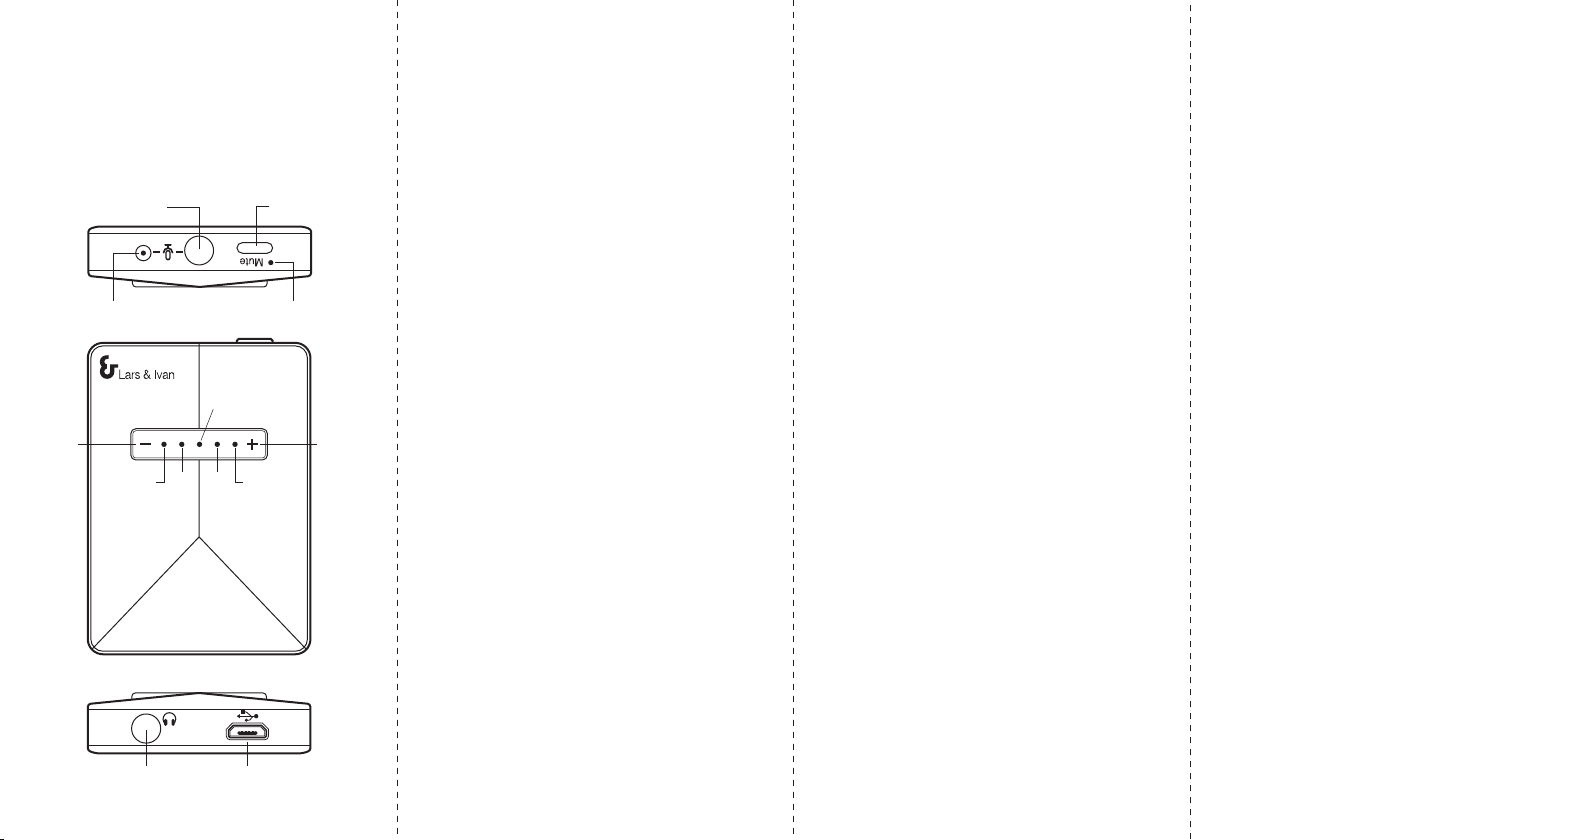
Light indicator:
1) is power ON indicator, after USB plugged
in and is connected to PC. Flashing if audio
data is receiving.
2) is to indicate Up volume level when
VOL"+" key is press. indicator (Blue)
will flash with a short press on VOL "+",
Press and hold VOL "+" , indicator (Blue)
will flash continually.
3) is to indicate decrease volume level when
VOl " – " key is press. indicator (Blue)
will flash with a short press on VOL " – ",
Press and hold VOL " – " , the indicator
(Blue) will flash continually.
4) (Red light) is mute indicator for
microphone only.
Mic in:
1) There is a Built-in microphone inside
DAC Fire for your convenience to record.
2) If you want to connect your own condenser
microphone, You may plug in your
Microphone to DAC Fire to record.
Please note the internal mic will be
disable when ext. mic is connected.
3) To record, you need to select DAC Fire
device as input on your recording software.
Recording:
1) When recording (PC is set at record mode,
the indicator and will be flashed.
2) There is a Mute button and Mute
indicator (Red light), during recording,
press Mute button to mute microphone input
and mute indicator (Red light) ON. Press
again to activate microphone input and Mute
indicator OFF.
Play Music:
Indicatorflashing if audio data is receiving.
Microphone connection
is optional
Headphone Micro USB data
and power cable
Mute
button
Mic
Volume
up
Volume
down


