Larson Davis EPS2116 User manual

EPS2116
Outdoor Microphone & Preamplifier Protection

Larson Davis
EPS2116 Environmental
Protection System
Reference Manual

IEPS2116.01 Rev D i-2
Copyright
Copyright 2018, by PCB Piezotronics, Inc. This manual is copyrighted, with all rights reserved. The manual may not be copied
in whole or in part for any use without prior written consent of PCB Piezotronics, Inc.
Disclaimer
The following paragraph does not apply in any state or country where such statements are not agreeable with local law:
Even though PCB Piezotronics, Inc. has reviewed its documentation, PCB Piezotronics Inc. makes no warranty or representa-
tion, either expressed or implied, with respect to this instrument and documentation, its quality, performance, merchantabil-
ity, or fitness for a particular purpose. This documentation is subject to change without notice, and should not be construed as
a commitment or representation by PCB Piezotronics, Inc.
This publication may contain inaccuracies or typographical errors. PCB Piezotronics, Inc. will periodically update the material
for inclusion in new editions. Changes and improvements to the information described in this manual may be made at any
time.
Safety
If the equipment is used in a manner not specified by Larson Davis, the protection provided by the equipment may be
impaired.
Recycling
PCB Piezotronics, Inc. is an environmentally friendly organization and encourages our customers to be environmentally con-
scious. When this product reaches its end of life, please recycle the product through a local recycling center or return the prod-
uct to:
PCB Piezotronics, Inc.
Attn: Recycling Coordinator
1681 West 820 North
Provo, Utah, USA 84601-1341
where it will be accepted for disposal
Warranty
For warranty information, refer to our Terms and Conditions of Sale on our website,
www.larsondavis.com/TermsConditions.aspx.
i.1 Contact Larson Davis
Website
www.larsondavis.com
Worldwide Corporate Headquarters
Larson Davis - a PCB Piezotronics division
3425 Walden Avenue
Depew, NY 14043-2495 USA
Toll-free (in the US): 888-258-3222
Phone: 716-926-8243
USA fax: 716-926-8215
E-mail: [email protected]om

EPS2116 Reference Manual 1-1
Table of Contents
Module 1 Overview 1-1
1.1 Getting Started .................................................................................................................................1-1
1.2 What is the EPS2116? .......................................................................................................................1-1
Module 2 Assembly & Mounting 2-1
2.1 Overview ...........................................................................................................................................2-1
2.2 Assembly ..........................................................................................................................................2-1
Module 3 Operations 3-1
3.1 Calibration .......................................................................................................................................3-1
3.2 Windscreen Replacement ...............................................................................................................3-3
3.3 Desiccant Replacement ...................................................................................................................3-5
Appendix A Technical Specifications A-1
A.1 Standards Met by EPS2116 ..............................................................................................................A-1
A.2 Included Accessories .......................................................................................................................A-2
A.3 Optional Accessories .......................................................................................................................A-2
A.4 Physical Specifications ....................................................................................................................A-2
A.5 EPS2116 Dimensions .......................................................................................................................A-3
A.6 Wind-induced Noise .........................................................................................................................A-4
A.7 EPS2116 Corrections .......................................................................................................................A-5
A.8 Acoustical Response ........................................................................................................................A-8

EPS2116 Reference Manual Getting Started 1-1
Module 1Overview
1.1 Getting Started ....................................................................................................................1-1
1.2 What is the EPS2116? ..........................................................................................................1-1
1.1 Getting Started
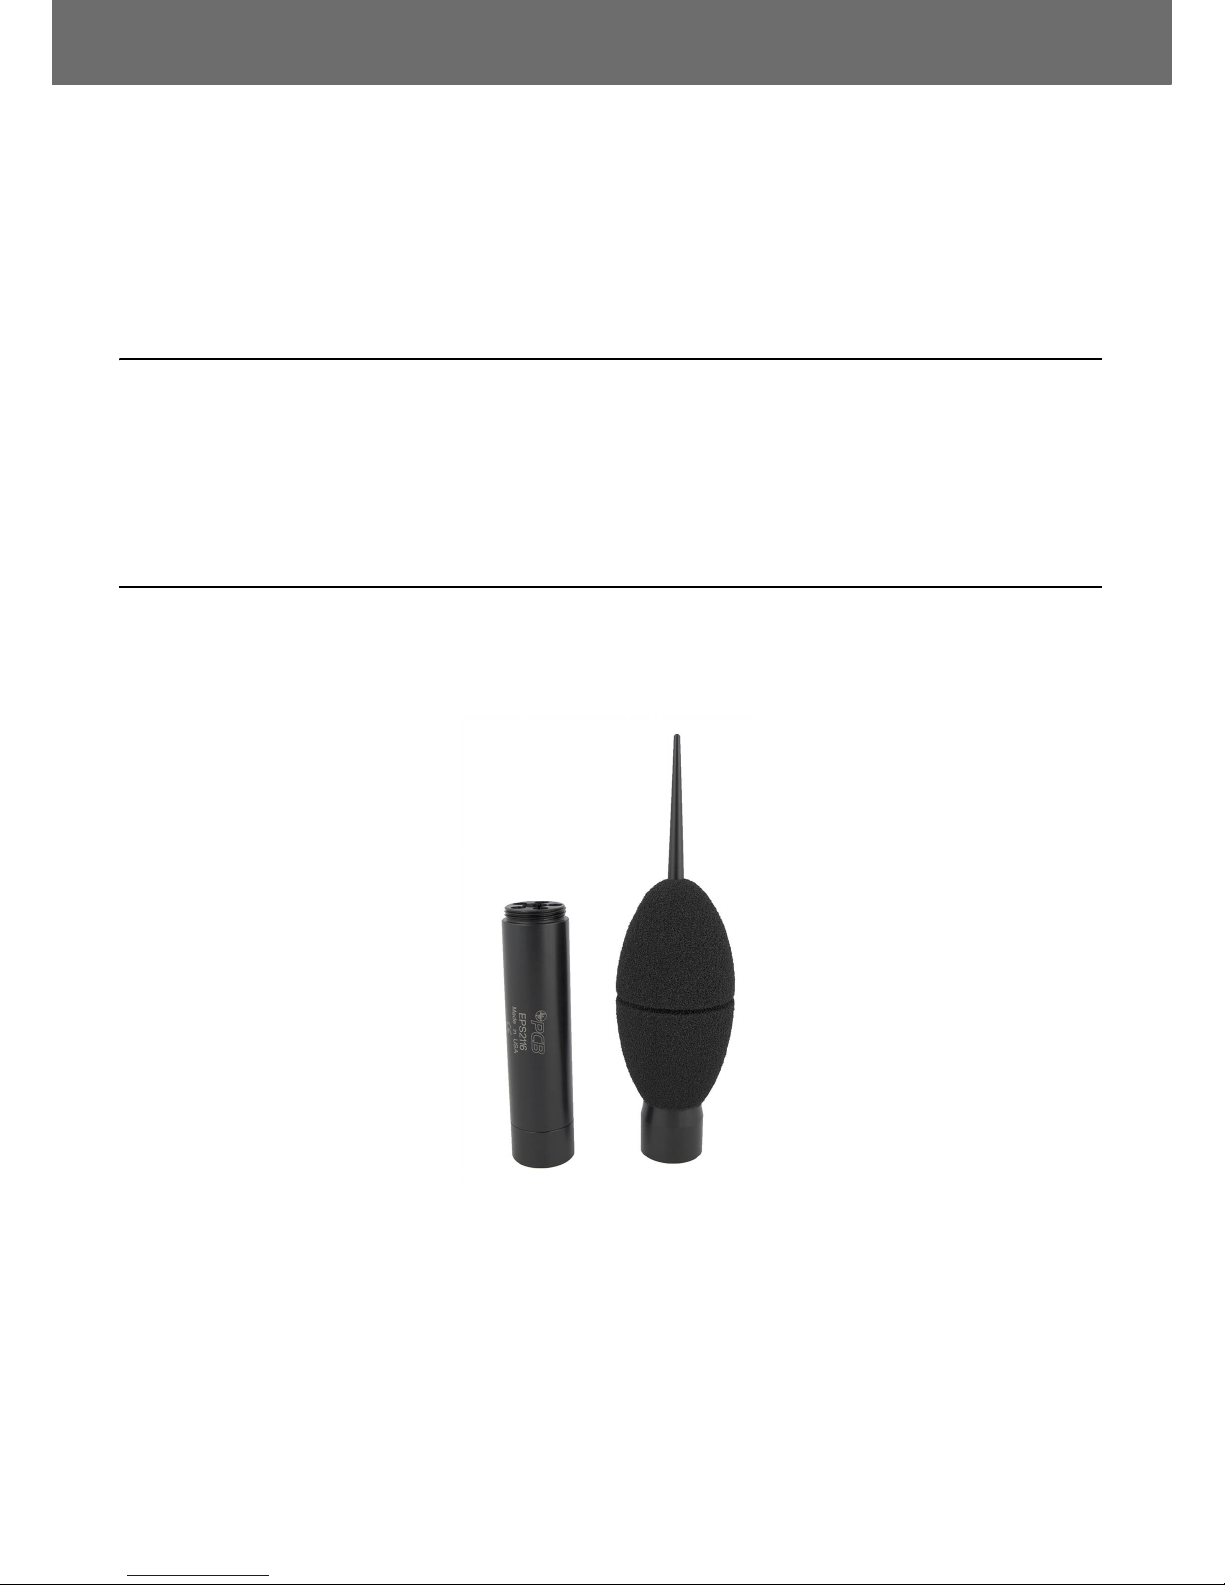
The EPS2116 is an environmental protection system accessory that
provides complete weather protection to your ½ inch microphone and
microphone preamplifier.
Before you begin working with the EPS2116, read an overview of its
capabilities and learn how to assemble, mount, and calibrate the
device to optimally perform your tasks.
1.2 What is the EPS2116?
The EPS2116 protects your microphone if it is exposed to wind, rain,
and humidity during the data collection period.
The EPS2116 can help accomplish your tasks:
• If you deploy the microphone in unpredictable weather, the
water-repellent membrane in the EPS2116 will protect it from
rain, sleet, and snow
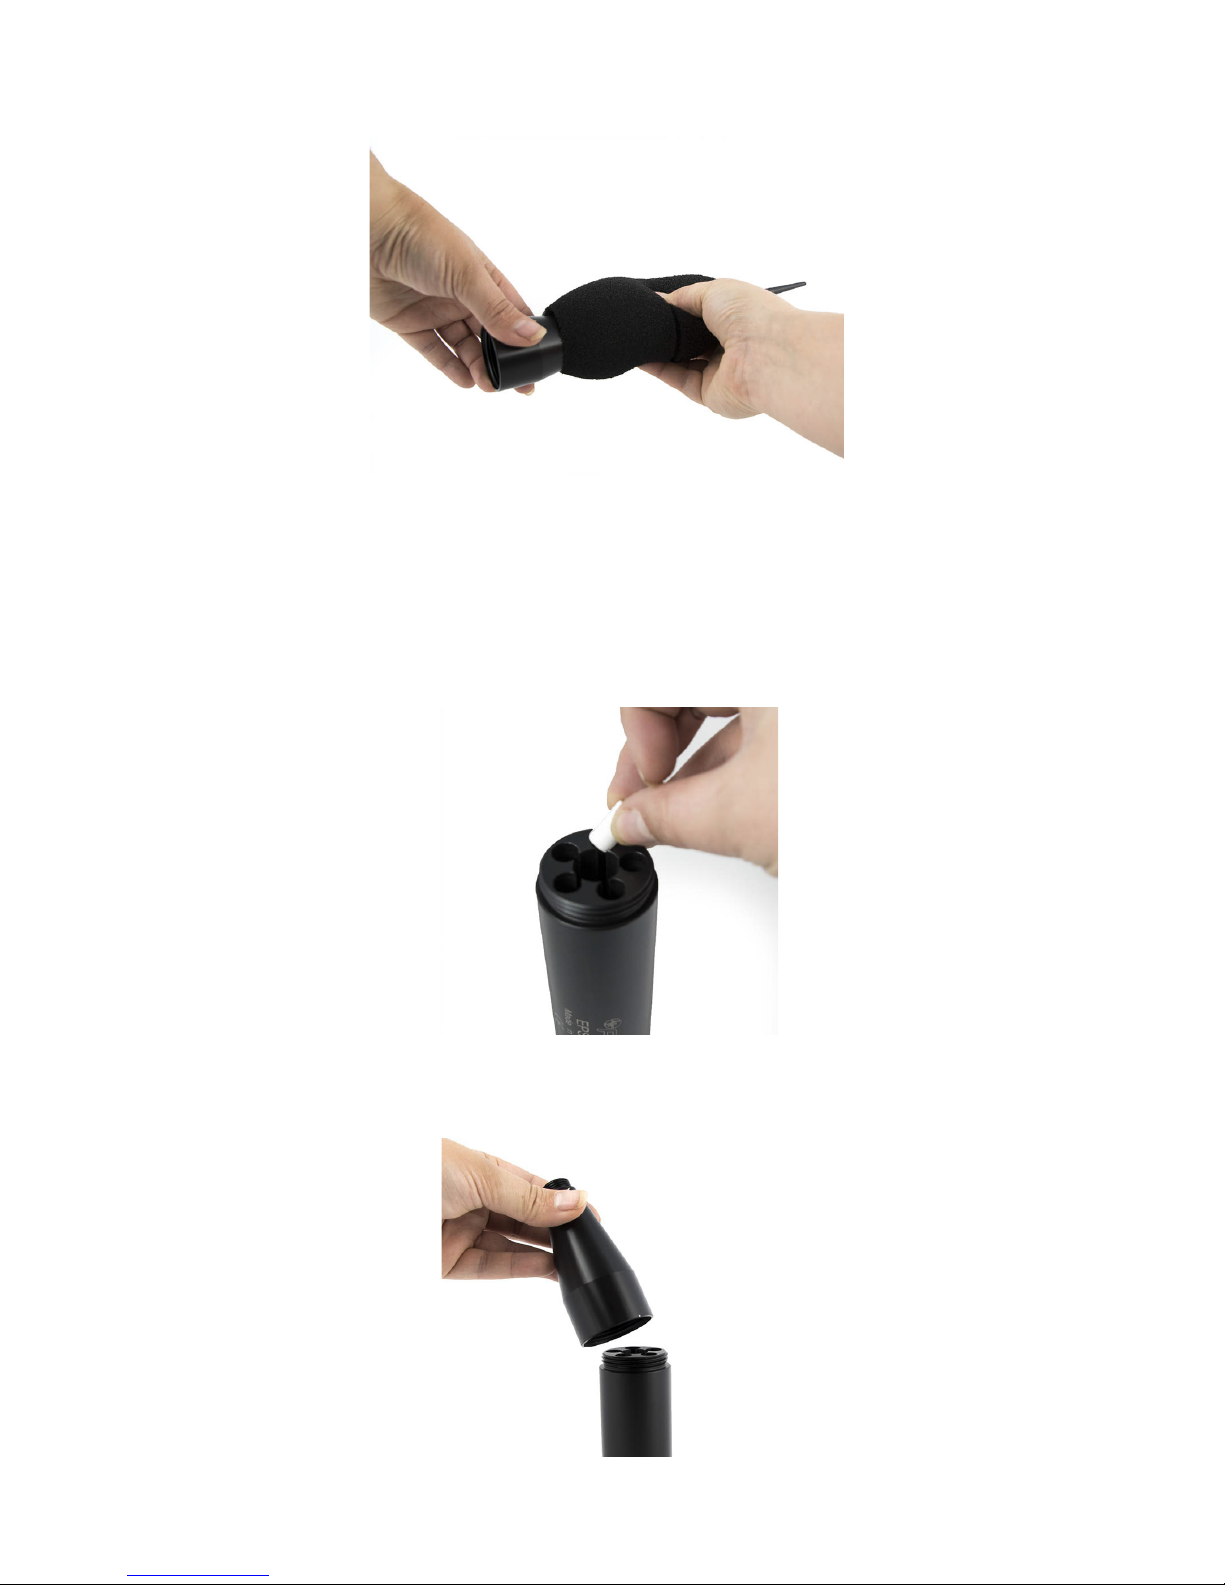
• In high humidity environments, desiccant cartridges can be
inserted to preserve performance
• Birds are unable to land on your device and are effectively
deterred by the built-in bird-spike.
It works with back-vented microphones in particular, in which static air
pressure reaches the back of the microphone from an opening inside
the device. Moist air passes through the desiccant before reaching the
preamplifier and the back of the microphone.
The EPS2116 is intended to be connected on a threaded ¾ inch
conduit, 1½ inch (38mm) speaker stand, or similar mating connector
when in use. The whole assembly can be fastened on a mounting screw
for tripod use in the field. The EPS2116 is a necessary tool for
environmental exposure sound monitoring.

EPS2116 Reference Manual What is the EPS2116? 1-2
FIGURE 1-1 EPS2116
Birdspike
Windscreen
Top
Base
Adapter

EPS2116 Reference Manual Overview 2-1
Module 2Assembly & Mounting
2.1 Overview ..............................................................................................................................2-1
2.2 Assembly ..............................................................................................................................2-1
2.1 Overview
The EPS2116 must be assembles and disassembled in a proper order to
not compromise the integrity of the protection devices. The EPS2116
comes shipped with the base and the top separate, and the windscreen
and birdspike together.
2.2 Assembly
The EPS2116 will come shipped with the top, birdspike, and
windscreen attached, along with the base and adapter together.
FIGURE 2-1 EPS21116 as shipped
The fist step will be to assemble the pieces so they are ready for the
cable and preamplifier. To do this, follow these steps:
CAUTION Do not pull the
windscreen off the birdspike
with an upward motion. If you
have to separate, pull the
windscreen down and the
birdspike up.
Step 1 Hold the top with one hand, grip the windscreen and
birdspike, at windscreen middle, gently twist apart.

EPS2116 Reference Manual Assembly 2-2
FIGURE 2-2 Grip windscreen to birdspike, unscrew
TAKE NOTE If using the
PRM2103, desiccant is not
required as the preamplifier
uses built-in heaters to
control humidity within the
microphone and preamplifier
Step 2 If using desiccant cartridges, insert four stacks of five into
the desiccant chambers in the base. Use one indicating
desiccant for the first use. And when you change them, use
the second indicating.
FIGURE 2-3 Desiccant install
Step 3 Screw top onto base.
FIGURE 2-4 Screw top onto base

EPS2116 Reference Manual Assembly 2-3
Step 4 Thread CBL222 up through adapter, base, and top. Then
attached preamplifier/microphone to cable.
FIGURE 2-5 Thread cable, add preamp/mic
Step 5 If you are mounting the EPS2116 to a tripod, pole, or other
device, screw the device onto the bottom at this step,
being careful not to twist the cable. Hold the EPS2116 still
and twist the mounting device up into the EPS2116.
Step 6 Push preamp/mic down until the mic is fully seated at the
top. Do not pull cable down.
FIGURE 2-6 Push microphone down

EPS2116 Reference Manual Assembly 2-4
Step 7 Grip windscreen in middle, holding birdspike, screw onto
assembly.
FIGURE 2-7 Windscreen
Once assembled, the EPS2116 can be left in place during calibration or
transport.

EPS2116 Reference Manual Calibration 3-1
Module 3Operations
3.1 Calibration ...........................................................................................................................3-1
3.2 Windscreen Replacement ...................................................................................................3-3
3.3 Desiccant Replacement ......................................................................................................3-5
3.1 Calibration
To calibrate microphones in the EPS2116, follow these steps:
TAKE NOTE The microphone
and preamplifier can be
pulled up if needed to allow
the microphone to seat fully
inside the calibrator, though
this is not necessary when
using the CAL200 or CAL250.
Step 1 Remove birdspike and windscreen by unscrewing the
assembly.
FIGURE 3-1 Remove birdspike
Step 2 Place the calibrator (CAL250 shown) on the microphone by
pushing down gently while slightly twisting clockwise.

EPS2116 Reference Manual Calibration 3-2
FIGURE 3-2 CAL250 on mic
Step 3 Perform calibration as described in sound level meter
manual.
Step 4 Remove calibrator by pulling it up while slightly twisting it
counter-clockwise.
Step 5 Replace birdspike and windscreen.
FIGURE 3-3 Replace windscreen

EPS2116 Reference Manual Windscreen Replacement 3-3
3.2 Windscreen Replacement
To replace the windscreen, follow these steps:
CAUTION Removing the
windscreen by pulling it over
the top of the birdspike can
damage the rainscreen.
Step 1 Remove birdspike and windscreen by unscrewing the
assembly. Grip windscreen/birdspike and twist off.
FIGURE 3-4 Remove windscreen
Step 2 Remove windscreen from bottom of birdspike.
FIGURE 3-5 Remove windscreen from birdspike
Step 3 Screw birdspike back on top.

EPS2116 Reference Manual Windscreen Replacement 3-4
FIGURE 3-6 Return birdspike to top
Step 4 Place new windscreen over birdspike.
FIGURE 3-7 Push windscreen
Step 5 Push windscreen down until the bottom aligns with
windscreen seating line.

EPS2116 Reference Manual Desiccant Replacement 3-5
3.3 Desiccant Replacement
To replace the desiccants, follow these steps:
Step 1 Remove windscreen and birdspike by unscrewing it from
the top.
FIGURE 3-8 Remove top
Step 2 Gently pull mic and preamp through the EPS2116.
Disconnect preamplifier from cable.
FIGURE 3-9 Pull cable up

EPS2116 Reference Manual Desiccant Replacement 3-6
Step 3 Replace desiccant cartridges. Discard the old and replace
with new.
FIGURE 3-10 Replace desiccants
Step 4 Screw top back onto base. Connect preamplifier to cable,
and push down until seated, do not pull.
FIGURE 3-11 Replace top and preamp
Step 5 Place windscreen/birdspike over top and screw on. You do
not need to over-tighten.
CAUTION Do not let the
cable slip down into the
base, it may be difficult
to retrieve.

EPS2116 Reference Manual A-1
Appendix ATechnical Specifications
A.1 Standards Met by EPS2116 .................................................................................................A-1
A.1.1 Sound Level Meter Standards ..............................................................................A-1
A.1.2 Safety Requirements ............................................................................................A-1
A.2 Included Accessories ...........................................................................................................A-2
A.3 Optional Accessories ...........................................................................................................A-2
A.4 Physical Specifications .......................................................................................................A-2
A.5 EPS2116 Dimensions ...........................................................................................................A-3
A.6 Wind-induced Noise ............................................................................................................A-4
A.7 EPS2116 Corrections ...........................................................................................................A-5
A.8 Acoustical Response ...........................................................................................................A-8
A.8.1 Reference Direction ..............................................................................................A-8
A.8.2 EPS2116 Responses with Free-Field (0°) Correction .........................................A-10
A.8.3 EPS2116 Responses with Random Response (diffuse) Correction ..................A-15
A.8.4 EPS2116 Responses with 90° Correction ...........................................................A-19
Values specified are typical unless tolerances are provided.
A.1 Standards Met by EPS2116
A.1.1 Sound Level Meter Standards
When used with the Larson Davis Model 831 or LxT versions, the EPS2116 can be used as part of a Class 1
or 2 measurement system, according to IEC 61672-1:2013 and ANSI S1.4-2014, when the appropriate
microphone correction is used.
A.1.2 Safety Requirements
Compliance Standard
All IEC 61010-1 (2010): Safety requirements for electrical
equipment for measurement, control, and laboratory use
IP 55 IEC 60529 (2001): Degrees of Protection Provided by Enclosures
NEMA 4 NEMA 250 (2008): Enclosures for Electrical Equipment
2002/95/EC (RoHS 1) RoHS: The Restriction of Hazardous Substances Directive

EPS2116 Reference Manual A-2
A.2 Included Accessories
A.3 Optional Accessories
*Desiccant cartridges contain 0.05% cobalt chloride and are suitable for use in Europe.
A.4 Physical Specifications
CAUTION Although non-toxic, the desiccant cartridges are not edible. Keep away from children and pets.
Parts Quantity Accessories
WS011 2 Windscreen for EPS2116
M2116.01 1 Camera/instrument tripod adaptor
ADP103 1 EPS2116 to TRP003 adaptor
I2116.01 1 CD with instruction manual
Parts Accessories
TRP001 Camera/instrument tripod
TRP003 Tripod, maximum height 8 feet, for use with portable noise monitoring
systems and ADP034
TRP019 Permanent, tilt-down pole use with ADP100
TRP020 Semi-permanent tripod use with ADP100
DSC003 50 non indicating desiccant cartridges* & 2 indicating desiccants
ADP100 Adaptor connecting EPS2116 to TRP019 or TRP020. Connects 3/4”-14
NPSM (ISO 228-G 3/4) to 1 1/2” BSPF (ISO 228-G 1.5).
CAL200 Class 1 acoustic calibrator for 1/2” microphones
Dimensions
Windscreen/birdspikes Height 24.0 cm (9.5”) ; O.D. 7 cm (3.0”)
Total Height 42.55 cm (16.75”)
Desiccant Chamber Height 8.3 cm (3.3”); O.D. 4.2 cm (1.6"); I.D. 1.5 cm ( 0.6”)
Mounting 3/4” standard solid wall PVC conduit thread (female)
Weight
Windscreen/birdspikes 32 g (1.1 oz.)
Body 176 g (6.2 oz.)
Desiccant cartridges 20 g (0.70 oz.)
Total 340 g (12.0 oz.)

EPS2116 Reference Manual A-3
A.5 EPS2116 Dimensions
FIGURE A-1 EPS2116 Dimensions

EPS2116 Reference Manual A-4
A.6 Wind-induced Noise
The following show data for the self-generated noise created by the EPS2116 due to wind.
MPH m/s A-weighted Level (dB)
52.3 26.7
10 4.5 36
15 6.7 44.2
20 8.9 51.4
25 11.2 57.6
30 13.4 63
35 15.6 67.6
40 17.9 71.7
45 20.1 75.1
50 22.4 78.2
55 24.6 81
60 26.8 83.4
65 29.1 85.8
70 31.3 88.1
75 33.5 90.4
80 35.8 92.9
85 38 95.7
90 40.2 98.9
95 42.5 102.5
100 44.7 106.6
105 47 111.4
110 49.1 117
115 51.4 123.4
120 53.6 130.7
Table of contents