manuals.online logo
Brands
  1. Home
  2. •
  3. Brands
  4. •
  5. Larson Electronics
  6. •
  7. Inverter
  8. •
  9. Larson Electronics HAL-24-2L-LV-SOL-80C-C1D2-20C User manual

Larson Electronics HAL-24-2L-LV-SOL-80C-C1D2-20C User manual

Ver.0918-1
HAL-24-2L-LV-SOL-80C-C1D2-20C Larson Electronics LLC 1
Thank you for purchasing the Larson Electronics HAL-24-2L-LV-SOL-80C-
C1D2-20C solar powered Explosion Proof LED light. Follow the steps below
for installing and maintaining your unit.
IMPORTANT
READ CAREFULLY BEFORE OPERATING THIS LIGHT. SAVE THESE INSTRUCTIONS
FOR FUTURE REFERENCE.
THIS FIXTURE SHOULD BE INSTALLED BY QUALIFIED TECHNICIANS IN STRICT
ACCORDANCE WITH THE NATIONAL ELECTRICAL CODE AND ANY LOCAL
REQUIREMENTS.
WARNING: IF UNSURE ABOUT ANY SECTION OF THESE INSTRUCTIONS, CONSULT
A QUALIFIED PROFESSIONAL TO INSTALL THIS DEVICE.
WARNING: DEVICE IS SUITABLE FOR INSTALLATION IN WET LOCATIONS.
WARNING: ALTHOUGH WATERPROOF, ANY PART OF THIS UNIT IS NOT DESIGNED
OR INTENDED TO BE SUBMERGED.
WARNING: DO NOT ALLOW DETACHABLE WIRES TO BECOME SUBMERGED!
IF DROPPED OR DAMAGED, THE UNIT MAY NO LONGER BE WATERPROOF AND
SHOULD BE REPLACED.
HOW SOLAR LIGHT WORKS
Solar light must be placed outdoors. The solar panel collects and converts sunlight
into DC power while the pre-installed rechargeable batteries store the energy to
power the light at night.
Solar light illumination time
It depends on the seasonal sunlight availability in your geographical area under
certain weather conditions. Stronger or longer sunlight hours enable batteries to
store more energy which provides more lighting hours. On the contrary, weaker or
shorter sunlight hours reduce the lighting hours and its brightness as well.
Solar panel mounting locations
Solar panel must be placed outdoor at a location with its solar panel receiving direct
sunlight at least five hours each day. Shadowed locations will not allow batteries to
be fully charged and will reduce both the brightness of the light and the lighting
hours. Precautions (prior to first time use)
1. To maximize battery capacity, the solar panel should be fully charged by
direct sunlight for five hours before initial use.
2. Under extremely cold temperatures, the batteries may not charge fully. In
such cases, the Solar Lights may not stay illuminated as long.
MOUNTING SOLAR PANEL
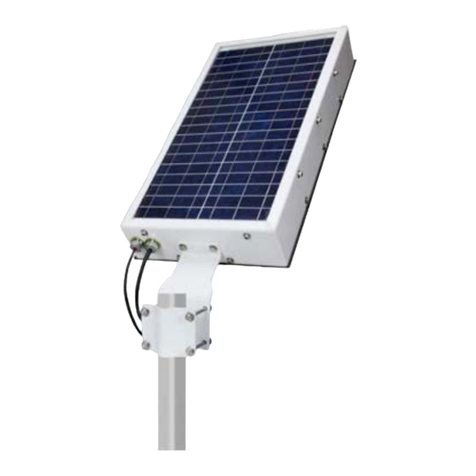
This solar panel includes a permanent mounting system that allows for mounting to
square/round poles or flat surfaces such as a wall or post shown in figure 1.
Position the solar panel in a location that receives the maximum amount of sunlight
throughout the day. This may need adjusted depending on the season. With pole
mounting, loosen the adjustment bolts to fit solar panel onto pole. Once mounted,
tighten bolts snug to secure panel to pole. For surface mounting, remove additional
plate and use the existing mounting holes to mount directly to surface.
MOUNTING
The light is connected to the
panel by cord. Be sure the
light is connected to the
solar panel and that the
deutsch connections are
tight. Run the cord and
mount the light nearby.
LAMP INSTALLATION
PRECAUTIONS
•Do not install fixture in any classified location where the marked
operating temperature exceeds the ignition temperature of the hazardous
atmospheres.
•Consult fixture nameplate for the suitability ambient temperature shown on
the nameplate.
•Refer to fixture nameplate for minimum supply wire temperature rating.
•Verify that the supply voltage agrees with fixture rating as indicated on
nameplate.
•All local and national electrical/building codes must be followed
when installing this lighting fixture. For code interpretation, consult
your local authority.
•Product must be used only with glass lens intact and all cap threads
fully engaged. Do not use if lens or fixture is cracked or damaged.
Caution: Only use lamp size, type and /or wattage as shown on fixture nameplate.
We strongly recommend that only a licensed electrician install this product.
WARNING: Make sure that the power is disconnected before installing. This fixture
is heavy and must be mounted to a surface that can structurally support the load.
WARNING: Do not let fixture hang on one bracket at any time. Failing to
comply can result in breakage of end casting or mounting bracket, allowing
the fixture to fall, which can cause serious injury or death.
•The mounting brackets are shipped installed on the fixture.
•Install the brackets to wall or ceiling with two 3/8" bolts (not supplied) at
center measurements.
•Fixture is now ready for mounting.
It is strongly suggested to use two licensed electricians to proceed with the final
mounting of the fixture to avoid any possible personnel injury or damage to the
fixture as the unit is heavy and will be slightly awkward to hold in position and
attach to brackets mounted on wall or ceiling. Depending on mounting height and
Operation Guide
DEUTSCH CONNECTION
Ver.0918-1
HAL-24-2L-LV-SOL-80C-C1D2-20C Larson Electronics LLC 2
scaffolding, a hydraulic man–lift or two good quality ladders should be used.
ON/OFF SWITCH (IF EQUIPPED)
Toggles the attached light on or off according to the operator`s preference.
DAY/NIGHT SENSOR (IF EQUIPPED)
The dusk to dawn photocell activates the light at night and turns it off at dawn. For
operating the unit full time, slide the cover over the photocell sensor to disable it.
This can be repositioned by loosening the set screw on the side and tightening once
desired angle is achieved. The selected location should not be near night time light
sources such as porch lights or street lights as they may cause the light to turn off at
night.
MOTION SENSOR (IF EQUIPPED)
When the motion sensor detects movement, the light is turned on. Once motion has
stopped, the light turns off after the set time delay. The Time Delay can be adjusted
with the dial on the motion sensor located inside the solar panel enclosure.
TO ADJUST TIME DELAY:
1. With a 3/16 Allen wrench, remove the screws holding the back plate to the
solar panel. There are 10 screws securing the back plate.
2. Once free, lift back plate and locate the motion sensor inside. This is
attached to the back plate. Be careful not to stress the wires connected to
the motion sensor when lifting.
3. With a small flathead screwdriver, rotate the dial on the
motion sensor to the new time delay you wish to set.
Point the arrow to the number indicated on the motion
sensor. Fully counter-clockwise is a 1 minute delay
while fully clockwise is a 10 minute delay. Do not force
the adjustment screw past its stopping points.
4. Once set, replace the back panel on the solar panel. Replace all screws
removed earlier and tighten. Be sure the back plate is fully seated and that
there are no pinched wires to maintain weatherproofing.
The minimum time (fully counter-clockwise) is approximately 1 minute and the
maximum time (fully clockwise) is approximately 10 minutes. Set the control to the
desired setting between these limits.
The motion sensor has an effective range of 16 feet and can sense a moving human
body to 26 feet with a field of view of 60 degrees.
CHARGING
With up to 5 hours of daily sunlight, this light is designed to function 10 hours.
Ensure there are no obstructions that could result in little to no sun reaching the
panels. Indirect sunlight will extend the charge time. As with all solar powered
equipment, charging time is affected by the amount of available ambient light. When
ambient light levels drop below a certain level, such as on cloudy days, the unit will
not recharge as quickly.
MAINTENANCE
If the lens or solar panel becomes dirty, wipe down with a mild soap and water
solution.
Keep snow and debris clear of the solar panel so the batteries can charge. If the
panels are covered by snow or debris for an extended period of time, allow the
battery to charge in full direct sunlight for at least 5 hours for the battery to reach its
full capacity.
It is recommended to occasionally inspect the unit for any defects.
TROUBLESHOOTING
If for any reason the LED light does not power on:
Batteries not fully charged: Make sure the fixture is placed in an area where
the solar panel gets the maximum amount of full, direct sunlight every day. If
the solar panel does not receive enough sunlight during the day (e.g. due to
cloudy or overcast weather conditions), it will be recharged on the next sunny
day and resume operation.
Other light sources: If your solar light is located too close to street lights,
porch lights or other lights, the solar panel may turn off the fixture. Relocate
the solar panel or eliminate those other light sources.
Not enough direct sunlight: Ensure that the fixtures are not installed in a
shady area, for example, in the shadow of a tree or a house. If necessary,
move the fixtures to an area that gets full direct sunlight.
Switch is in the OFF position: (For units equipped with a power switch.)
Cycle power button in a dark room. The light(s) should come on when the
switch is in the on position if the unit is fully charged.
9419 US-HWY 175
Kemp, TX 75143 USA
P: 800-369-6671 | INTL: 903-498-3363 F: 903-498-3364
sales@larsonelectronics.com
www.larsonelectronics.com

Other Larson Electronics Inverter manuals

Larson Electronics HAL-SPK-2X150PNL-SCS-2X100AH-24-PLC User manual

Larson Electronics

Larson Electronics HAL-SPK-2X150PNL-SCS-2X100AH-24-PLC User manual

Larson Electronics WCDE-6-NL User manual

Larson Electronics

Larson Electronics WCDE-6-NL User manual

Larson Electronics LEDEMG-400VA Owner's manual

Larson Electronics

Larson Electronics LEDEMG-400VA Owner's manual

Larson Electronics SPLT IVT-12VDC-1000VA-120VAC Series User manual

Larson Electronics

Larson Electronics SPLT IVT-12VDC-1000VA-120VAC Series User manual

Larson Electronics SPEPSN-HRN-PA Manual

Larson Electronics

Larson Electronics SPEPSN-HRN-PA Manual

Popular Inverter manuals by other brands

Fuji Electric Frenic-Mini user manual

Fuji Electric

Fuji Electric Frenic-Mini user manual

Kostal PIKO 10 operating manual

Kostal

Kostal PIKO 10 operating manual

Craftsman 580.326300 owner's manual

Craftsman

Craftsman 580.326300 owner's manual

Parker AC30 series user manual

Parker

Parker AC30 series user manual

Hitecsa ACVIBA HE Series Installation, operation & maintenance manual

Hitecsa

Hitecsa ACVIBA HE Series Installation, operation & maintenance manual

Toshiba VF-NC3C instruction manual

Toshiba

Toshiba VF-NC3C instruction manual

Solax X3 series Quick installation guide

Solax

Solax X3 series Quick installation guide

Altronics M 8070 instructions

Altronics

Altronics M 8070 instructions

SMA SUNNY TRIPOWER CORE1-US user manual

SMA

SMA SUNNY TRIPOWER CORE1-US user manual

Terex T50 Operator, service & parts manual

Terex

Terex T50 Operator, service & parts manual

Winco PSS8000 Installation and operator's manual

Winco

Winco PSS8000 Installation and operator's manual

HERKULES HSE3000H instruction manual

HERKULES

HERKULES HSE3000H instruction manual

SunSynk SUNSYNK-8K-SG01LP1 Installer manual

SunSynk

SunSynk SUNSYNK-8K-SG01LP1 Installer manual

SMA SUNNY ISLAND 8.0H installation manual

SMA

SMA SUNNY ISLAND 8.0H installation manual

Sofar 250KTL-HV user manual

Sofar

Sofar 250KTL-HV user manual

Kaco blueplanet 3.0 NX1 M2 Quick Installation Instruction

Kaco

Kaco blueplanet 3.0 NX1 M2 Quick Installation Instruction

Growatt SPF 5000 ES Service manual

Growatt

Growatt SPF 5000 ES Service manual

Briggs & Stratton Powerlink On-Board Generator System Supplement

Briggs & Stratton

Briggs & Stratton Powerlink On-Board Generator System Supplement

manuals.online logo
manuals.online logoBrands
  • About & Mission
  • Contact us
  • Privacy Policy
  • Terms and Conditions

Copyright 2025 Manuals.Online. All Rights Reserved.