manuals.online logo
Brands
  1. Home
  2. •
  3. Brands
  4. •
  5. Larson Electronics
  6. •
  7. Inverter
  8. •
  9. Larson Electronics SPEPSN-HRN-PA Manual

Larson Electronics SPEPSN-HRN-PA Manual

Class I, Div. I Explosion Proof Horn - Industrial Siren
Larson Electronics, LLC Phone: (800) 369-6671 Fax: (903) 498-3364 www.larsonelectronics.com
1of 3
-SPEPSN-HRN-PA-
Class I, Div. I Explosion Proof Horn - Industrial Siren Instruction Guide
Thank you for your purchase of the Larson Electronics Solar Powered Horn. This unit is completely assembled, tested
and ready for installation when shipped from the factory. Please follow the steps below in order to operate and maintain
this product.
IMPORTANT
READ CAREFULLY BEFORE OPERATING THIS UNIT. SAVE THESE INSTRUCTIONS FOR FUTURE REFERENCE.
WARNING: IF UNSURE ABOUT ANY SECTION OF THESE INSTRUCTIONS, CONSULT A QUALIFIED PROFESSIONAL TO
INSTALL THIS DEVICE.
WARNING: DEVICE IS SUITABLE FOR INSTALLATION IN WET LOCATIONS.
WARNING: ALTHOUGH BEACON IS WATERPROOF, IT IS NOT DESIGNED OR INTENDED TO BE SUBMERGED.
WARNING: DO NOT ALLOW DETACHABLE WIRES TO BECOME SUBMERGED!
•IF DROPPED OR DAMAGED, THE UNIT MAY NO LONGER BE WATERPROOF AND SHOULD BE REPLACED.
•TO AVOID HAZARDS TO CHILDREN, ACCOUNT FOR ALL PARTS AND DESTROY PACKING MATERIALS.
•ON SOME UNITS, THE BASE CONTAINS A MAGNET. PEOPLE WITH PACEMAKERS SHOULD CONSULT THEIR
PHYSICIAN(S) BEFORE USE. ELECTROMAGNETIC FIELDS IN CLOSE PROXIMITY TO HEART PACEMAKER COULD
CAUSE PACEMAKER INTERFERENCE OR PACEMAKER FAILURE.
HOW SOLAR HORN WORKS
Solar panel must be placed outdoors. The solar panel collects and converts sunlight into DC power while the
pre-installed rechargeable batteries store the energy to power the horn.
Solar light illumination time
It depends on the seasonal sunlight availability in your geographical area under certain weather conditions.
Stronger or longer sunlight hours enable batteries to store more energy which provides more horn runtime. On
the contrary, weaker or shorter sunlight hours reduce the lighting hours and its brightness as well.
Solar panel mounting locations
Solar panel must be placed outdoor at a location with its solar panel receiving direct sunlight at least five hours
each day. Shadowed locations will not allow batteries to be fully charged and will reduce both the brightness of
the light and the lighting hours. Precautions (prior to first time use)
1. To maximize battery capacity, the solar panel should be fully charged by direct sunlight for five hours
before initial use.
2. Under extremely cold temperatures, the batteries may not charge fully. In such cases, the horn may not
run as long.
INSTALLATION:
MOUNTING
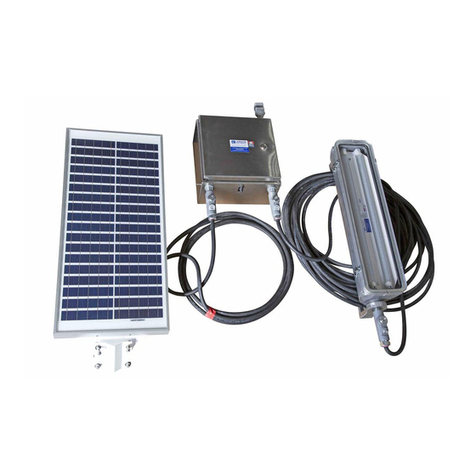
This solar panel includes a permanent mounting system
that allows for mounting to square/round poles or flat
surfaces such as a wall or post shown in figure 1.
Position the solar panel in a location that receives the
maximum amount of sunlight throughout the day. This
may need adjusted depending on the season. With pole
mounting, loosen the adjustment bolts to fit solar panel
onto pole. Once mounted, tighten bolts snug to secure
panel to pole. For surface mounting, remove additional
plate and use the existing mounting holes to mount
Class I, Div. I Explosion Proof Horn - Industrial Siren
Larson Electronics, LLC Phone: (800) 369-6671 Fax: (903) 498-3364 www.larsonelectronics.com
2of 3
directly to surface.
Keep in mind, the horn is connected to the panel by
15ft. of SOOW cord. Be sure the horn is connected
to the solar panel and that the deutsch connections
are tight. Run the cord and mount the horn nearby
using the two predrilled mounting holes toward the
base. If magnetic mounting, attach horn to solid
metal surface. The horn comes with user selected
permanent or magnetic mount and color from
factory.
HORN WIRING DIAGRAM
OPERATION
The solar panel comes preconfigured with user the
selected panel operation option..
you wish the lamp to become operative, slowly
rotate the control in a clockwise direction until a
point is reached where the lamp illuminates. Leave
the control set at this point. At this position, the unit
should become operative at approximately the
same level of darkness each evening. Observe the
operation of the unit. If the unit is starting to operate
too early (e.g. when it is quite light), adjust the
control slightly anti-clockwise. If the unit starts to
operate too late (e.g. dusk), adjust the control
slightly clockwise. Continue to adjust until the unit
operates as desired.
.
ON/OFF SWITCH (-On.Off)
The on/off switch powers the beacon on or off with
the flip of a switch. The power switch is located on
the solar panel for operating the beacon at a
moment’s notice.
Remove the mounting plate from the light and mark
holes on surface. Drill through holes for bolts or
screws to fit through. Attach beacon to mount on
and twist to secure.
After the batteries have been fully charged, the
beacon will illuminate with configured panel
operation listed.
The solar panel surface must be kept clean to
collect sunlight effectively.
CHARGING
With up to 5 hours of daily sunlight, this beacon is
designed to function 15 hours. Ensure there are no
obstructions that could result in little to no sun
reaching the panels.
MAINTENANCE
If the lens or solar panel becomes dirty, wipe down
with a mild soap and water solution.
Keep snow and debris clear of the solar panel so
the batteries can charge. If the panels are covered
by snow or debris for an extended period of time,
DEUTSCH
CONNECTOR
Class I, Div. I Explosion Proof Horn - Industrial Siren
Larson Electronics, LLC Phone: (800) 369-6671 Fax: (903) 498-3364 www.larsonelectronics.com
3of 3
allow the battery to charge in full direct sunlight for
at least 5 hours for the battery to reach its full
capacity.
It is recommended to occasionally inspect the unit
for any defects.
TROUBLESHOOTING
If for any reason the LED beacon does not power
on:
Batteries not fully charged: Make sure the
fixture is placed in an area where the solar
panel gets the maximum amount of full, direct
sunlight every day. If the solar panel does not
receive enough sunlight during the day (e.g.
due to cloudy or overcast weather conditions),
it will be recharged on the next sunny day and
resume operation.
Other light sources: (For units equipped with
a day/night sensor.) If your solar light is
located too close to street lights, porch lights
or other lights, the solar panel may turn off the
fixture. Relocate the solar panel or eliminate
those other light sources.
Not enough direct sunlight: Ensure that the
fixtures are not installed in a shady area, for
example, in the shadow of a tree or a house.
If necessary, move the fixtures to an area that
gets full direct sunlight.
Switch is in the OFF position: (For units
equipped with a power switch.) Cycle power
button to STROBE Mode 1 in a dark room.
The light(s) should come on when the switch
is in the on position if the unit is fully charged.
SPECIFICATIONS
Operation: Automatic- Manual On/Off Rocker Switch
Panel Dimensions: W-11 3/8" L-15 3/4" D-1"
Beacon Dimensions: H-5 3/4" Diam-3.5" 3.75"
Footprint
Solar Panel Watts:30
LED Watts: 3.6 @.244 amps
Battery: (2) 8aH sealed lead acid batteries
Charging Time: 5 Hours
Runtime: 15 hrs
Mounting: Surface or Post
Should further information not covered by these
instructions be required, please contact Larson
Electronics at 1-800-369-6671 for further
assistance.
Please visit LarsonElectronics.com for Warranty
and Return information.

Other Larson Electronics Inverter manuals

Larson Electronics SPLT IVT-12VDC-1000VA-120VAC Series User manual

Larson Electronics

Larson Electronics SPLT IVT-12VDC-1000VA-120VAC Series User manual

Larson Electronics HAL-SPK-2X150PNL-SCS-2X100AH-24-PLC User manual

Larson Electronics

Larson Electronics HAL-SPK-2X150PNL-SCS-2X100AH-24-PLC User manual

Larson Electronics HAL-24-2L-LV-SOL-80C-C1D2-20C User manual

Larson Electronics

Larson Electronics HAL-24-2L-LV-SOL-80C-C1D2-20C User manual

Larson Electronics LEDEMG-400VA Owner's manual

Larson Electronics

Larson Electronics LEDEMG-400VA Owner's manual

Larson Electronics WCDE-6-NL User manual

Larson Electronics

Larson Electronics WCDE-6-NL User manual

Popular Inverter manuals by other brands

Zena 150 series manual

Zena

Zena 150 series manual

Sealey MW80 instructions

Sealey

Sealey MW80 instructions

Hoymiles HMT-1800-6T manual

Hoymiles

Hoymiles HMT-1800-6T manual

SunSynk SUNSYNK MAX user manual

SunSynk

SunSynk SUNSYNK MAX user manual

HIRESEA TD200 product manual

HIRESEA

HIRESEA TD200 product manual

Power Electronics SD 500 Series Programming and Software Manual

Power Electronics

Power Electronics SD 500 Series Programming and Software Manual

GYS CUTTER 21 manual

GYS

GYS CUTTER 21 manual

CyberPower CPS150CHURC1 user guide

CyberPower

CyberPower CPS150CHURC1 user guide

Olimpia splendid DC DUAL 21 HP HE Instructions for installation, use and maintenance

Olimpia splendid

Olimpia splendid DC DUAL 21 HP HE Instructions for installation, use and maintenance

Vicruns VD520 Series user manual

Vicruns

Vicruns VD520 Series user manual

Steca stecagrid 300 Installation and operation manual

Steca

Steca stecagrid 300 Installation and operation manual

Sungrow SG5KTL-MT user manual

Sungrow

Sungrow SG5KTL-MT user manual

Invertek Drives Optidrive ODP-2 user guide

Invertek Drives

Invertek Drives Optidrive ODP-2 user guide

Bosch c-Si M 48 EU Installation and operation guide

Bosch

Bosch c-Si M 48 EU Installation and operation guide

LG Mono X Plus Series installation manual

LG

LG Mono X Plus Series installation manual

Offgridtec PSI-Pro Series manual

Offgridtec

Offgridtec PSI-Pro Series manual

enertik BS-550-SLA user manual

enertik

enertik BS-550-SLA user manual

Makita G1100 user guide

Makita

Makita G1100 user guide

manuals.online logo
manuals.online logoBrands
  • About & Mission
  • Contact us
  • Privacy Policy
  • Terms and Conditions

Copyright 2025 Manuals.Online. All Rights Reserved.