1
TRANSMISSION
Instruction Manual
design studio deForm
General Information
Assembling Transmission requires a minimum of three people.
The glass components are extremely fragile and should be handled with extreme
care. Never lift the glass components from their centre, only ever attempt to lift and
move when supported from their largest edge.
Checklist
Before attempting to assemble Transmission please ensure that you have all of the
necessary components and tools;
Glass Shade
Electric Cables
Springs Screws
Metal Legs
Sphere Necklace
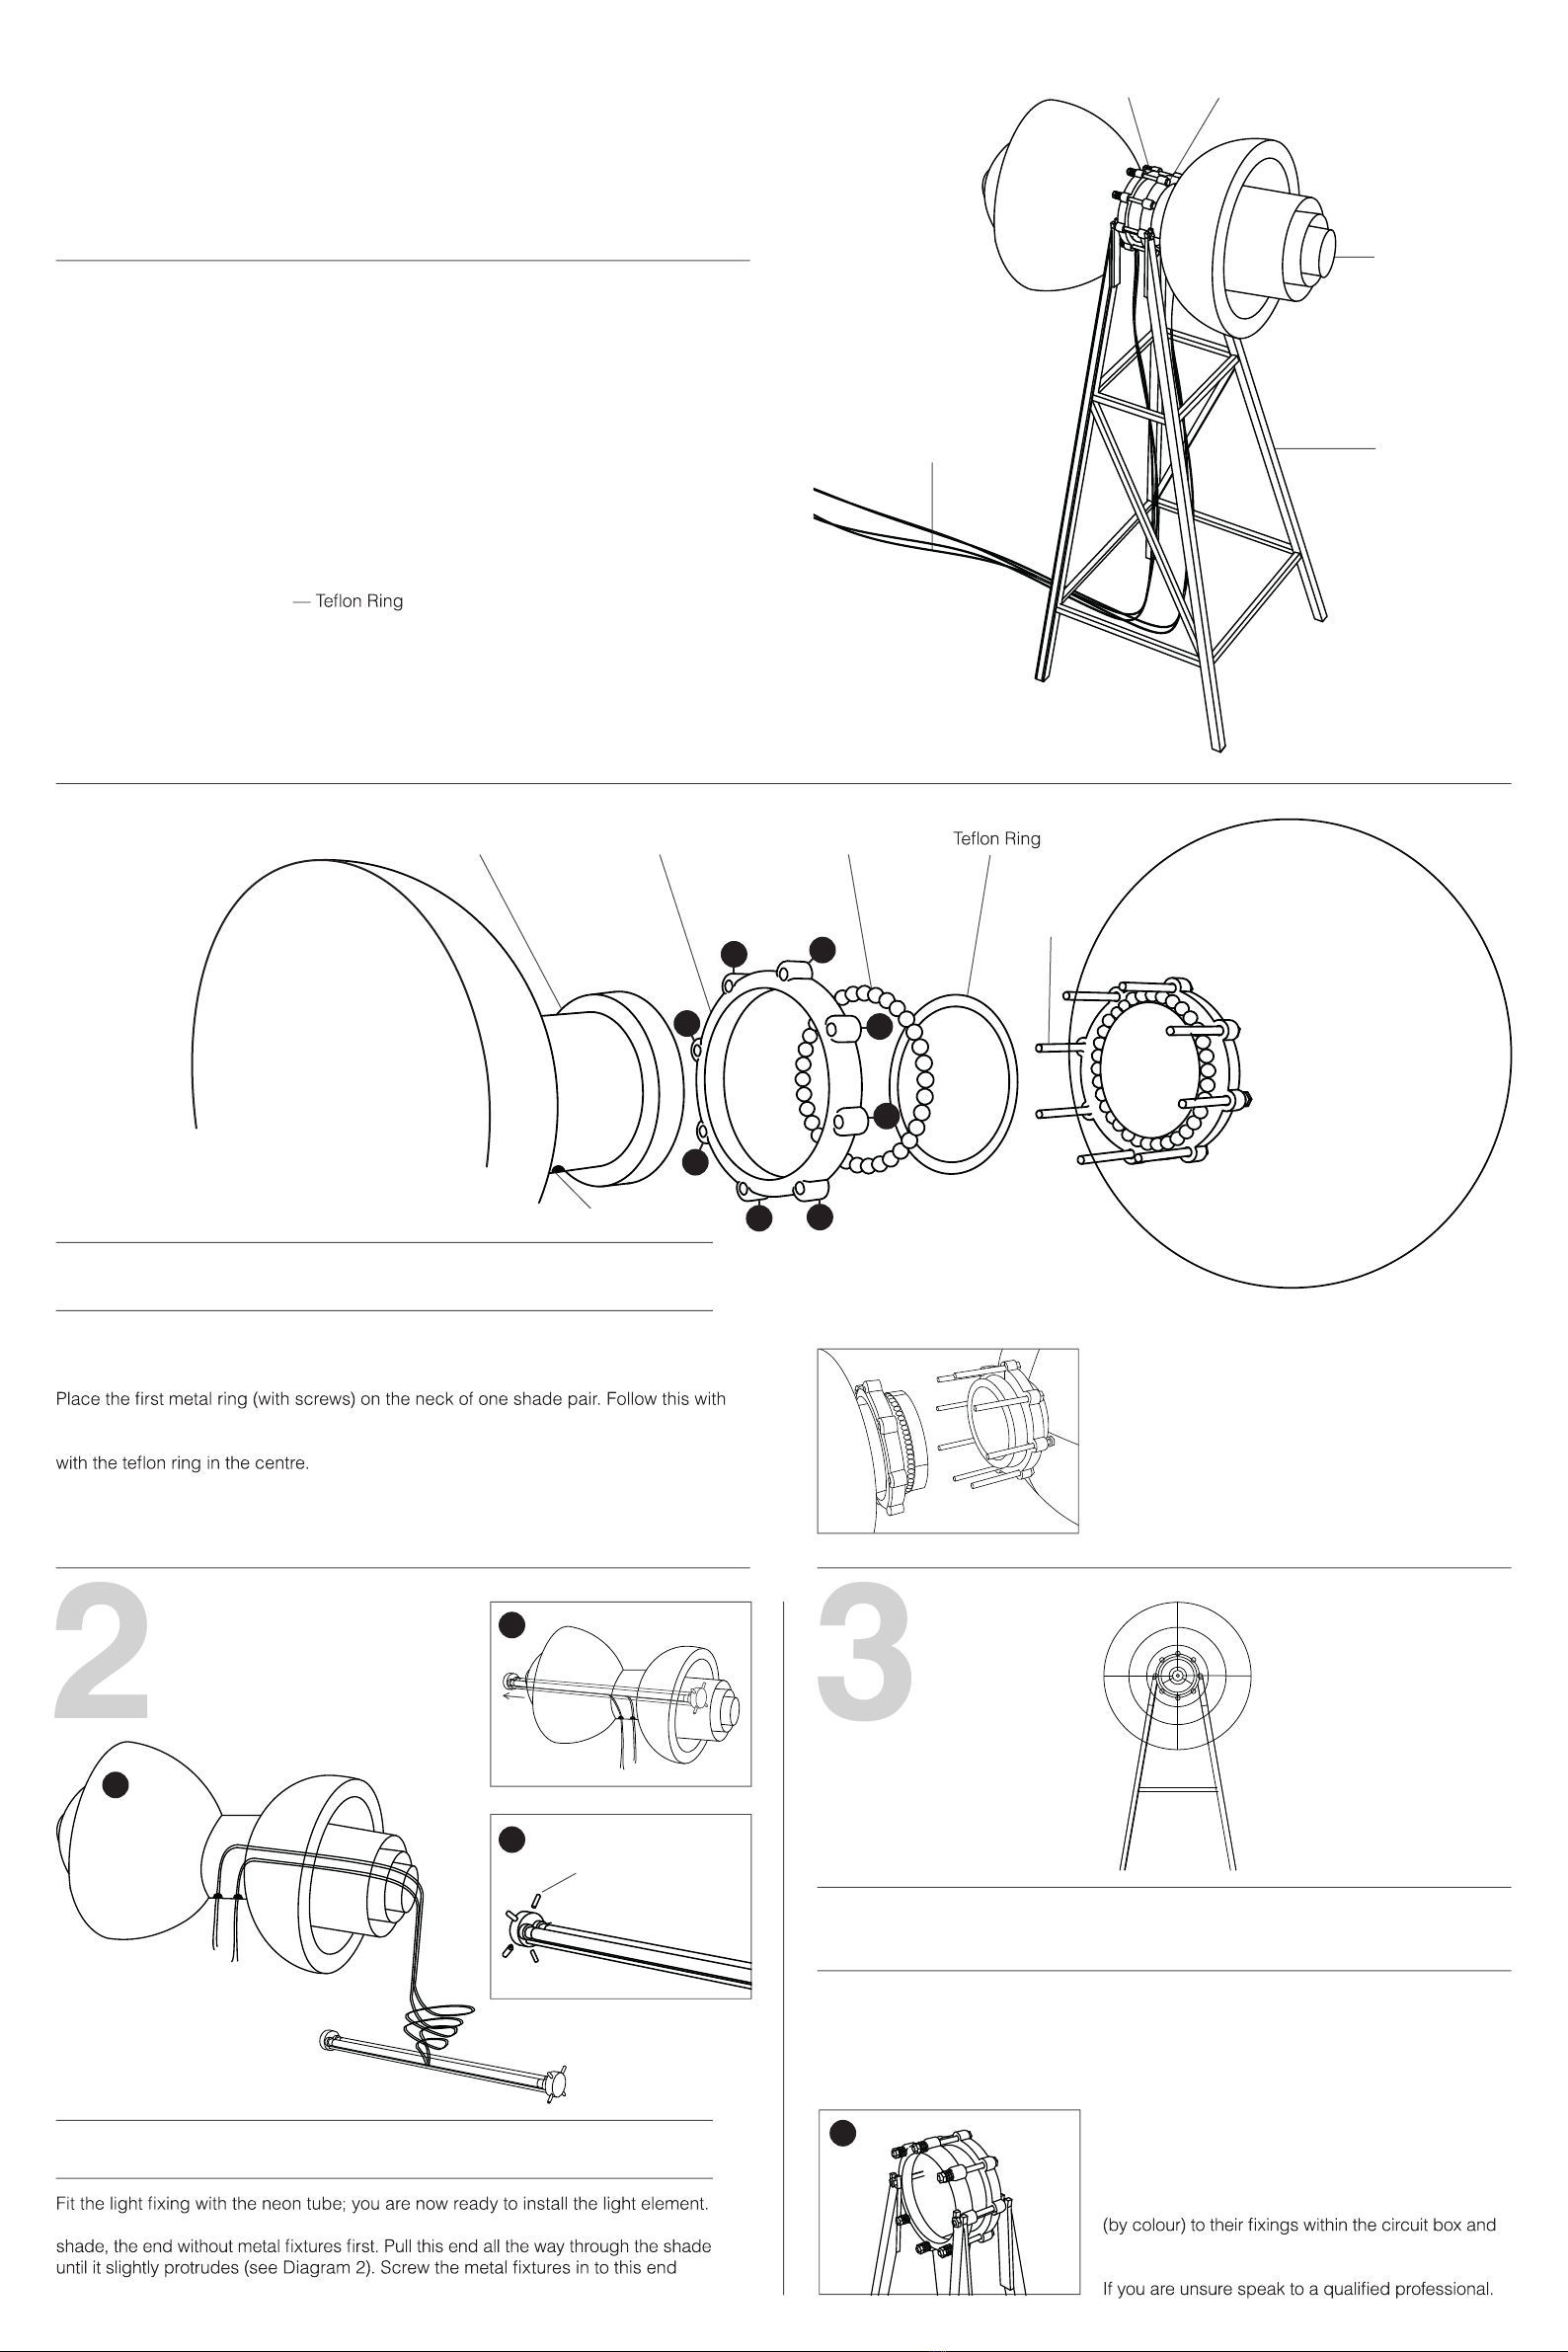
Metal RingGlass Ring
Cable Hole
Screws
Glass Shade
Primary Components
— Metal Legs
— Glass Shades
Secondary Components
— Screws
— Springs
— Light Element
— Electric Cables
— Circuit Box
— Sphere Necklaces
— Metal Rings
The Shade
The Element The Legs
Caution : Take care when lifting the glass components.
Caution : Be careful not to over tighten the screws as damage may result.
Caution : Be careful not to over tighten the screws as damage may result.
Caution : Take care when working with electrical components.
Caution : Take care when working with electrical components.
Rest the shade pairs on a soft surface, cable holes facing down. Carefully thread
two light element cables through each cable hole (see Step 2, Diagram 1).
a sphere necklace; connect necklace together using the supplied wire. Repeat with
the second shade pair and the other metal ring (without screws). Connect the halves
Thread screws 2, 3, 4, 6, 7 and 8 equipped with springs and gently connect the pairs
together. Screws 1 and 5 do not require springs and are for use in Step 3, Diagram 4.
Taking the assembled shade from Step 1, carefully slide the element inside of the
(see Diagram 3) and position the element back in the centre of the shade.
You are now ready to attach the legs to the shade
and complete the lamp. Carefully lift the assembled
shade with installed light elements into place on
top of the metal legs.
Thread the two remaining screws (1 and 5) through
their alloted holes (see Step 1, Main Diagram) and
the top of the metal legs. Tighten, allowing the cables
to hang down the centre of the leg structure.
Unscrew the electrical circuit box. Match the cables
connect. Once re-sealed the lamp is ready for use.
If you encounter any problems
during assembly, contact;
jakub@studiodeform.com
+420 777 05 99 22
www.studiodeform.com
The two shade pairs shown
coming together correctly.
View of the metal legs assembled
together correctly without shade.
1
2
3
4
5
6
78
1
2
4
3
Metal Fixtures


