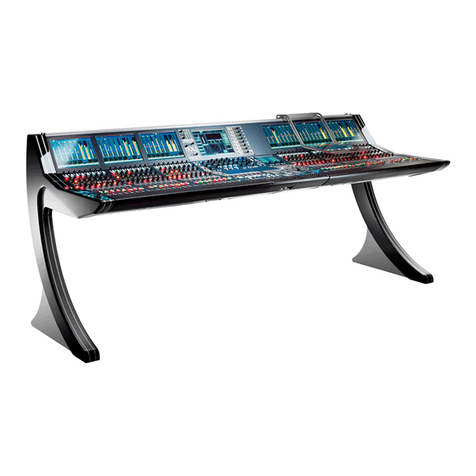
LAWO diamond User manual

diamond - User Manual
Version: 8.0.0/1
Exported on: 24 October, 2023
2 / 228
Copyright
All rights reserved. Permission to reprint or electronically reproduce any document or graphic in whole or in part for any
reason is expressly prohibited, unless prior written consent is obtained from the Lawo AG.
All trademarks and registered trademarks belong to their respective owners. It cannot be guaranteed that all product
names, products, trademarks, requisitions, regulations, guidelines, specifications and norms are free from trade mark rights
of third parties.
All entries in this document have been thoroughly checked; however no guarantee for correctness can be given. Lawo AG
cannot be held responsible for any misleading or incorrect information provided throughout this manual.
Lawo AG reserves the right to change specifications at any time without notice.
© Lawo AG, 2023

diamond - User Manual
Version: 8.0.0/1
Exported on: 24 October, 2023
3 / 228
Table of Contents
1 diamond - General Information................................................................................................................................................. 6
1.1 diamond - About this Documentation ................................................................................................................................... 7
1.2 diamond - Important Safety Instructions.............................................................................................................................. 8
1.3 diamond - Important Cleaning Instructions.......................................................................................................................... 9
2 diamond - Getting Started........................................................................................................................................................10
3 diamond - Hardware ................................................................................................................................................................. 11
3.1 diamond - Surface Description .............................................................................................................................................12
3.2 diamond - Frame Expansion................................................................................................................................................. 13
3.3 diamond - Mounting Options ................................................................................................................................................15
3.4 diamond - Control Surface Modules ................................................................................................................................... 16
3.5 diamond - Virtual Extension .................................................................................................................................................20
3.6 diamond - Power Supplies ...................................................................................................................................................22
3.7 diamond - Grounding............................................................................................................................................................24
3.8 diamond - Cabling Considerations ......................................................................................................................................25
3.9 diamond - Multi-frame Surfaces.......................................................................................................................................... 27
3.10 diamond - Frame Variants....................................................................................................................................................29
4 diamond - Installation ..............................................................................................................................................................36
4.1 diamond - Installation Instructions ......................................................................................................................................37
4.2 diamond - Unpacking............................................................................................................................................................38
4.3 diamond - Installing the Frame ............................................................................................................................................39
4.4 diamond - Mounting the VX Modules..................................................................................................................................40
4.5 diamond - Exchanging a Control Surface Module .............................................................................................................43
4.6 diamond - Wiring ...................................................................................................................................................................45
4.7 diamond - MF Key Labels.....................................................................................................................................................48
5 diamond - System Setup......................................................................................................................................................... 49
5.1 diamond - Setup Quick Start................................................................................................................................................50
5.2 diamond - Configuration Tools ............................................................................................................................................56
5.3 diamond - Opening a Web UI Session ................................................................................................................................58
5.4 diamond - Control Network Requirements.........................................................................................................................59
5.5 diamond - Network Settings ................................................................................................................................................60
5.6 diamond - Configuring the IP Connection to Power Core.................................................................................................63
5.7 diamond - Control Interface Settings..................................................................................................................................68
5.8 diamond - Communication Modes .......................................................................................................................................71
5.9 diamond - Slot IDs.................................................................................................................................................................76
5.10 diamond - Configuring the Virtual Extension...................................................................................................................... 79
6 diamond - Operation.................................................................................................................................................................81
6.1 diamond - Control Surface Overview.................................................................................................................................. 82
6.2 diamond - Fader Strip Control .............................................................................................................................................85
6.3 diamond - Source-Specific Functions.................................................................................................................................88
6.4 diamond - Central Controls..................................................................................................................................................92
6.5 diamond - Powering On........................................................................................................................................................98
6.6 diamond - Fader Strip Assign .............................................................................................................................................101

diamond - User Manual
Version: 8.0.0/1
Exported on: 24 October, 2023
4 / 228
6.7 diamond - Input Gain and Pan ........................................................................................................................................... 103
6.8 diamond - Auto Gain ........................................................................................................................................................... 104
6.9 diamond - Stream Selection............................................................................................................................................... 105
6.10 diamond - Bus Assign ......................................................................................................................................................... 108
6.11 diamond - Source Parameters ............................................................................................................................................ 111
6.12 diamond - Sum Bus Parameters ........................................................................................................................................ 136
6.13 diamond - Metering............................................................................................................................................................. 137
6.14 diamond - Monitoring ..........................................................................................................................................................141
6.15 diamond - PFL and AFL ...................................................................................................................................................... 147
6.16 diamond - Talkback .............................................................................................................................................................151
6.17 diamond - Conference and N-1 ......................................................................................................................................... 153
6.18 diamond - VCA Grouping.................................................................................................................................................... 156
6.19 diamond - Snapshots.......................................................................................................................................................... 158
6.20 diamond - The Setup Menu................................................................................................................................................ 169
6.21 diamond - Working with Extension Modules.................................................................................................................... 172
7 diamond VX - Operation .........................................................................................................................................................178
7.1 diamond VX - Changing the Viewing Angle...................................................................................................................... 179
7.2 diamond VX - Getting Started............................................................................................................................................ 180
7.3 diamond VX - Operating Principles ................................................................................................................................... 183
7.4 diamond VX - Channel Strip Page ..................................................................................................................................... 186
7.5 diamond VX - Playout Page................................................................................................................................................ 190
7.6 diamond VX - Browser Page ...............................................................................................................................................191
7.7 diamond VX - Routing Page ............................................................................................................................................... 192
7.8 diamond VX - System Health ............................................................................................................................................. 193
7.9 diamond VX - Timer Operation .......................................................................................................................................... 194
7.10 diamond VX - User Menu ................................................................................................................................................... 199
7.11 diamond VX - Login and Logout ........................................................................................................................................200
7.12 diamond VX - Edit User Labels ..........................................................................................................................................202
7.13 diamond VX - Load Snapshot and Save Snapshot ..........................................................................................................205
7.14 diamond VX - Settings........................................................................................................................................................206
7.15 diamond VX - Initial Settings..............................................................................................................................................209
8 diamond - Configuration.........................................................................................................................................................212
9 diamond - Software Tools and Diagnostics ........................................................................................................................ 213
9.1 diamond - Software Revisions and Updating Firmware.................................................................................................. 214
9.2 diamond - Web UI ............................................................................................................................................................... 215
10 diamond - Service Procedures .............................................................................................................................................223
11 diamond - Data and Specifications ......................................................................................................................................224
11.1 diamond - Part Numbers ....................................................................................................................................................225
11.2 diamond SC - Specification................................................................................................................................................227

diamond - User Manual
Version: 8.0.0/1
Exported on: 24 October, 2023
5 / 228
This user manual describes all aspects of the diamond console. It contains information for users, technicians and system
integrators.

diamond - User Manual
Version: 8.0.0/1
Exported on: 24 October, 2023
7 / 228
1.1 diamond - About this Documentation
This documentation represents the latest state of information. Subject to availability, manuals covering former versions are
provided via the Lawo Download-Center(after login).
General Safety & Important Notes
When working with our hardware components, it is important to read and observe all of the instructions provided in the
"General Safety Information for Lawo Equipment" booklet delivered with your devices.
The same symbols are used in the product documentation so please look out for them as follows. The letter in brackets
before the signal word denotes the language version: e.g. (E) = English.
Other Informational Icons
When reading about our software or the general operation, you may also see the following icons.
Further Information
Mechanical drawings and data sheets (including weights and dimensions) are available from the Lawo Download-Center
(after login). We also recommend that you carefully observe the release notes for your product/system.
Lawo User Registration
For access to the Lawo Download-Center, and to receive regular product updates, please register at: www.lawo.com/
registration.
Contact Details
If you need further assistance, the Lawo Support Department can be contacted by email at [email protected], or by
telephone during normal working hours - please visit the Support area of the Lawo website for the most up-to-date contact
details.
(E) WARNING - warnings or mandatory actions.
These instructions must always be observed to ensure the personal safety of the user, and to protect your system and
the work environment from potential damage.
(E) IMPORTANT NOTE - important information for proper functioning.
General information and points of clarification. Please take note.
Useful tips and shortcuts. Feel free to follow if you like.
Notes. To avoid getting stuck, make sure you follow.
Important actions. To keep the system operational, you should always follow.

diamond - User Manual
Version: 8.0.0/1
Exported on: 24 October, 2023
8 / 228
1.2 diamond - Important Safety Instructions
When working with our hardware components, please read and observe all of the instructions provided in the "General
Safety Information for Lawo Equipment" booklet delivered with your devices.
Click on the link below to read or download the booklet as a pdf.
Lawo_Safety.pdf

diamond - User Manual
Version: 8.0.0/1
Exported on: 24 October, 2023
9 / 228
•
•
•
1.3 diamond - Important Cleaning Instructions
Before cleaning your Lawo devices, please read and observe all of the following instructions.
Cleaning the diamond Surface
To clean a Lawo control surface please use a cleaning cloth with the following properties:
Antistatic
Fluff-free
Without emery pieces
(E) ATTENTION
DO NOT spill liquids into any system components!
DO NOT clean the front panels or operational surfaces with sharp instruments.
(F) ATTENTION
NE PAS renverser de liquides dans les composants du système!
NE PAS nettoyer les panneaux avant ou les surfaces opérationnelles avec des instruments pointus.
•
•
•
•
•
•
(E) IMPORTANT NOTE
General Cleaning / Disinfecting Requirements
Lawo hardware products are made from a variety of different materials, and each material might have specific cleaning
requirements. Therefore, a general allowance for the disinfection of product surfaces with disinfectants containing
alcohol cannot be given.
Our front panels and operational surfaces are not entirely approved for treatment with chemical cleaning agents and
disinfectants. Component surfaces, buttons and electronics can be permanently damaged by treatment with such
agents and the lifespan can be dramatically shortened. Please note that some substances can lead to discoloration of
surfaces.
Lawo is not responsible for damage caused by the unauthorized use of disinfectants on our products and surfaces.
Damages caused by unspecified treatment of modules and components are not covered by regular or extended
warranties or SLA regulations.
This is a general instruction and recommendation for cleaning that applies to all Lawo products:
Before cleaning the device, unplug all external power sources.
Clean the device with a soft cloth, dipped lightly in warm to hot soapy water.
Do not use any liquid cleaning agents or spray cleaners that may contain flammable materials.
Do not get moisture into any openings.
Do not use aerosol sprays, bleaches, or abrasives.
Do not spray cleaners directly onto the item.
The above information and our technical application advice are given to the best of our knowledge.

diamond - User Manual
Version: 8.0.0/1
Exported on: 24 October, 2023
10 / 228
•
•
•
•
•
2 diamond - Getting Started
If you are new to diamond, then please read the following topics to get started.
diamond - Powering On
diamond - Fader Strip Control
diamond - Central Controls
diamond - Fader Strip Assign
diamond VX - Operating Principles

diamond - User Manual
Version: 8.0.0/1
Exported on: 24 October, 2023
11 / 228
•
•
•
•
•
•
•
•
•
•
3 diamond - Hardware
This chapter describes the diamond frame and its hardware components.
diamond - Surface Description
diamond - Frame Expansion
diamond - Mounting Options
diamond - Control Surface Modules
diamond - Virtual Extension
diamond - Power Supplies
diamond - Grounding
diamond - Cabling Considerations
diamond - Multi-frame Surfaces
diamond - Frame Variants

diamond - User Manual
Version: 8.0.0/1
Exported on: 24 October, 2023
12 / 228
3.1 diamond - Surface Description
diamond can exist as a single-frame or multi-frame surface, where each frame is available in a range of sizes and layouts.
The images below show three examples.
The surface is modular. All slots are equal in width: 1 ME = 168mm, equivalent to 4-faders. There are two module depths:
full height (336mm) for standard frames, and half-height (168mm) for the upper slots in extended frames. The standard
sizing allows modules to be repositioned to achieve the desired layout.
The smallest surface consists of a single module (2-fader Combo). This can be expanded by adding standard modules to
increase the width, and extension modules to increase the depth. Optionally, the Virtual Extension (VX) can be added to
either standard or extended frames. The Virtual Extension occupies the space above two modules, and so is only available
for certain frame widths: 2 ME, 4 ME, 6 ME or 8 ME. The images in the next topic show the frame expansion stages. Each
frame is available in one of two versions to support different mounting options: either tabletop or countersunk.
diamond is specified using a range of main frame and extender frame layouts. To create a single-frame surface, choose one
of the main frame options. Extender frames can be added to increase the fader count or create a split-frame surface. In
total, the control surface can include any number of frames as long as the maximum slot allocations are not exceeded.
Each frame is powered from an external DC power supply. Frame widths of 5 ME or above require two supplies. If the
Virtual Extension is included, each VX module also requires its own power supply.
Frames are convection cooled and so there are no fans inside the surface or VX modules.
The frame construction must be specified at the time of order; there is no possibility to convert the frame later.
Blind plates are available for both standard and extensionmodule slots. These can be fitted to a larger frame to
allow for future expansion.

diamond - User Manual
Version: 8.0.0/1
Exported on: 24 October, 2023
13 / 228
3.2 diamond - Frame Expansion
This topic explains how a diamond frame can be expanded.
1. The minimum width = 2-faders.
2. The width increases in 2-fader steps by adding standard modules.
3. The depth can be increased by adding extension modules.

diamond - User Manual
Version: 8.0.0/1
Exported on: 24 October, 2023
14 / 228
4. The Virtual Extension (VX) can be added to both standard and extended frames. It occupies the space above two
modules, and so is only available for certain frame widths: 2 ME, 4 ME, 6 ME or 8 ME.

diamond - User Manual
Version: 8.0.0/1
Exported on: 24 October, 2023
15 / 228
3.3 diamond - Mounting Options
Each frame can be ordered in one of two versions: either tabletop or countersunk. The version must be specified at the time
of ordering; there is no possibility to convert the frame later.
The Tabletop version is designed for tabletop placement. This version includes a leather hand rest and stylish side/rear
profiles.
The Countersunk version is designed to fit flush within your studio furniture. This version comes with different front, rear
and side profiles.
Mechanical drawings for all frame variants are available from theLawo Download Center (after login).
The images below show some examples.
Tabletop frame Countersunk frame

diamond - User Manual
Version: 8.0.0/1
Exported on: 24 October, 2023
16 / 228
1.
2.
a.
b.
c.
3.
◦
◦
◦
◦
•
•
•
•
•
•
3.4 diamond - Control Surface Modules
The diamond surface is modular. All slots are equal in width: 1 ME = 168mm, equivalent to 4-faders. There are two module
depths: full height (336mm) for standard frames, and half-height (168mm) for the upper slots in extended frames. The
standard sizing allows modules to be repositioned to achieve the desired layout.
Maximum Slot Allocations
When combining more than one frame, or exchanging modules, it is important that the maximum slot allocations are not
exceeded:
The maximum number of physical faders is 60 (equivalent to 15 Fader modules).
For the central controls,up to 7 Central and4 Combo modules are supported.Each Combo takes the place of a Fader
module (in slots 12 to 15), and the following conditions must be observed:
Power Core (single-console license) - supports one Access Group, controlled from either a Central or Combo
module.
Power Core (Max license) - supports up to 4 Access Groups, controlled from any combination of Central and Combo
modules (access group numbers must be unique).
Any additional Central and Combo modules run in monitor mode.
For extension modules, the following rules apply:
Up to 15 Rotary Fader Extension Modules (in slots 33 to 47).
Up to 4 Combo Extension Modules (in slots 44 to 47). Each Combo Extension replaces a Rotary Fader Extension.
Up to 6 Rotary Central Extension or Key Extension Modules (in slots 49 to 54).
Up to 7 additional Key Extension Modules (in slot 48 and slots 20 to 25).
The slot allocations can be checked by opening the "Frames → Surface" configuration in the ON-AIR Designer.
Standard Modules
All standard modules are 168mm x 336mm (full height). They canbe fitted to a standard frame or the lower slots in an
extended frame.
In summary, the options are:
Fader Module A - 4 x fader strips (layout A).
Fader Module B - 4 x fader strips (layout B).
Central Module - dedicated central controls for maximum functionality.
Combo Module A - 2 x fader strips (layout A) + condensed central controls.
Combo Module B - 2 x fader strips (layout B) + condensed central controls.
Blind Plate (full height) - can be fitted to a larger frame to allow for future expansion.
The table below provides more information.
The operation of each module is defined by its slot ID, and not the physical position in the frame. This means that a
module can be positioned anywhere in the frame and still offer the same functionality.

diamond - User Manual
Version: 8.0.0/1
Exported on: 24 October, 2023
17 / 228
•
•
•
•
•
•
•
•
•
•
•
•
•
•
•
•
•
•
•
•
•
•
Fader Module A (711/10)
4 x 100mm faders
4 x rotary encoders
8 x TFT displays
36 control keys
Fader Module B (711/12)
4 x 100mm faders
4 x rotary encoders
8 x TFT displays
36 control keys
Central Module (711/20)
6 x rotary encoders
6 x TFT displays
78 control keys
2 x ambient light detectors
Combo Module A (711/21)
2 x 100mm faders
6 x rotary encoders
8 x TFT displays
44 control keys
2 x ambient light detectors
Combo Module B (711/22)
2 x 100mm faders
6 x rotary encoders
8 x TFT displays
44 control keys
2 x ambient light detectors

diamond - User Manual
Version: 8.0.0/1
Exported on: 24 October, 2023
18 / 228
•
•
•
•
•
•
•
•
•
•
•
•
•
Blind Plate (711/11)
1 ME (full height)
Extension Modules
All extension modules are 168mm x 168mm (half-height). They can be fitted to the upper slots in an extended frame, or to a
standard frame / lower slot (if a special mounting bar is fitted).
In summary, the options are:
Rotary Extension Module - 16 x rotary controls (with control keys).
Key Extension Module - 64 programmable control keys.
Combo Extension Module - 8 x rotary controls (with control keys) + 32 programmable control keys.
Blind Plate (half-height) - can be fitted to a larger frame to allow for future expansion.
The table below provides more information.
Rotary Extension Module (711/15)
16 x rotary encoders
8 x TFT displays
16 control keys
Key Extension Module (711/25)
64 control keys
Combo Extension Module (711/26)
8 x rotary encoders
4 x TFT displays
32 control keys
Blind Plate (711/16)
1 ME (half-height)

diamond - User Manual
Version: 8.0.0/1
Exported on: 24 October, 2023
19 / 228
•
•
•
Mounting Extension Modules in a Standard Frame
It is possible to mount two extension modules into a full-height slot if a special mounting bar is fitted. The images below
show mounting bars fitted to both a standard and extended frame.
Specifications for the Physical Controls
The following general information applies to the physical controls.
All rotary encoders are touch-sensitive and include an LED indicator ring (for color-coding).
All faders are touch-sensitive and motorized.
All control keys can be configured to light in a range of colors and states. Some keys are labeled by the TFT displays
and others use foil-printed labels.
You can find more technical information about each module in the corresponding data sheets.

diamond - User Manual
Version: 8.0.0/1
Exported on: 24 October, 2023
20 / 228
3.5 diamond - Virtual Extension
Both standard and extended frames can be ordered with the Virtual Extension (VX). This optionadds integrated touch-
screen displays to the console. If the Virtual Extension is not included, then similar functionality can be achieved by running
the Desktop App on an external display.
Permitted Frame Size
Each VX display occupies the space above two control surface modules, and so this option is available for certain frame
widths: 2 ME, 4 ME, 6 ME or 8 ME.
Viewing Angle
The display(s) are secured to the special side profiles that are part of the VX frame. This allows the viewing angle to be
adjusted to one of three positions by the user. For instructions, please see diamond VX - Changing the Viewing Angle.
Host PC Requirements
The VX software runs on a Windows PC that must be supplied by the customer. A license to run the standard configuration
(for the Virtual Extension or Desktop App) is included with every console.
A single host PC can support multiple displays, depending on its specification. If the control surface includes multiple
frames with more than 6 displays, then it is recommended to install a second host PC. The following document contains
more information about the PC requirements: Vistool PC Config.pdf.
Physical Connections
The host PC connects to Power Core via the IP network. Each VX display connects to the host PC via Display Port and USB,
and is powered by its own external DC power supply.
If the control surface is fitted with more than one VX display, then the host PC must support multiple Display Port and USB
connections.
Table of contents
Other LAWO Dj Equipment manuals


